As I promised, I have a new project to share with you this morning. The other week I got an email from the Home Depot Team, asking if I would be interested in working on a creative project with them. Of course I would! What was even better was they were looking for me to work on a project that would add style and function to a student's space. Perfect, since I'll be back at my night classes on September 14th and we've been working on sprucing up my laundry room / office space in the basement recently.
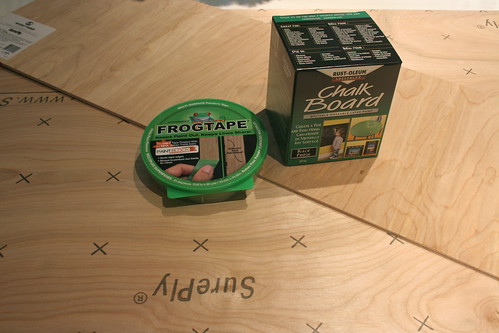
I immediately started to brainstorm some ideas and thought that a chalkboard calendar over my desk would be a great way to keep track of my assignments and projects and manage my time better. After measuring the wall over my desk and determining that a 2' x 3' calendar would be the right size, I headed to Home Depot with my $50 gift card to buy the supplies - here's the breakdown...
Chalkboard Paint - $21.49 + tax
Frog Tape - $7.99 + tax
1/4" Underlayment - $9.99 + tax
For a total of $44 (and change... our receipt went for a walk) - under budget!
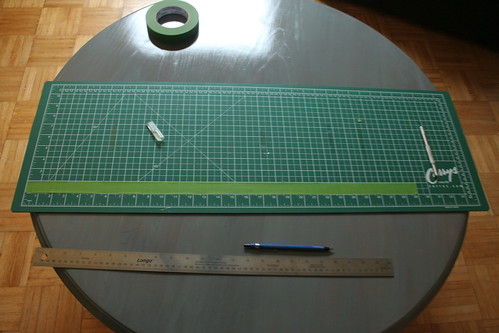
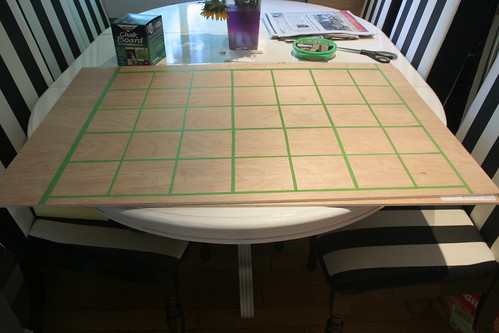
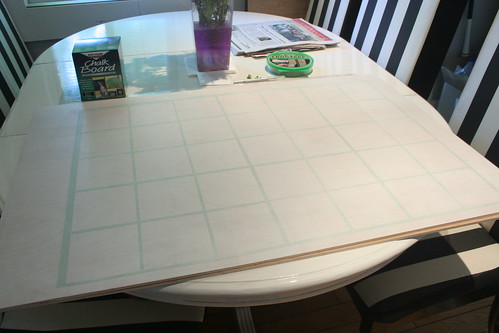
Once home, it was time to decide how to handle taping off my calendar. I'd go into all of the math, but I don't really know how I could share my measurements without it sounding confusing. But, the basic idea was that I allowed for space to write the days of the week, have five rows of seven days and then a space for the month and a space for notes. Since the tape was an inch wide, I needed to lay it out on my cutting mat and use a straight edge ruler and my xacto knife to cut it down into more narrow strips that would work with all of my math...
Rather than going the traditional route with the Month at the top, I ran the month along one side of the calendar, while leaving the opposite side open for writing important notes and reminders for myself. My final taped off board looked like this...
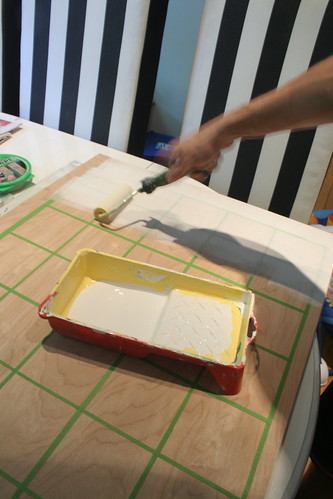
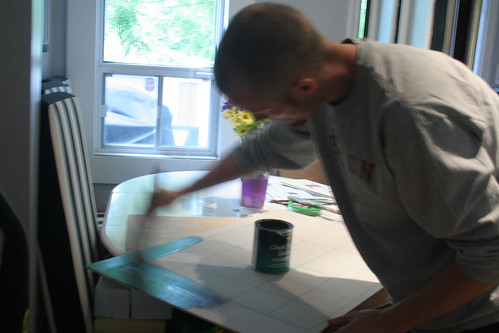
The next step, was to prime everything. So, out came the basic latex primer and on it went using a mini foam roller that we already had at home...
It sat like this in our kitchen for two days (some things came up around here) and on Sunday morning B was kind of enough to get the first coat of paint on with a brush.
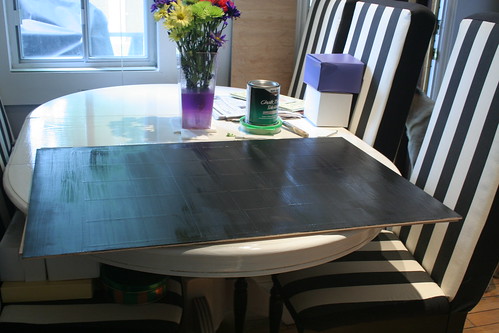
We then had to wait the recommended 4 hours to get the second coat on the board. At the time I had some girlfriends over visiting with me and Halle, so B was kind enough to finish paining it for me... and peeling the tape off once it was all dry. I was thrilled to later see the finished project...
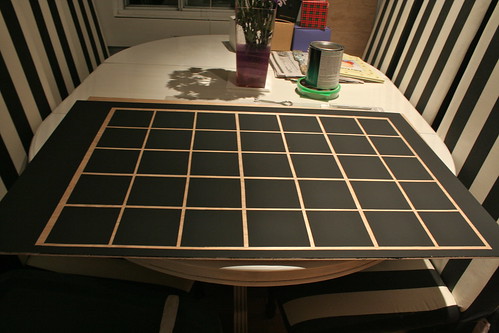
I know... it's not in my office and there is nothing written on it yet. The next step is to let the chalkboard paint cure for 3 days before we can write on it. That actually works quite well as it means I'll be able to start using it for the beginning of September!
I'm so happy with this project and the materials were definitely within a student's budget! Even if you didn't have $44 to spend on it, it would be easy to buy regular painter's tape for less (I decided to use Frog Tape in order to get cleaner lines). I'll be back on Thursday with the final board in my office all filled out and ready to run!
Thanks again to the Home Depot for asking me to work with them - I had a lot of fun working on this project and I know it will be extremely useful to me when I'm back in my classes!
Have you completed any back to school projects, or do you have any that you're finishing up now - either for you or your little one's? I'd love to hear how you stay organized when back to school season hits!
What a great idea! I like that the wood grain pokes out between the black.
ReplyDeleteGreat idea! I am painting a chalkboard wall in our kitchen to be able to organize our lives this fall! But I love your chalkboard calendar. Martha Stewart did something similar except each square was a different shade of grey chalkboard paint AND she made her own chalkboard paint - only Martha would! I found that too complicated - your idea is way easier and looks fantastic.
ReplyDeleteI am going to buy some frog tape this week as I am painting some stripes on my daughter's wall this week, never used the stuff but can't wait to try. Congrats on the Home Depot gig, lucky you!
Night classes? You are brave!
I'm participating in this too! I'll be posting one of my projects this week! I love the idea of the chalkboard calendar - so functional!!
ReplyDeleteWhat a great project!!!Do you have any chalkboard paint left-over? I have a small antique (nice way to say "old") board that could use new paint. It covers a storage box that could be used for chalk and erasers. I'll send it up if you don't mind....
ReplyDeleteKerry, what a fabulous project. I could use one of those in my office! Can't believe you are able to fit so much in with a five week old! She is just stunning btw!
ReplyDeletefun fun! By the way, you guys are way brave for painting directly ON your dining room table with those chairs right under the paint...I am a drop-cloth queen and I think you guys are gutsy!
ReplyDelete