Tuesday, November 24, 2015

Storing Those Holiday Memories

When I think of Christmas, what I love most are the traditions. Those feelings of routine and familiarity that come with the season. It is the best part of Christmas, but also the hardest part about living on the opposite side of the country from my family and all of my childhood friends. Though we have done our best to start are own traditions on the west coast, there was one tradition that I was able to bring out here with us, creating and mailing Christmas cards.

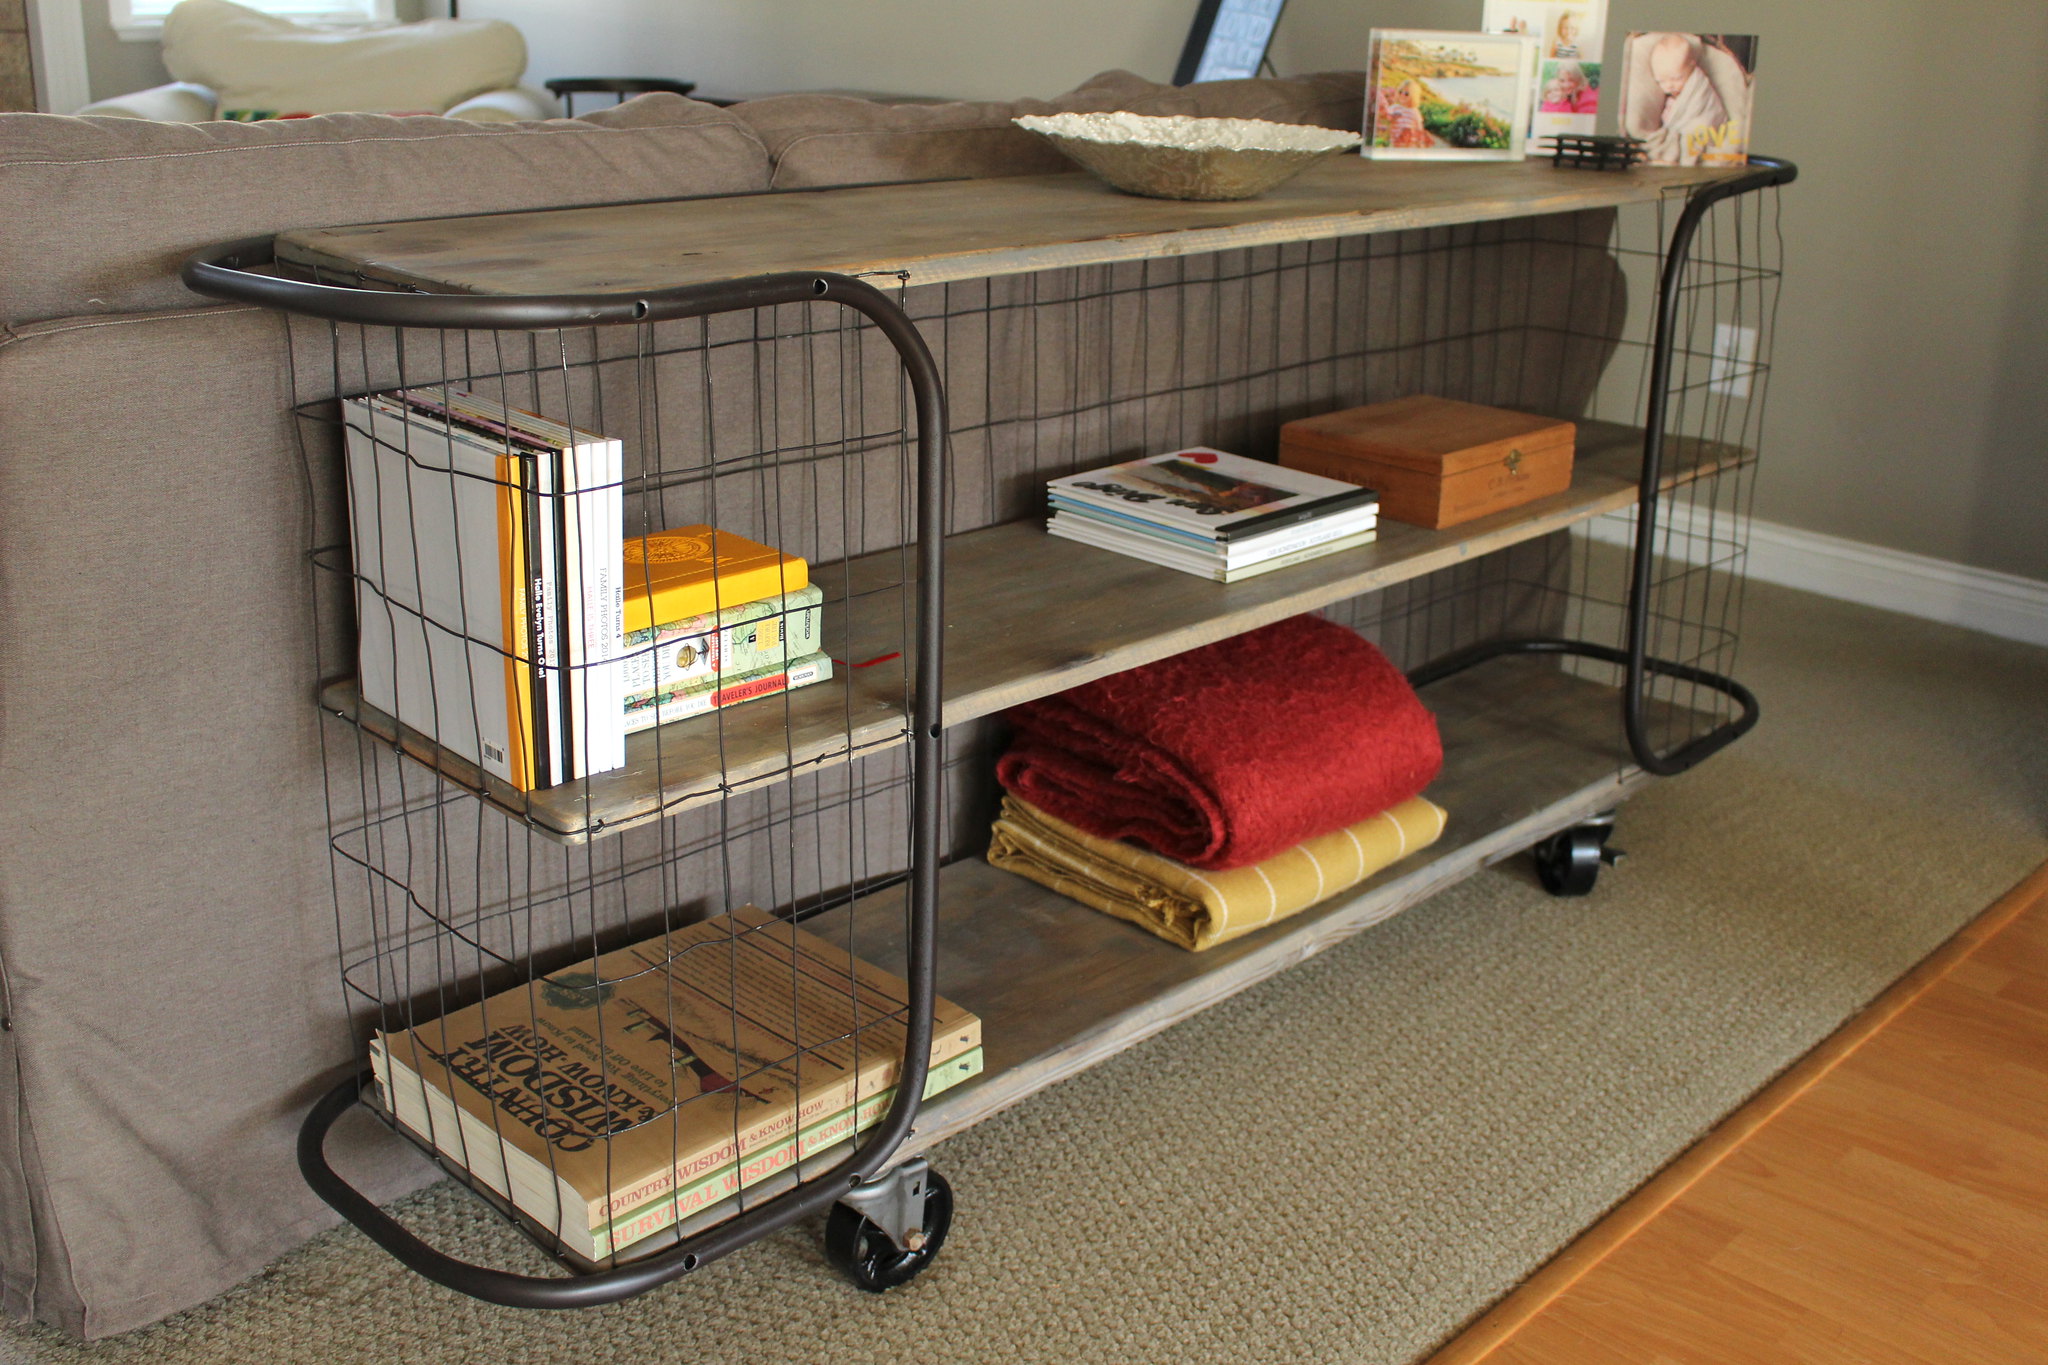
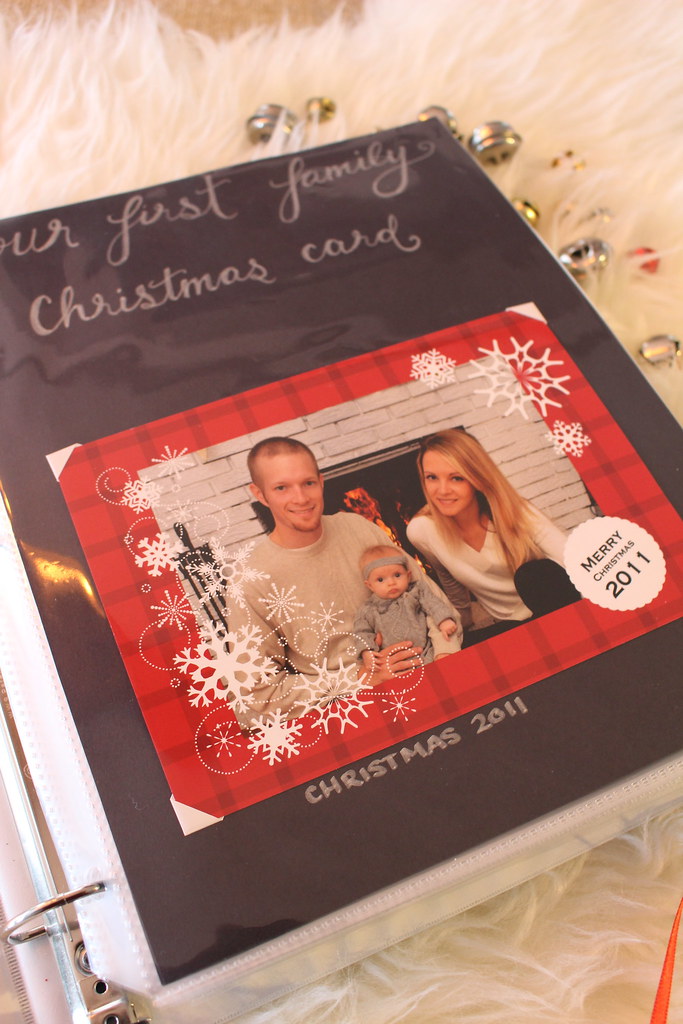
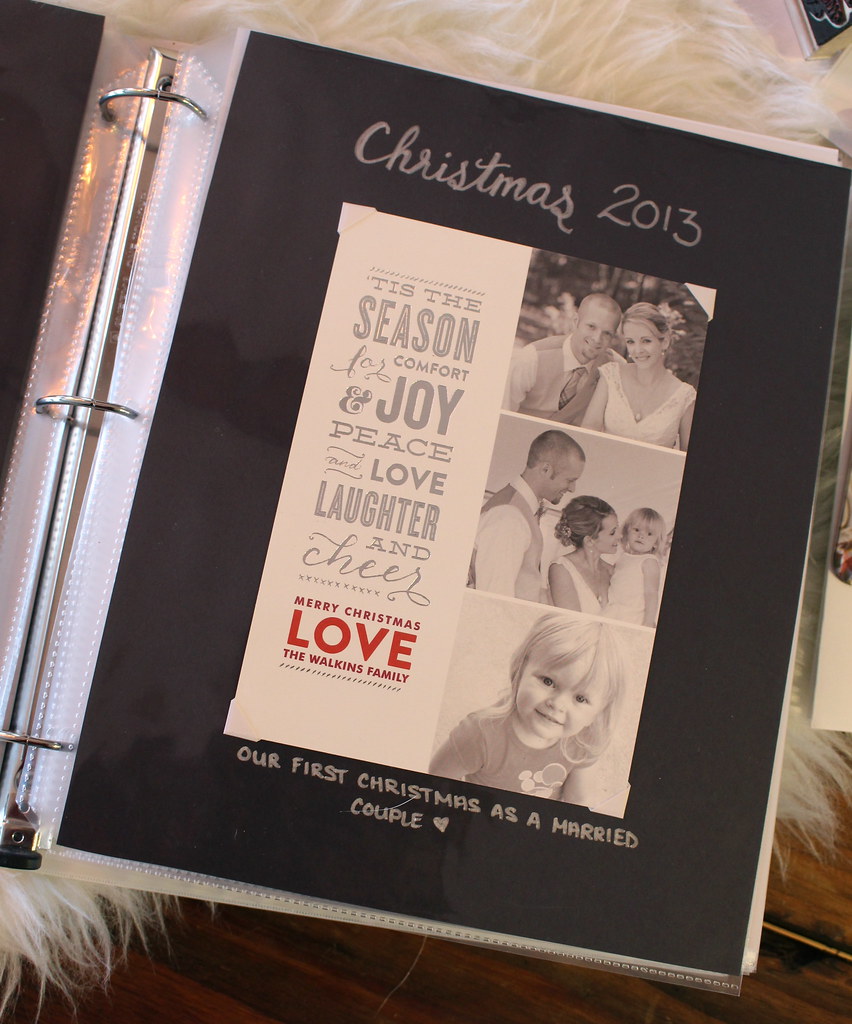
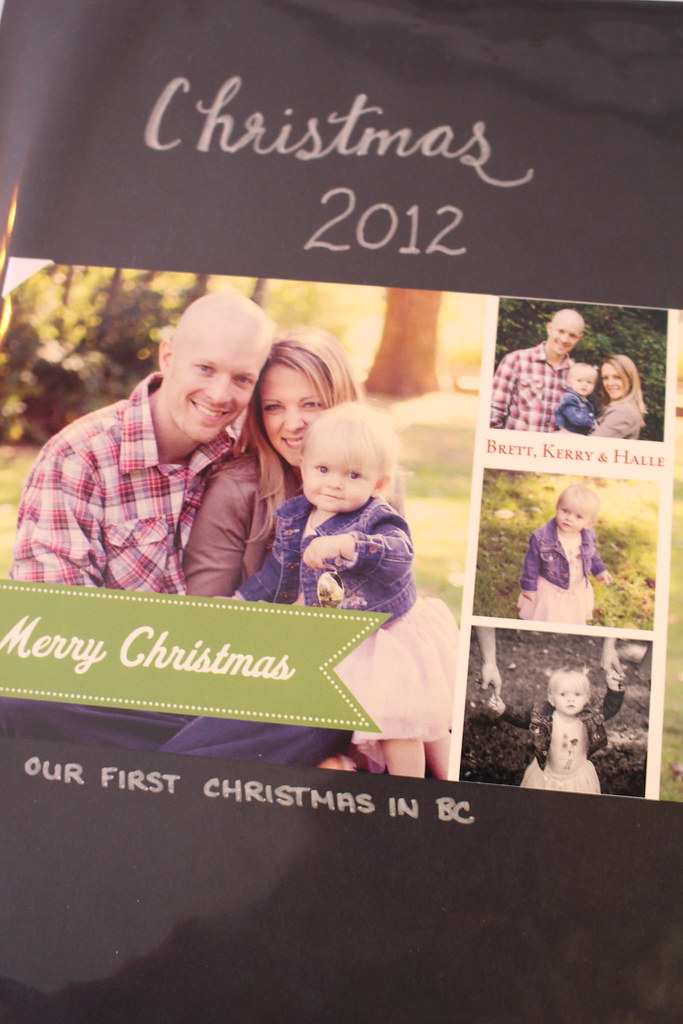
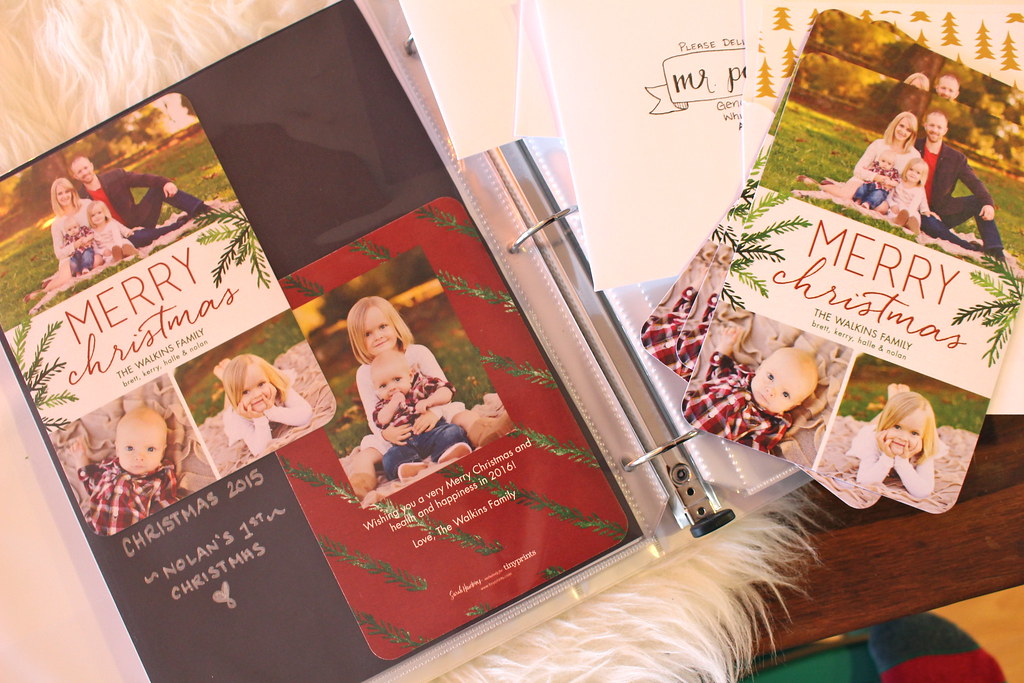
Ever since I was a child, I always loved jumping on the pile of mail that my Dad brought in when he got home from work and ripping open the Christmas cards that came in from all over the country. As B and I started our life together, I stuck to mailing out cards every Christmas and when Halle joined our family in 2011, I decided to start sending photo cards. I always loved receiving photo cards of our friends with families, and thought it would be fun to do as well. I've had a number of people who live far away, tell me how much they enjoy seeing our card every year and seeing how much Halle has grown. I was happy that our friends and family enjoyed them, but I wanted to make sure that I had a special spot to safely keep them, so that we could look back on them (and other holiday photos - like Santa & Easter bunny photos), whenever we wanted


Storing Christmas Cards

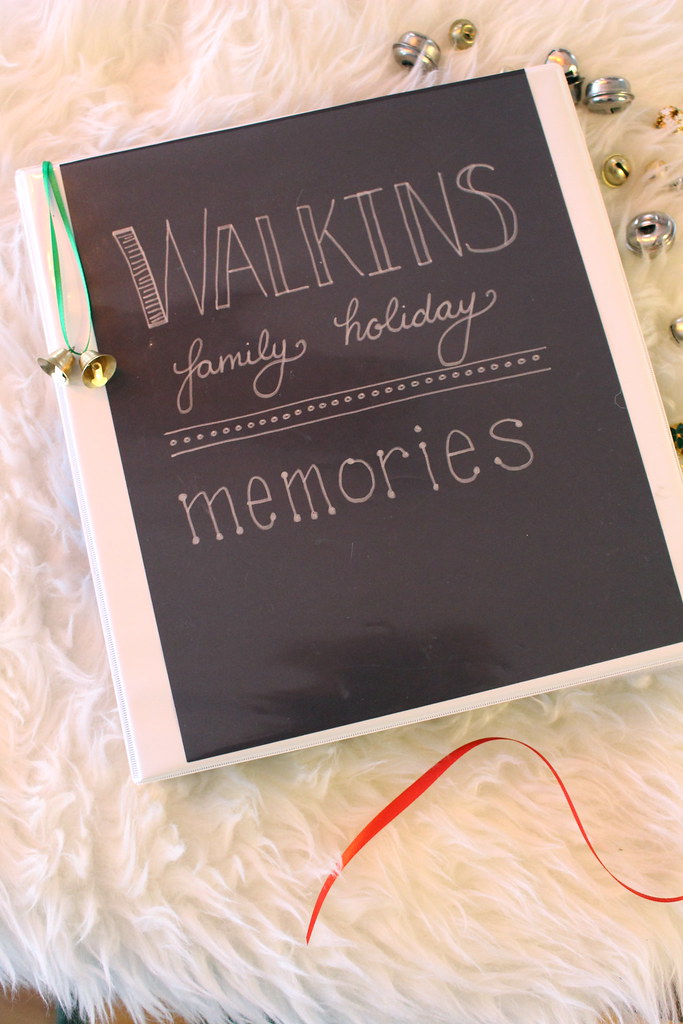
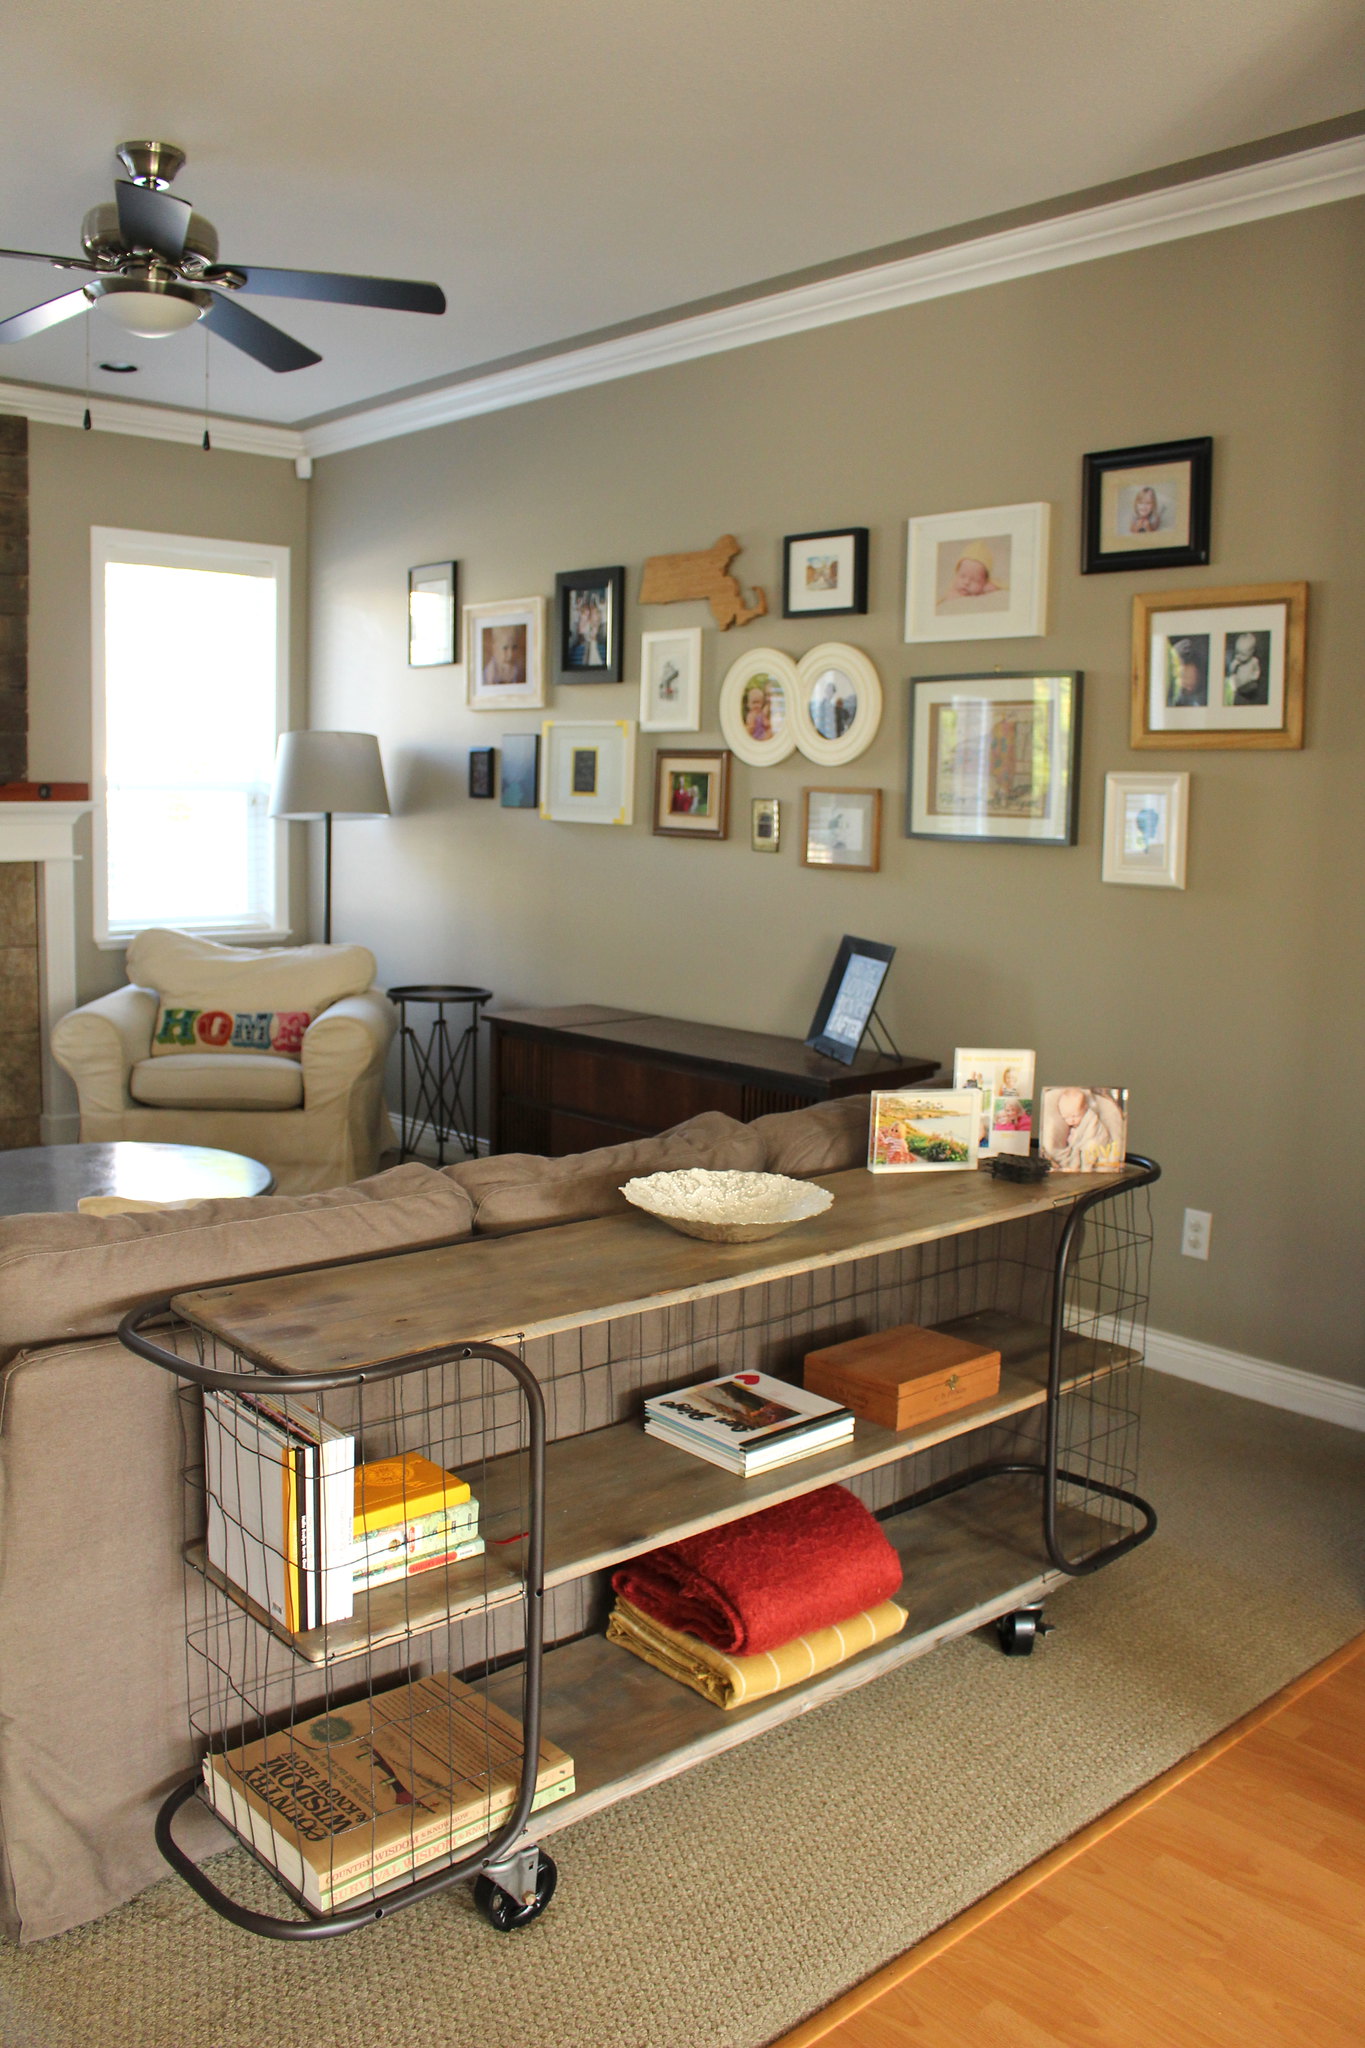
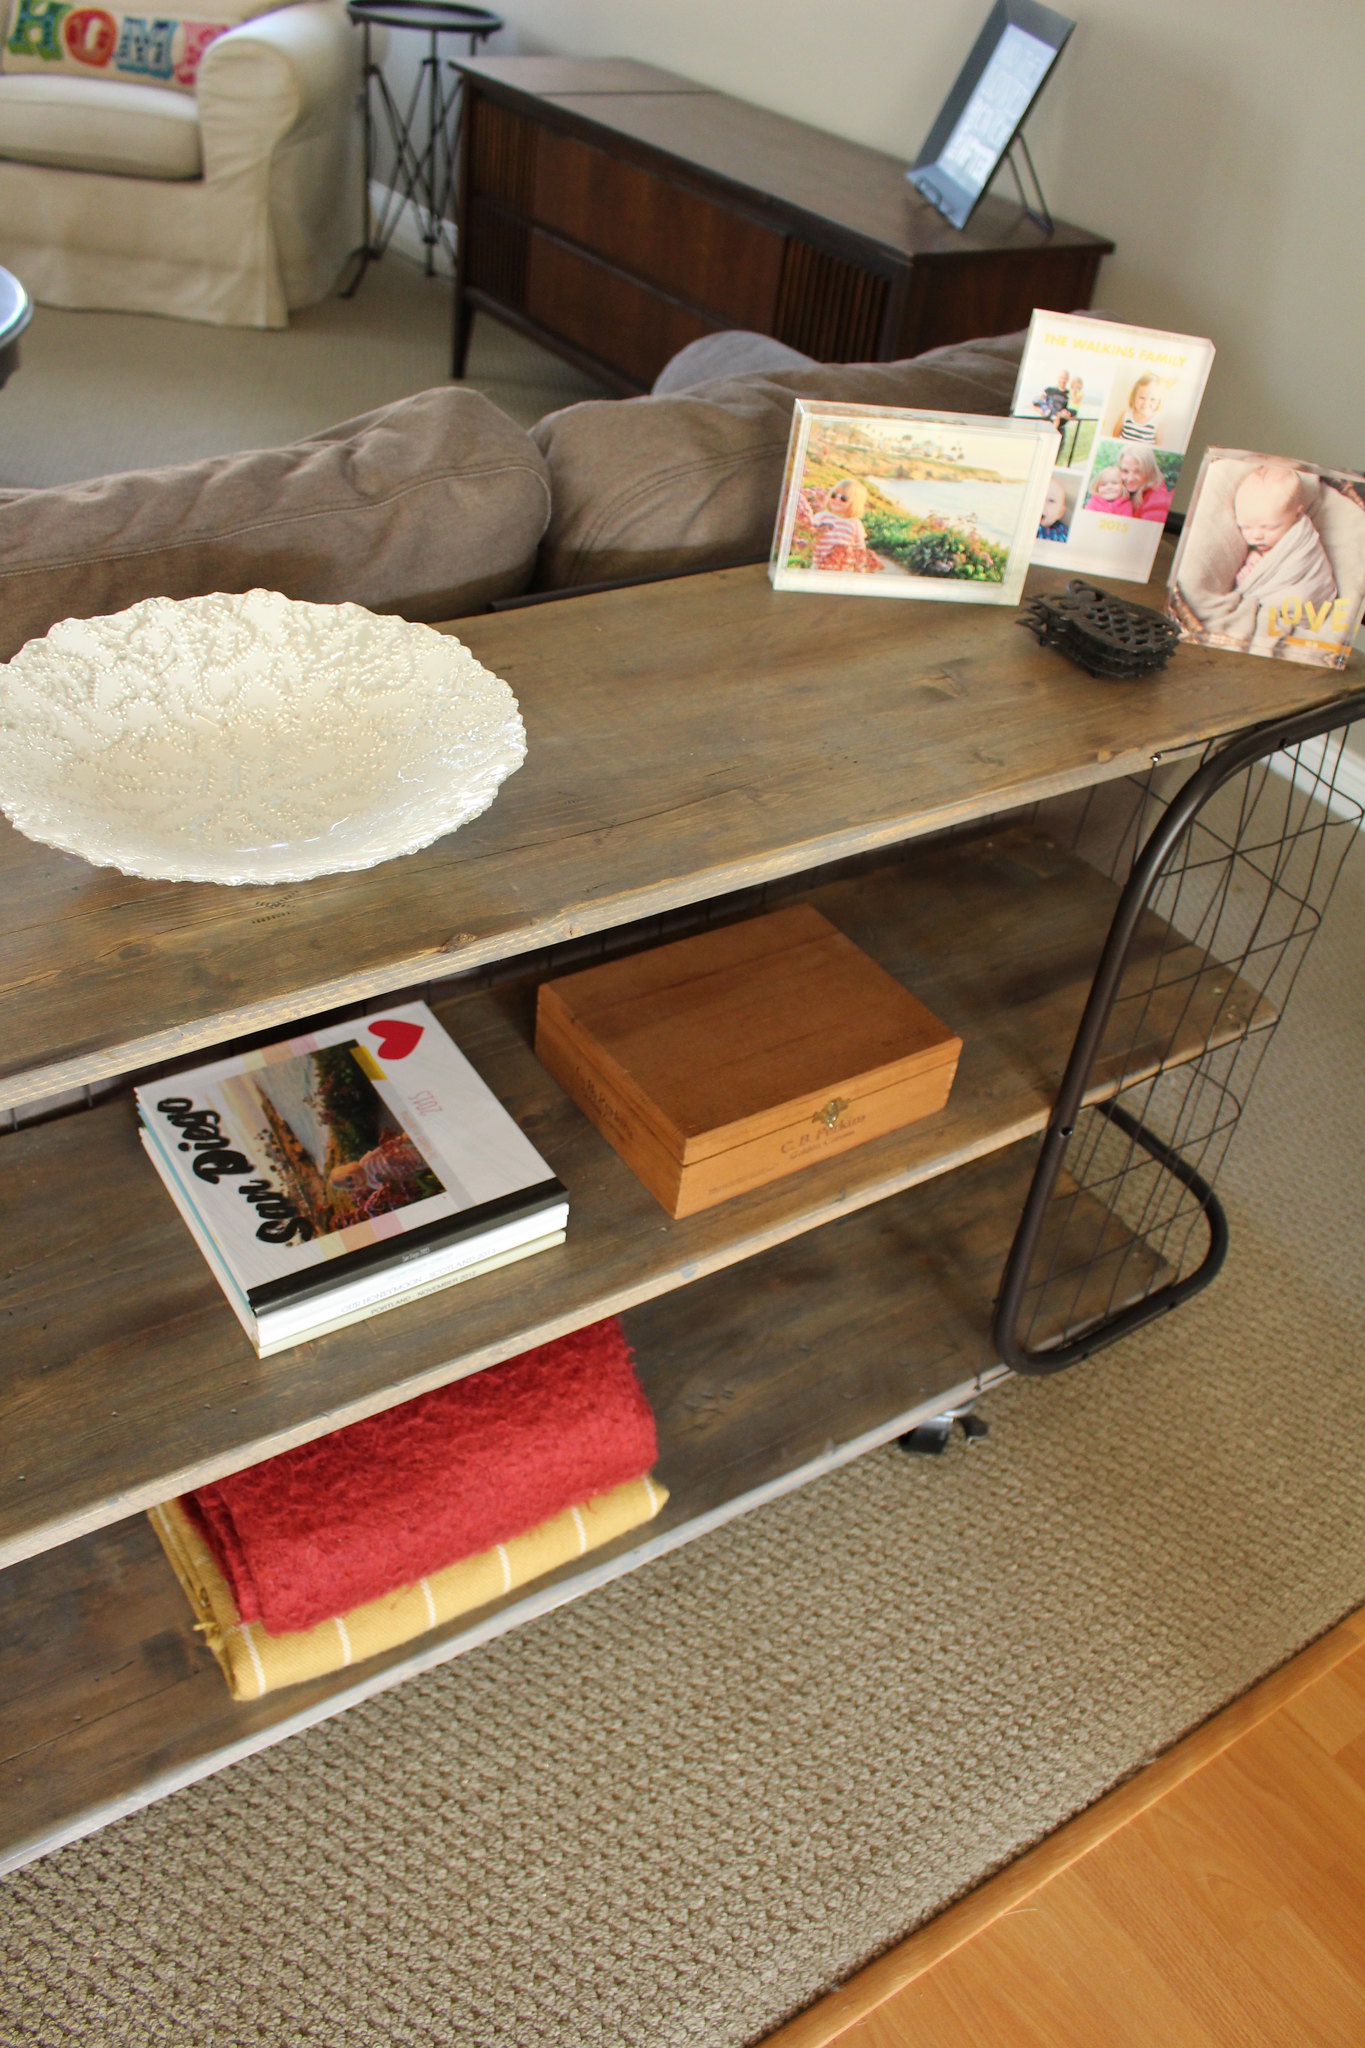
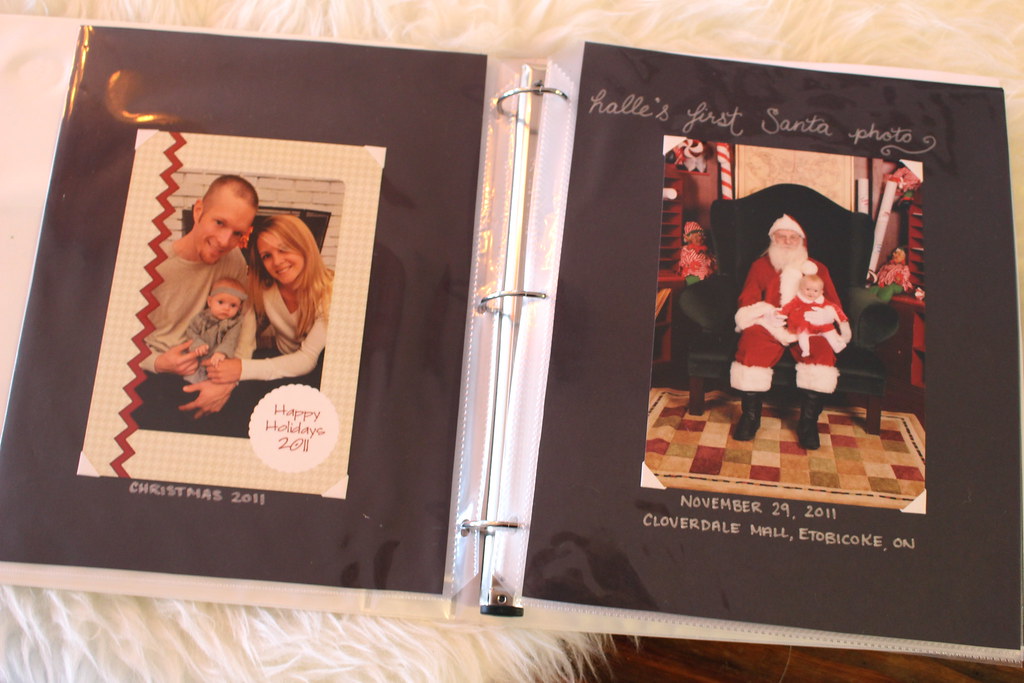
The solution I opted for was easy and inexpensive - perfect for a family on a budget, like we are. I used a basic white 3 ring binder, and created a handwritten cover on black construction paper to slide into the front pocket. Inside of the binder, I use clear pocket pages to store the cards and photos. I've attached them to black construction paper using photo safe adhesive corners and labeled each memory with the year and where the photo was taken. 


Storing Christmas Cards

Storing Christmas Cards

I love pulling this binder out every time there is a new photo to add, and Halle enjoys looking back at herself as a baby too. I hope that Nolan will enjoy it just as much. I'll be honest, it's fun to see how B and I have both changed since we first became parents as well.

Storing Christmas CardsStoring Christmas Cards

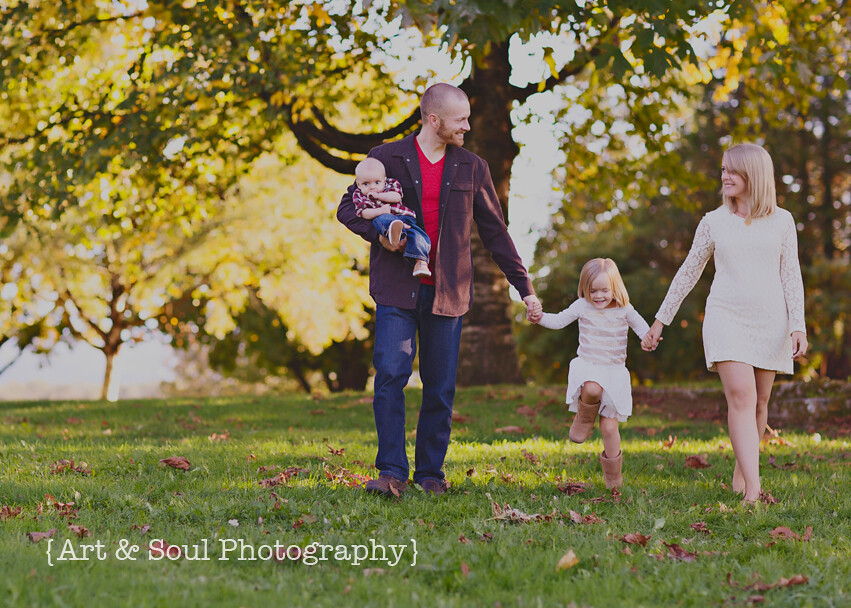
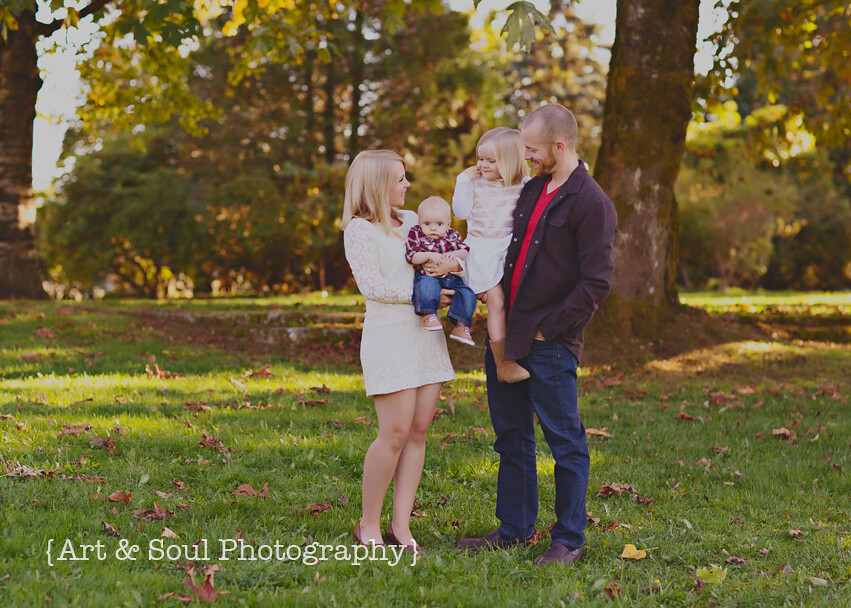
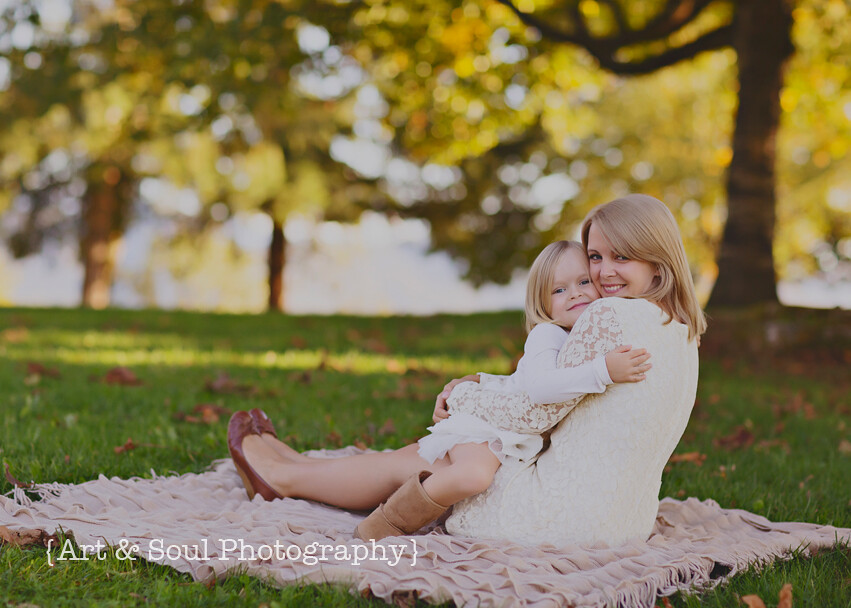
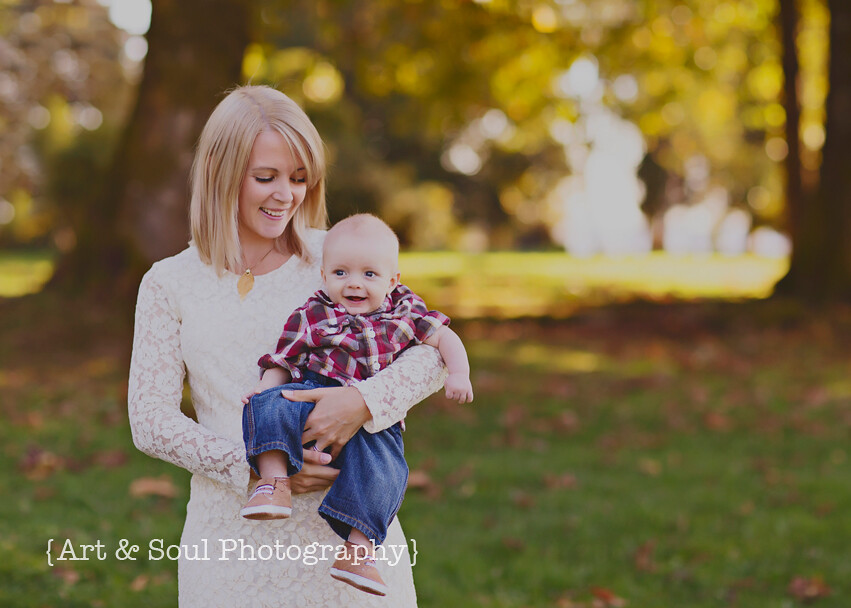
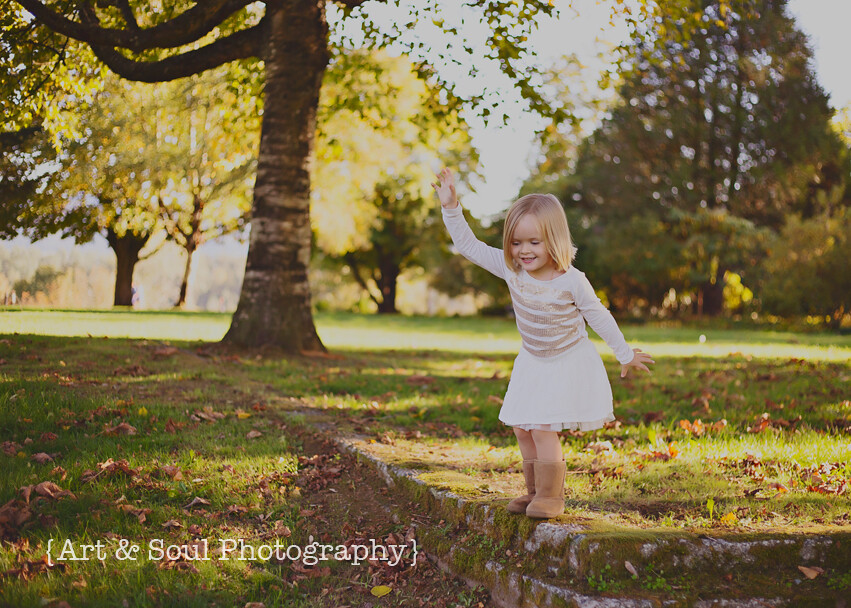
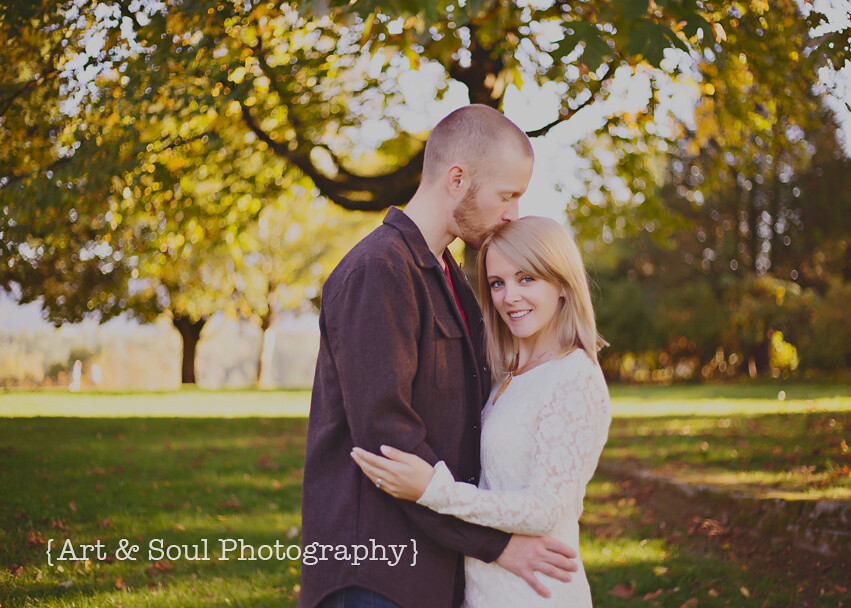
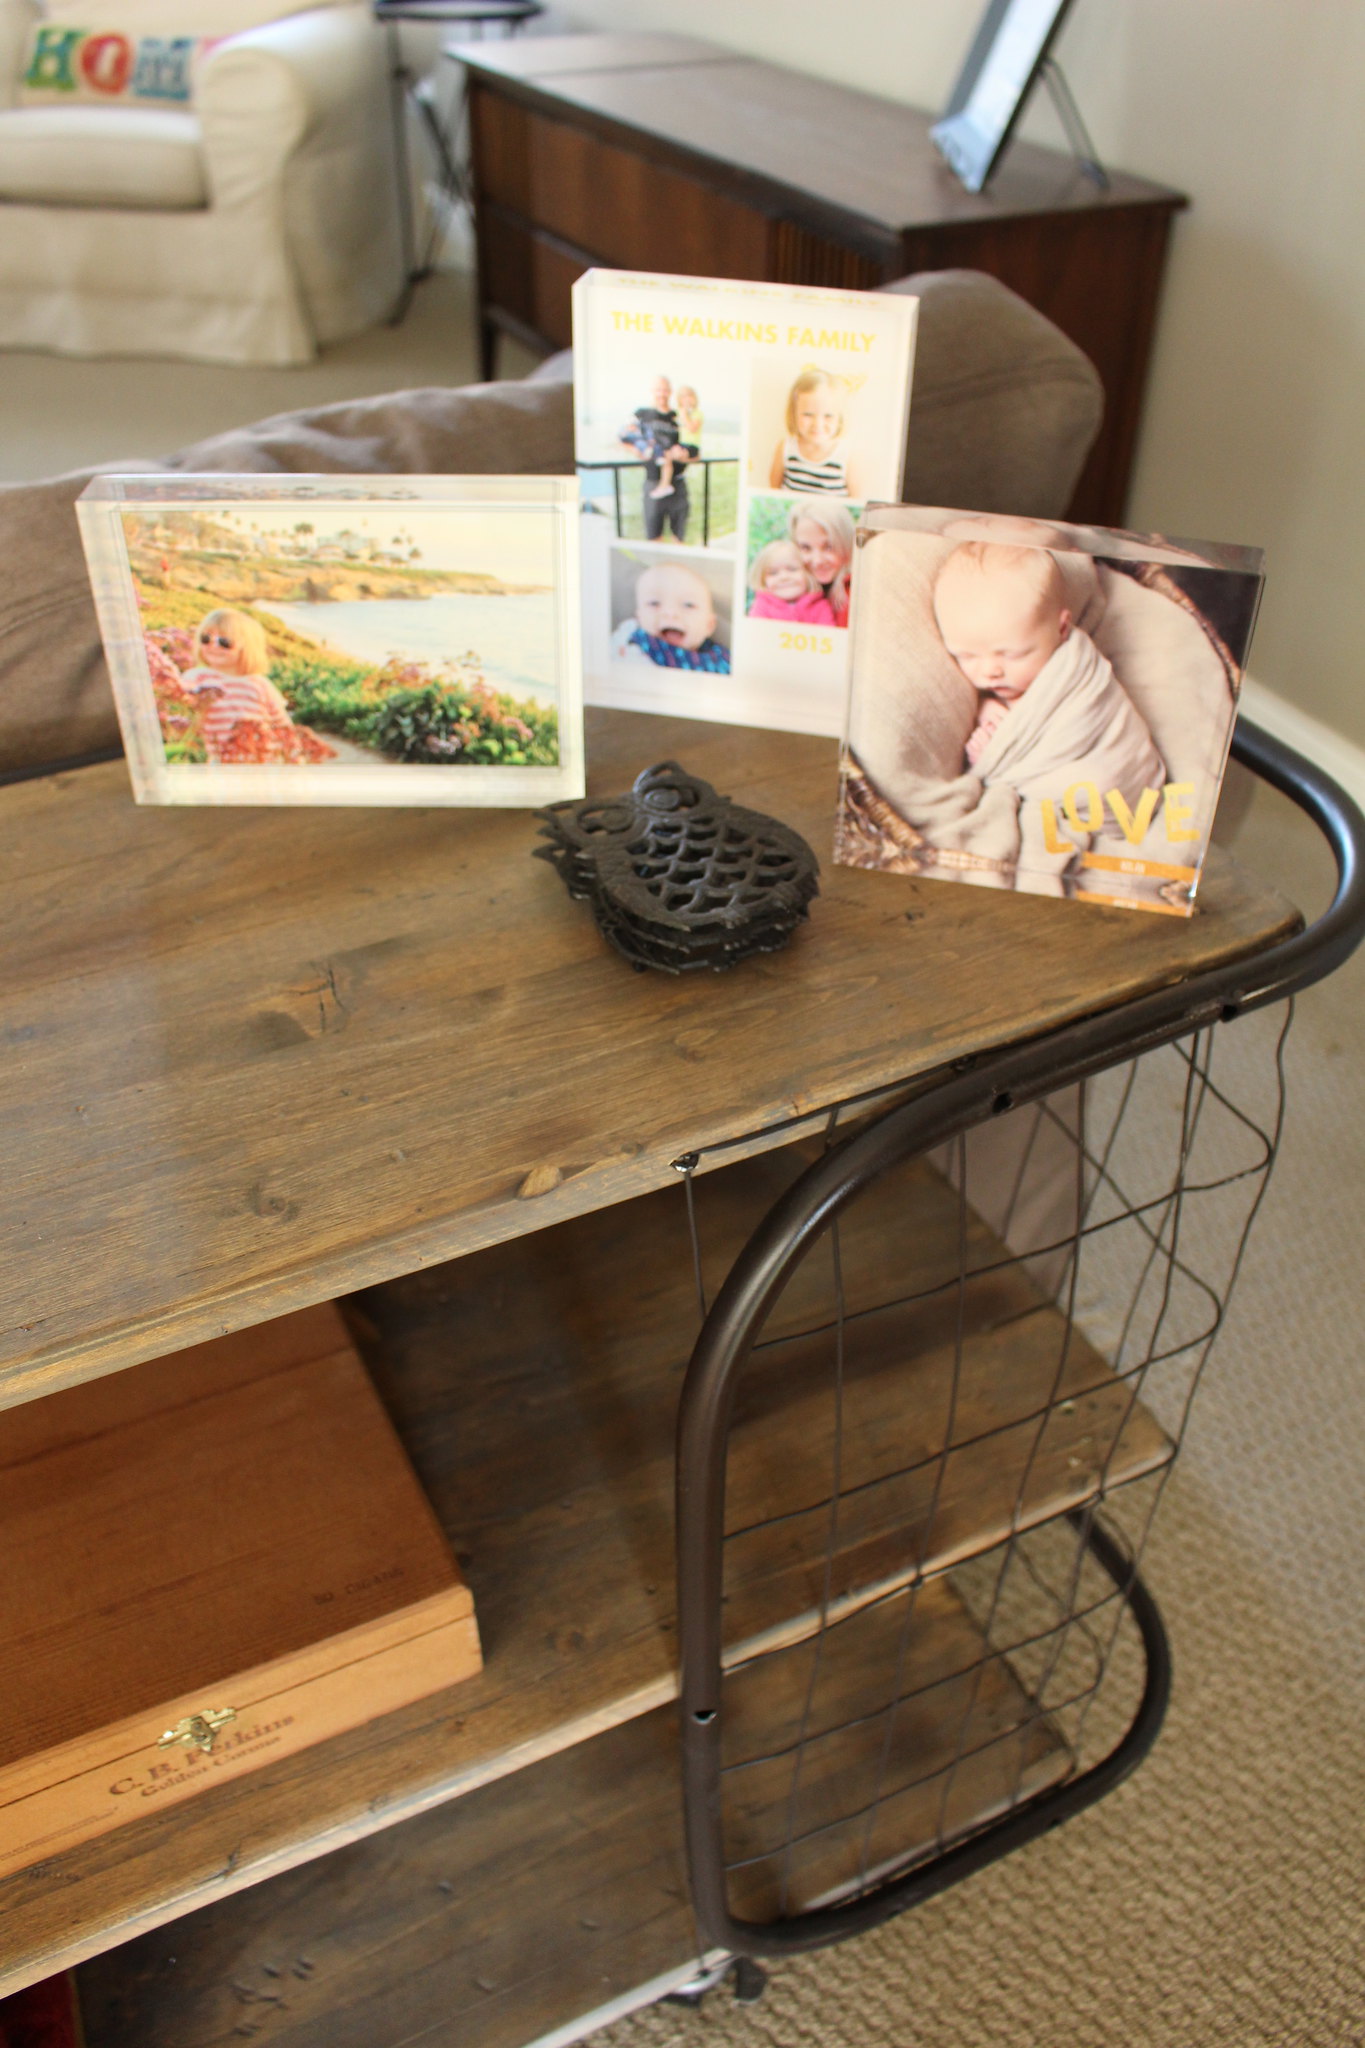
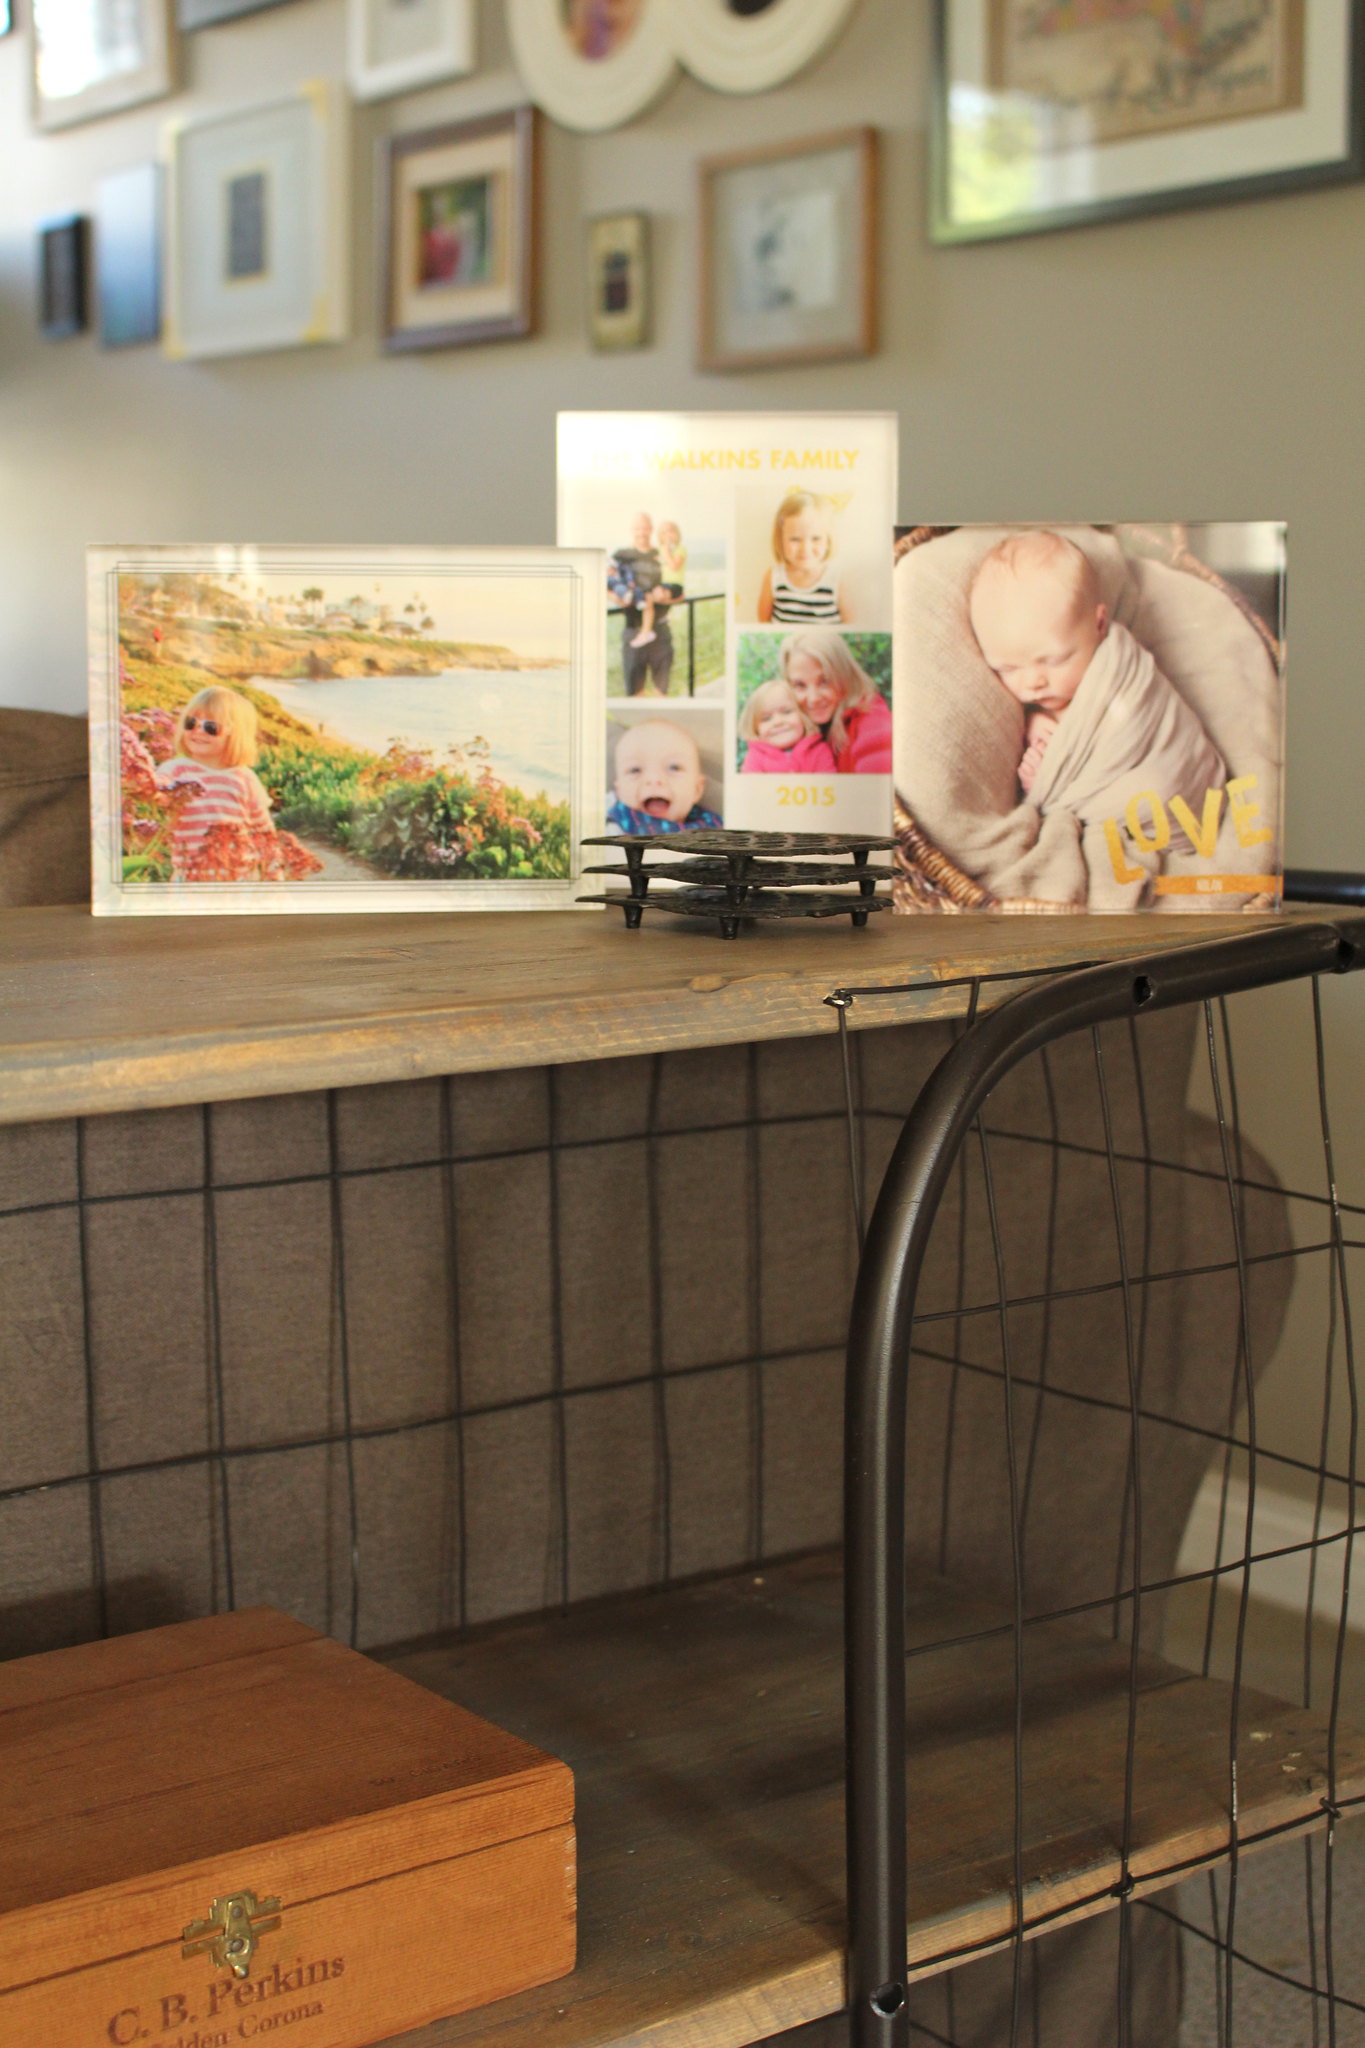
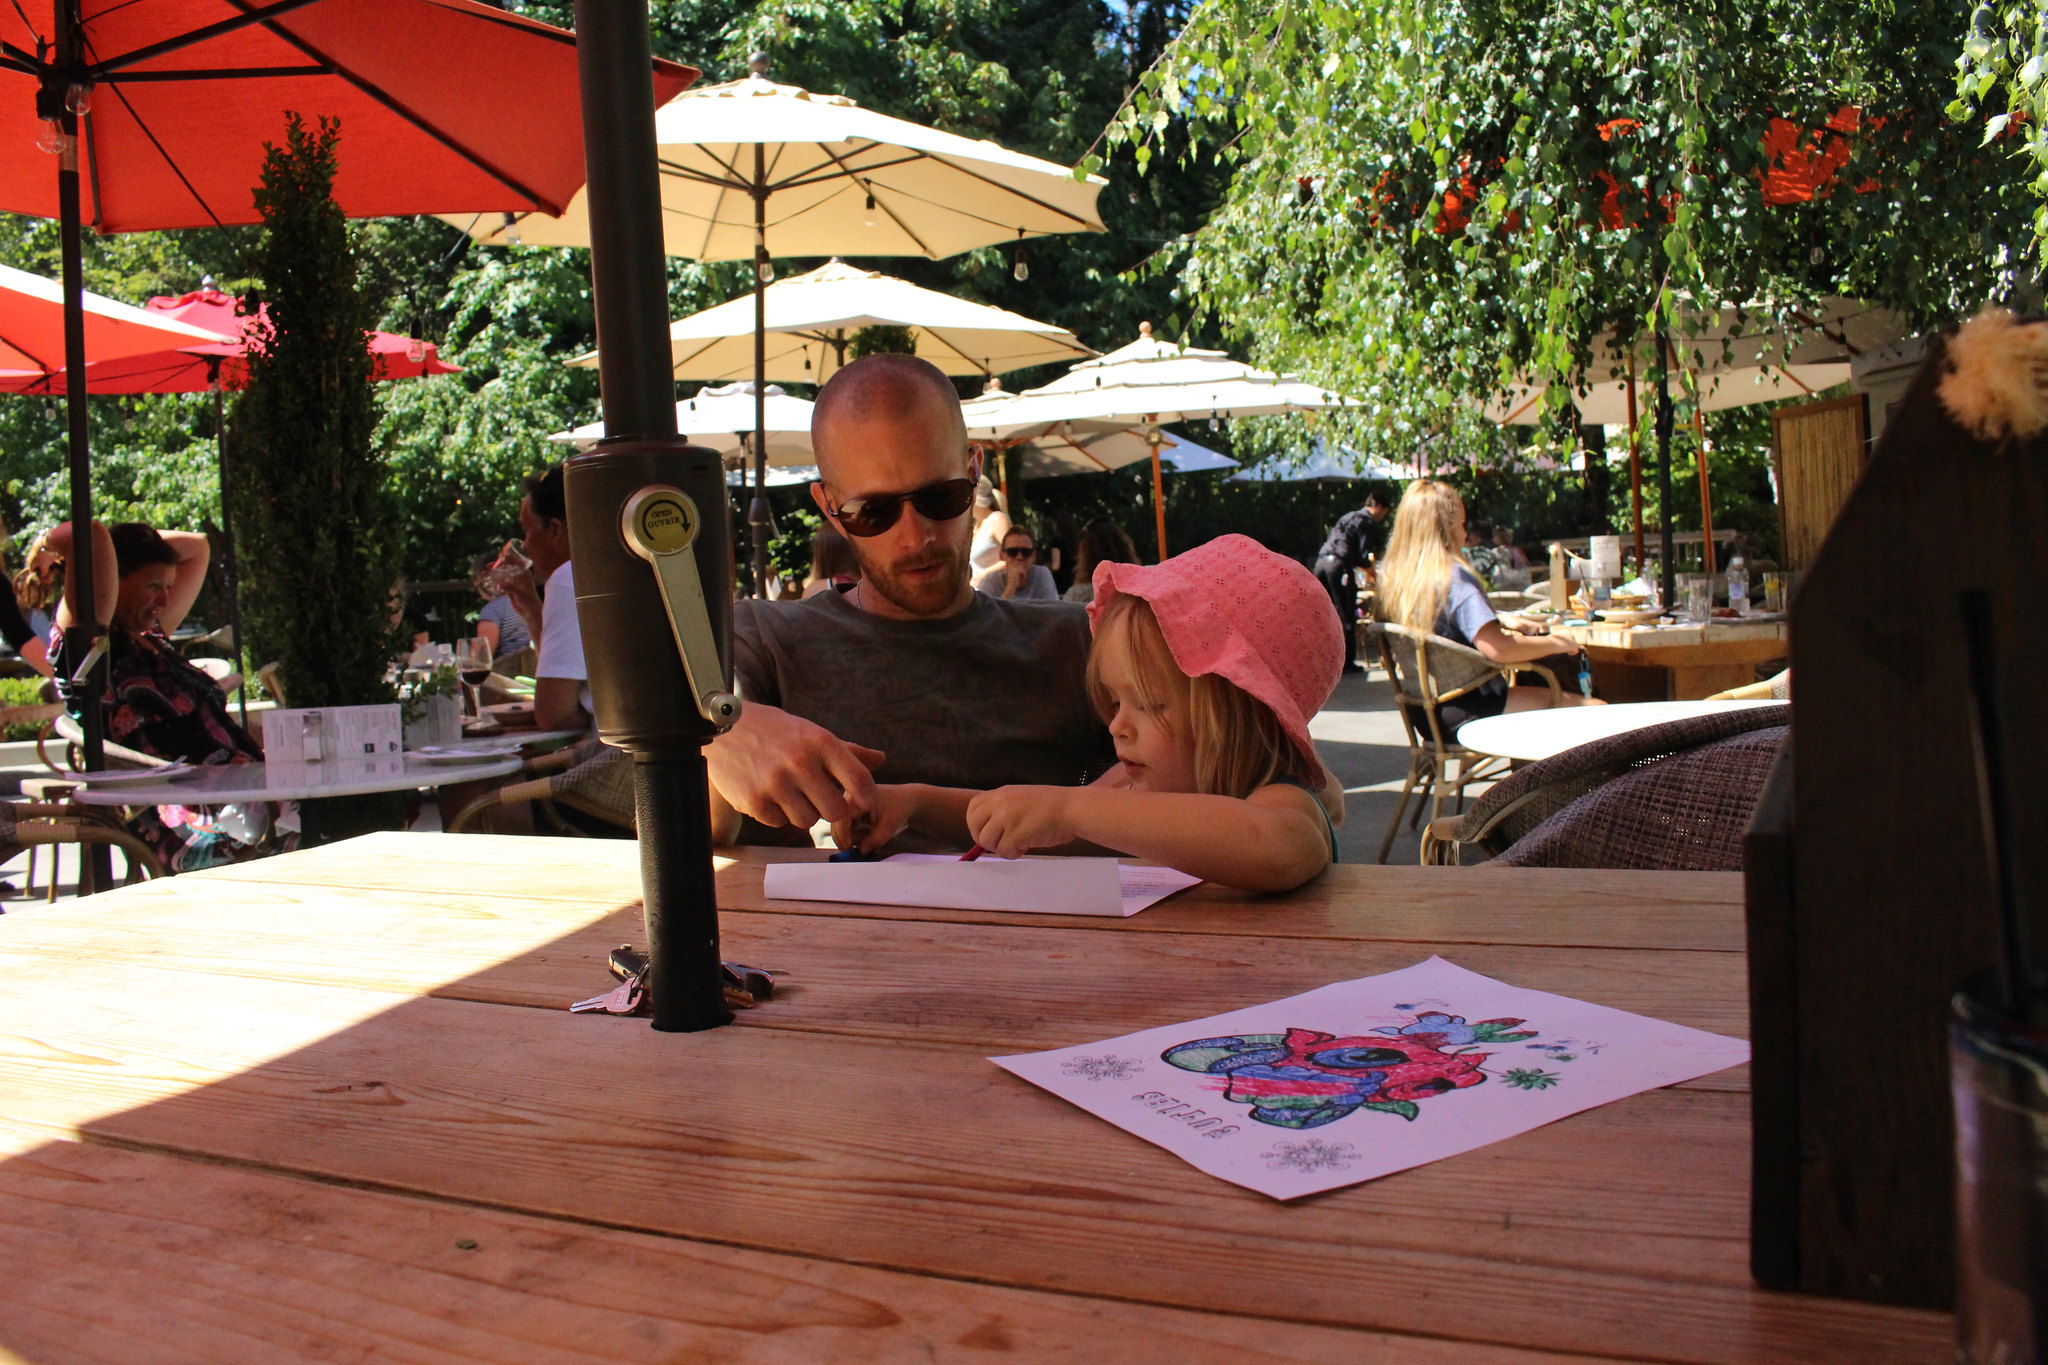
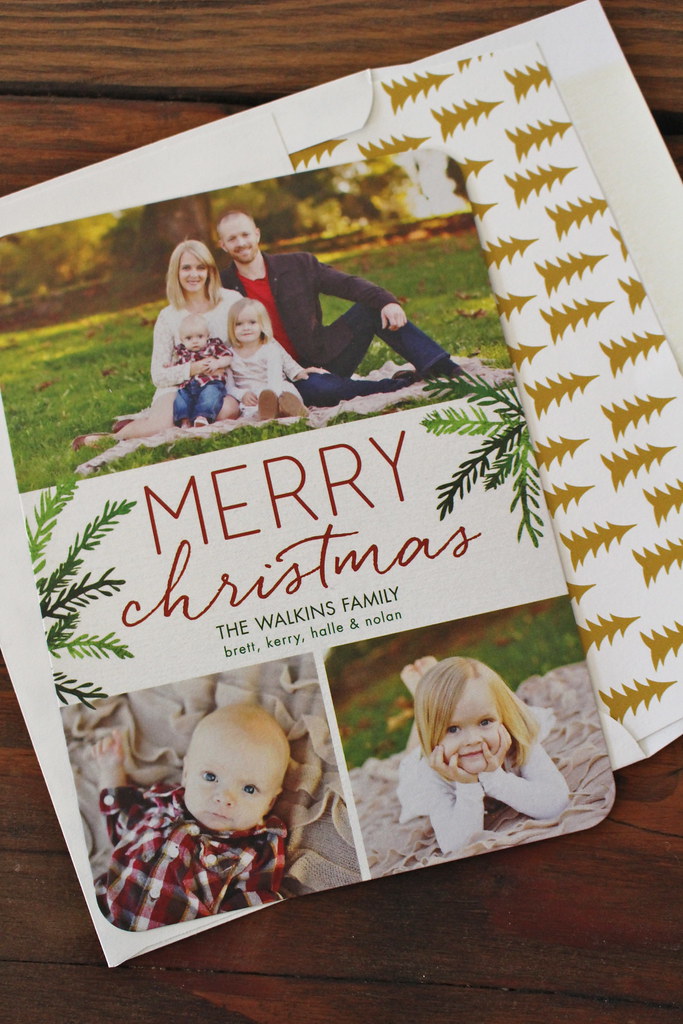
This years Christmas cards are my absolute favourite. We used photos from our family session (which I shared a peak at last month), and designed them on Tiny Prints. It was hard to pick my favourite design because everything was so gorgeous and they have a ton of fun options (like laser cut cards - so awesome!), but in the end I went with this beautiful traditional looking card as it matched the best with the colours in our photos. B and I also really loved the gold Christmas tree envelope liners! They are so fun, and add just that little bit of extra cheer to the mail!

Storing Christmas Cards

As always I included one photo of all of us together and then highlighted an individual photo of each of our babies! Yes, Halle is almost four and a half... but she will NEVER stop being my baby!


Storing Christmas Cards

Storing Christmas Cards

I enjoy coming up with new ways to address the cards each year, as well. I mean, everybody loves receiving 'snail mail' in this highly electronic world, but it's so much better when that mail arrives in your mailbox looking beautiful - am I right? Not visible in these photos - some cute glittery red hearts that appear in different locations on each envelope. Halle keeps telling me how beautiful the hearts are and how much she loves them.

Storing Christmas Cards

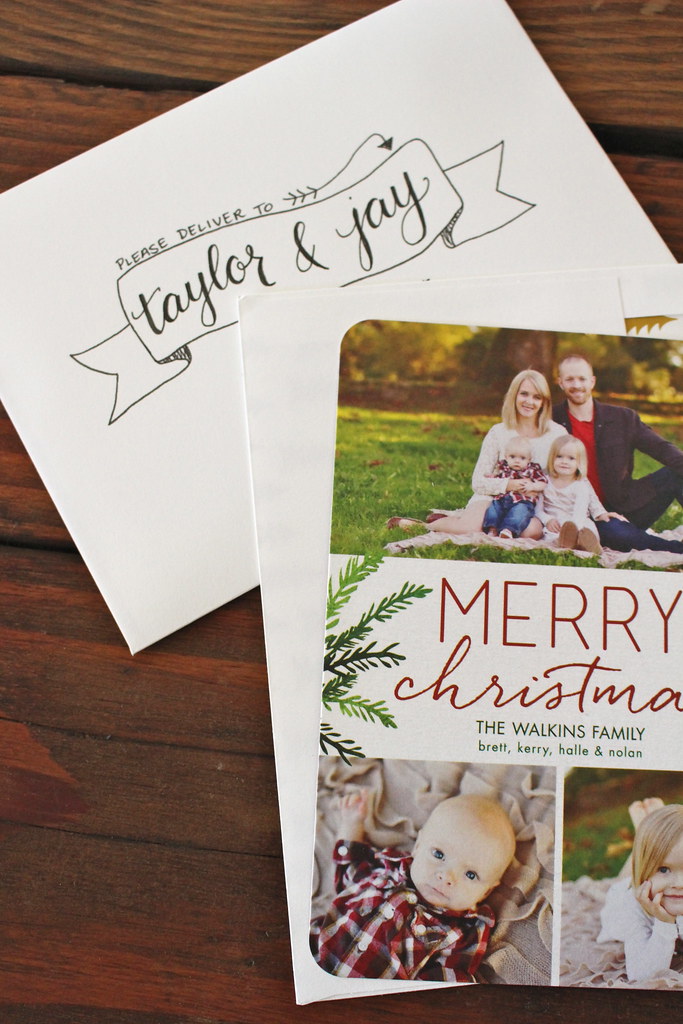
So there you have it, our simple solution to storing our holiday cards and memories... along with a look at our most recent Christmas cards.

Do you send Christmas cards every year? Does anyone else love sending photo cards to friends and family, and do you keep them to look back on? I'd love to hear what you do, and most specifically - how do you display cards that you receive. I still haven't found my favourite way to display all of the cards that arrive in our mailbox!
SHARE:

Wednesday, October 14, 2015

Family Photo's & Outfits

It's that time of year again, and everyone is thinking about family photo's (if they haven't had them done already). I love updating our family photos every fall (you can find a look at our past one's here: 2011, 2012, 2014) and it's one tradition I plan to continue, for as long as possible.


FamilyPhotos-Oct2015

This year we had Shana of Art and Soul Photography take our photos. We lucked out with an absolutely beautiful sunny day for our first photos as a family of four.


FamilyPhotos-Oct2015

I am really happy with outfits I picked out for everyone. I wanted us to coordinate without being too matchy-matchy, and I didn't want to go out and spend a ton on new clothes either. I decided to go with cream and gold for us girls and brown and red for the boys with dark jeans.


FamilyPhotos-Oct2015

FamilyPhotos-Oct2015

I started by choosing my dress (It's a lace H&M dress from about 4 years ago, that I had altered a couple of years ago). Then I went through Halle's closet and found the gold sequin shirt (it's a Joe Fresh shirt that I bought second hand) and the adorable skirt she got as a gift. Brett already had every piece of his outfit in his closet, so then I just had to pay a visit to my favourite second hand kids store to find Nolan's outfit.


FamilyPhotos-Oct2015

FamilyPhotos-Oct2015

FamilyPhotos-Oct2015

Once again, I am so thrilled with our photos (as I have been every year), and I'm glad we found Shana! She also did Nolan's newborn photos for us, and we can't wait to see her again for his 6 month and 1 year photos.

Do you get family photos done yearly? Have you had any done this year? I would love to hear how you pick outfits for your family photos!
SHARE:

Monday, October 5, 2015

A Copycat Sofa Table

One thing that we have always been slow to add to our home is furniture. We try to be careful when bringing in pieces and we are always very conscience of our budget. We don't really splurge on pieces, and if we know what we want, B would rather build it for us. The best part about building our own furniture is that we can always get the end result that we desire, taking away or adding details as we please, and it saves us a ton of money. Of course, when I decided that I wanted a sofa table for our family room it was time for us to flex our DIY muscles once again.

Before we began to build, I started looking at Pinterest and different big box stores for inspiration. We could've built something simple and straight forward, but I knew that I wanted something different (read not all wood), and provided us with storage space. When I found the Bleached Pine Rolling Console from West Elm, I knew that I had found our next project. It took quite a few weeks of sourcing materials and discussing plans before we started. The finally decided on the following supplies to help us build our table:

- 3 - 12" x 5' pine boards
- 2 - 10' pieces of conduit (1/2" EMT)
- 50' of Galvanized Wire Fencing
- 3/4" Fencing Staples
- 4 - 4 x 1 1/4 Vintage Black Cast Iron Swivel Casters (2 with brakes) (not pictured as they were still being shipped to us)


Console Table Supplies

Our plan was to build a similar looking table to West Elm's but with a smaller foot print and aged looking wood. After taking measurements, we decided the table would be 12" deep, 5' long and 2' tall (with the casters on). This would ensure the table would be only slightly shorter than the length of our couch, come up nicely to the back of it, and be deep enough to hold books and photos, without being too deep.

Console Table BuildingConsole Table Building

With our plans in place, our first step was the most fun! After B sanded the wood down (so we wouldn't have sharp edges) we got to beat up and "age" those pine boards. Our weapons of destruction?

DIY Console Table

Basically anything from B's shop that we could use to scrape, dent, gouge or cut the wood with. We threw a bag of screws at them, wacked them with chain, a hammer, a file... whatever we had, we used it.

DIY Console Table

DIY Console TableDIY Console Table

Once we thought that they good and beat up, it was time for our first coat of stain. We started with Varathane's Ultimate Wood Stain in Golden Pecan (which we used for the Love Your Wood Challenge last month). B applied it lightly and wiped it off quickly since we didn't want it to be too orange. Next, we put on some of the Varathane Ultimate Wood Stain in Weathered Grey (also used in the Love Your Wood Project). Again, it was applied lightly just to bring some aging to the wood.

DIY Console TableDIY Console Table

Once both stains dried, we beat up the wood a little more. More gauges, cuts and scrapes, but we also upped our game and B brought out his blow torch so we could burn it as well. Our last step in aging the boards was adding dark brown stain to random sections of the boards (which we used on our dining table that B built). This toned down the grey and really helped to complete the aged look of our boards.

DIY Console TableDIY Console Table

DIY Console Table

DIY Console Table
You'd never guess that we started with plain pine boards, would you?

With our wood ready, it was time to start preparing the other parts of our table. Using Rust-Oleum's Painters Touch 2x The Coverage spray paint in Dark Walnut, we sprayed the galvanized fencing and fencing staples.

DIY Console Table

DIY Console Table

In order to start assembling our table, B created 8 spacers from scrap wood that were 12" tall to  match the spacing on the galvanized fencing. We had four spacers between each shelf, screwed into the corners to hold the shelves sturdy. Then, using a hammer B nailed the fencing to the shelves using the fencing staples. This step took the longest, as he put a fencing staple at every other cross section of the fencing to keep it sturdy. We had a few staples split the wood, but it really just added to the aged/beat up look of our barn board (and they were on the bottom or back side of the table, which was good). 

DIY Console Table

DIY Console Table

DIY Console Table

Next, B needed to bend the conduit pipe. Using a manual conduit bender that he picked up from Home Depot, he made 90 degree bends in the piping. This part proved to be the most difficult to mimic from the inspiration table. B mentioned to me quite a few times that with the conduit bender he wouldn't be able to get the pipe to wrap right around the wood, but rather we would end up with it winged out, more like handles on a bar cart. I was totally okay with this change in design and actually liked it more. 

Console Table Project - October 2015Console Table Project - October 2015

To attach the conduit to the table he drilled 1/4" holes halfway through the piping in order to hide the screw heads and then drilled a 1/16" pilot hole through the other side of the pipe and into the wood. He then used 2 1/2" screws to attach the piping to the wood. 

The final step was adding the heavy duty cast iron casters that we ordered from Caster Connection. He screwed the castors to some  6" x 3/4" x 4'-4" aged scrap wood that he had, and then screwed that wood to the bottom shelf... and we now have this table!

Console Table Project - October 2015

Console Table Project - October 2015

Console Table Project - October 2015Console Table Project - October 2015

This is the perfect spot for my vintage owl trivets, as well as our new Acrylic Photo Blocks from Tiny Prints. I love them because they are such a beautiful and different way to display some of our favourite photos and memories! 

Console Table Project - October 2015

Console Table Project - October 2015

Though I would like to build a blanket ladder for this room, at the moment the bottom shelf is the perfect spot to keep a couple of my favourite throws from Penney & Company.

Console Table Project - October 2015Console Table Project - October 2015

I'm so in love with this table and thrilled that we decided to challenge ourselves to work with more than just wood to create a new piece for our home. Yes, B did the constructing but we collaborated on how to age our boards and what products to use for the look we wanted - we do make a pretty good team, if I do say so myself.

Have you been working on anything new that challenges you to think outside the box? Or maybe you've just acquired a really great piece of furniture that has made you look at your home in a new way!? We'd love to hear about it! 

SHARE:

Tuesday, September 8, 2015

Around the Island - Coombs & Nanaimo

Welcome back! I hope you all had a safe, happy and fun final long weekend of summer! We went on another camping adventure out towards Kamloops with friends and had a great time and today our darling girl has her first day of preschool - I am so excited for her. Before I get to this past weekends camping trip, I wanted to share some more photos from our Island adventure last month - this time with photos from our stops in Coombs and camping in Nanaimo. Once we left Stamp River, we headed to Coombs Country Market for lunch, ice cream and groceries (for our stay in Nanaimo). We enjoyed a delicious lunch on the patio at Cuckoo and then enjoyed huge Ice Cream cones after grabbing our groceries (a must stop for ice cream when on the island for sure). 


Coombs Country Market - August 2015
{My loves colouring on the patio at Cuckoo}

IMGCoombs Country Market - August 2015_1089Coombs Country Market - August 2015

Coombs Country Market - August 2015

Once we wrapped up there, we were off to our next campsite at Living Forest in Nanaimo. This stop allowed B to work during the week while the kids and I could play and have fun in the area. We had some other friends camping at the same site so we were able to spend time with them as well which was fantastic. I also took an afternoon to spend some time with the kids in Downtown Nanaimo - somewhere I knew we would have fun after our "Staycation" there last summer...

Nanaimo - August 2015
{the view from our campsite}

Nanaimo - August 2015
{Down at the beach at the camp ground}

Nanaimo - August 2015
{Family Dinner at the campsite}

Nanaimo - August 2015
{Watching the float planes in the Nanaimo Harbour}

Nanaimo - August 2015

Nanaimo - August 2015Nanaimo - August 2015
{At the park, reading a new book & flying her kite when B got off work}

Nanaimo - August 2015

Nanaimo - August 2015
{An evening dip in the Nanaimo River}

Nanaimo - August 2015

It was a nice camping trip in Nanaimo, but after 4 nights we were off again to our next destination - our friends' family lake house on Sproat Lake. We spent the final weekend of our little family summer vacation surrounded by friends at the lake house, swimming, eating, drinking and just enjoying great company. It was a fantastic way to break in our Boler and we learned a lot about what needs to be fixed over the winter! We have big plans to update our little trailer and make it more comfortable and functional. Should be some fun to share on here!

What did everyone get up to this past long weekend?
SHARE:
Related Posts with Thumbnails
© Life on Misneach Ridge
Blogger Designs by pipdig