Monday, May 31, 2010

A Sunny Transformation: Part 2

Remember a couple of weeks ago, I shared with you the transformation of my ugly green yard chairs into some bright and shiny blue ones? (If you missed it, you can check it out here) Well, the other two chairs AND the table are finished and ready for their close up!

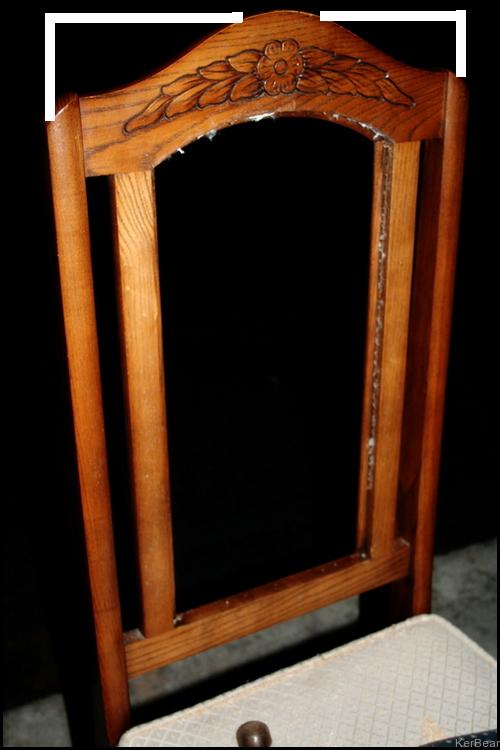
After completing the blue chairs, I moved onto transforming the "blah beige" one chairs. Here's a little before shot:


Yeah, nothing special right? I figured since I had that fabulous blue on our other four chairs, I'd go with another colour and picked yellow! Yup! Yellow! Since the style, size and shap of the chairs was completely different from the other four, I thought it was a great opportunity to throw in another colour that could liven the space up a little.


I followed the same steps, as when I did the first chairs, wiping them down and then spraying them with the yellow paint. We started off with a can of the Rustoleom 2x coverage spray paint in Sunshine yellow. I must say, I was extremely disappointed in the coverage I got from it. So when that ran out, we picked up a can of the regular indoor/outdoor sunshine yellow from Rustoleom and got about the same, if not better coverage from it. My advice, don't waste the extra buck for more coverage... you won't get it!


Well, needless to say, it took way longer than I expected, but I finally finished up the yellow chairs the same day that I gave my range hood a little face lift. BUT, before I reveal them, I'll share with you my table progress - which I completed yesterday afternoon.


I started off by getting the table up onto sawhorses and B sprayed it down first with the hose to get the worst of the grime off, and then I went over it again with some of our eco works glass cleaner.


Once it was all cleaned, I pulled out some old newspaper we had laying around, and some green painters tape and got to work covering up both sides of the glass table.


It took a lot of time and patience, but was worth it to not have to sit around with a razor blade afterward scraping off any paint that got on the glass. So, with everything taped up, I got two coats of blue on. I didn't want to kill myself getting the paint perfect, as we agreed that the majority of the time we have people over, we'd likely have a table cloth on the table.

After letting the table sit and dry for quite a while (in the glorious weekend sun), we got it put together and got everything up on the deck. I'm really happy with the lovely bright colours we now have on the drab ugly back deck. It'll work for the time being (our friends even came over for dinner tonight and commented that they liked the colour choice).


What do you think? Improvement over my faded dark green and blah beige chairs and table?
SHARE:

Sunday, May 30, 2010

Garage Sale Find

Yesterday morning, I convinced B to go and hit a few garage sales with me to "just look". Of course, it didn't quite work out that way. We happened upon one garage sale where an older couple seemed to have kept everything they ever owned. There were some pretty cool things, and when I spotted this chair, I knew I had to have it. 


B insisted we had too many projects, and enough bills to pay - we didn't need the extra chair. Even after the lady told us she would part with it for $27, and I told him I was willing to sell the two chairs I had previously bought for this one (as I haven't actually started working on them), his answer was still "No". 

After a little bit of hard work, promises (and maybe a bit of pouting) we headed back and I talked the lady into selling it to me for $22 - not bad... especially considering I already own the fabric I will recover it in.

The frame of the chair is all solid wood;


I love the carved detail, and the shape of the chair;


They had clearly had it recovered quite some time ago, so all I'll really need to go is change the fabric. The padding underneath is in fantastic condition!


As soon as I saw it, I knew what my finished product would look like! I saw it in our (finished) basement, so I've begun the work! For $22 for the chair, $3.98/yard for the fabric I will use, I knew we couldn't pass it up! Keep an eye out - I've already started working away...


SHARE:

Thursday, May 27, 2010

Gifts Fit For a Princess

This July, my cousin's little girl will turn 4, I'll call her R. She is absolutely the apple of my eye. I was the first of the extended family (on my Uncle's side) to hold her when she was only 6 days old, and ever since I can't get enough of her sweet little smile and princess attitude. My favorite story has to be of the time my cousin told her I was coming to visit and she told my cousin that I was her best friend.


My little R - July 2009

I've had her for a girls sleepover once while B was away and we ate pizza and baked Valentine's cookies for her to bring home to her Mom and Dad and baby brother. To make a long story short, I love her and can't believe she will be four this year. So, leading up to her birthday, I've started to think of birthday gifts that are good for a 4 year-old, that are also useful and practical (believe me, she has enough toys!). Here's some of what I've come up with...


Love these adorable Piggy Banks from Pottery Barn! I think the Pink one would be perfect for my R, and of course we'd throw in a buck or two for good luck! Not bad since they are currently on sale too!


This personalized Princess book, also from Pottery Barn, would be perfect! The last time she visited, I asked her what she wanted to be when she grew up... she told me "A Princess!". She doesn't realize she already is in my eyes!


I thought this flower clip from hblackberry on Etsy would be a great little detail to decorate the top of the gift. Then afterwards it could be worn in her hair or clipped to a bag, top, dress... you name it!


How adorable is this print designed by the very talented Lindsay from Penny People Designs (and of course the wonderful blogger behind Aubrey & Lindsay's Little House Blog). I adore it and think it perfectly fits my little R. Now, I know it's not currently available as she is scaling back on her designs as her own little one is due very soon, but I had to share. You can still check out the designs she does have available over at her Etsy store. (of course, if I were to buy her a print, there would be a toy involved as well... I understand 4-year-olds may not appreciate wall art as much as I do...)


I think this little necklace from filigreepheasant is adorable. R loves dressing up and looking pretty - so a nice little necklace might be a fun little idea for her. Especially if it involves a crown and pink!

This is just a quick round up of ideas. I'll be continuing my brainstorming before I run out and purchase something. What would you buy for a little princess of your own?

SHARE:

Wednesday, May 26, 2010

Range Hood Redo

I've felt so strange recently being away from my blog (and twitter)! With my new hours at work, school, home projects and life in general I have found it hard to fit in time for the blog - not to mention all of the computer problems I have been having recently. However, computer problems have been solved after I went out the other day and replaced my old crappy HP with a brand new MacBook... I am in LOVE!


Anywho - on to what you came to read about... projects! We've completed a lot recently, and I was happy to jump back into my kitchen refresh project two weekends ago. What exactly did I get up to in the kitchen? Well, if you've been reading then you know I've already painted our backsplash, started painting the wood cupboards, and I've also painted the walls... which I have yet to fully share. So what else could I do?

Well, honestly, our vent fan was pretty gross. Despite the little sticker on the inside of the fan that clearly states "Clean Grease Covered Areas Regularly" - I don't think that thing had been cleaned in many, many years. Also, it was an almondy, yellowish colour that just wasn't fitting in with the rest of our appliances (which are currently a mixture of white and stainless). We are slowly moving over to stainless appliances as necessary, but we see no point in buying a new range hood until the kitchen gets a complete overhaul in the future, so I took on the task of giving it some new life!

Here's our sad and sorry looking range hood before I gave it some TLC:


The first step was for B to turn off the power to the hood. You don't want to be messing with any sort of electrical currents when you're disconnecting things - so just do it the right way, please! Once it was disconnected, I took the greasy mess out back and got busy with my good friend "Krud Kutter" (who you may remember helped me out with my tile painting project). I knew it was pretty bad so I just went with the straight "Krud Kutter" - no water added and it did the trick beautifully! Of course, I could see a bit of film on top of it after I had wiped the whole thing down, so I used a fresh rag with some water and gave it another wipe down and let it dry.

Thankfully, our range hood wasn't too rusty, and was definitely not glossy - so I didn't have to worry about sanding (though I am sure it wouldn't have hurt, I'm just lazy). Once I was sure the fan was dry, I taped off anything I didn't want painted, like electrical wires and the buttons, and pulled out the silver appliance epoxy we had purchased that morning while at Home Depot (it was a total spur of the moment project).

I worked as the can instructed, giving two light coats at first about a minute or two apart and then let it dry for half an hour between each following coat. Be sure you don't use this for anything that has direct heat on it like stove tops, ovens or microwaves. Once we had let it sit for hours drying in the sun B gave it a light spray with some clear coat (though not necessary) to make sure it was all sealed, and then it was installed.


The silver is a little darker than the stainless on the dishwasher and microwave, but this is definitely a huge improvement over the hold yellowish hue it once bore. I know it will look particularly fantastic once I get around to finishing ALL those cupboards! (I will soon, I swear!)

So, there you have my latest addition to my list of kitchen refresh projects! What do you think? Have you ever tackled painting an appliance? How did the project turn out for you?
SHARE:

Friday, May 21, 2010

Long Weekend Away

I apologize once again for the lack of posts this past week. Unfortunately, after solving my camera uploading issues on the weekend, I've once again hit a road block. Can't quite figure out what's keeping me from uploading, but I plan to get to the bottom of it. Home project related posts should be back soon.

In the meantime, B and I are once again escaping for the long weekend. We're hitting the road and making our way to Pittsburgh to visit my 91 year old Great Aunt. The woman is a firecracker, and I hope that if I live to be 91 I'm just like her. She's quick and witty, with a wicked sense of humor. Still sharp as a tack and living on her own. We've always a lot in common; our love of dancing, football and hockey, our sense of humor, and, of course, our love of American men!

We're looking forward to the visit and celebrating her 91 years, and of course, seeing a city neither of us have visited before. Maybe when I get back I'll even be able to share some photos. For now, here's some photos of the matriarch from my Mother's side.


It's photos like this that make me happy that my Mom and my Aunt are all about our family history. That is my Aunt Flo as a little girl - held by my great grandfather. My mom's Dad is the boy on the left with the little on on his shoulders.

This is me and my Great Aunt - December 2008

With her birthday cake for her 90th - we celebrated last August during our Annual family reunion at my Parent's house.


Aunt Flo with my Mom (right) and my Aunt Carol (left)

This trip has been a long time coming! We can't wait to see her. Hope you all have a safe and enjoyable long weekend (my Canadian friends)... for my American readers, one more week and you'll be able to enjoy your long weekend.
SHARE:

Saturday, May 15, 2010

Moving On

You've all patiently sat by and read a lot of posts recently that haven't had much to do with actualy project progress going on at our abode. Of course, that doesn't mean that things haven't been moving along. We're actually at quite an exciting stage of our basement bathroom reno, as it's finally starting to resemble a usable space. (For those of you who have just arrived, you can see my previous basement bathroom posts here and here).

Just a quick trip down memory lane, the last time I posted our bathroom was looking like this:


The biggest reason I've been quiet on posting on this topic is that for most of March and April there was mainly just plumbing and electrical work being done. Of course, there was also the closet renovation which took a lot of time away from the basement. But here we are, back at work down there and this past weekend we really banged a lot out.

The week before we had got up all of the cement board and mold and mildew resistant drywall in the shower enclosure. This was definitely one of those situations that tested our relationship. Thankfully, we managed to finish that portion of the project without ay blood-shed. It was surprisingly the rest of the ceiling drywall that proved to be the biggest hassle. Once we completed that on Friday evening, I left B to it and fell asleep on the couch where he woke me at 2am once he had completed the remainder of the drywall installation. I was thrilled to head down there after breakfast on Saturday morning and check out the progress!

Saturday afternoon we cleaned up the basement a little and started building the bench that will be in the shower. Unfortunately work was cut short that day with a lot of running around and preparations that had to take place in advance of mother's day. By Sunday evening, B and I were both back in our work gear down below mudding all of the joints with some heavy duty drywall mud. Long story short, in a little over a week the bathroom went from looking like it does above, to what you see below (with the exception of the plumbing and electrical work that was done of course):


So thrilled to see something that is finally starting to resemble a room! Now, keep in mind - due to some computer and camera issues I was experiencing, this is what the bathroom looked like about a week ago. Therefore, there has been even further progress since these photos were taken! We're nearing the end people!
SHARE:

Thursday, May 13, 2010

A Sunny Transformation

Recently we've been trying to focus as much time as possible on the exterior of our house in preparation for the summer months. Along with starting a veggie garden and cleaning up the gardens and front yard in general, I've been working on another project to spruce up our outdoor entertaining area. 

We were lucky enough that when we moved into our house last July, we had some family members moving the week before, and they donated a lot of old furntiture they didn't want/use anymore. Worked out well for us, as we didn't have to run out and spend a lot of money, that we didn't have, to furnish our first home. Fast forward a year later, the patio set we were given is looking a little worse for wear.

Don't get me wrong, perfectly usable, functional pieces that I am completely happy we got for $0. I just felt that we needed something a little more bright and cheery in the yard. Something I looked forward to going out to sit at in the morning with B and a cup of tea, to admire our backyard that we will one day transform into something beautiful. Once I decided this, I wasted no time getting to work transforming the table and chairs. The first step was to sand down the pieces of the table that were rusty, to clean them up and make sure that it wouldn't bubble and peel once painted.


(Looking at this picture, I'm wondering how my sanding technique worked. Who holds sandpaper like that??) The sand paper I am using above was something B gave me that he said was especially for cleaning up rust, and felt similar to a rough cloth. I used it on the areas that weren't too badly rusted. For the parts that were really bad, I used regular old sand paper (in whatever grit B handed to me...sorry!).

Once sanded and lined up, you can really see the rust on these pieces of our patio table. Not too worry - it wasn't visible for very long. I had it going from this....


To this, in practically no time! (They don't lie when they say that it's quick drying!)


For those of you who are interested, I used Rust-oleum's Painter's Touch in Caribbean Blue (Gloss). Even though I picked out the colour, I wasn't 100% sure about it before I started. I had some fear deep down about the colour being all wrong. Just to be certain I'd be happy, I did a small test patch on a plastic table we had laying around in the garage. I loved it immediately and after seeing it on our table pieces, I knew I'd love it on the chairs, and away I went...


Talk about a fun transformation, right? (Please pay no attention to the giant dead patches of grass. Those are all thanks to the dogs. Another project on our to-do list.) The blue makes the chairs so much more cheery, and they really pop in our yard, which is currently very drab! I didn't want to stop with the blue chairs though. Since two of the six chairs we received were a different style and colour, I thought it was the perfect opportunity to add a completely different colour into the mix.

What colour? Well, that one's taking a little bit longer to cover the way I've wanted it to. I plan on finishing up the set this weekend - so keep an eye out next week for our completely transformed patio set!

Do any of you have some old patio furniture you've given new life to? Or maybe some chairs that are calling out for a facelift like ours were?
SHARE:

Wednesday, May 12, 2010

The Chair Post

Since we're having a wide range of camera / computer troubles at home, I'm leaving the bathroom updates for the time being and moving onto something else you were asking for. A "quick and dirty" post on how we transformed my grandmothers dining set into something a little more us! I ask you to please bear with me, as I didn't document the process, take any process photos, or any "before" shots of our pieces for that matter. With that in mind, I apologize for any missing or vague steps. I'll do my best!

Quick recap for those who may have missed my first post. We took a table that looked similar to this:

Please note: This is not the actual table we transformed. Since we had no before pictures, I scoured the internet and found this "look-a-like" photo (it was a piece available at one of our local Habitat for Humanity ReStores)

And turned it into this:


Since the table was a pretty straight forward, "sand 'er down and stain 'er" kind of project, I'll leave it be and focus on how we got the chairs looking like they do.

First things first, we needed to dismantle the original chairs. I did manage to get a few photos of the very first chair that we took apart.


Getting the fabric/padding/wood insert out of the back of that chair was such a labour of love, I don't think we touched them again for another few months. Then at some point I think my Dad was "looking for something to do" and took each chair apart, carefully removing the back insert and unscrewing the seat from the chair. He then numbered everything so that when we were done we could match it all back up together. What a great father I have!

Once the chairs were apart I had to make a decision about how to handle the two chairs with arms from our set. "Two chairs with arms? I don't see any chairs with arms!" I know... I decided to lose the arms. So those were (kind of) carefully removed. Thankfully, we didn't have to be overly careful or worry about scratching the chair backs because I knew from the start that they would be completely slipcovered. From there we stained only the legs (in a glossy black stain) and let them dry. Easy pee-sy, right?

Well, it was this last part that turned into a bit of a hassle. As you can see from the pictures above, the original chairs had a curvy top with some carved detail. Really not my style, so we had to come up with a creative solution. After some thought, B used one inch strapping to create 90 degree angles on the chair tops, as I have depicted in my "Paint" altered photo below...


Seriously, no need to be jealous of my mad "Paint" skills. Unfortunately it's all I really had to work with given the fact that I had no progress photos of our little project. Deal! Thanks.

Moving on, the little structures looked pretty rough when they were done, and I actually remember my Dad seeing them and asking what we had done (he of little faith!). They worked out perfectly though.

Before we got started on the upholstering, we used plywood on either side of the chair to make the backs flat and solid. Then we used spray glue, and a staple gun to attach batting to the backs of the chairs - wrapping it from the bottom of the front, over the top to the bottom of the back. This ensured that everything was equally padded, and that there were no sharp edges from our DIY solution to losing the curvy backed chairs.

After a lot of discussion, and an inital attempt at making a removeable slip cover, my mom and I decided that it was not to be for these chairs.  Finally after a long night of sewing, we wrestled the fabric on and stapled the top piece in place before reattaching the chair seat. (Believe me, stripes can be just as difficult to deal with as pattern - lining up the stripes from the back of the chair to the seat was NOT easy!) And VOILA - we ended up with this...


I know it's not really the most detailed "how-to" post in the history of blogging, but it was almost a year ago that this project was completed and had actually spanned a period of year (at least). There is also the downfall of not actually having any actual "before" or "after" photos. But I hoped this helped to clear up our little project anyway!

I've learned my lesson. Always document the process and take pictures. Next time... I promise!

Any lingering questions or anything you think I may have missed? (I wouldn't put it past me to completely leave out a step despite my planning)
SHARE:

Monday, May 10, 2010

Back in Class

I was pretty silent over the weekend, mainly because we spent a lot of time working on the basement bathroom (there is HUGE progress that I can't wait to share this week!) and cleaning up around the house. We had a lovely Mother's Day brunch at our place for my parents on Sunday, followed by our first softball game of the season (which we won, after I got a player out at home on the last play of the game!). But the weekend is now over, and that means one thing... my first day back at school!

I'm taking evening classes and this spring term runs a little over a month so I'll be attending class twice a week (Monday and Wednesday). Thought I'd give a little run down on how my first night went.

The course I am taking this spring is a Residental Materials class, and the instructor is the lady who spoke at the information night I attended. She is funny and personable, but very knowledgable - the type of person I know will keep me engaged in the course material. It's going to be busy for the 15 classes we have, with three small projects, a large project (decorating a living room), a mid term and a final test... all by June 28th! We also have a holiday Monday during the course, and a field trip to Elte here in Toronto (Sadly she wants to have it the same day as the Christie Antiques Show, so looks like I'll be waiting for that until September).

Oh yeah - and of course, I was on the bus on my way to campus when I realized I had no pen on me. Totally something that I would do. Thankfully I passed the campus bookstore on my way to class and was able to pop in and pick up a pen and a bottle of water.

Tonight was a short class, we reviewed the course outline (majority of the class), and spent some time discussing vocabulary and colour scheme. I believe our first project (on Textile Application) will be assigned on Wednesday, so I'll have more to talk about as things progress. I do look forward to sharing it with my readers though, and I hope that you enjoy following along.

Keep your eyes peeled for a great basement progress post tomorrow! I can hear B working away on some stuff down there right now. It's looking good (finally!)
SHARE:

Friday, May 7, 2010

What To Buy?

Do you follow Janice over at "Life Begins at Thirty, Right?"? Well - you should! I do, and this past week she had a fantastic giveaway! $40 for CSN Stores! Not bad, right? Well, I was beyond excited when I heard from Janice telling me I was the winner of her fantastic little giveaway! Thanks Janice and CSN! I'm so excited to go shopping. Now it's just a matter of what I want to purchase...


Go on over and check out Janice's blog now! She'll be doing another giveaway when she reaches 50 followers! Make sure you don't miss that one!
SHARE:

Thursday, May 6, 2010

Dream Getaway: The Ocean House

Not too long ago I signed up to be a part of the website Jetsetter. Every week I get a number of lovely emails to my inbox showcasing all kinds of gorgeous hotels all over the world offering "deals". Until today, I never had the desire to share any of the hotels they had featured. I mean, they're all gorgeous, but there was something about "The Ocean House" that made me want to share. So let's go to Rhode Island, shall we?

Located in Watch Hill, Rhode Island, this resort boasts both hotel and residental accomodations! It was constructed to resemble the original hotel which stood in the same spot for 142 years before it was demolished due to structural issues. I could probably ramble on about all of the beauty of it, but since I haven't been and it's the pictures that have drawn me in - I'll let them do all the speaking!


Let me tell you, it's not too easy to find pictures when the hotel doesn't actually open until next month! Gorgeous though, no?
SHARE:

Wednesday, May 5, 2010

They Grow Up Too Quickly

One day, you've just brought them home as tiny little bundles of joy, and the next thing you know...


They're graduating from puppy training...

I wasn't able to take part in this little shindig, but B was there and had to corner Harley to get the hat on him. As you can tell, Harley was not a fan.
SHARE:

Add Another to the List

Just quick before I get to the real entry - I wanted to thank everyone that commented on my post from yesterday! It's so nice to get such positive feedback and kind words from readers (it's actually the most comments I've ever received - so thanks to those of you who came outta the wood work to say something sweet!) You can bet there will be plenty of updates as I once again head back school! Thank you, thank you, thank you! Now - onto today's post...

Call me crazy, but I love being busy. I thrive in fast paced environments and love always having something else to do. I find if I don't, I get lazy. (Okay, of course I get lazy even when I have lots to do - but don't we all?) So what exactly am I getting at here? Well, on top of the basement reno that seems to be never ending, my kitchen facelift project (that is currently at a stand still, which I plan on getting on top of again) and the ongoing process of beautifying our outdoor space, I'm adding yet another project to my task list. Yup, you read that right.

What's the project? Well, I've already given you a little hint with a couple of posts that have gone up over the last week, so I figured I'd go ahead and share a little more.

I'm currently working on a plan to have our master bedroom moved from the front room of the house, to the back bedroom. Why? I'm glad you asked! The bedroom we currently call "ours" is actually the smallest bedroom in the house. No, we're not crazy. We just had the IKEA Noresund Bed, which I've had since my third year of University. I think it's a pretty bed frame (that's discontinued), but unfortunately because of the size of the headboard and the layout of the bedroom, it just doesn't fit. I won't get into the logistics of "why" - just trust me on this one. So "buh-bye" bed frame, it is! It also means, I'm taking the opportunity to go in a completely different direction with our new master bedroom!

For now I've just come up with a moodboard to start, and I'm sourcing out the stuff that I'll need to pull it all together. I'm actually waiting a bit before I jump in head first, so I'm sure I hope we'll be done some more of our projects before this one really get's rolling!


I'm beyond excited for us to have a new look to our master, but I'm doing my best to restrain myself for the moment! Hopefully the wait for updates on this one, but be as long as it's been with other projects! (Keep an eye out for updates on the basement bathroom & backyard this week. There's been a lot happening - for real!)

Now the part where I ask for help! The Antro coiled rope knobs are EXACTLY what I want for my dresser - however, unless I have to, I'd prefer not to spend $12 (Cdn) on four knobs. Have you seen anything like them anywhere else out there? If you could point me in the right direction - I'd be forever grateful!
SHARE:
Related Posts with Thumbnails
© Life on Misneach Ridge
Blogger Designs by pipdig