Trending

Tuesday, August 11, 2015

Love Your Wood!

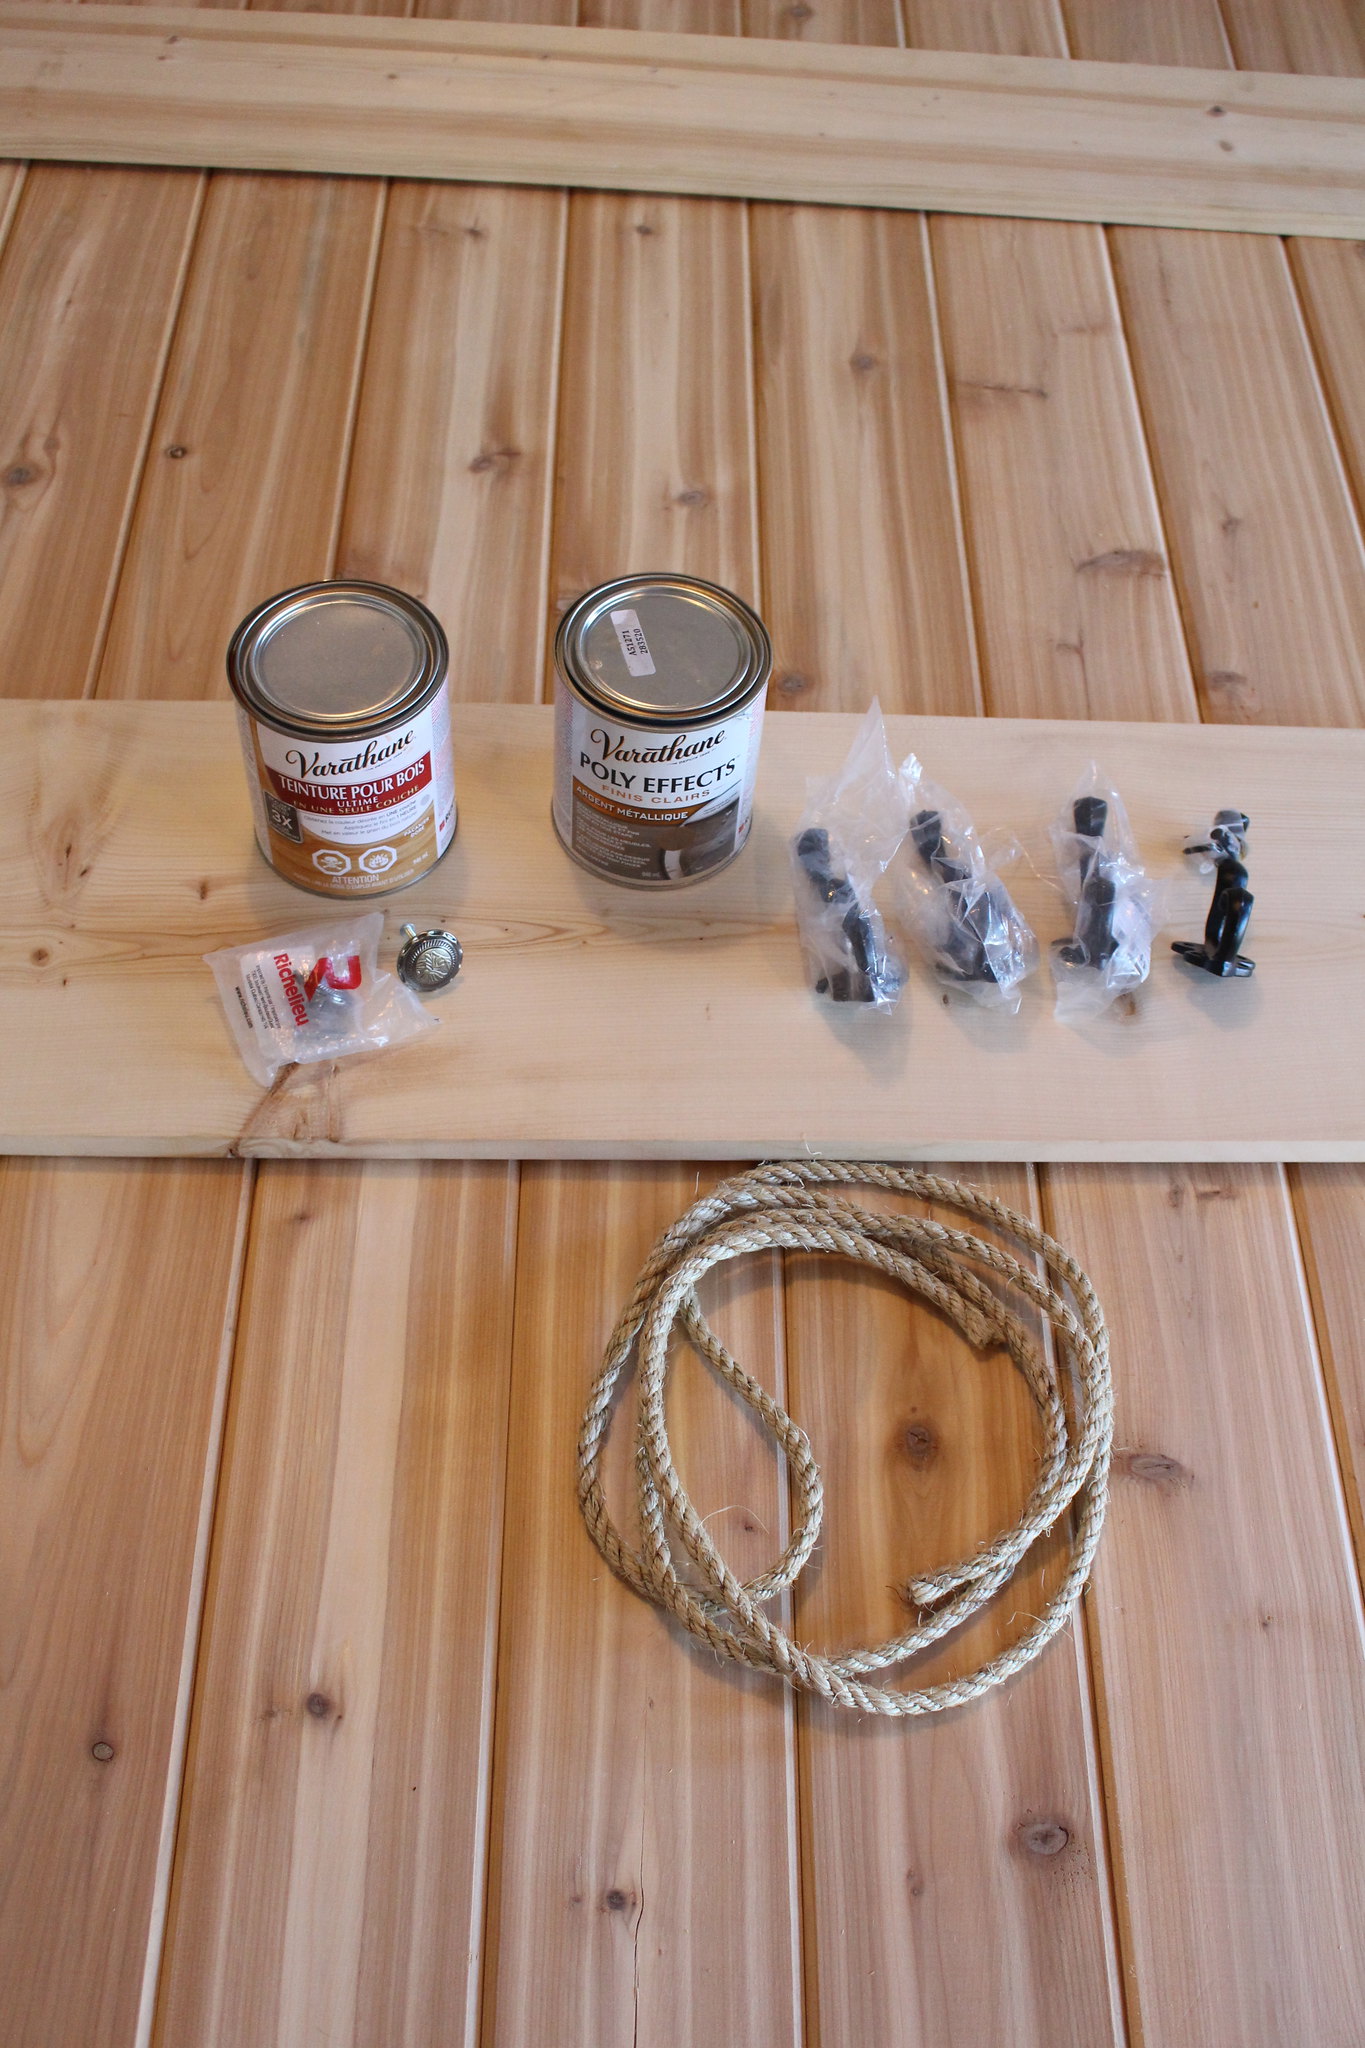
Last month I was contacted by the good people over at Rust-Oleum Canada, asking me to take part in their Love Your Wood challenge. The idea was that they sent me (and 7 other DIY bloggers) a box containing a wood stain, a clear coat, five mystery items (which ended up being a hook, a drawer pull, decorative stones, wire and rope) and a $75 gift card to help buy any additional items we needed. Each blogger had to refinish a piece of furniture or build something using wood, stain and three of the mystery items. If you follow me on Instagram then you've seen a few of my sneak peeks over the last little while. 


Love Your Wood

Love Your Wood

For my wood I picked tongue and groove cedar and some pine boards and the 3 mystery items that I picked to work with were the rope, hook and drawer pull (we bought extra hooks and an extra pull). As we worked we also ended up purchasing 6 brackets and an extra Varathane stain, in weather grey, to work with. 

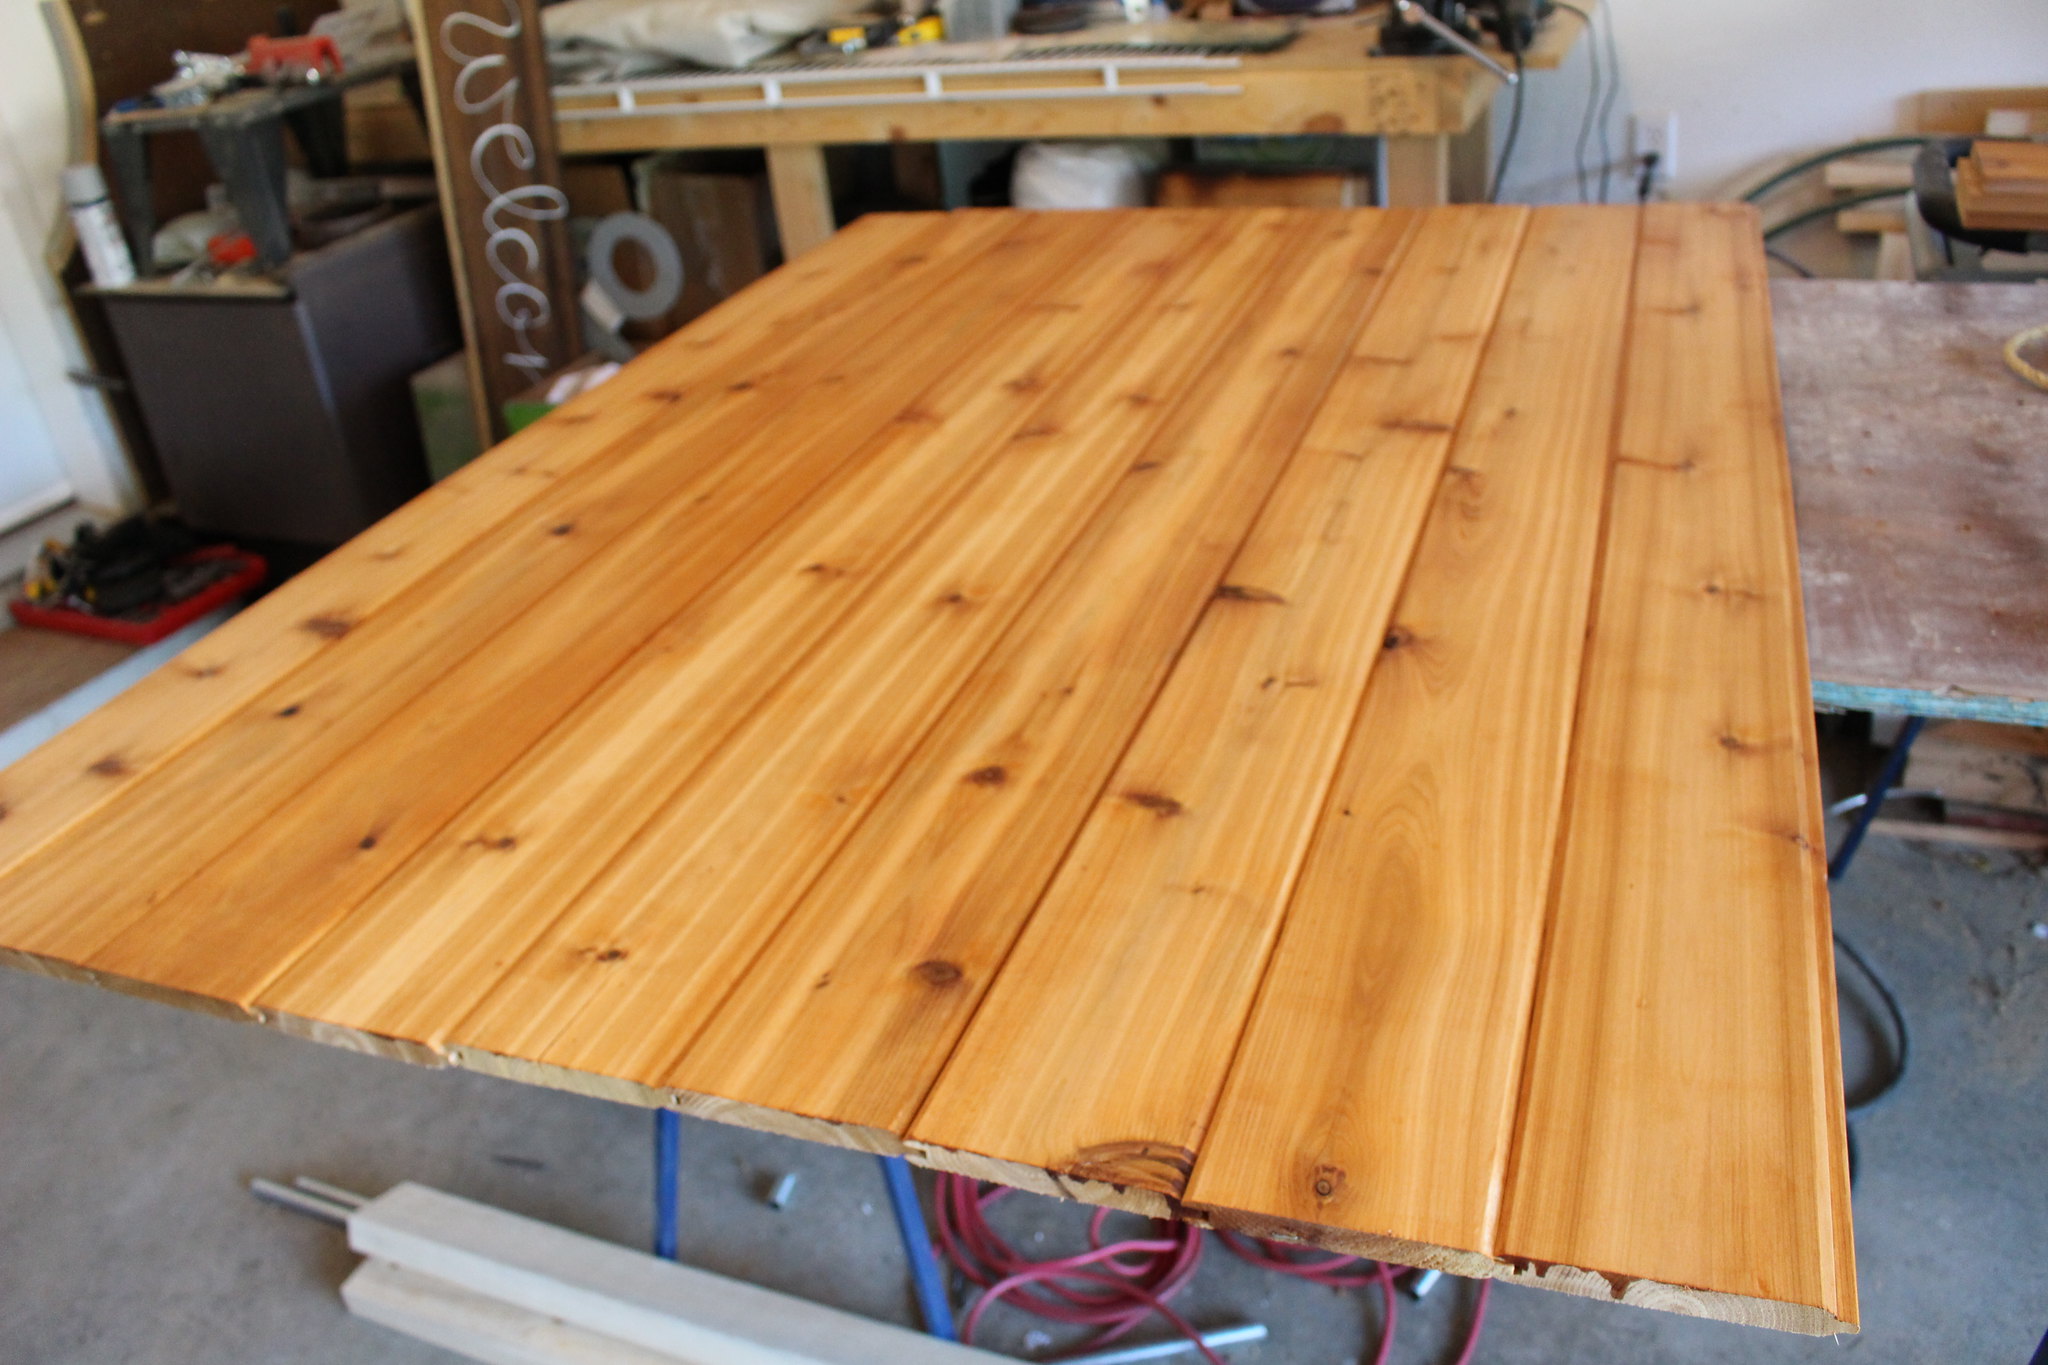
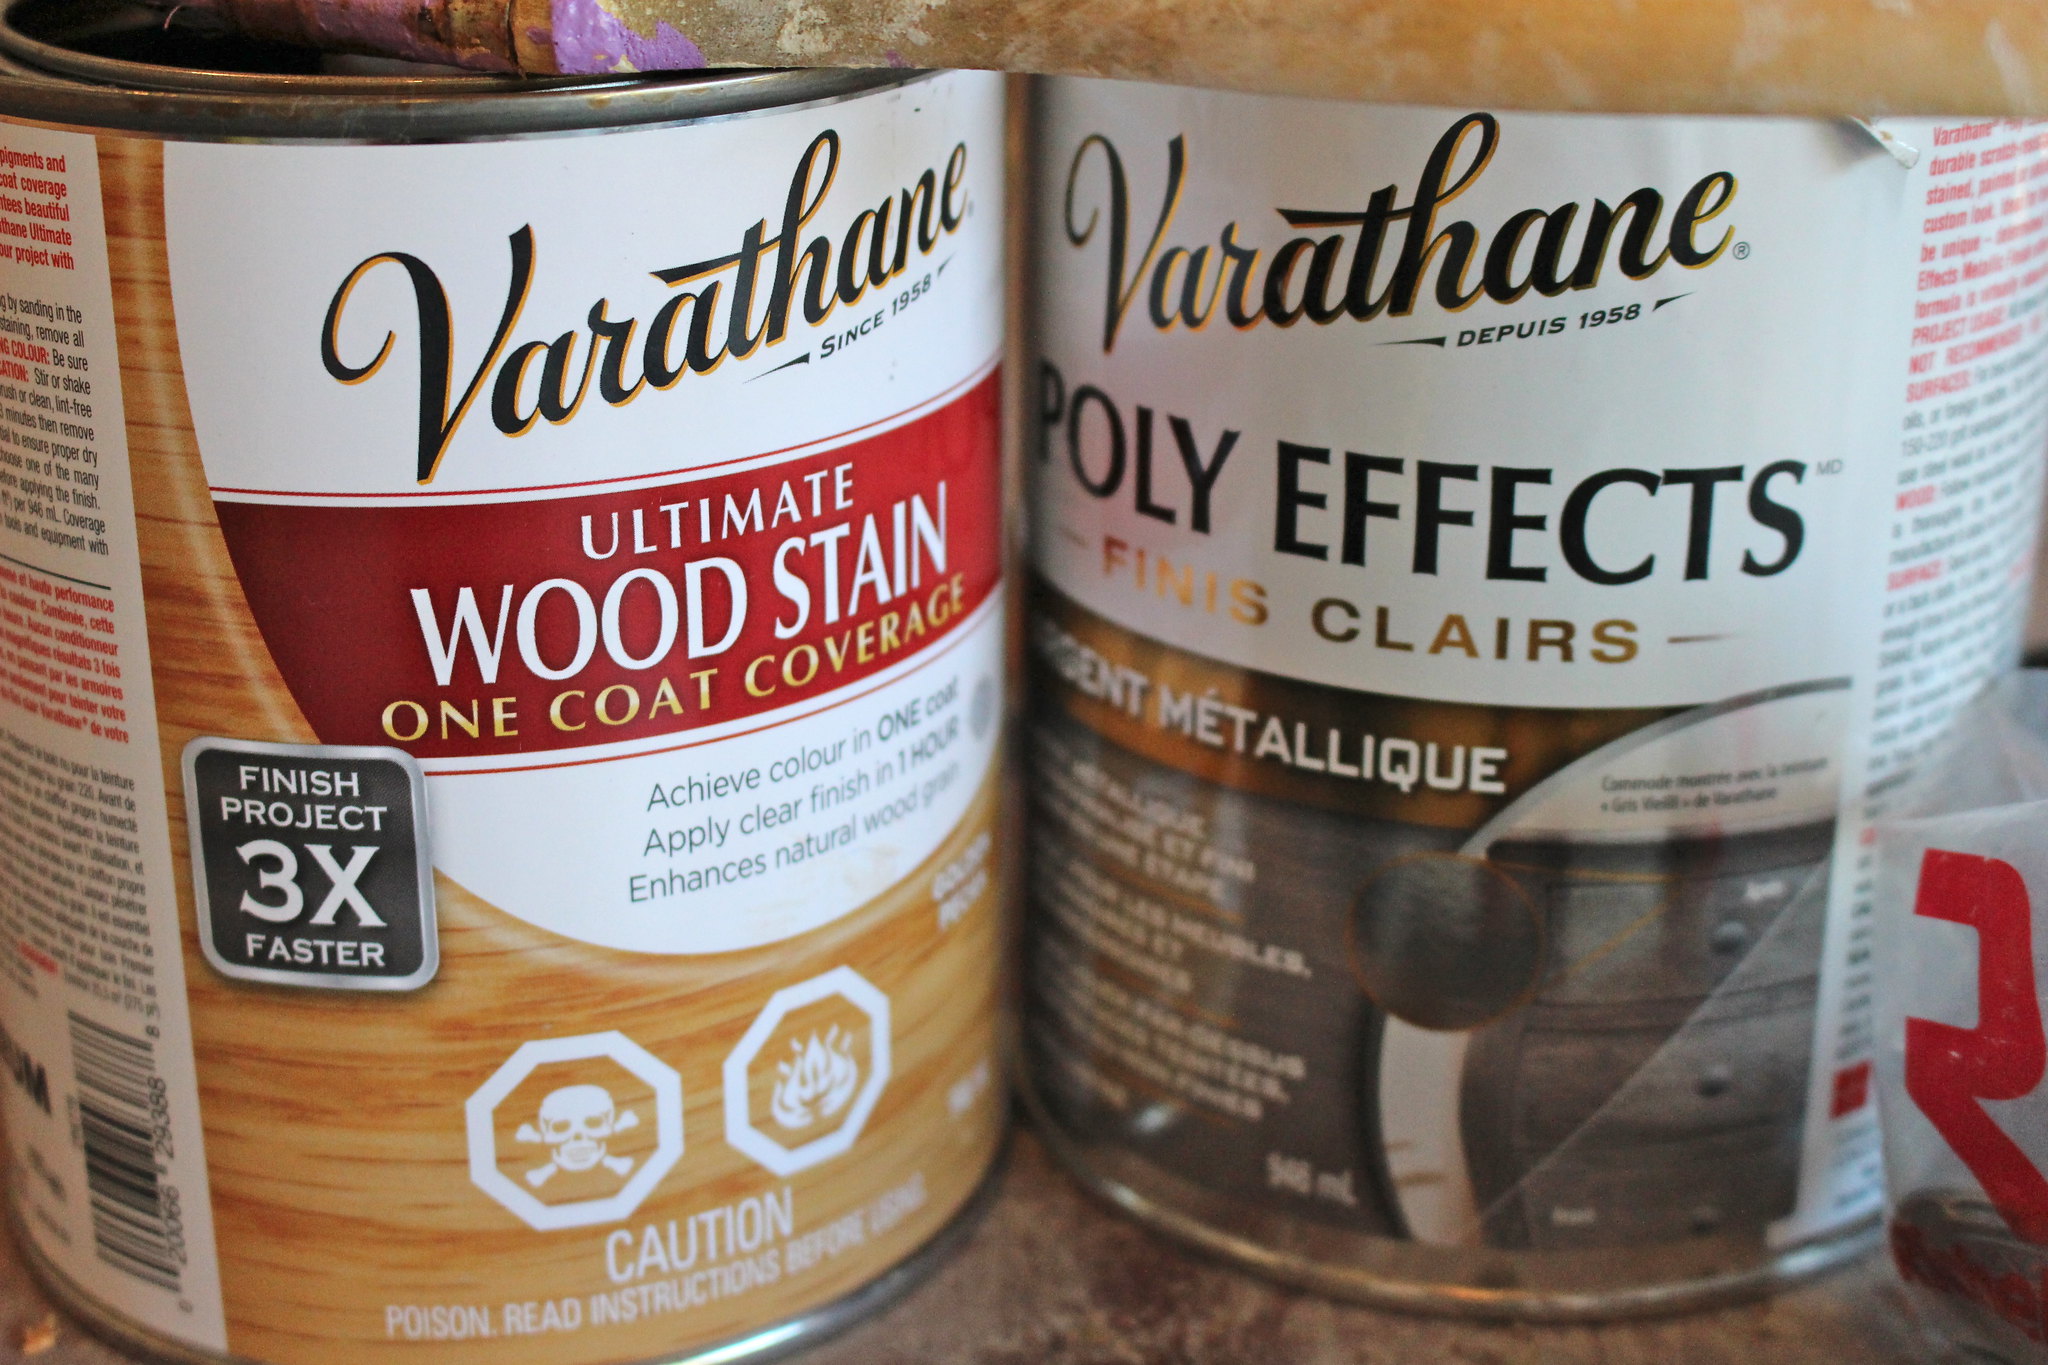
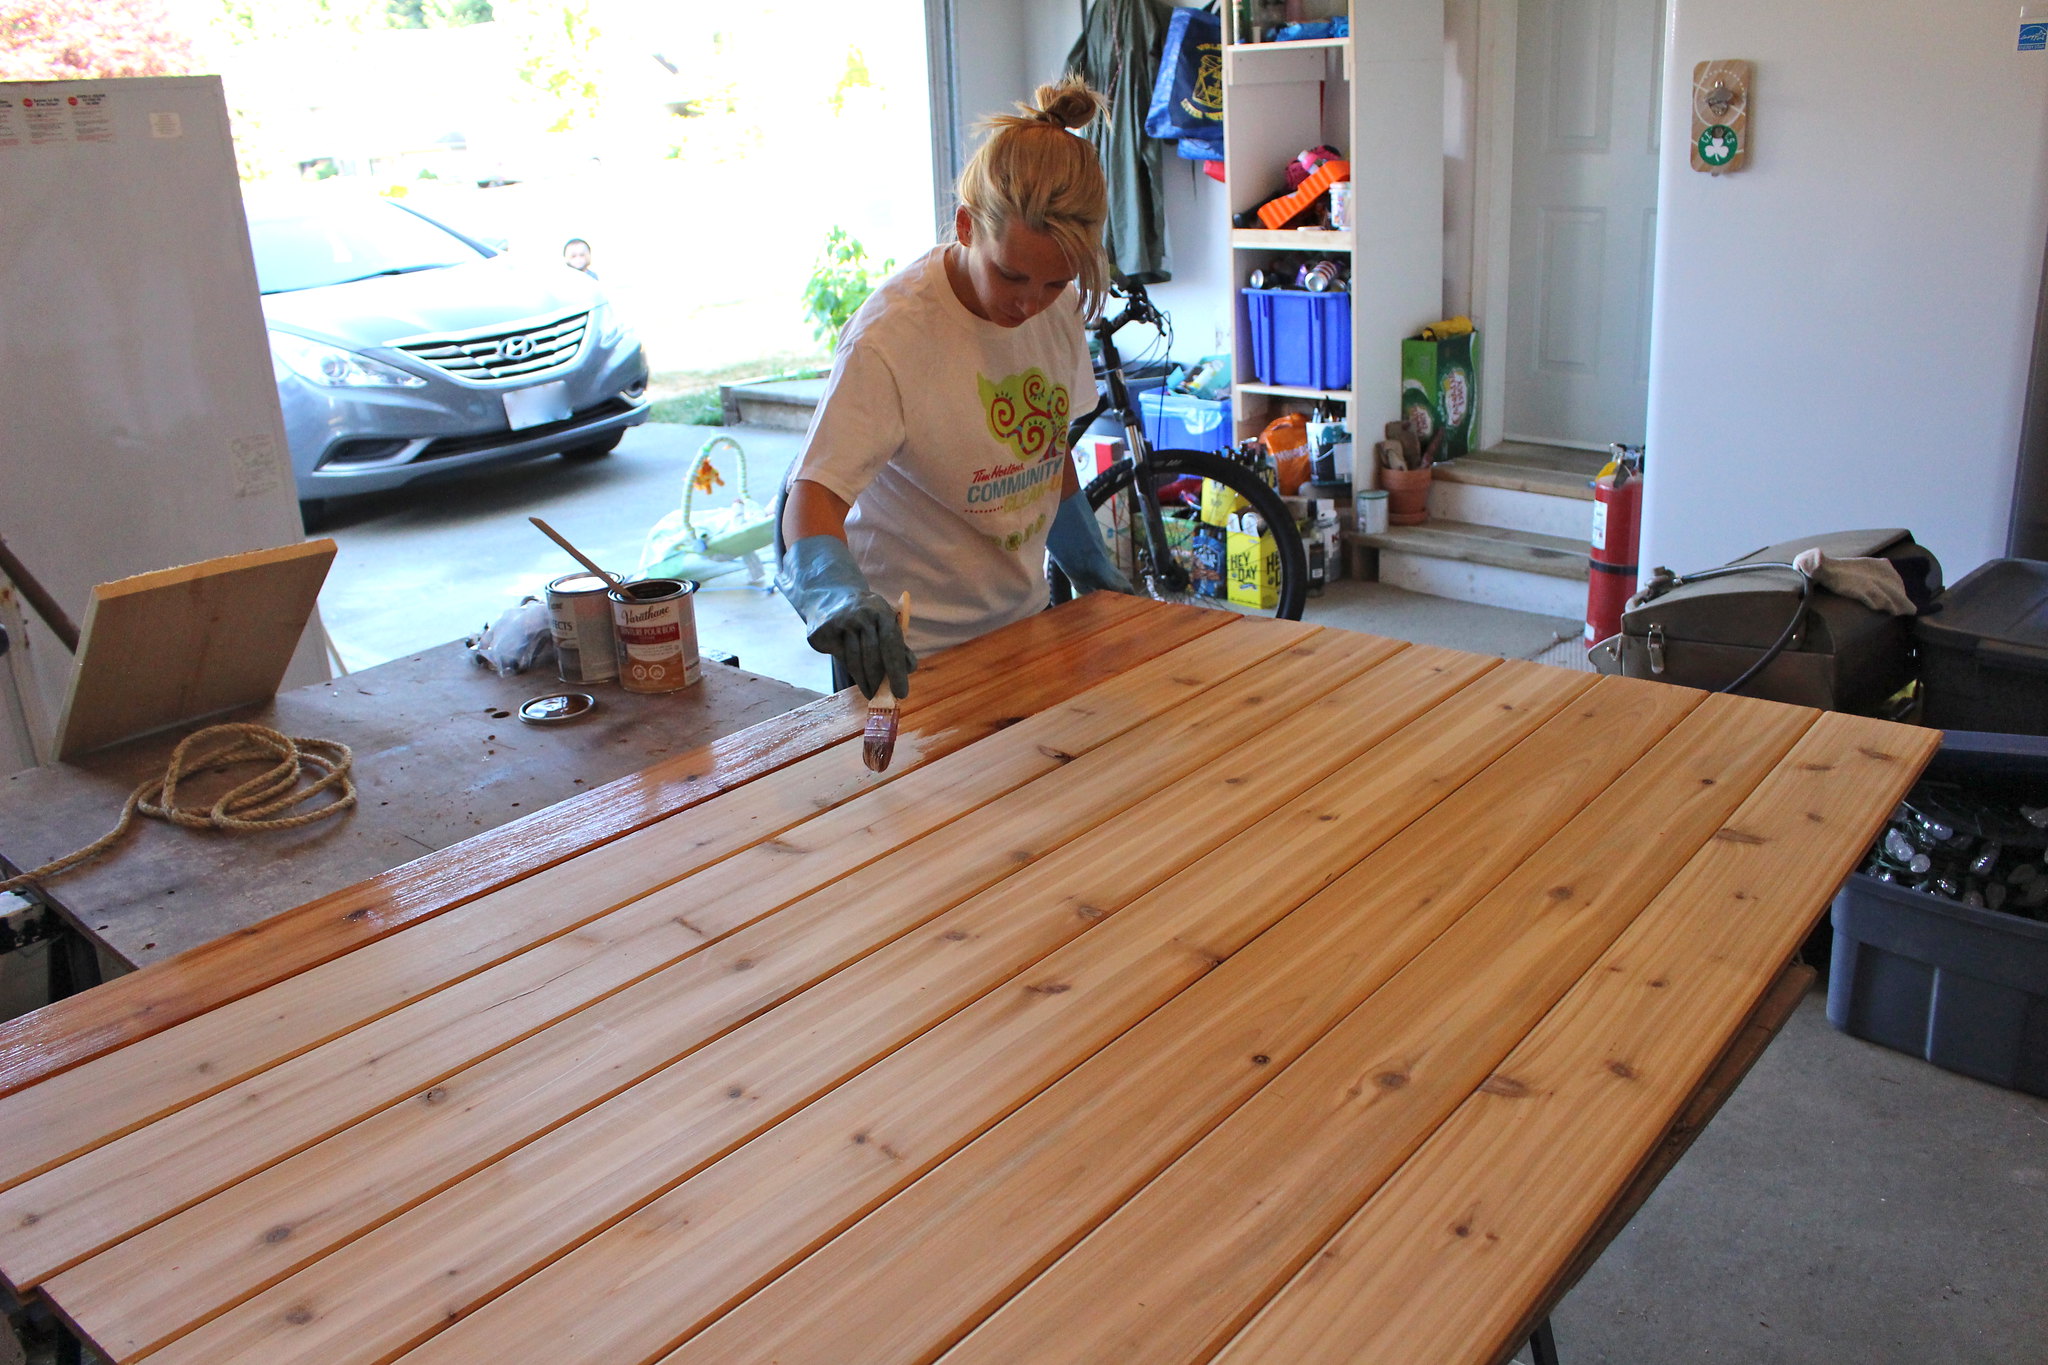
Rust-Oleum had provided me with the One Coat Coverage Ultimate Wood Stain in golden pecan. The stain covered wonderfully in one coat, and it was the perfect colour to put over my lovely cedar! It really brought out the beauty of the wood!
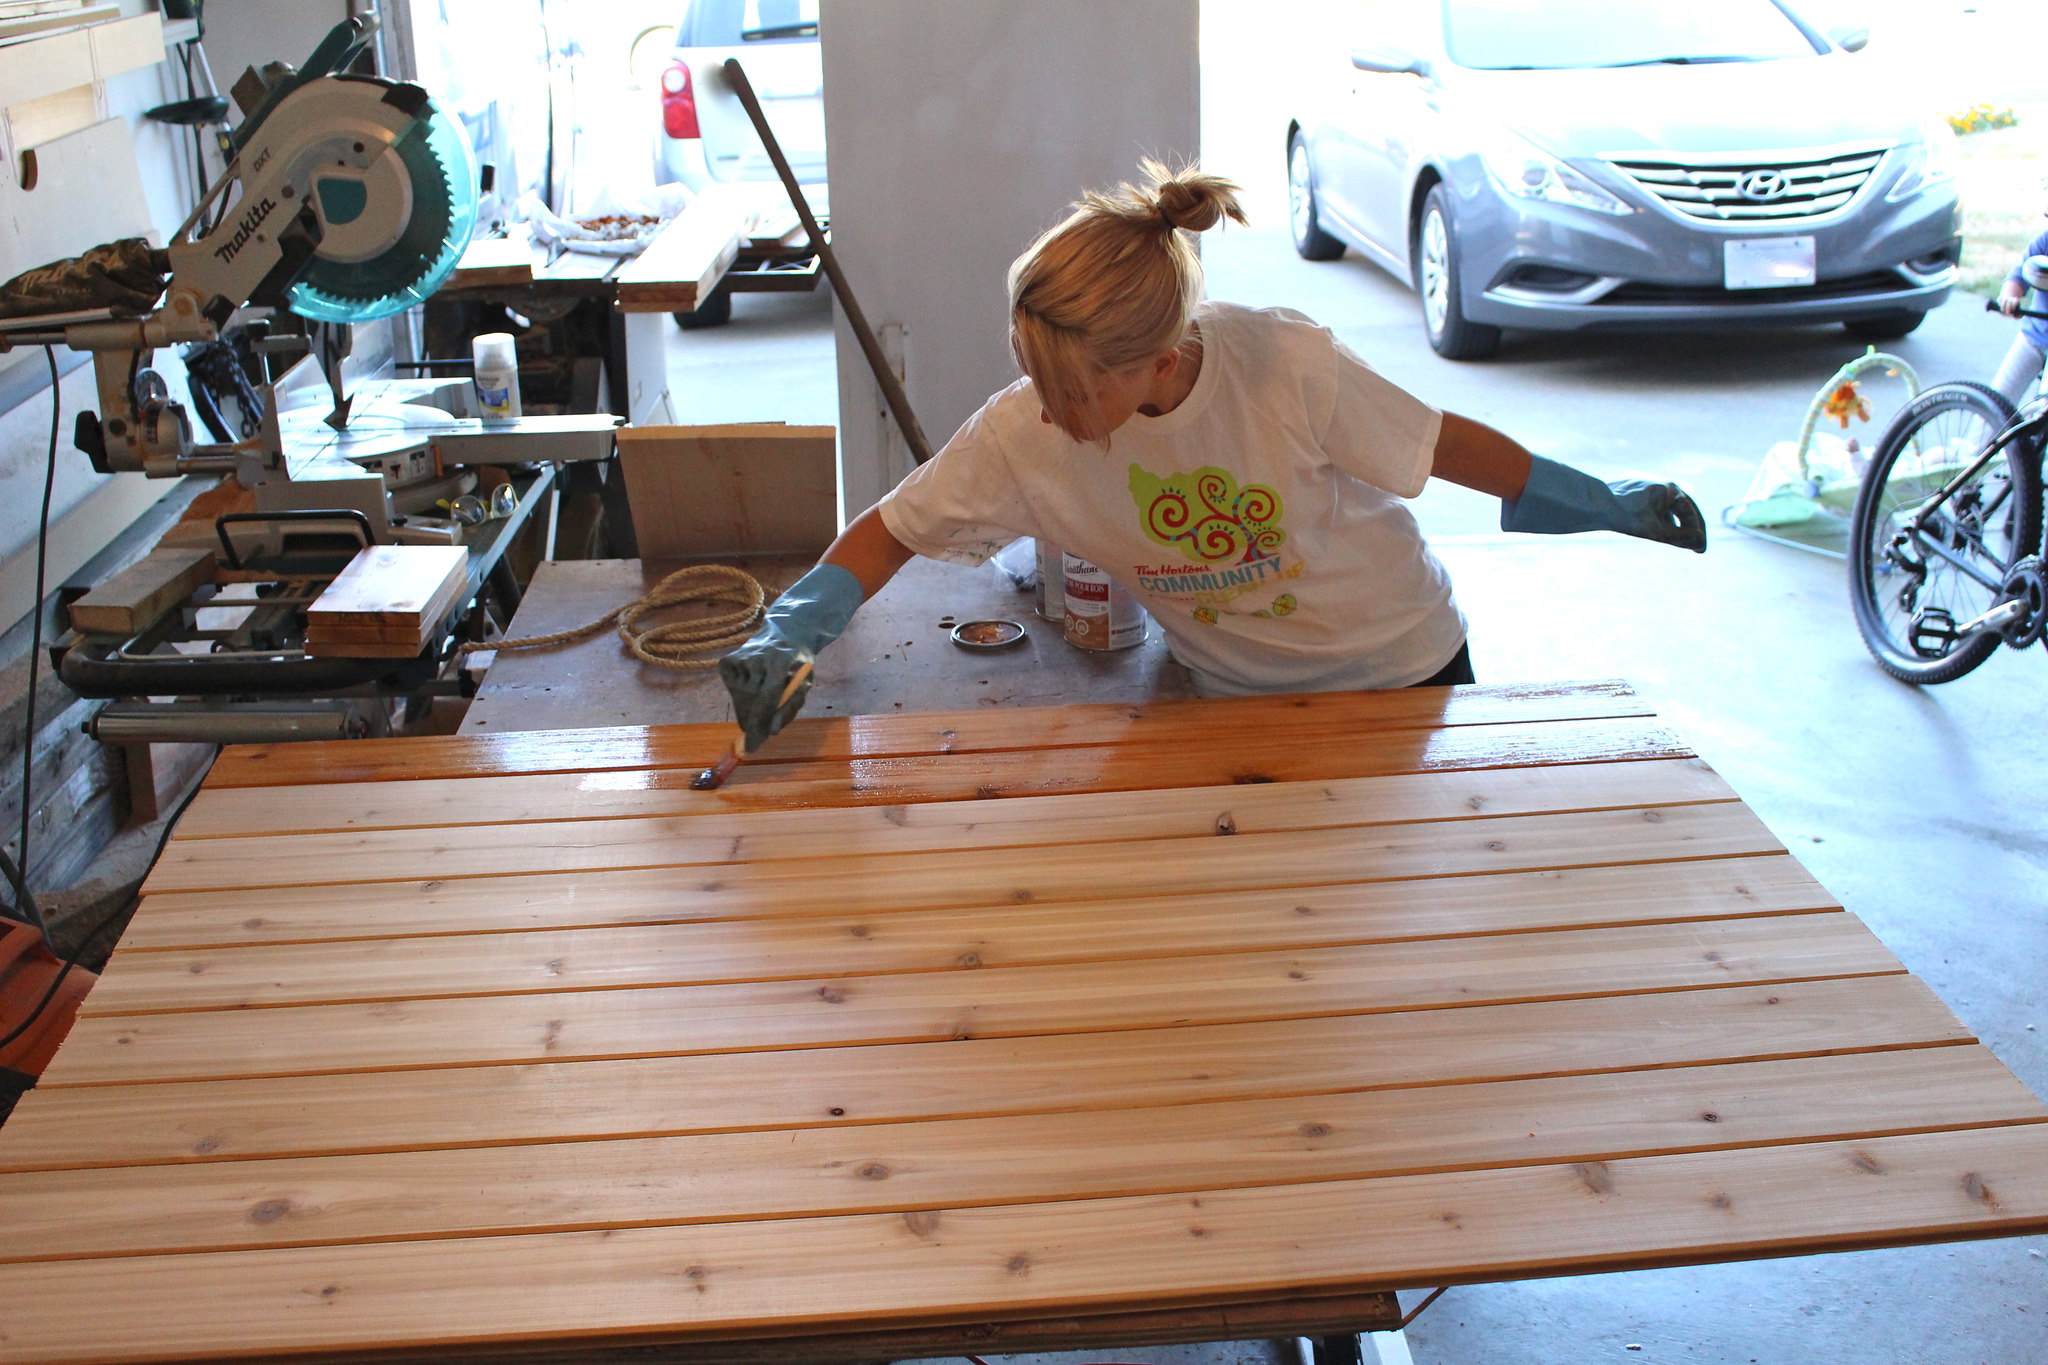
Love Your Wood

Love Your Wood

Love Your Wood

Hello beautiful golden cedar! It was the colour of the stain that led me in the direction of this wood, as I knew that would pair nicely. Sure enough, we had a beautiful result after just one coat of stain.
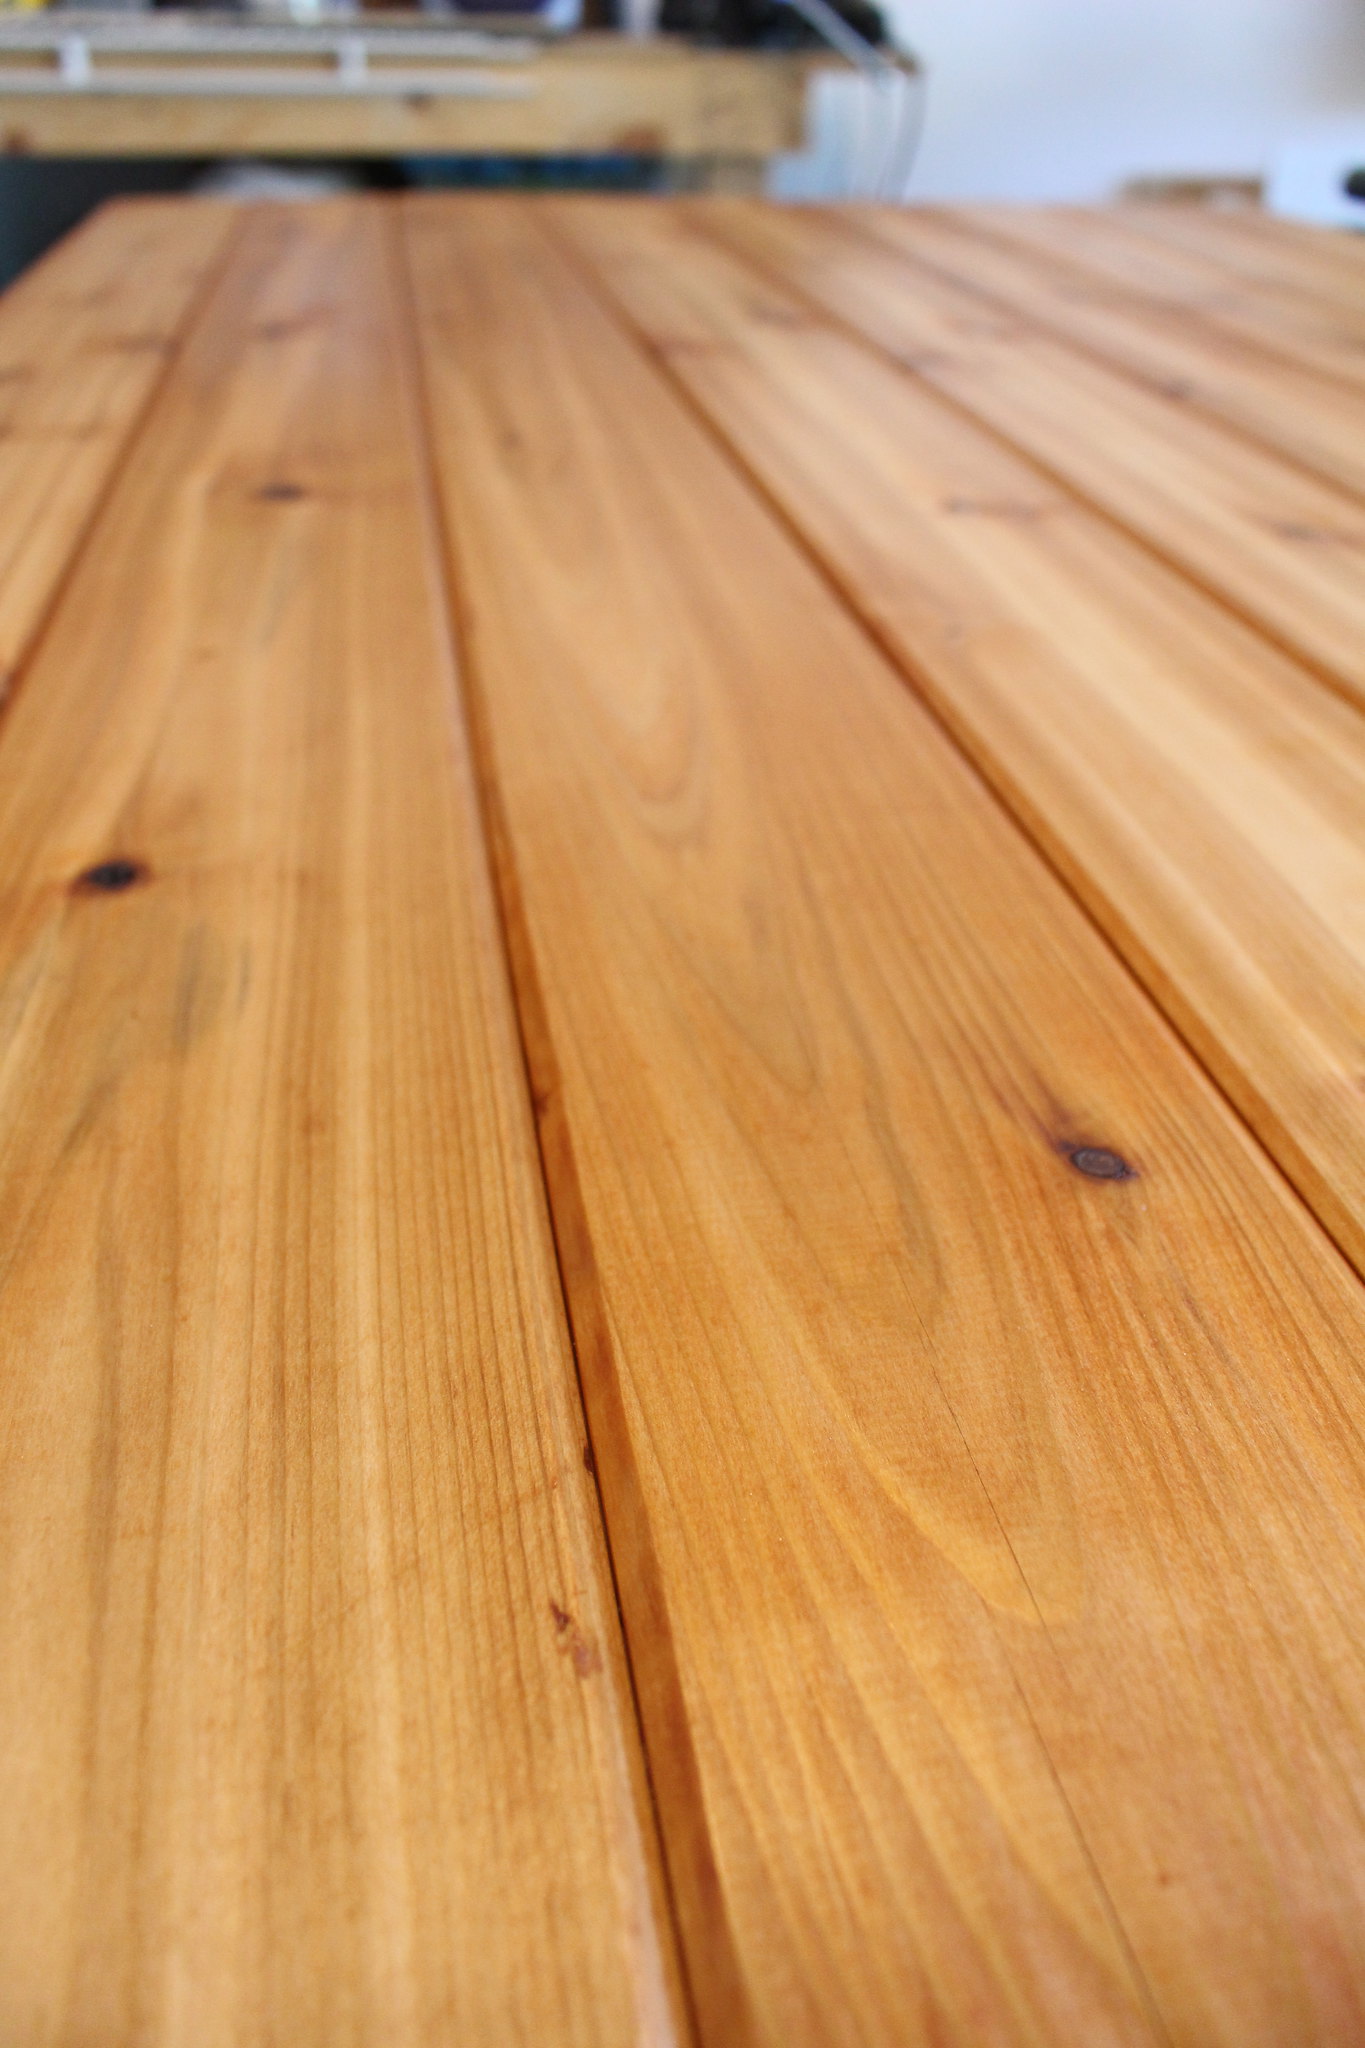
Love Your Wood

To be completely honest, I was a tad nervous about the clear coat they sent. It was metallic accent in silver and I wasn't too sure what to expect. I ended up being pleasantly surprised, seeing that the clear coat just added a really beautiful shimmer to both of the stains I worked with. I just went with the recommended minimum of two coats, and it was perfect. I'm sure if you added another coat or two, it would bring a much more metallic finish to the piece. I could see it working great on a pink dresser in a little girl's room - would give it a great shimmer!

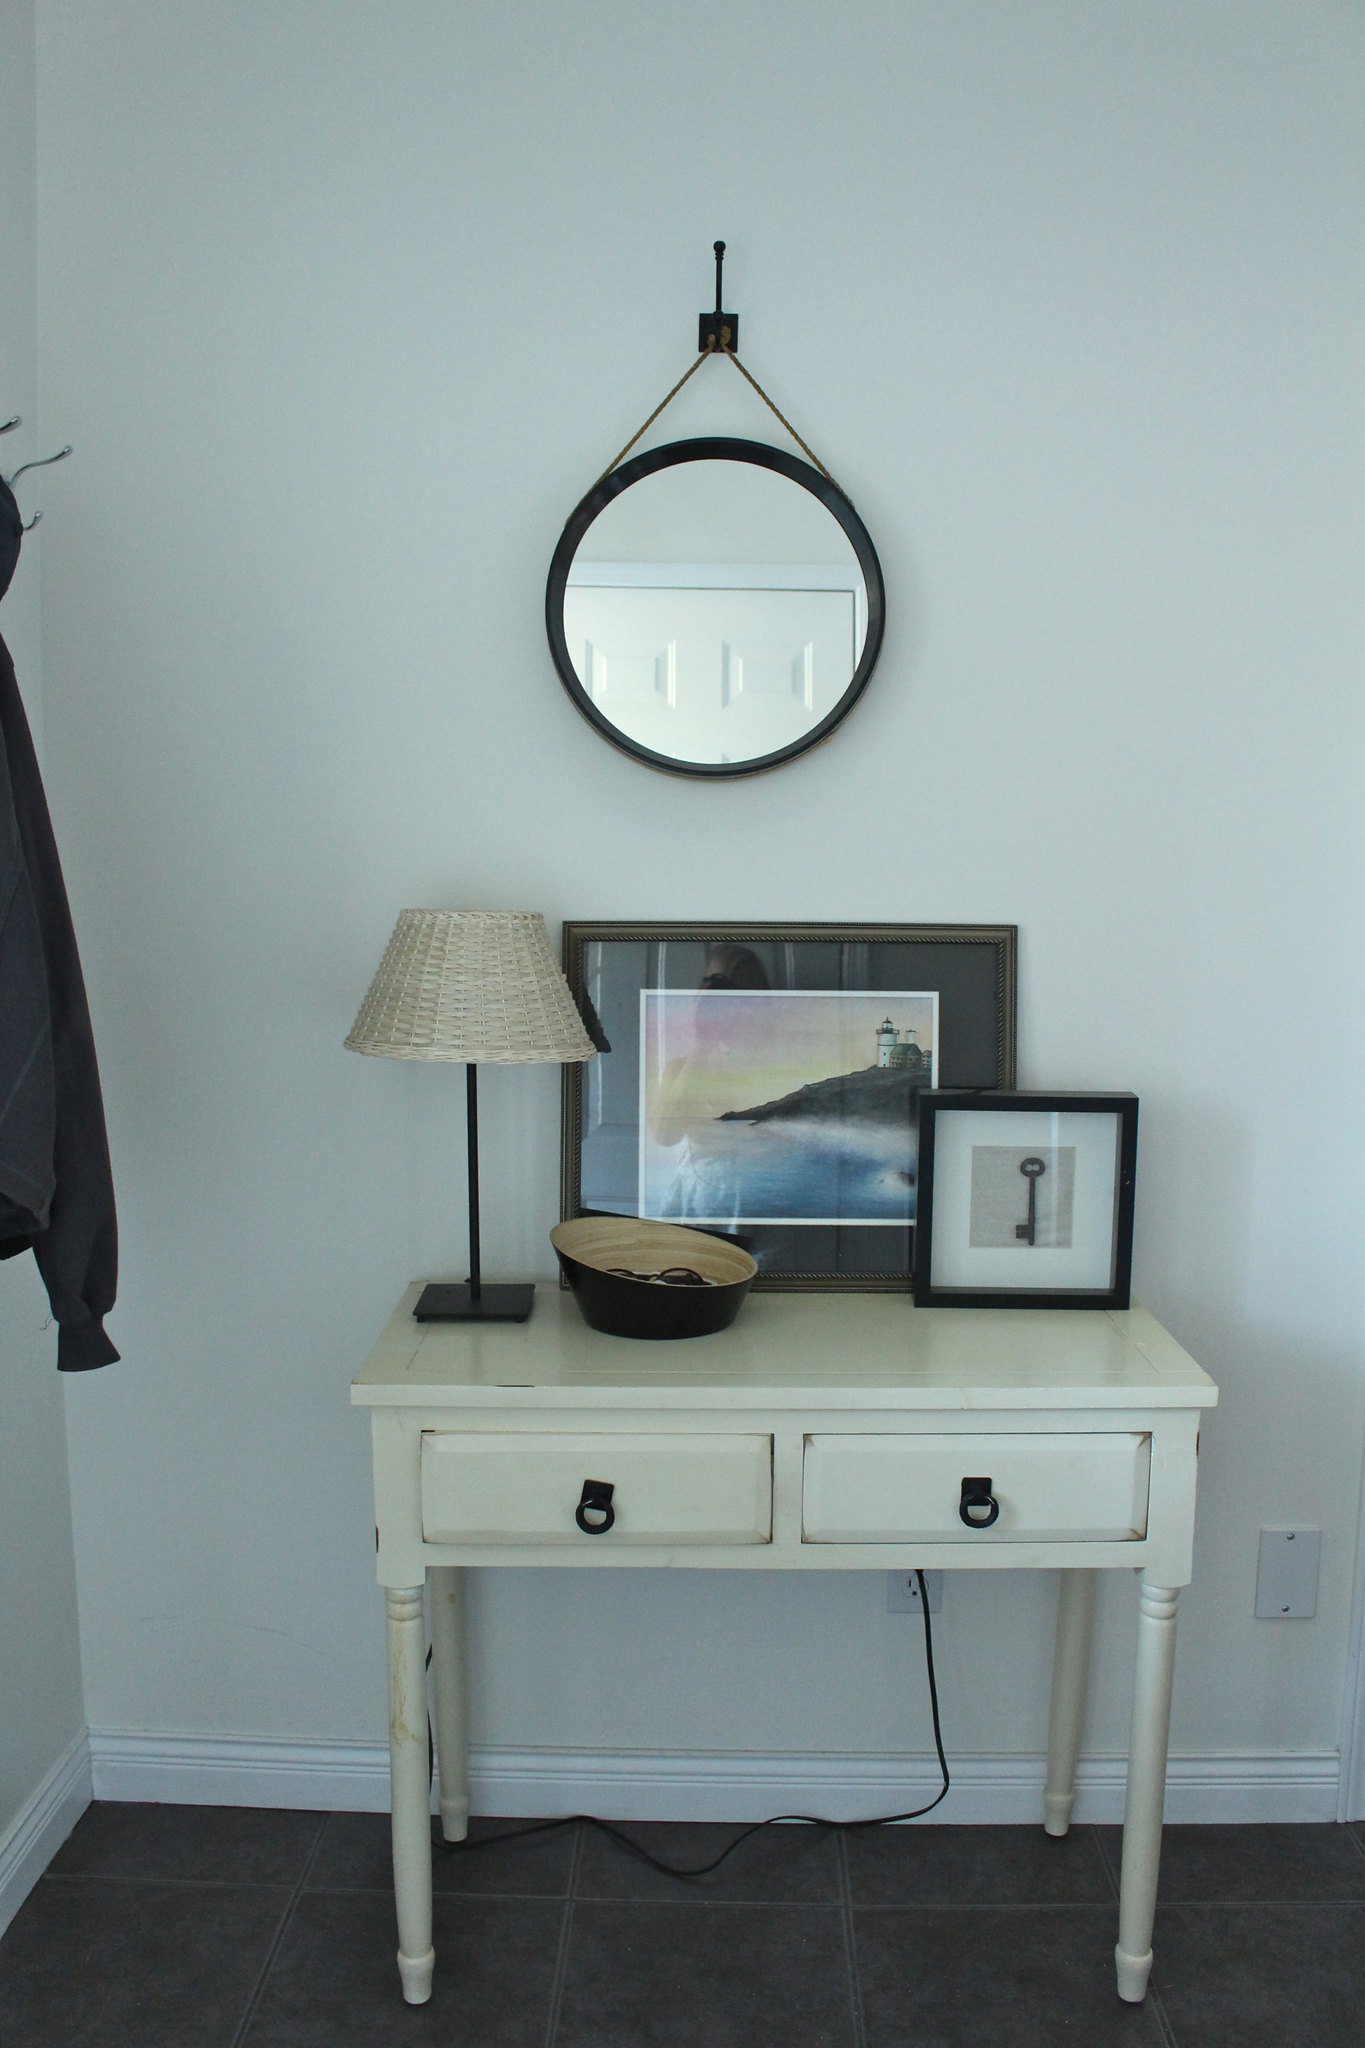
Moving on, with everything stained and protected, it was time to get into building. I was excited to get involved since B is usually the one doing all of the building. The best part, this wasn't just building something, we were also transforming a small corner of our home! The wall right by the front door to be exact...
Love Your WoodLove Your Wood

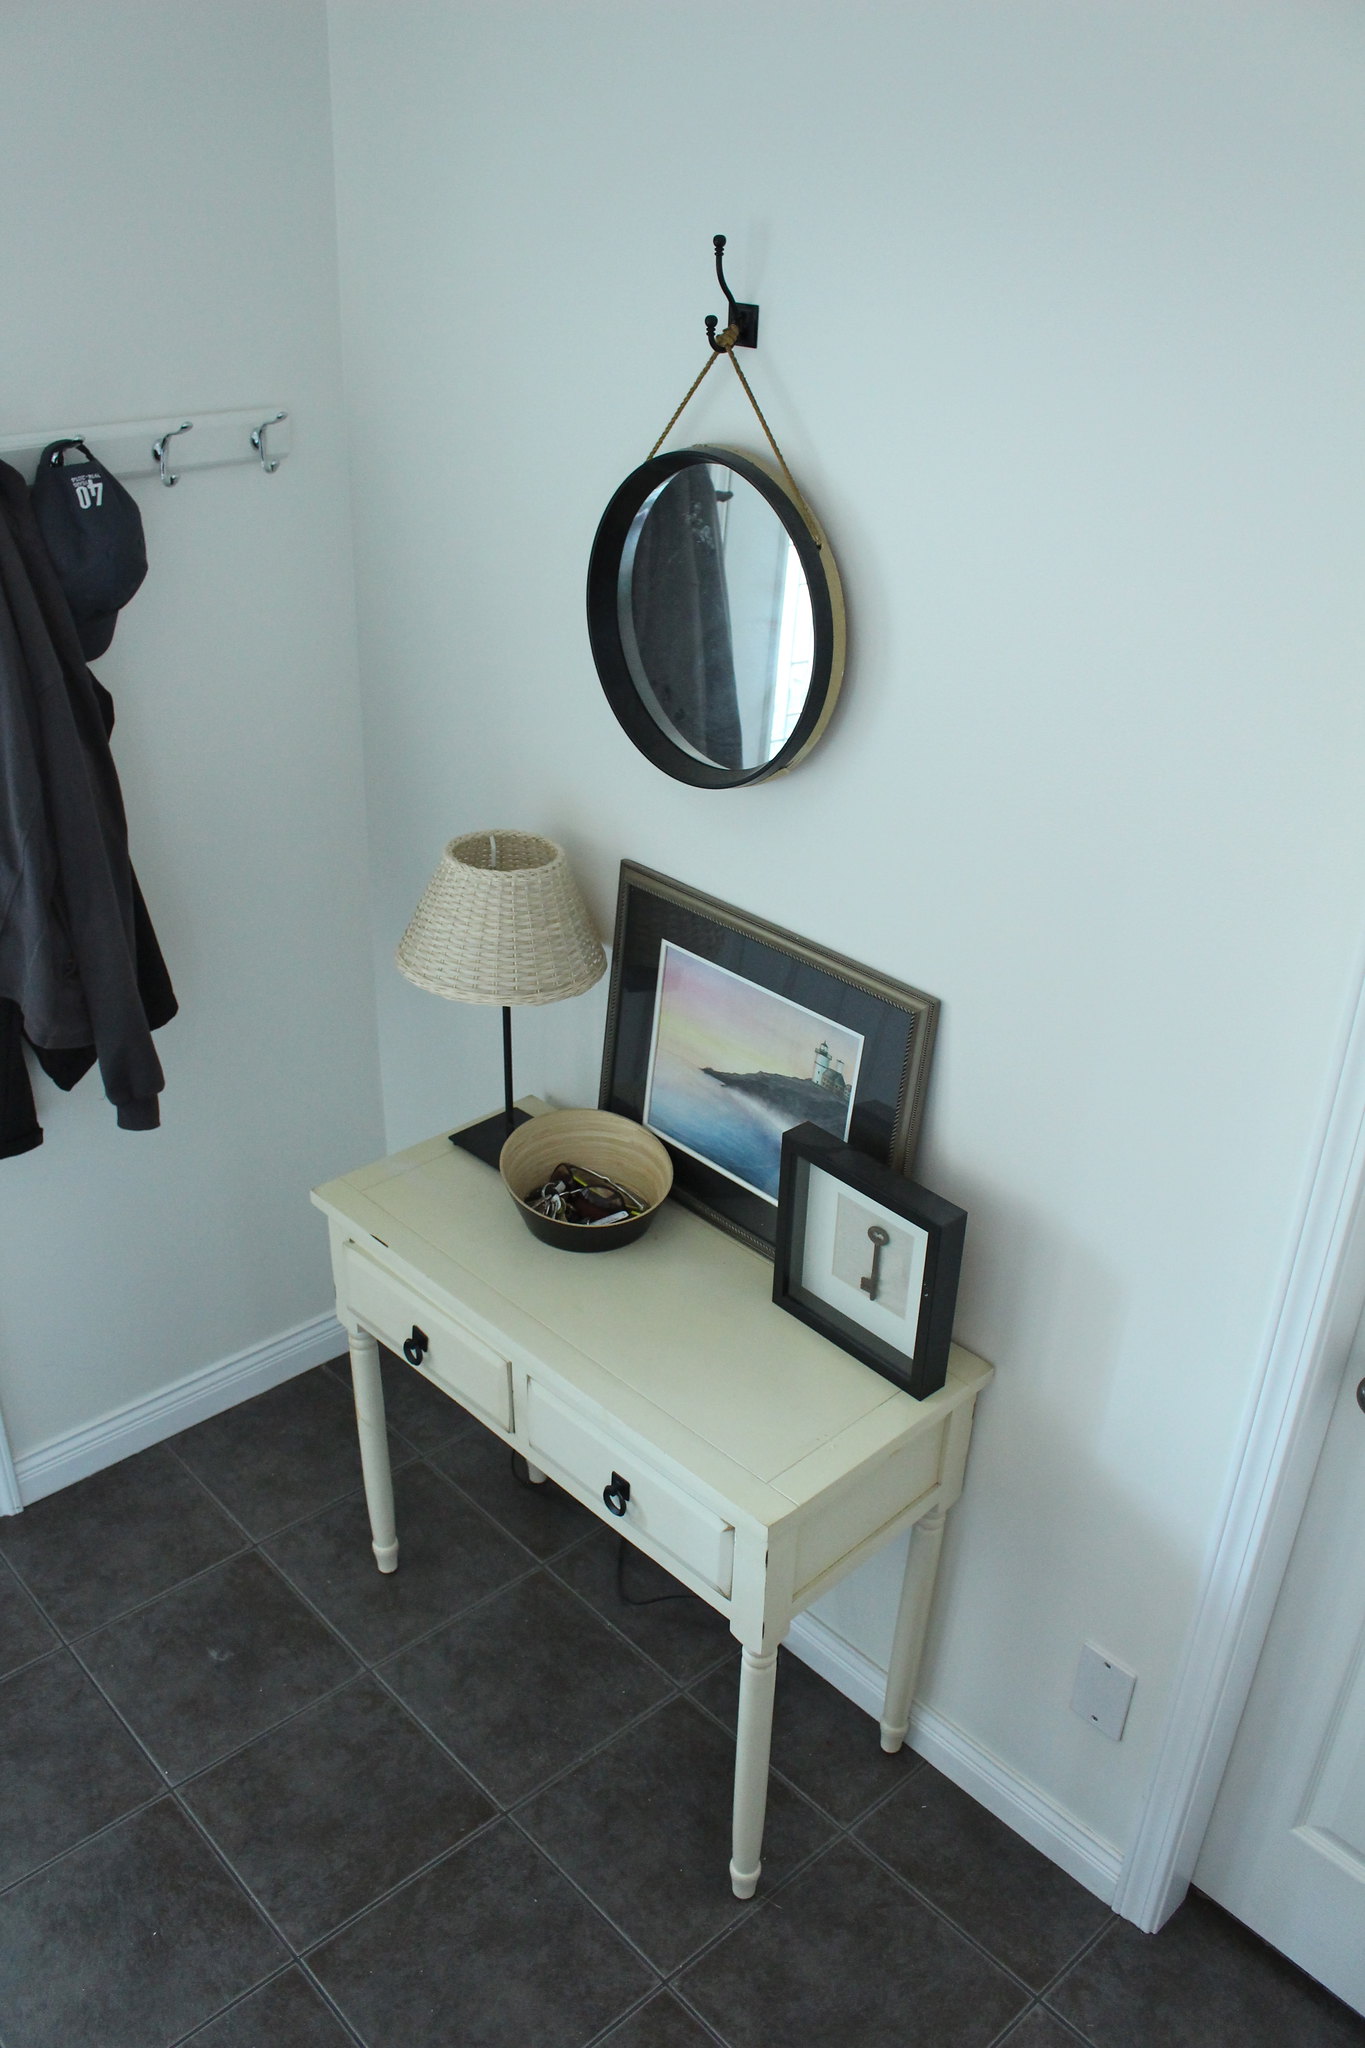
This too small table operated as a dumping ground for items when we walked in the door. When I started brainstorming for this challenge, a new functional front entrance space jumped out at me right away! It was time for ME to tackle it. We took everything away and I started by removing the baseboard (as you can tell, I was dressed appropriately for this part of the project).
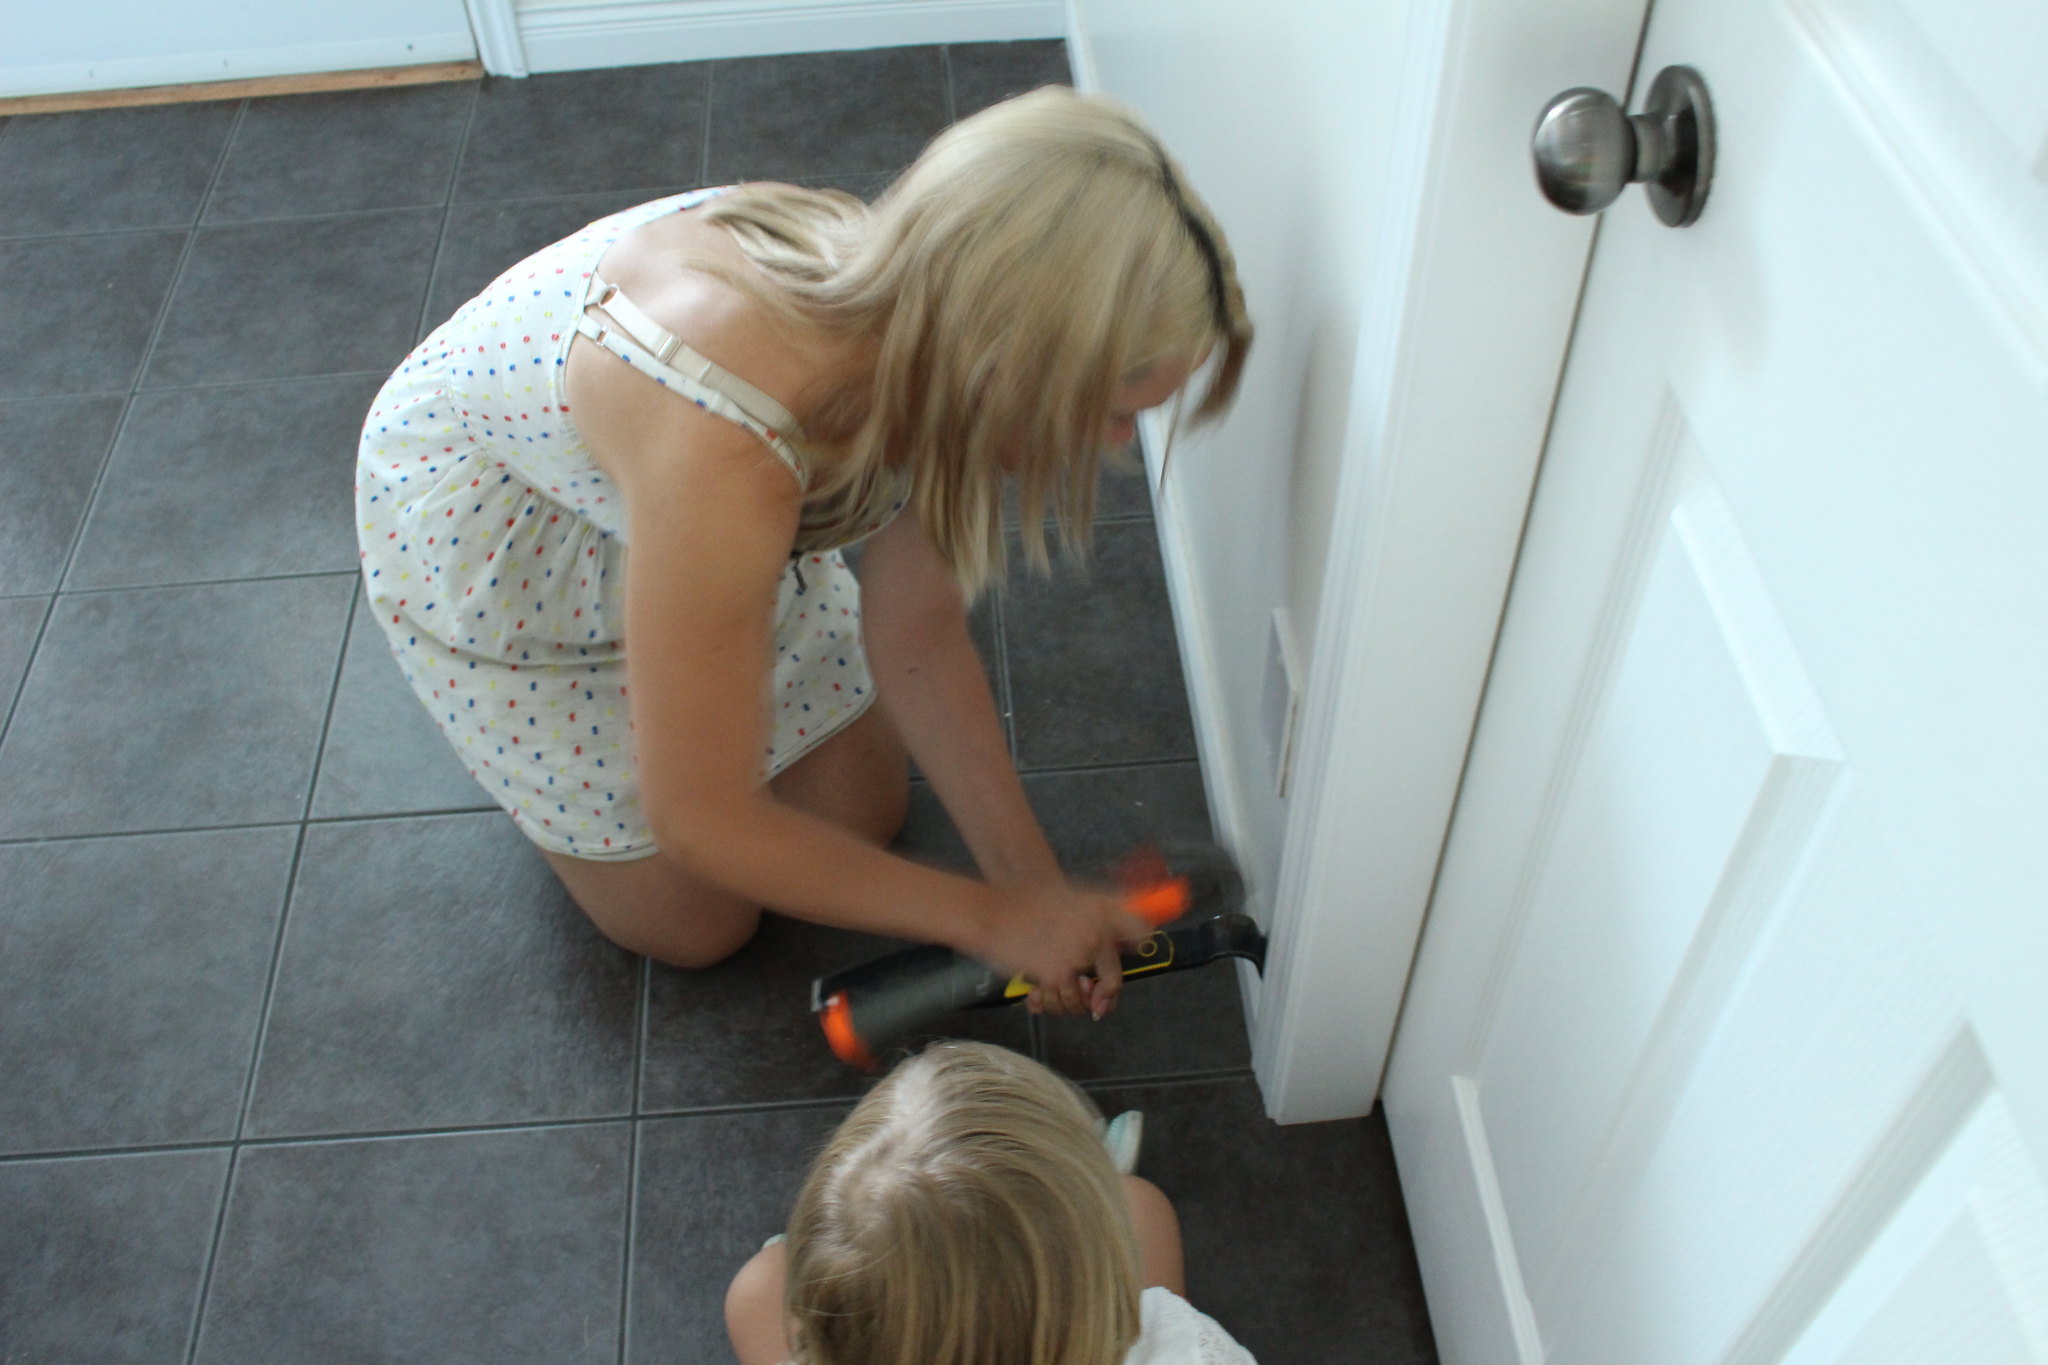
Love Your Wood

Then things had to be nailed. I love using our nail gun attached to the compressor - makes me feel tough and useful. Unfortunately, no photos of this nail gun toting Mama. B actually attached some large pieces of scrap wood to the studs in the wall to make sure that when I nailed my wood in place it would be securely anchored to the wall.

The cedar was nailed in place first, followed by the side trim and then the top trim board. The top shelf first got nailed into our trim boards to make sure it would stay put, then I drilled pilot holes for the decorative brackets and finally screwed them in place. Our bench is secured in place using larger brackets, so again I drilled pilot holes and then secured them in place with screws. 
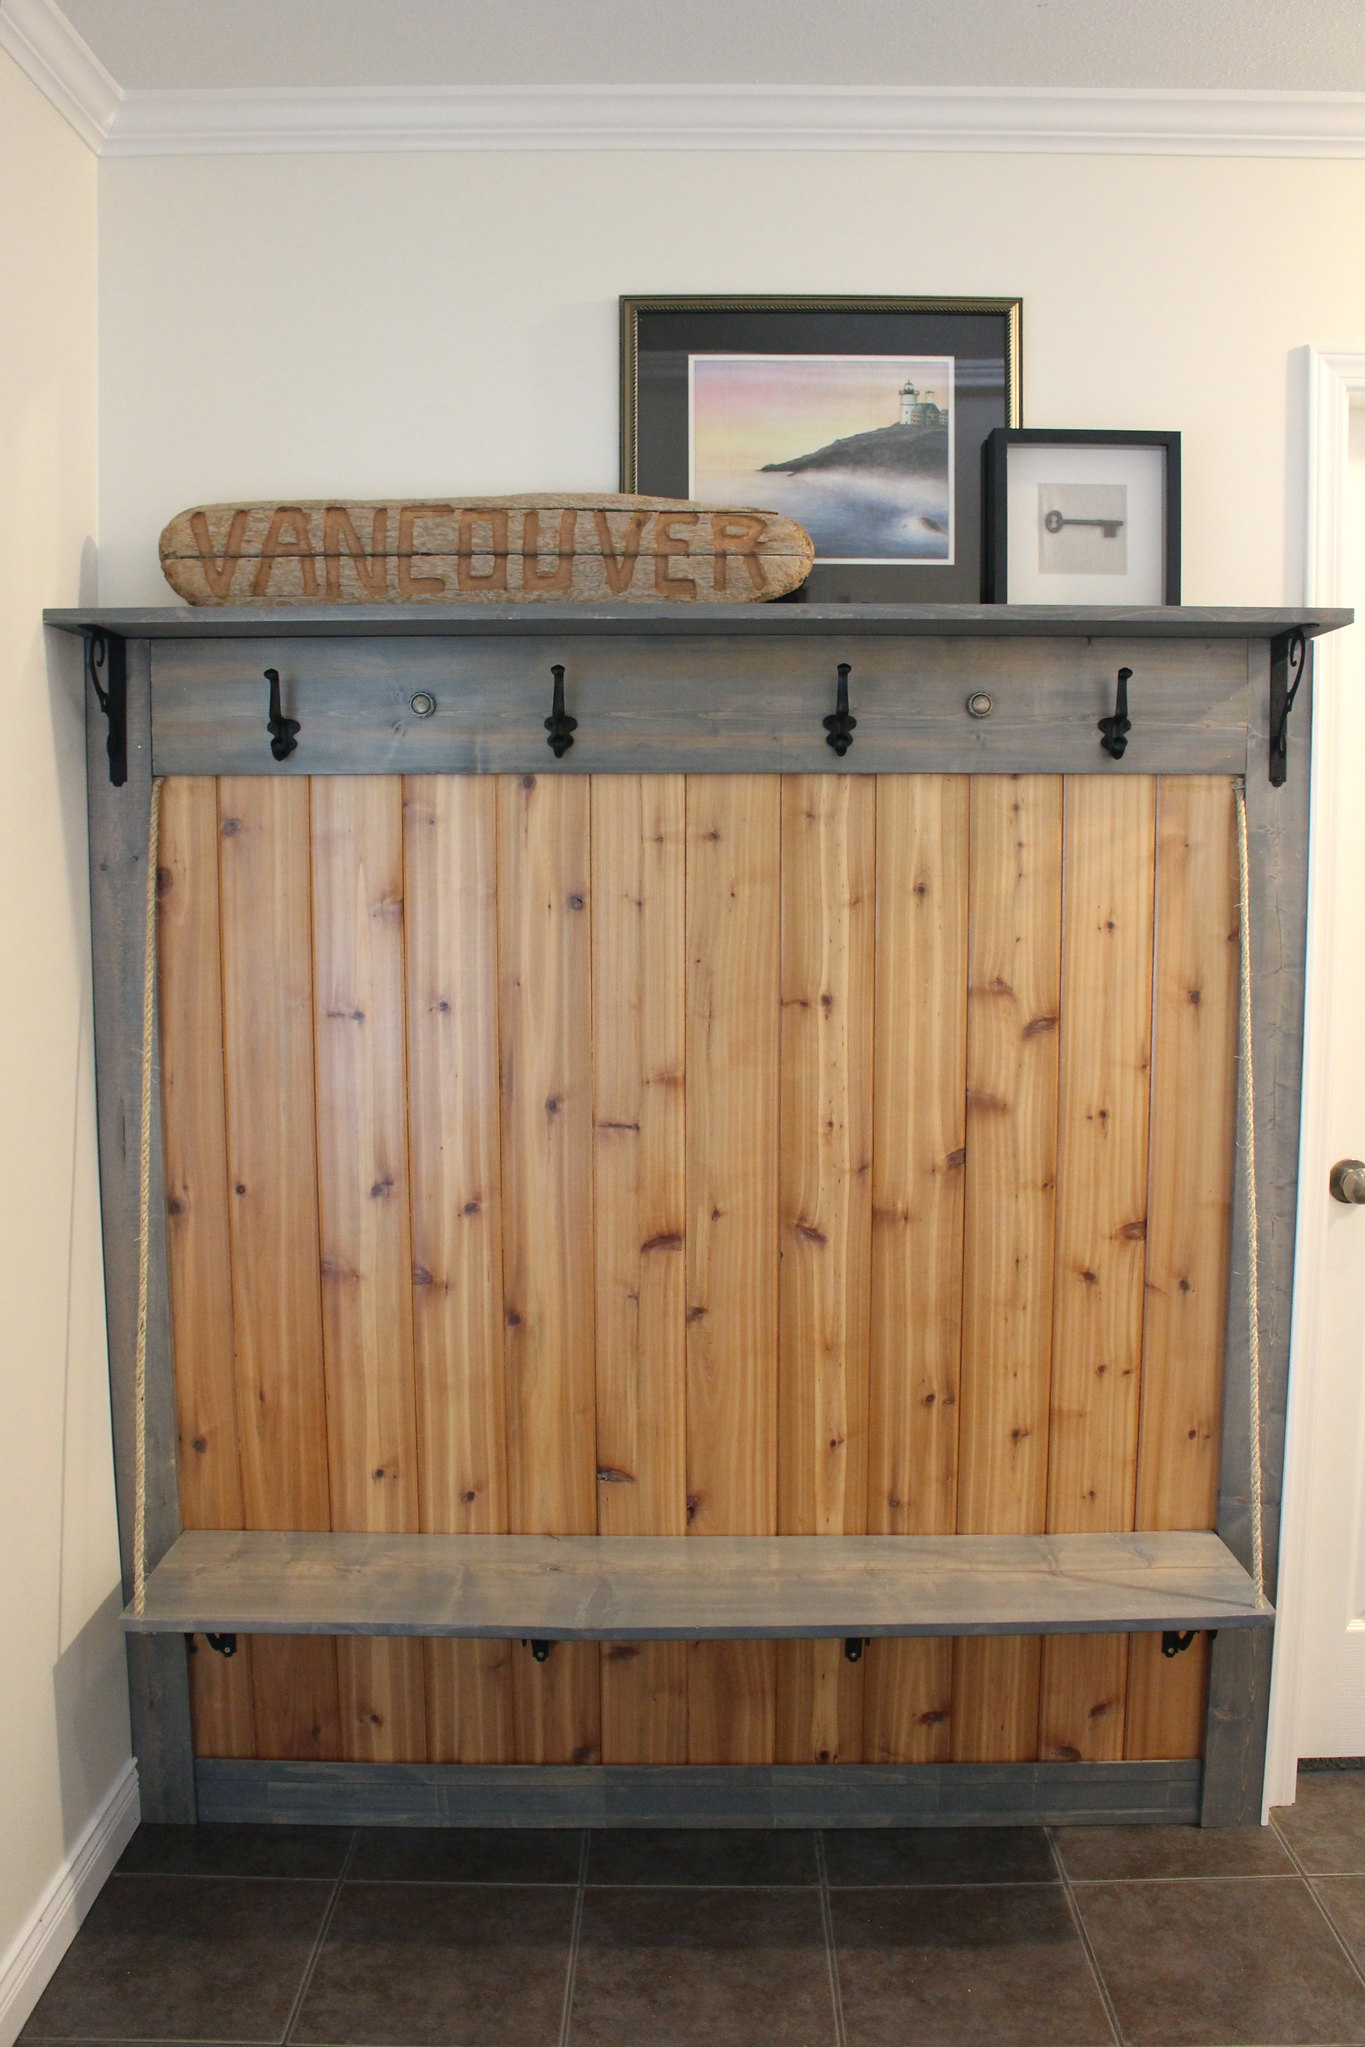
Love Your Wood

Our hooks went up in a very similar fashion, after being measured. I drilled pilot holes, then screwed them in place by hand. It took a lot longer, but I knew if I used the cordless screwdriver that I would strip the screws, so by hand it was. Once I was done B did go back over them with the screwdriver to make sure they were nice and tight.

By this point in installation Nolan had, had enough so I let B take over for the  installation of the rope and drawer pulls. The rope is attached to the corner of our pine trim and cedar using u-nails that he nailed into place. He then drilled a hole in the corner of the bench which he thread the rope through and nailed it into place as well. This was my favourite part of the project, I think the rope adds something to the bench, so it doesn't just look like it's floating off of the wall. The knobs I decided to use more decoratively (my initial idea was to have drawers under the bench, but that was too time consuming and complicated). B drilled holes only slightly larger than the back of the pulls and then pushed them into place.  
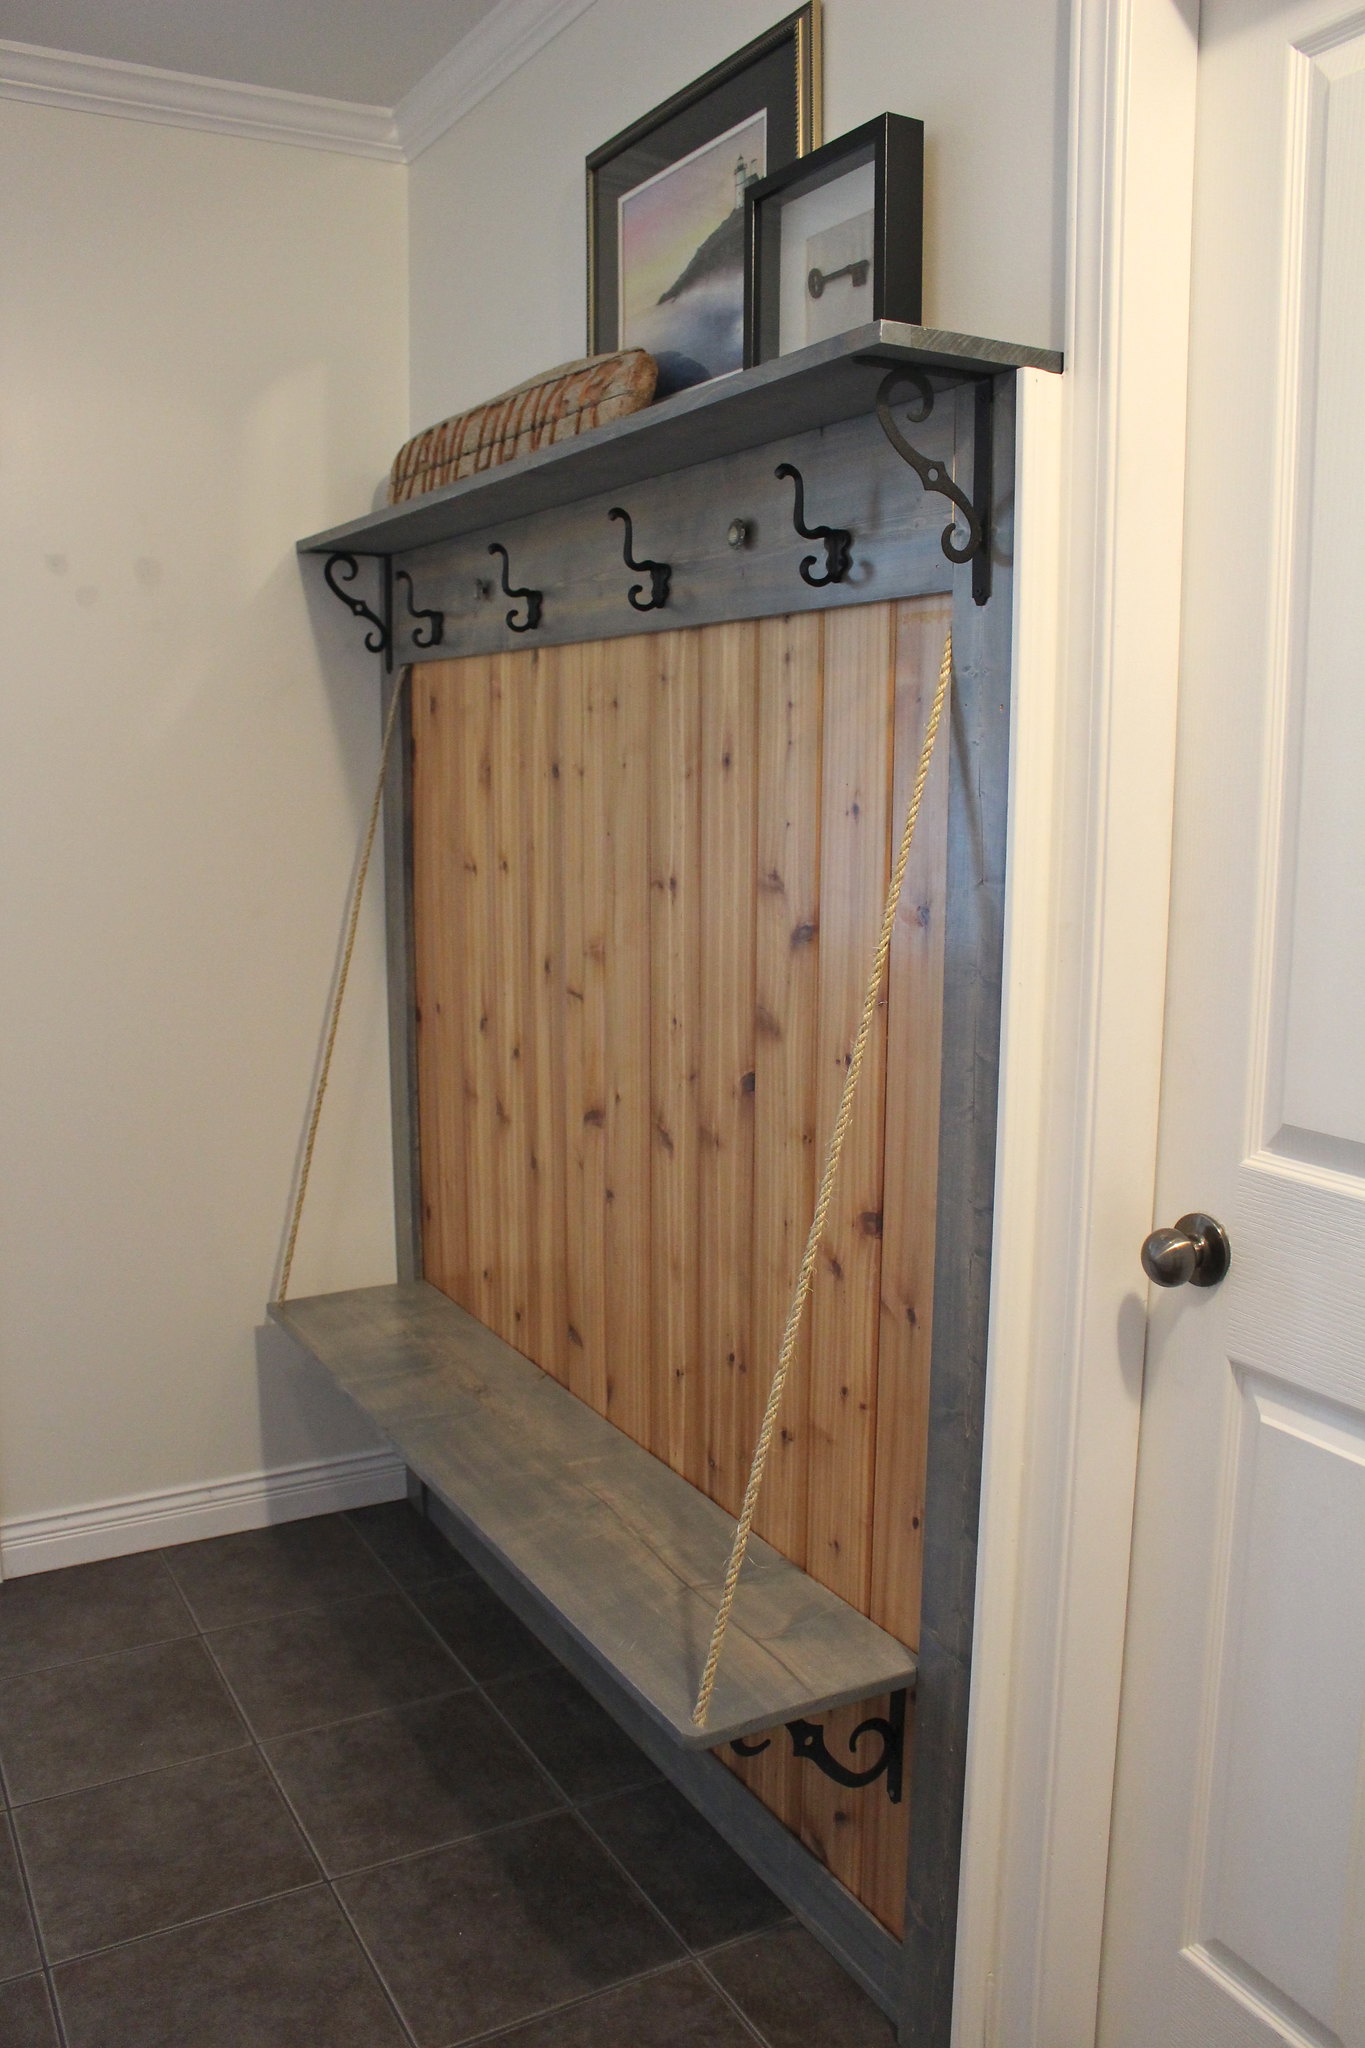
Love Your Wood

I honestly love how it turned out more than I even thought I would. It will be a much more functional space for us as we come in the front door to hang jackets and bags, and I may hunt out some trays for under the bench for our shoes to dry in the coming wet months (oh how I hope the rain will one day return). It's really perfect timing as Halle begins preschool next month too! I can already see her tiny pink backpack hanging here every day when she arrives home! It's a much more beautiful space overall, and I'm glad our top shelf can provide a safe spot for our artwork to sit (away from little hands), and we finally have a home to display that piece of driftwood B brought back from the island and carved up!

Now for some awesome before and after, side by side comparison shots!
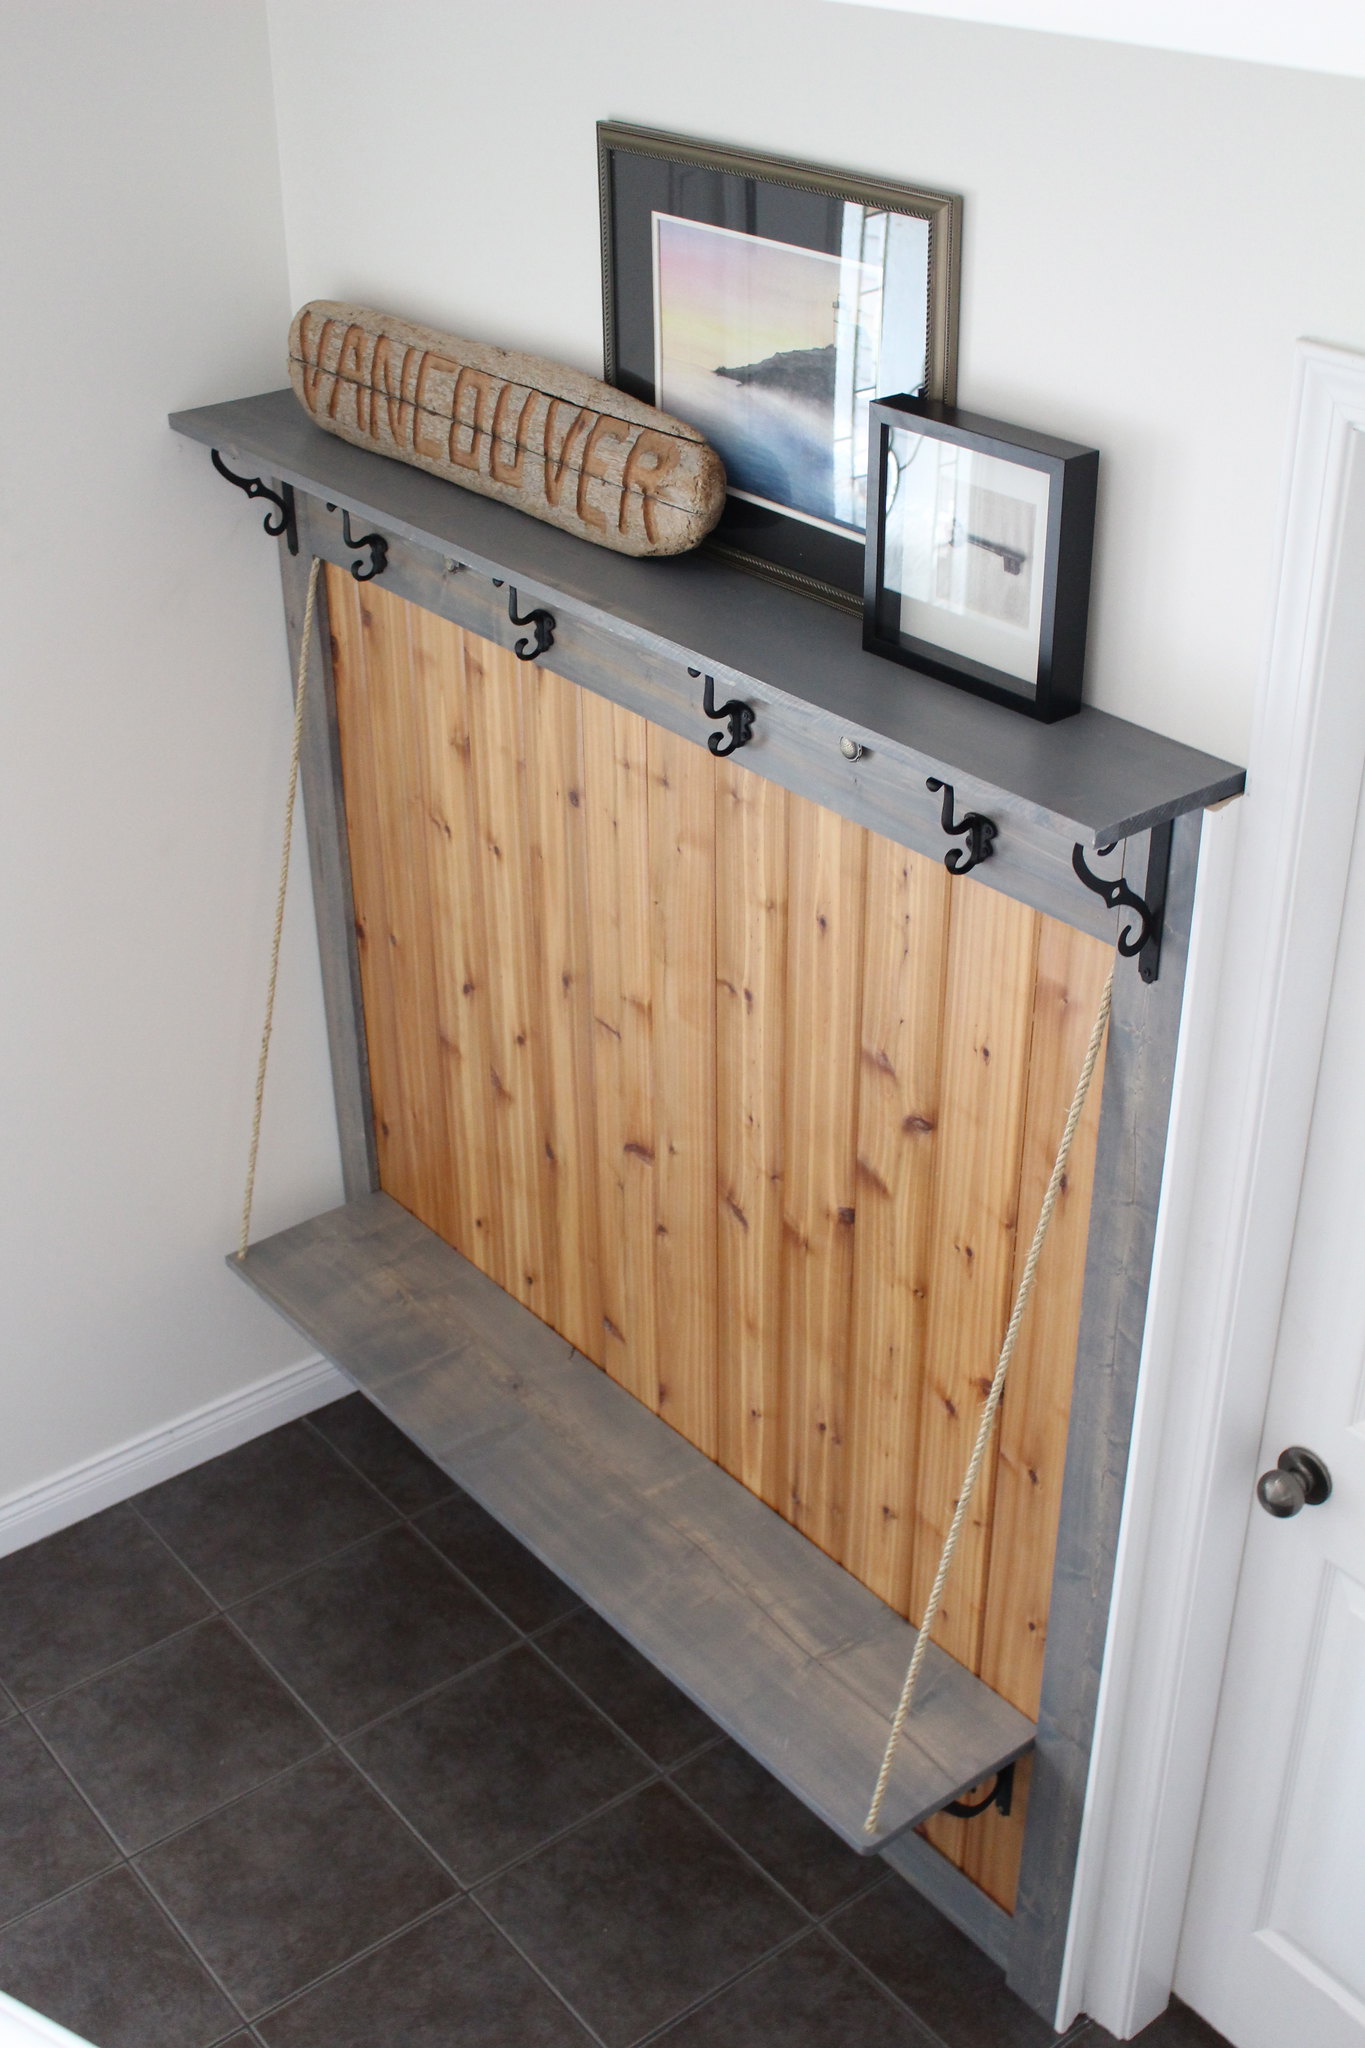
Love Your WoodLove Your Wood


Love Your WoodLove Your Wood

Now for the fun part! There were 7 other talented bloggers taking part so you need to check out what everyone else came up with (I'm excited to see what was made as well). Then - VOTE! As much as I want you to vote for me (please, please, please vote for me!) you need to pick your favourite of the 8 projects. There's $2,500 on the line, and if I win, I'd like to renovate one of our bathrooms - preferably the master bath!

Voting starts today and ends on August 31st at 11:59PM (EST). You can place a vote once per day over on the Helping You Finish Facebook page - so make sure to visit daily to support your favourite project! Thanks so much for checking out my project! HAPPY VOTING and may the best blogger win!!
SHARE:

Monday, August 10, 2015

Nolan's Custom Closet

We are creeping up on Nolan turning 3 months, and still his nursery is not complete. We mostly just need to hang his bookshelves, remove some bins and bring his chair in. Hopefully I can share a complete nursery reveal soon, but in the meantime, I wanted to share the custom storage I had B build for his closet.

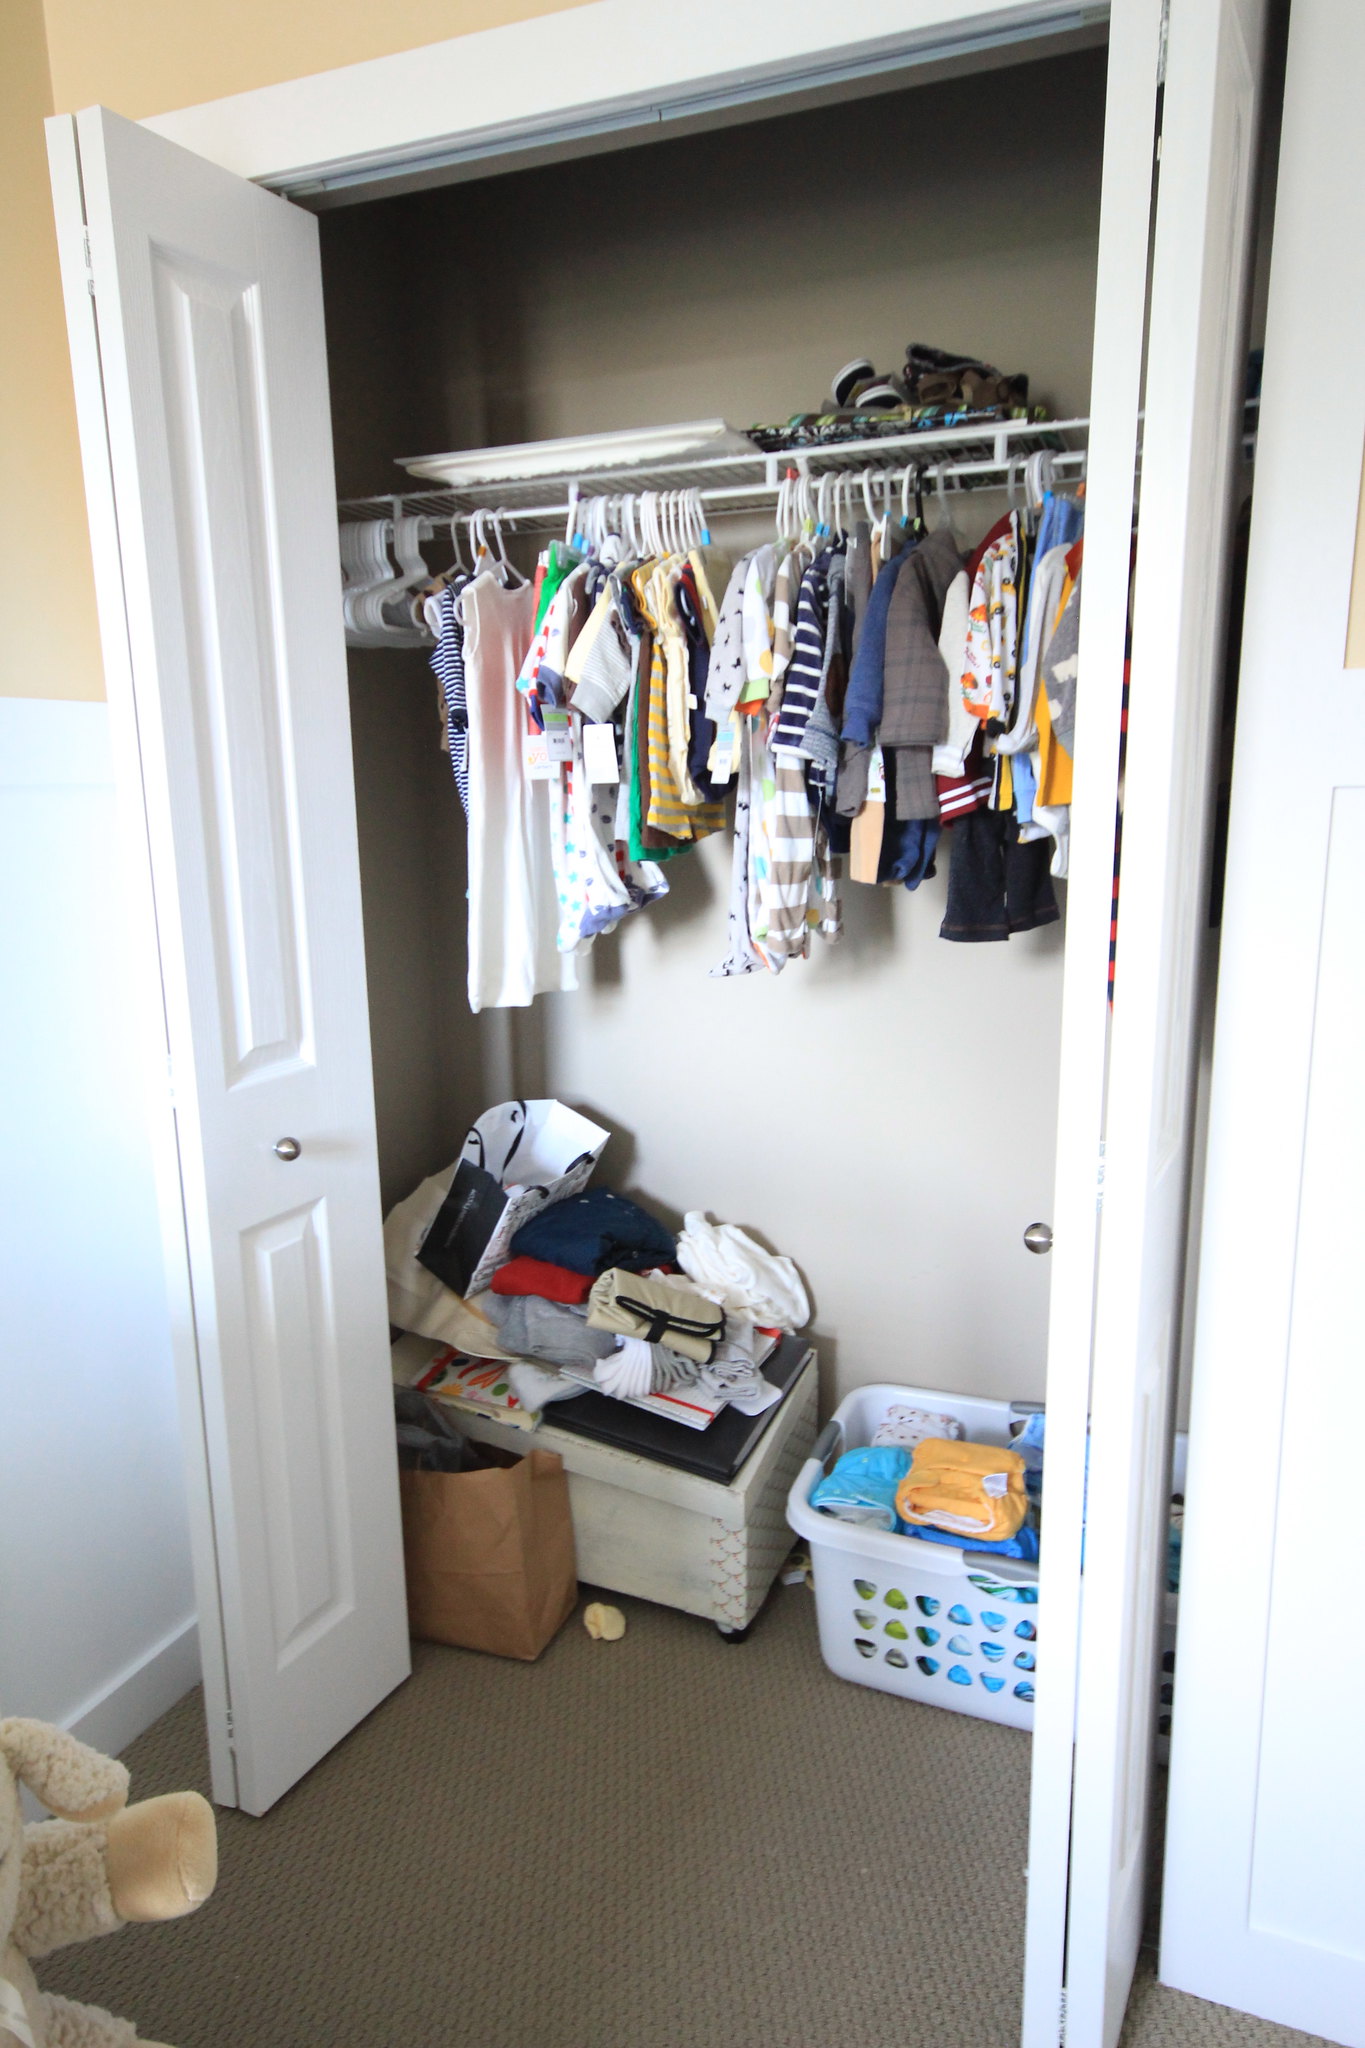
Last March we had tackled Halle's closet, using a lot of what we had to make the space more functional and tidy (you can read about her closet transformation here). A year on, we were so happy with how her closet worked, I knew I wanted something similar for Nolan's closet. What we started out with was quite simple, which didn't provide a variety of storage options for us...


Baby's Nursery - March 26, 2015

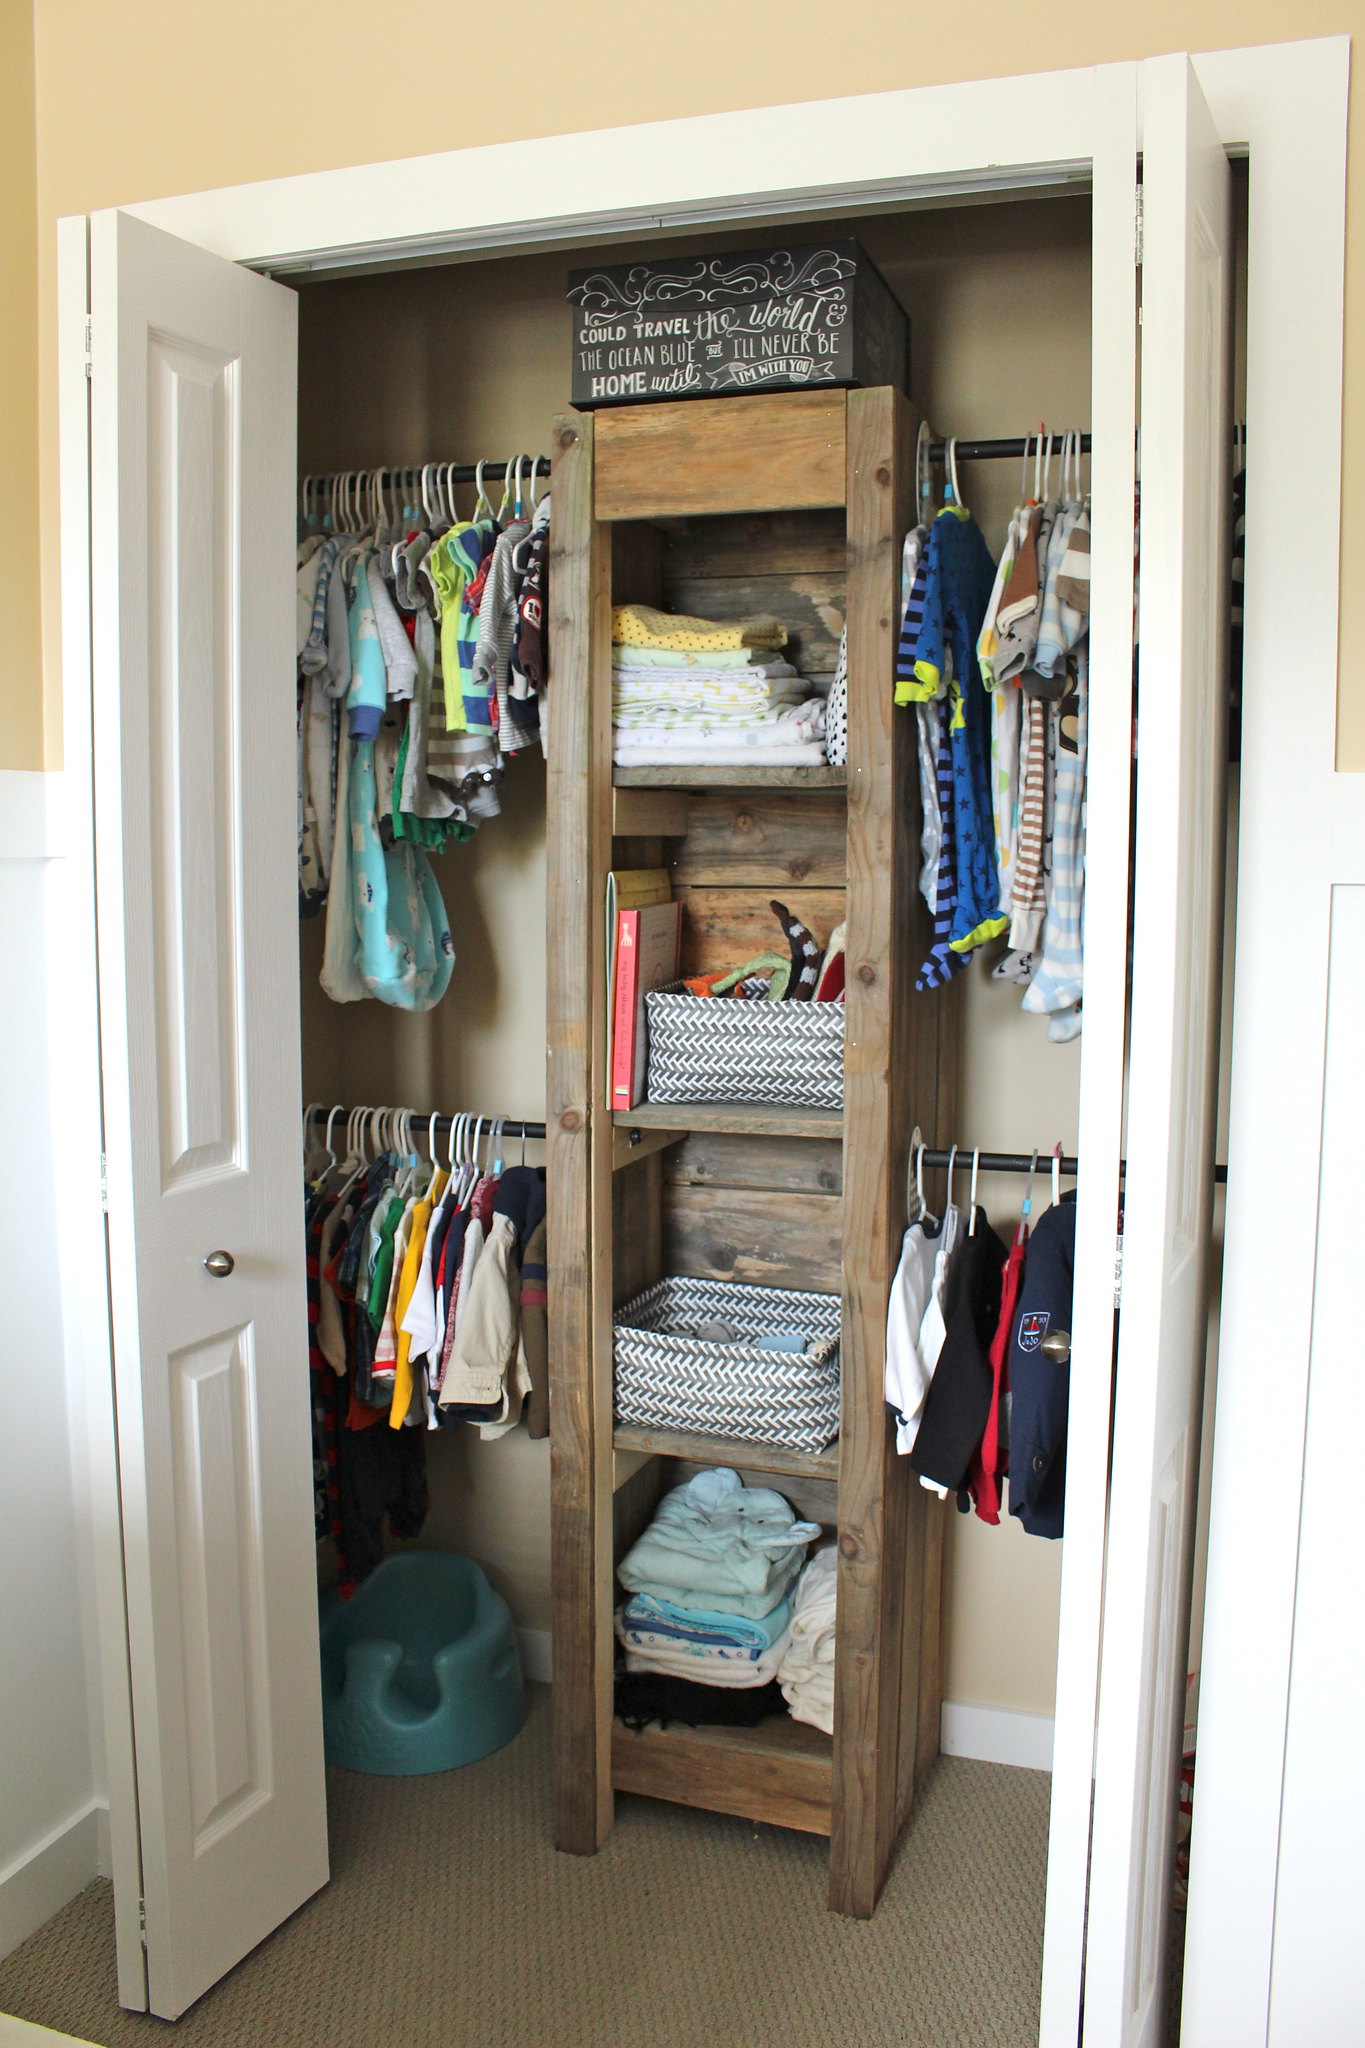
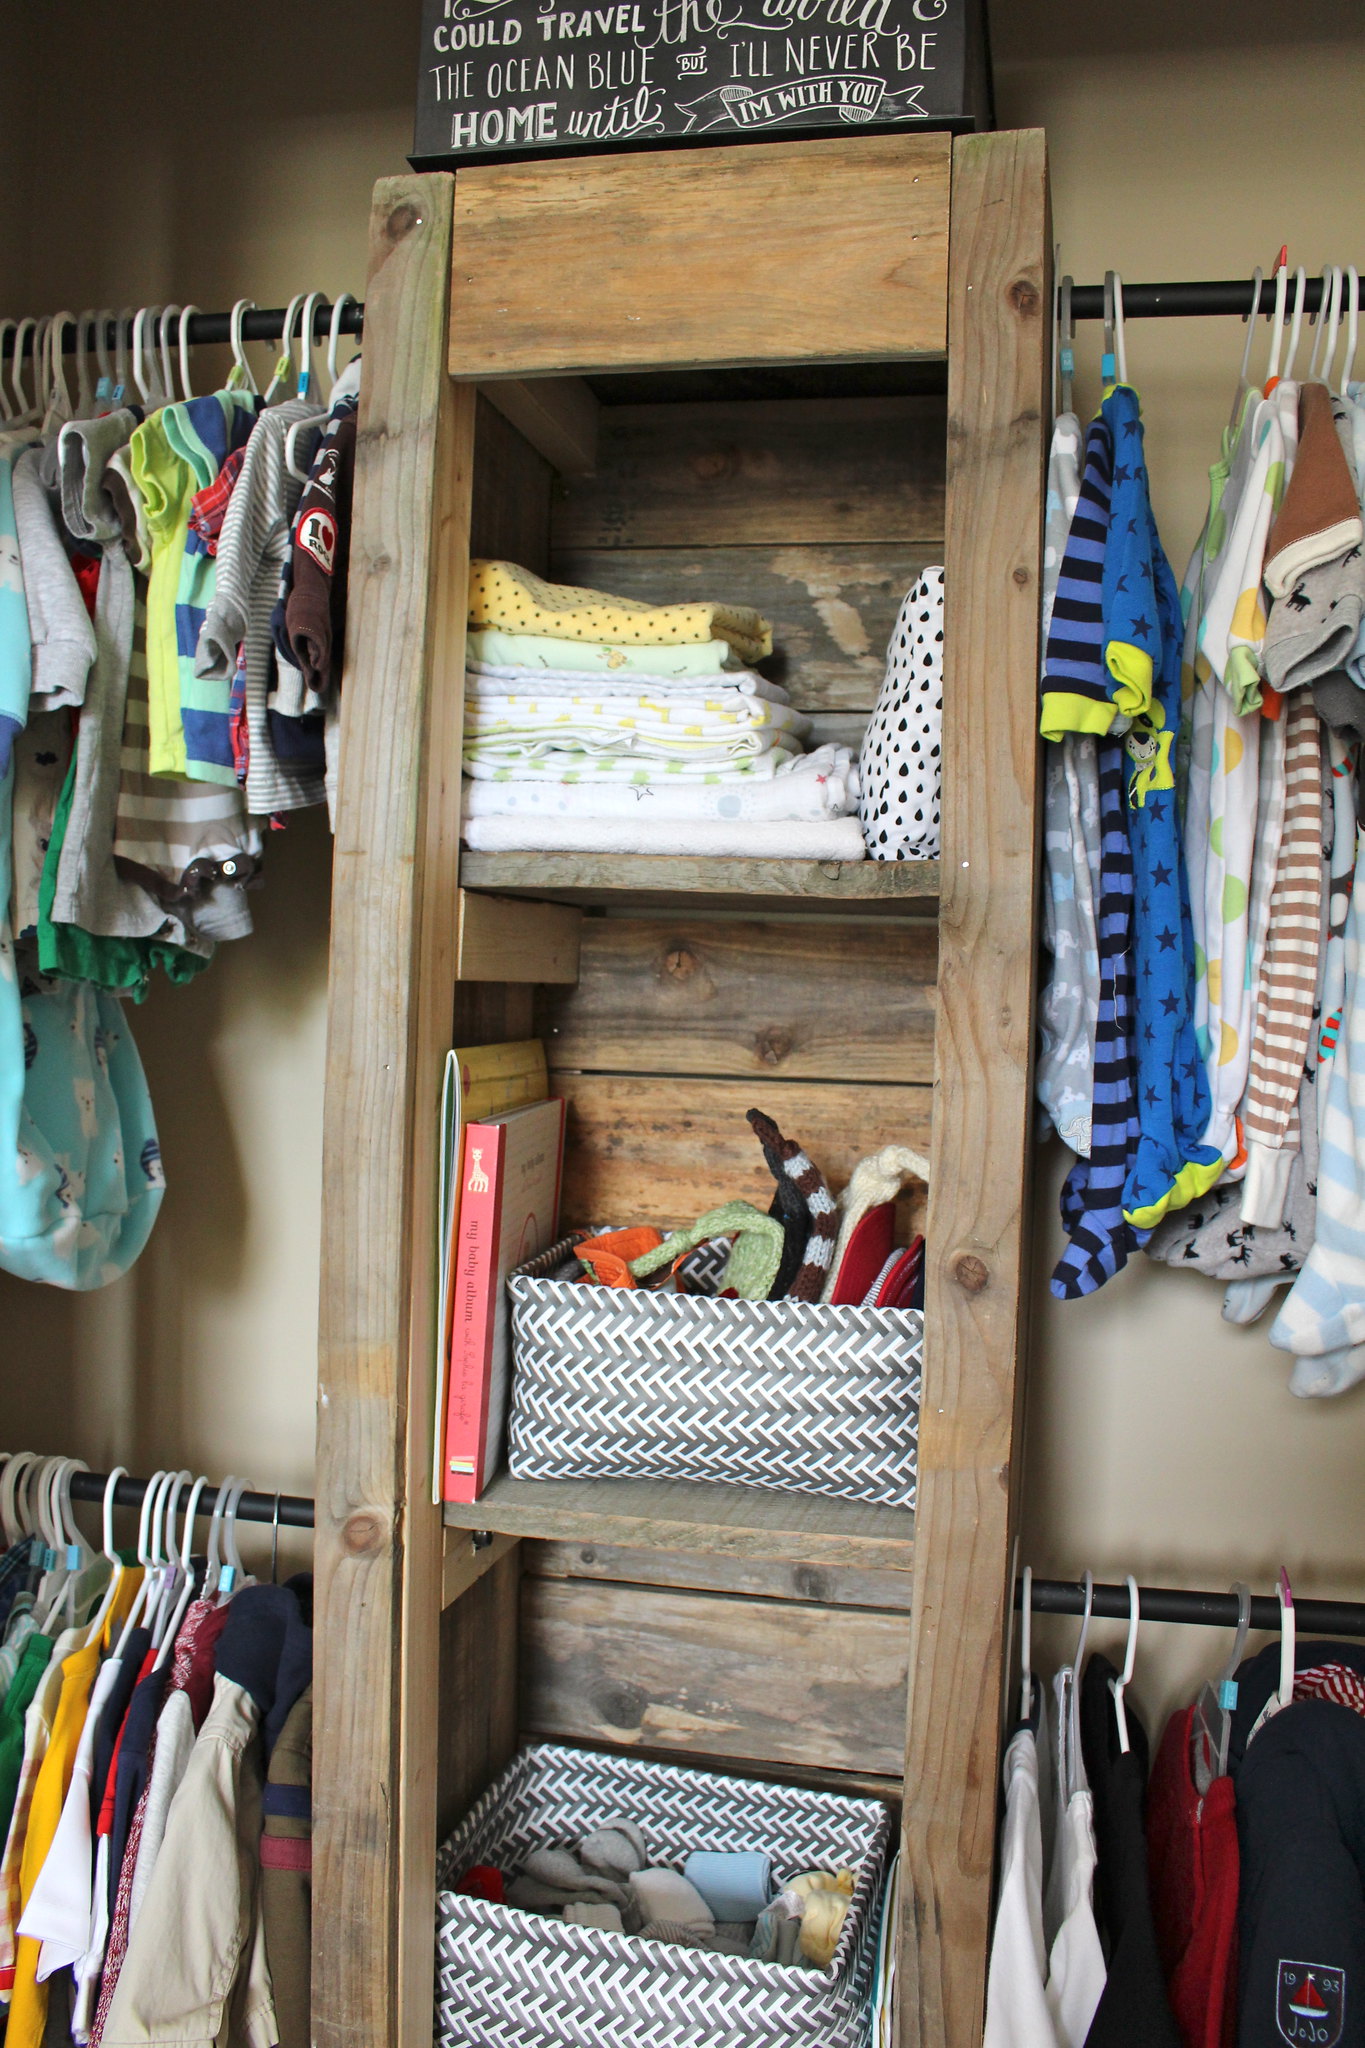
Yup, we had a lot of work to do to get things looking pretty. So, B set to work building some custom shelving for the centre of his closet. He used scrap wood that we had laying around, and what he constructed is absolutely perfect!

Nolan's Closet  - June 2015

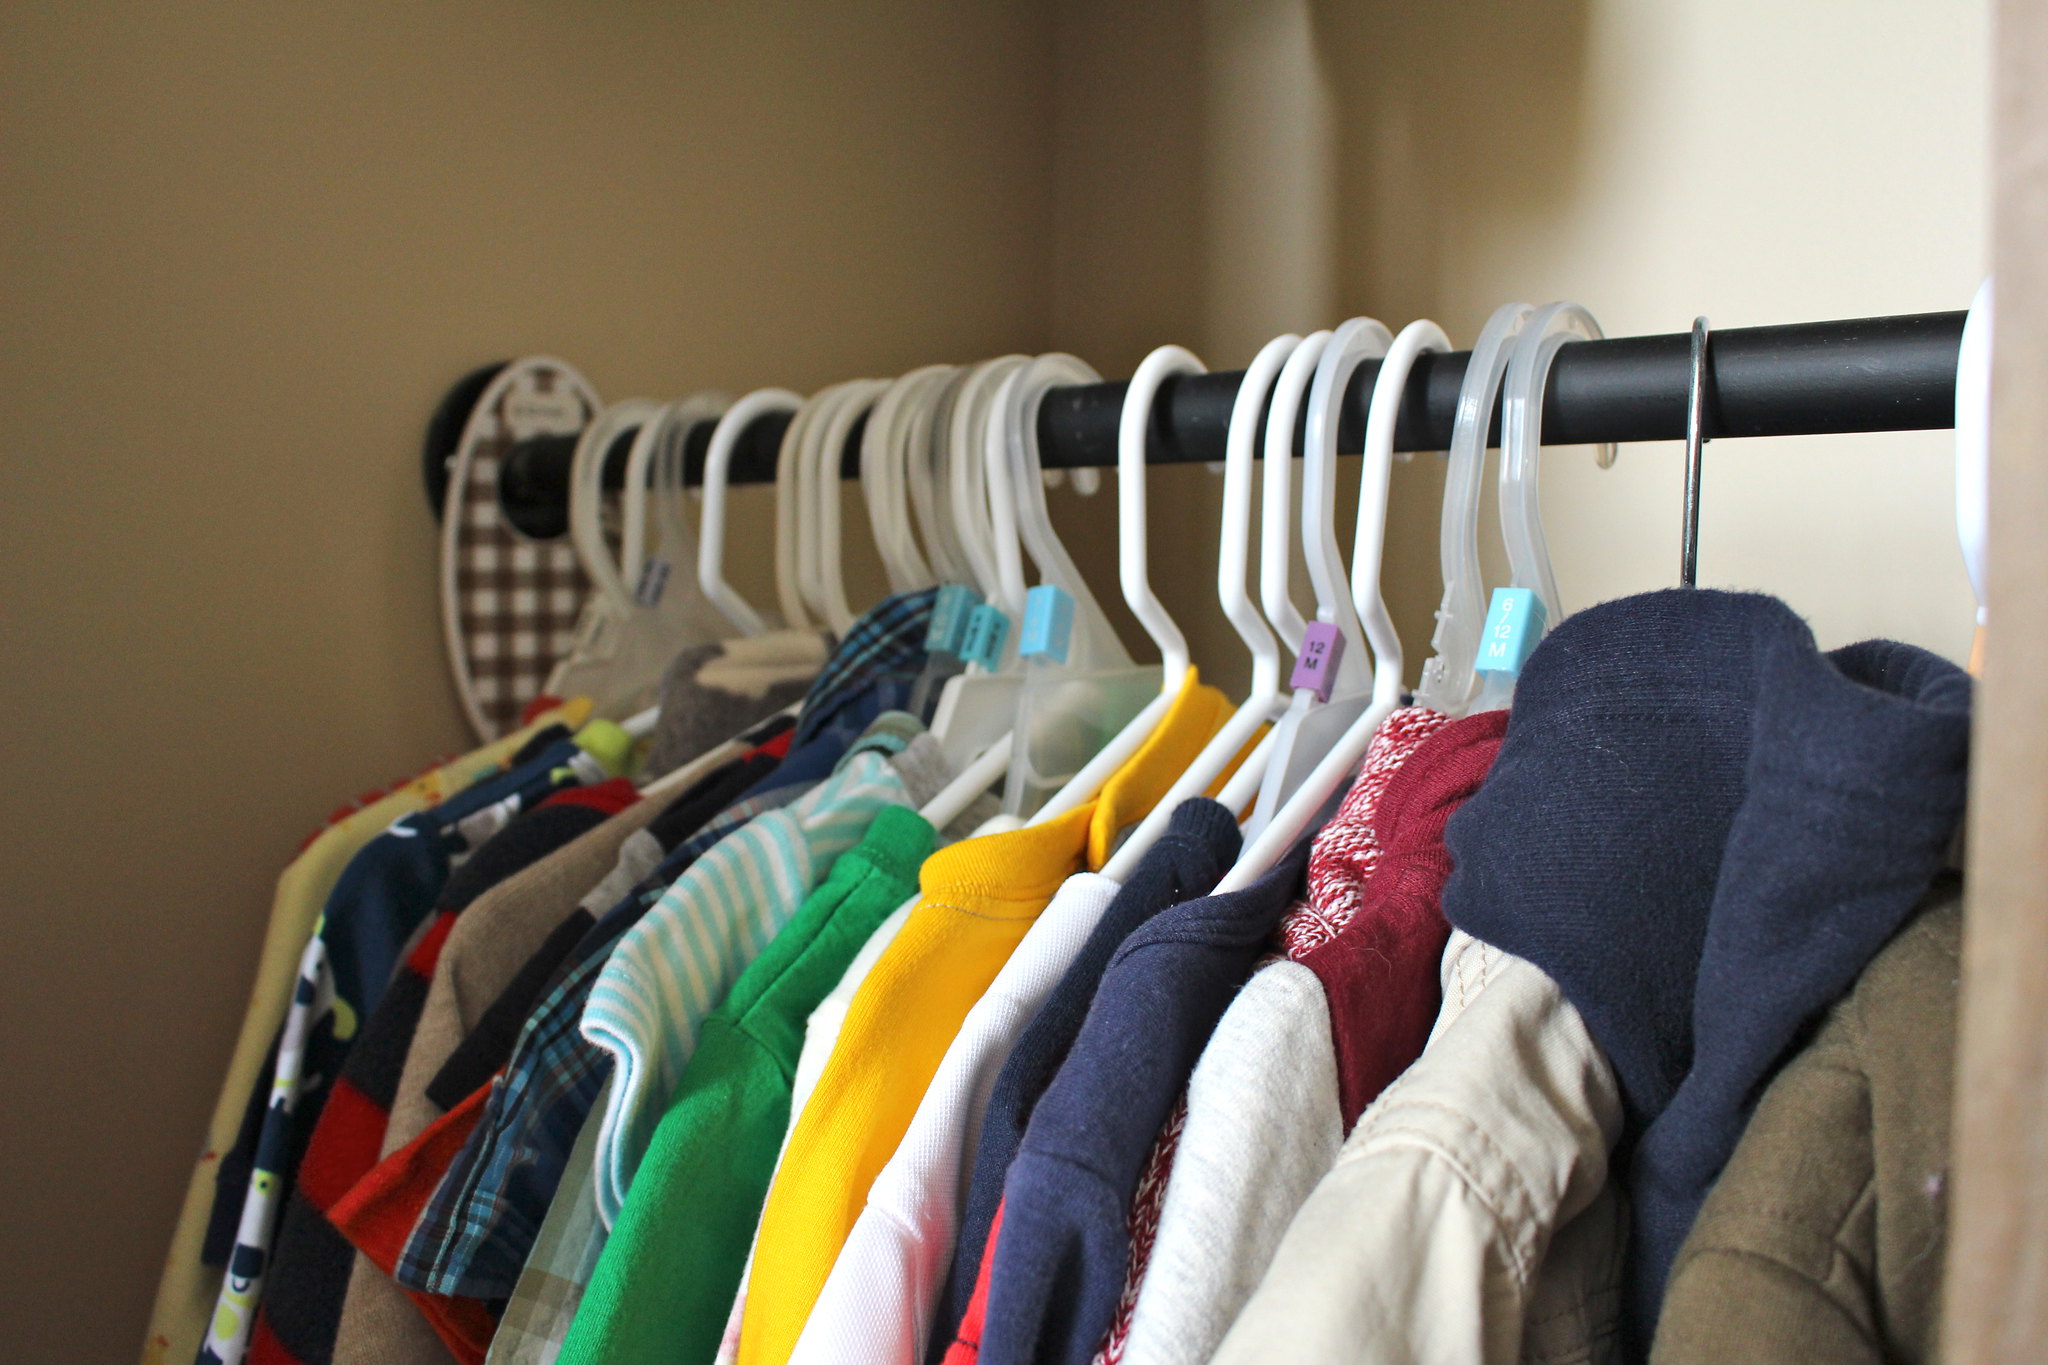
The shelves provide lots of room to keep blankets, towels, extra crib sheets & mattress protectors as well as some baskets for his socks and hats (this boy has LOTS of hats!). Putting the shelves in also allowed us to add four rods for hanging. While this configuration doesn't exactly give us more hanging space, it definitely helps me to keep things more organized!

Nolan's Closet  - June 2015

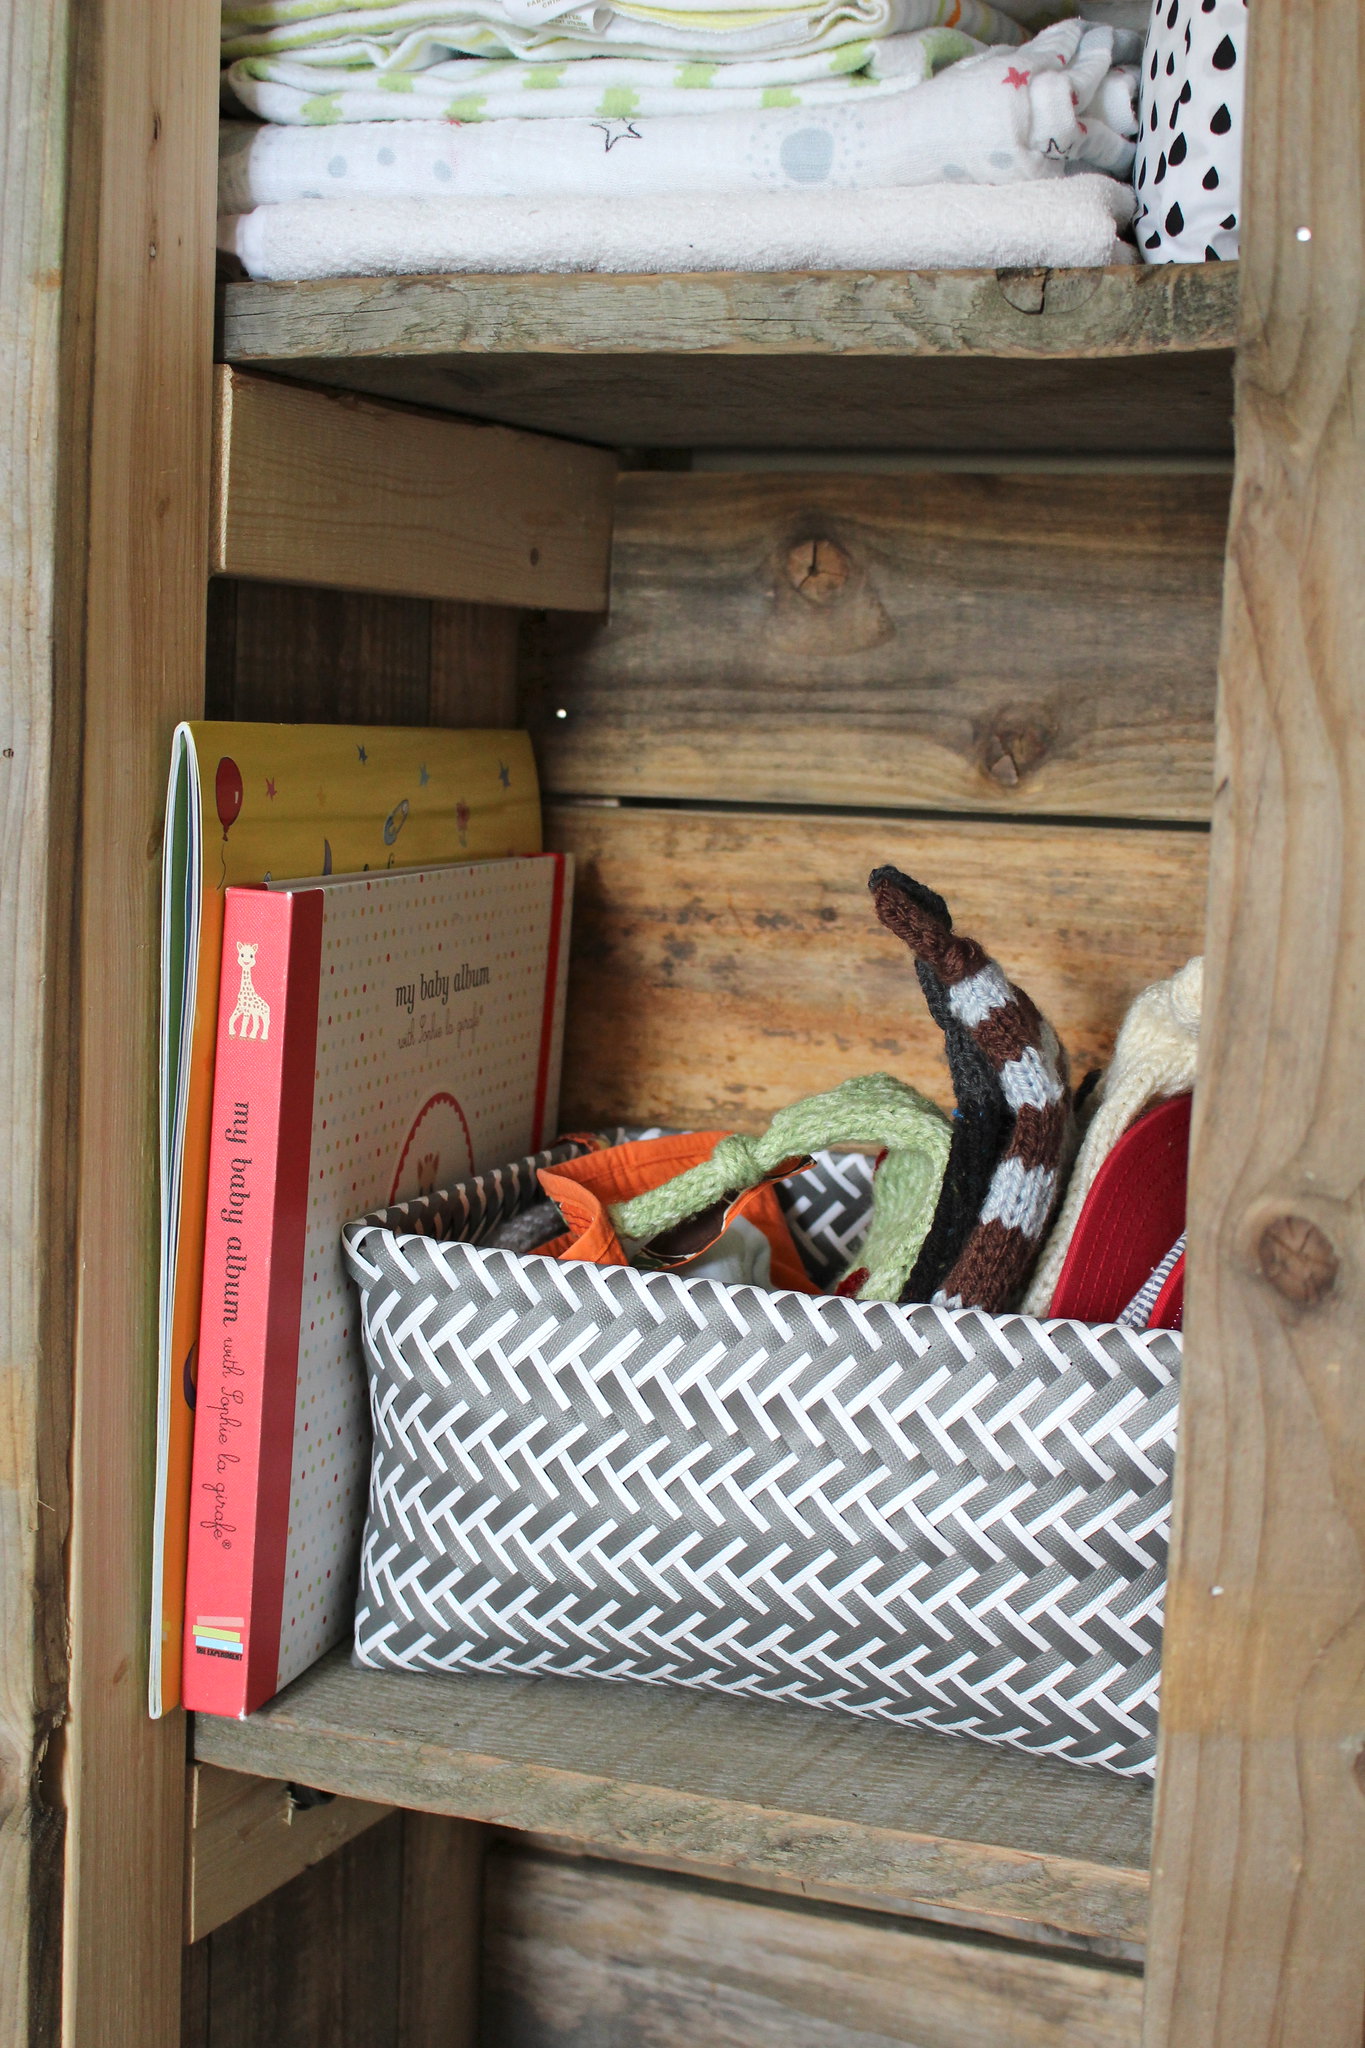
His baby book and first year calendar have also found a home in his closet. I'm pretty happy that I've been doing a decent job staying on top of both of them. The baskets I love, and picked up at HomeSense for around $10 each. I know once they have served their purpose in his room, they will be easy to use as storage somewhere else around here!

Nolan's Closet  - June 2015

The hanging rods are actually 1/2" galvanized pipe that we spray painted matte black. The match the pipe that we installed for his curtains. You can read more about his nursery here.

Nolan's Closet  - June 2015

It feels good have two of our many closets redone and organized. All of the rest of the closets in this house are also made up of wire shelving, which does not really do the best job at maximizing storage and organization. The next two most important closets? Our master bedroom and hallway linen closet! Maybe this winter will be our chance to work on those problem areas.

Do you have any closets that could use and organizational overhaul? Any of you working on major reorganizational projects this summer? 
SHARE:

Monday, March 31, 2014

A Little Closet Update

Here I am! Still kicking, though my drive to blog seems to have faded drastically. I think a lot of it has to do with my 2014 motto to simplify life. I've been enjoying the little moments with Halle these days. We finished her first round of swimming lessons together, we visit the library weekly, go for long walks with friends and the other day even enjoyed a nice lunch picnic! I've also focused a lot on sorting and organizing our home, and preparing much healthier meals for us.... and I even bake our own bread now! It's so nice and I've been feeling much happier and far more relaxed.

I am, however, hoping to get back on here and share what we'll be up to in the next little while - including our back garden plans and hopefully the built-ins in our dining room (we've been on the hunt for the right cabinets recently). In the meantime, I want to share a quick change we made in Halle's room recently.

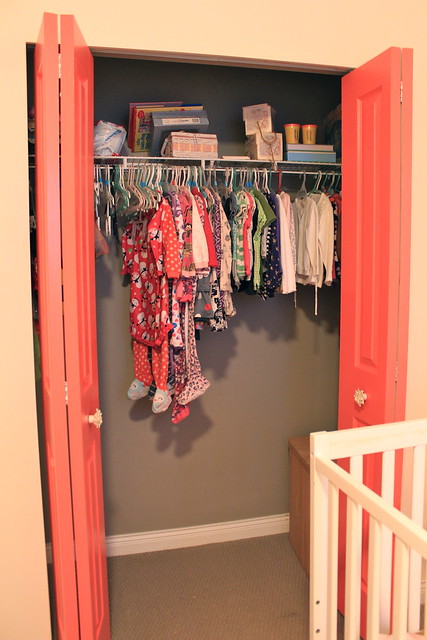
I just felt like Halle's closet wasn't providing great storage for us. It had a lot of hanging space, but that big blank floor invited things to just get thrown down there, and the top shelf just collected items that were idly thrown down and then forgotten about. I knew we needed a better solution...


First Time Fancy Toddler Closet Organization

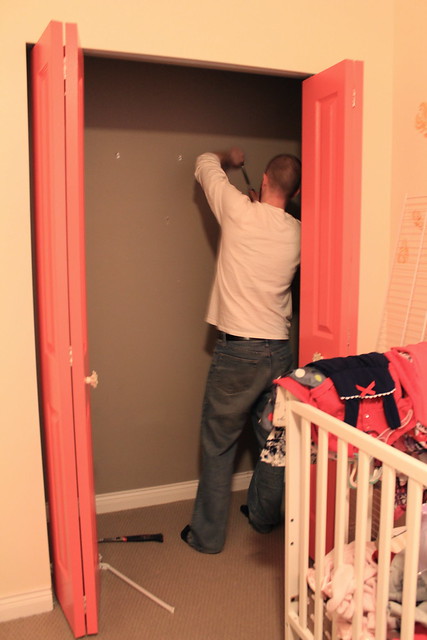
When I took that first photo I had already cleared out the floor space, so next I emptied that shelf and removed all of Halle's clothes. With everything out, it was as simple as B removing that wire shelf (that I was happy to say good-bye too... they seem to dominate our storage spaces in this house, and this is my first step to rid our home of them!).

First Time Fancy Toddler Closet Organization

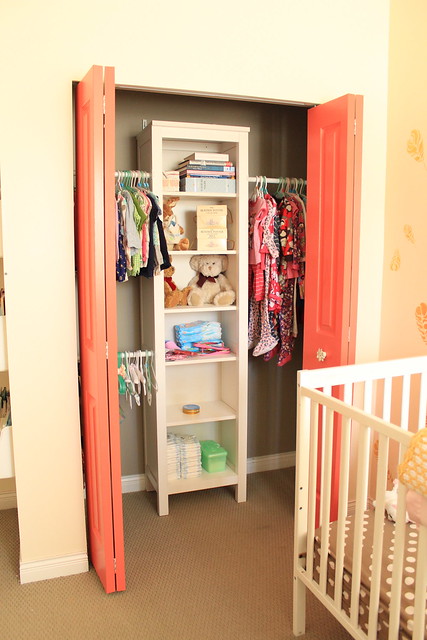
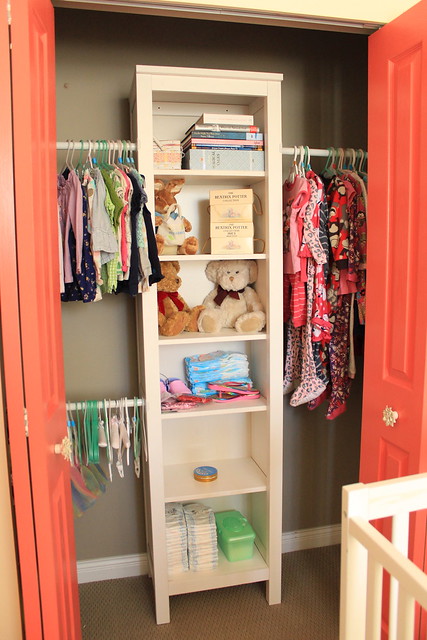
Though I had originally hoped to find an IKEA Expedit for cheap to center in the closet, we found something even better. The open Hemnes Bookshelf from our old entertainment unit had found a home in our front hall a while ago, and was just collecting items that didn't have a proper home. The other week I realized it would be the perfect solution to add some extra storage to Halle's room. Along with some brackets (to anchor the bookshelf to the wall) and some closet rods from Home Depot, Halle's closet now has some better storage than before...

First Time Fancy Toddler Closet Organization

Overall, we haven't gained more hanging space, but I wasn't looking to add hanging space (we had more than enough). What this new configuration allows us, is an easier way to organize her hanging clothes, plus find better homes for the items that had previously just been tossed into the closet. We are working on potty training at the moment, so I expect that we should free up another shelf and a half soon and it will be a good spot for some extra toys, shoes, etc.

The top shelves currently home some special books that I don't want her touching without our supervision (like my Beatrix Potter books), and some special teddy bears that are also not every day toys, but my parents had gifted to me when I was younger.

First Time Fancy Toddler Closet Organization

We never did paint the interior of her closet, but down the line we are positive the carpet in here will be ripped out - so we could always paint the closet at the same time. 

This was a nice little project to get us moving again! Our biggest upcoming project will surely be our back garden. Halle helped B to plant all of the seeds in started trays and we have a number of sprouts coming up for our tomatoes, cucumbers and peppers! We're excited to see how this progresses!

What projects have you been working on recently? Or what do you need to get moving on now that spring has sprung? (Well, it's sprung out west at least!)
SHARE:

Wednesday, May 15, 2013

File that Under "O"

... for organization. Last week when I announced our big news, I mentioned how we never got as organized around here as I would like. Well, I have decided that in the new house I will not let things get out of hand and I will do a better job on staying on top of organization. It's so important for everything to have it's own place, and it's extremely obvious to me now with a little one running around and all of the other things we have going on.

Top of my list when it comes to organization is a great filing system, but sadly B and I have not yet mastered it. We are working on it though and are starting by upgrading our system from a plastic rolling filing cabinet, a basket of papers and a bunch of other papers piled on top of my printer and on the kitchen island, to a proper filing cabinet.

This whole process really started back in mid March when we picked up this sad looking filing cabinet off of Craigslist for free...


602127_346945625404954_769829713_n

As many other projects seem to be going lately, this bad boy spent over a month hanging out in our Dining Room before we finally made a trip to Home Depot for some spray paint primer. Before we sprayed it, B did some light sanding on the rusty spots on the cabinet and then I got to spraying. We let the primer dry for quite a while (like two weeks - oops), before we took a trip back to Home Depot and grabbed two cans of Rustoleum Rust Spray paint in white. The body of the cabinet and the hardware got the white treatment, while the drawers got some chalkboard paint. With some help and encouragement from B we managed to finish this project up last week, and our old free filing cabinet is now looking a lot more pretty.

Filing Cabinet - May 2013

I wish I could get a better picture of it, but the house is in a constant state of madness as we pack everything up, and of course the cloudy days have returned, which doesn't allow for the best photos. The cabinet itself is looking lovely though.

Filing Cabinet - May 2013

We'll be able to write whatever we wish on those pretty drawers, or I can just leave them nice and clean - whatever I choose. Now of course the next big step will be taking care of the actual filing of paperwork.

We started going through some stuff this past weekend - shredding stuff we no longer needed and reorganizing some pre existing folders. We still have a long way to go before we have a really functional and easy to use system though.

How do you file everything? Do you have your stuff filed alphabetically, or do you file things in categories? What tips do you have for creating a fantastic filing system? I'd love to hear what you do to keep your paperwork organized at home!
SHARE:

Wednesday, December 19, 2012

Tackling the Storage Issue

The other week I shared some plans for our messy dining room. At the time I was being a little coy... and possibly lazy, and never shared a proper picture of our disaster area. So, if you want the ugly truth, here it is...

December 13, 2012

December 13, 2012

December 13, 2012

December 13, 2012

Yup... stuff... EVERYWHERE. And yes... I am extremely embarrassed showing this to all of you, but nothing like showing off a mess like this to get you motivated. It was not overly Christmas-y feeling and definitely not very organized or practical for a dining room / home office space - am I right? The worst part was this room was NOT hidden from view and is visible from the front hall, kitchen/living room AND the front door. Yup - this mess was on FULL display to everyone who came near our house, so it was time to take care of it. 

We're starting with baby steps and I'm being very budget conscious since right now we're focusing funds on our upcoming wedding. So, last Thursday we acquired a new piece for this space to help me to start getting things in order. Thankfully it was right in line with our minimal to no budget that we are working with to spruce up our space.

Last Tuesday I decided to take a browse through Craigslist to see what I could scrounge up as far as inexpensive furniture for our rather lacking home. I found a free 7 drawer dresser that looked like a perfect solution for our dining room storage nightmare. I shot off an email right away, telling myself it was probably gone as it had been posted the day before (and we all know how quickly free stuff goes on Craigslist). About an hour later my cell phone rang with the sweet, sweet news that the dresser was still available! JOY! After a little bit of back and forth, B headed over to pick up the dresser on Thursday night and I started cleaning up and organizing the room.

The above photos were taken on Thursday before we moved in the dresser. I've been working away since then, slowly getting rid of things we no longer needed, organizing and reorganizing and finding a proper home for all of the bits and pieces in there. There is still some work to be done, and our bins for Christmas decorations still need to be relocated back to the basement, but there is already a drastic improvement in the space. Check it out:

December 18, 2012
{Yes - first on my list once I have the space all ready to go is to hem those curtains. Drives me nuts!}

December 18, 2012

December 18, 2012

So what are my plans? Well first of all, we plan on repositioning the mirror so that it hangs horizontally instead, B just needs to change the wire on the back. As far as the dresser goes, it definitely needs some love. It has some scratches and paint splatters and other mysterious marks all over it.

I'm thinking I'd like to keep the top and the base of it this dark colour and then paint the whole middle section of it white. Maybe spray the handles black and get some new knobs for the doors on the bottom left. I won't be diving head first into anything over the holiday's, but I am pleased to see this little progress.

Do you have a room that is just a storage nightmare? Maybe you've started organizing a space yourself, or have added your own budget piece of furniture to your home? Or maybe, you aren't crazy like me and you are just focusing on your family and this wonderful season? Whatever it is you are up to, I'd love to hear about it!
SHARE:

Tuesday, May 8, 2012

Adding Storage

When we transplanted from our tiny Toronto home to our new spacious pad in British Columbia, I never imagined I would be having a hard time trying to store things in Halle's closet. After all, it was significantly larger than her previous one. 


Okay, so storage itself wasn't the main issue - it was hanging all of her tiny little clothes. This girl is a fashionista and she doesn't even know it, and the one rod (installed too closely to the top shelf), was just not cutting it for hanging all of her adorable little outfits...


Halle's Closet

Not only was there not enough room to hang everything, but half of her hangers didn't even fit properly over that single rod, making it hard to slide items to find what I was looking for. From the moment I started unpacking her clothes, I knew that something would have to be done about this situation. 

The top two things that I took into account were 1) it had to be removable and 2) it had to be inexpensive. With those two considerations in mind, it seemed like a no brainer - we'd use a tension rod. Perfect!

May 7, 2012

It adds that extra row of hanging space that we need, and the hangers that don't fit onto the top rod, slide easily along this narrower tension rod. I love that we have a ton of extra space to slowly add to her 12 - 18 and 18 - 24 month clothes as we find stuff we love for a great price (yes, the entire top rod is dominated by 6-9 and 6-12 month clothes... she has SO MANY).

May 7, 2012

Such a simple project, but the type of project we will have to become more familiar with, as we adjust to living the life of renters once again.

What tips and tricks do you have for improving and increasing your storage space for less? We're happy to take any and all of them at this point.

Tomorrow I'll give you a better look at how Halle's nursery is coming along. We're finally starting to get some things hung on the wall, but I still have quite a few decisions to make, and you all know that I value your opinions! 
SHARE:

Wednesday, January 11, 2012

Full Steam Ahead!

Last week we officially proclaimed our to-do list for 2012. With a lot to accomplish, and a lot of motivation, we got right down to business, starting with the first spot you see in our home - the front entrance.


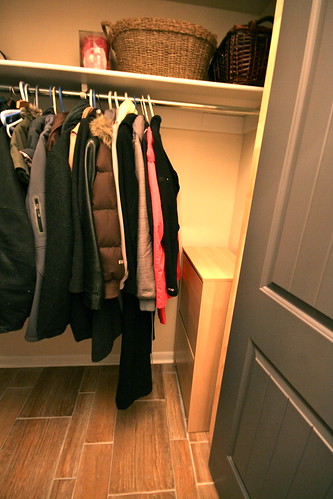
The big closet thatwe put into our front entrance in late 2010 was meant to help with our storage and organization issue in this little ol' house. While it has served us well in the storage department, it hasn't been doing so hot in the area of organization...


January 4, 2012


Not pretty, right? It had been bothering me for ages, so I was happy to work on this one early on. My first step was to pull everything off that top shelf. I organized a basket of dog stuff, and the second held all of our scarves, mitts and other winter accessories. Any winter pieces we no longer needed or wanted were put into a donate bag. Our large collection of baseball caps was also sorted through - with one of B's old hats getting tossed in the trash and a couple going into the donate bag as well. 


With the top shelf under control, everything came out of the bottom and it got a good vacuum. There was one pair of old boots that went the way of the trash and a few pairs that went into our donate bag.

January 4, 2012

One thing that I was really happy about, was to get that old trunk out of the closet. It took up a ton of floor space, and with shoes just piled in there, it wasn't helping us stay very organized. So, to solve the shoe storage dilemma and clear up some floor space, we headed to IKEA and purchased two BISSA Shoe cabinets, which fit perfectly on the two ends of the closet (and at $30 a piece, were easy on the bank account)...

January 4, 2012

January 11, 2012


Each drawer is meant to hold four pairs of shoes, but since we had a few pairs of sandals and some of my flats, a couple of drawers held more than four and left us with some extra space for future storage. Clear floor space also means more space to store Halle's car seat and stroller. In the end, it makes me incredibly happy to see it finally looking nice and neat...

January 8, 2012

January 8, 2012

I'm loving that clear floor space! No more shoes just randomly tossed about on the floor. Now I won't be so embarrassed when guests come over and go to hang their coats in our closet. There is definitely still room for improvement, but things are already looking much better!

Have you started to tackle any projects on your to-do list? Maybe you've just been working on purging and organizing your home too? I'd love to hear what you've been doing around your home!
SHARE:

Tuesday, August 9, 2011

You May Call Us Crazy...

... but on Sunday afternoon while Halle took a little nap, B and I wanted to accomplish some stuff at home, so back down to the laundry room we went (yes instead of resting and relaxing). There were quite a few projects we wanted to finally finish, and first on that list was to put up the large LACK shelf we had picked up from IKEA the Tuesday before Halle was born.


B started out by measuring how far we wanted the shelf off the countertop, and then used his level to get a straight line of where we would mount it.


August 7, 2011
Check out that concentration!

We then used that straight line to line up the back of the shelf and B marked where we would have to put the anchors and screws...

August 7, 2011

As you would expect he then drilled the holes we would need to mount the back of the shelf, and put in some drywall anchors to make sure my shelf was secure...

August 7, 2011

From there it was a matter of screwing in the back plate for the shelf and sliding it into place. It looked great when it was up - level and all!

August 7, 2011

We weren't quite done yet though... we had some fun to add to my space. A couple of Christmas' ago, B had bought me a wall decal of the London skyline. Not everyone is a fan of wall decals, but I'm really happy with how this one looks...

August 7, 2011

I'm using the "Count Your Lucky Stars" print from Brittany's shop to hide the water valves on the back wall. I haven't decided if it's too much though. Thoughts?

August 7, 2011

We were working on a couple of other projects down there at the same time, but I'll have to share those another day. Both will help to hide some really unattractive aspects of the room, and I know they'll make a huge difference! We're doing our best to finish off this space ASAP, as we do have a new, big renovation coming this fall... so stayed tuned for more info on that soon!

What projects have you been working on around the home recently?
SHARE:

Monday, January 24, 2011

My Great Clean Out!

Today I'm joining in on a little clean up / organization blog party that Anne-Marie of 10 Rooms has put together! 

When Anne-Marie emailed me about taking part in "The Great Clean Out", I just knew I had to say yes... what better motivation to get my butt in gear and start cleaning and organizing? I also knew right away what room I would be tackling... My Craft Room / Office / Laundry Room...


Yeah - it was looking pretty rough. Left over Christmas pieces were stuffed in boxes in here. Construction materials had been placed here to stay out of the main basement living area. Basically, it had been a giant catch all for anything that didn't have a proper home.

With me back to classes as of last Monday (I'm soooo excited about my class this term!), I knew I needed to whip this space into shape so that I would have somewhere to escape to and get my work done. My first step was just to get EVERYTHING out... which meant relocating it all (with the help of B) into our living area. My #1 rule was that anything that didn't belong, was not to go back in! I knew that by keeping it out in the open in our living space, I would be more motivated to find a proper place for everything. After running the vaccum around quickly, I got to work organizing.

With the help of B, we moved my brand new IKEA "As-Is" dresser into the spot that was previously occupied by our big, ol' ugly filing cabinet (which we no longer needed).


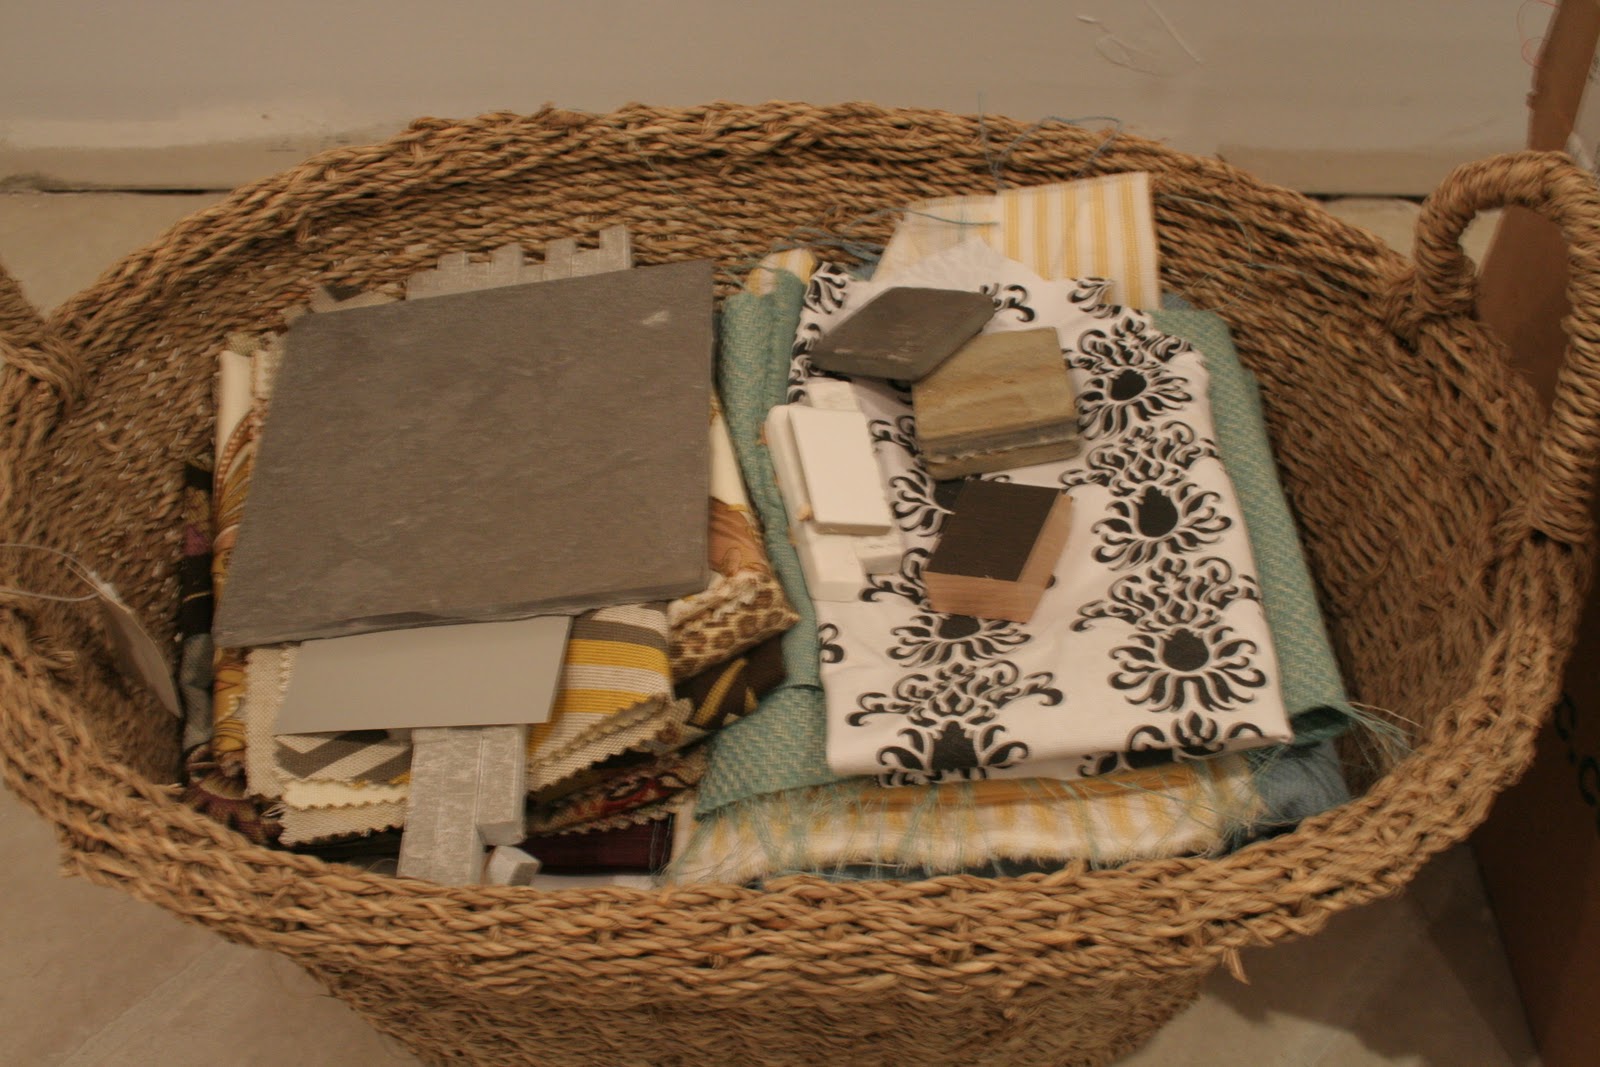
There was a lot of stuff to sort out and organize. Old school projects, paper (LOTS OF PAPER!), crafty items, fabric and other samples... and pretty much any other thing you can possibly think of. 


It kept me busy for quite some time, and I definitely did not complete this in a couple of nights, it was an on going process. Items were moved, and moved again. At this point it is by no means "perfect", but it's exactly what I set out to accomplish for now. It has more storage, and it's a lot more functional than it was before - take a look at the before and after...


I can actually get INTO the room again... and with all that new drawer space, everything has a home!


The top left drawer contains ribbons, my blog cards and some other crafty items (and yes, it could still use some organization... I'll be working on that). The drawer on the right is looking a little better with a utensil organizer keeping all of my pens, pencils, markers, etc. nice and organized. This will make looking for a pen and other writing utensils a lot easier!


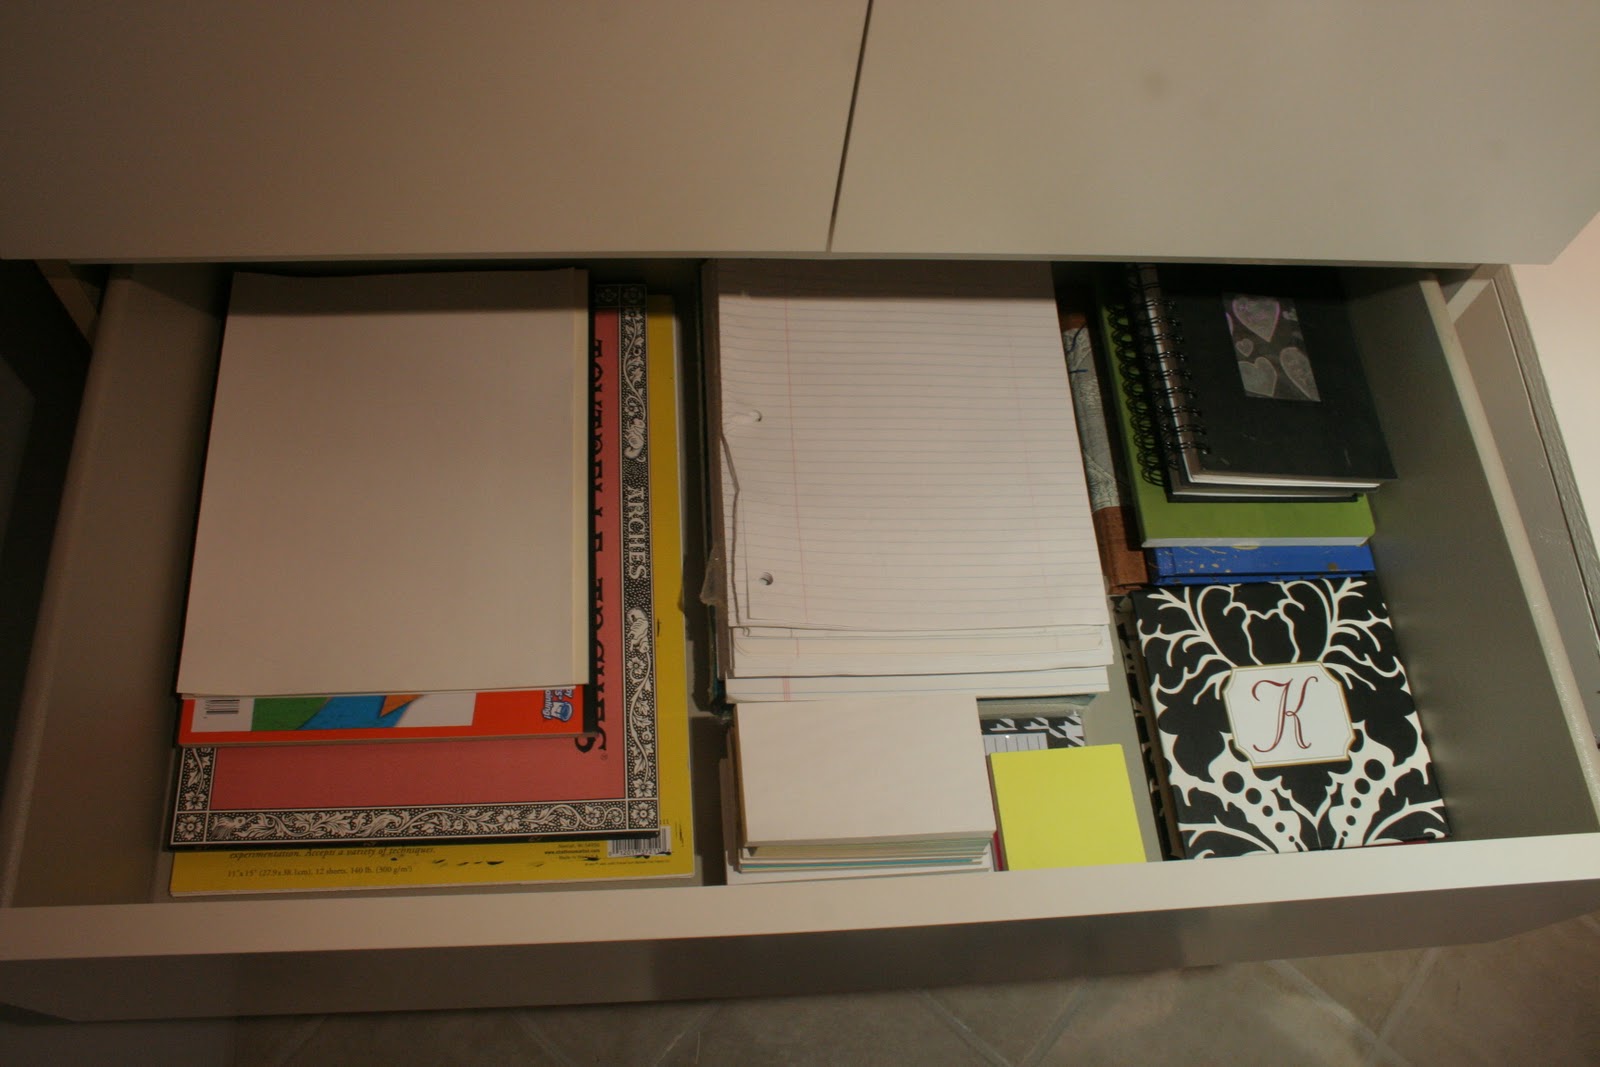
The next drawer down is home to all of my paper. The far left is craft and painting papers, the middle is blank and lined paper with some smaller pads down at the bottom. The right side is all notebooks - yeah, there are a lot of those around here.


The third drawer down I have dedicated to "gift wrapping/giving materials"... kind of. You see blank note cards, some tissue paper and a LOT of tape... that could also use a little extra organization.


This drawer holds a lot of my old writing stuff. I used to be big into writing poems and short stories, and they are all housed here. I am hoping to condense everything so I can free this drawer up... I have a feeling my bottom drawer contents will only continue to expand in the future...


My fabric drawer doesn't look very exciting right now, but they are all organized by colour, and my neutrals ended up at the top. 

My cleaning also got B motivated, and last weekend while I was back home spending some time with my family, he made some more progress on finishing up my desk. He finished painting it white, got the final trim attached, put up my cork board and attached my pistons... check it out in action...


I have a bunch of stuff that I stumbled across that needs to be added to my inspiration board up there, but I think that it is so perfect! What a lucky girl I am to have B make me such a fabulous desk! 

So, that's everything that went back in... what came out? Well, of course the old desk and filing cabinet - both of which are waiting to be relocated to my parents house. All of the Christmas stuff that had ended up in there was packed up when we did a proper clean up after the holidays, and then this...


Quite a lot to toss and recycle, as well as quite a few things that we will donate / add to our garage sale pile (we are determined to make a little bit of cash off all of the extra / unused stuff we have laying around).


Organizing, cleaning and purging our home of things always calms me down and makes me feel good, so thank you to Anne-Marie for lighting the fire under me, and getting me going on cleaning up this room! I'm already dreaming of all of the great projects I'll work on in here and all of the great blog posts I can write from my nice clean desk! Make sure you head over to Anne-Marie's blog to see her Great Clean Out and find out who else participated!

Have you taken on a major cleaning / organization project recently, or do you have one coming up? I would love to hear some of your best organizational tips!
SHARE:
Related Posts with Thumbnails
© Life on Misneach Ridge
Blogger Designs by pipdig