Trending

Monday, November 24, 2014

Mission Seating Complete!

Well hello blog land. It has been a while, and I've honestly been a little torn on whether I miss blogging on not. I miss the community, but I feel like I'm still connected to a lot of those people on other social media networks. I don't miss the pressure I used to feel to constantly be putting together quality, inspirational content. It's not always easy to come up with something that is worth blogging about these days. I am sure a lot of you can relate to that! Honestly, today I was supposed to be taking part in a really awesome Canadian Bloggers Christmas Home Tour, but we just weren't in a place to share anything really fabulous and inspirational from around here, and now I feel like I've let down a bunch of really awesome bloggers. For that I feel awful.

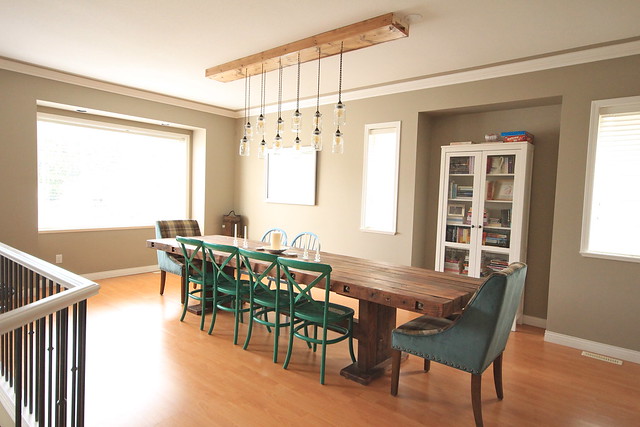
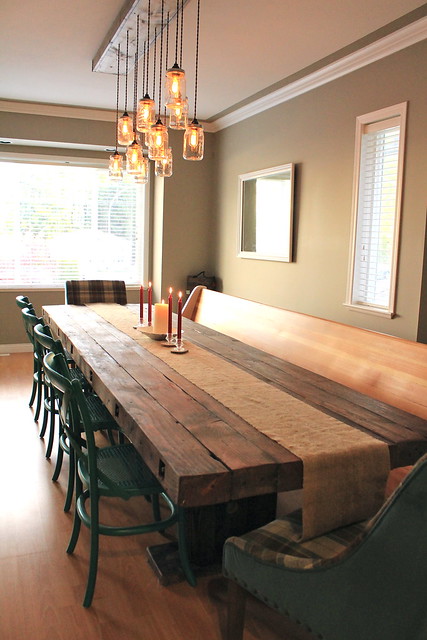
Today though, I FINALLY have something worth sharing and there is more coming soon! We're finally crossing some big projects off of our list, which is great because we are adding some more big projects to our list for the new year. For now, I'm excited to share our completed church pew in our dining room!

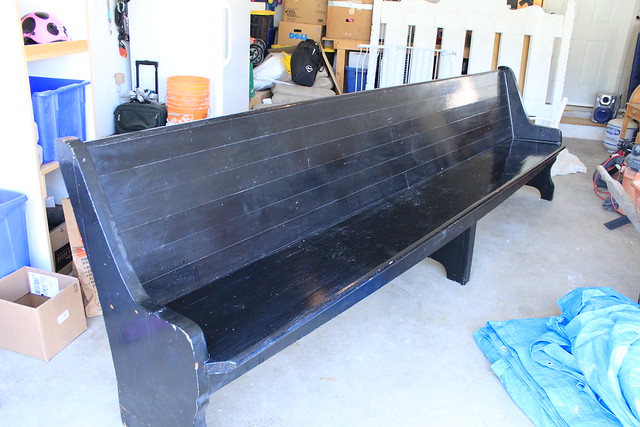
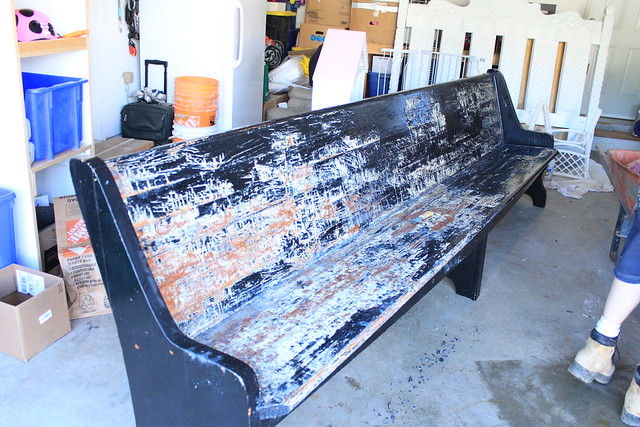
Back in May we picked up this 11 foot church pew off of Craigslist for $100...


Dining Room Pew - Before

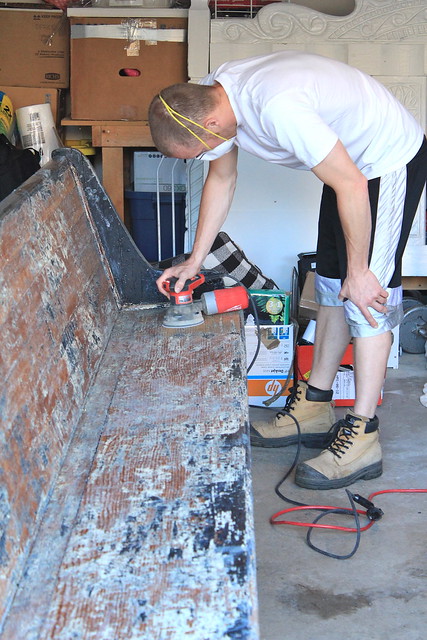
We spent a lot of time in the spring and summer just trying to strip and sand all of that glossy black paint off. It was truly a labour of love...

Dining Room Pew - Stripping

Church Pew

Church PewChurch Pew

Church Pew

Church Pew

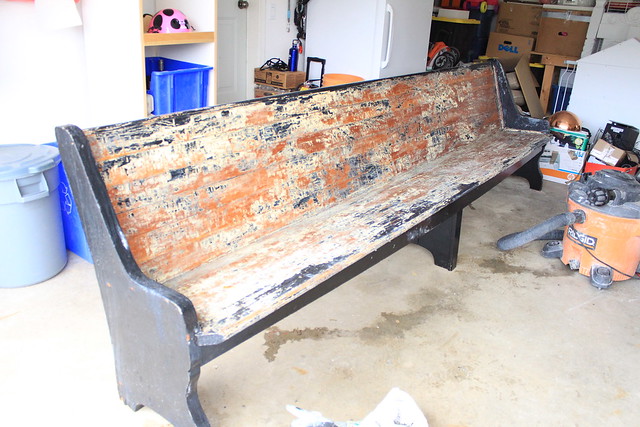
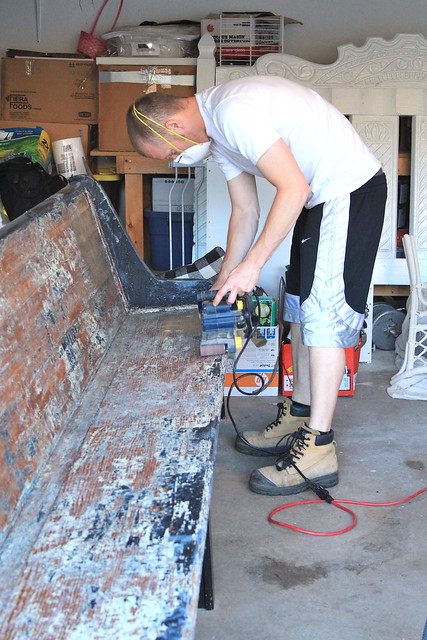
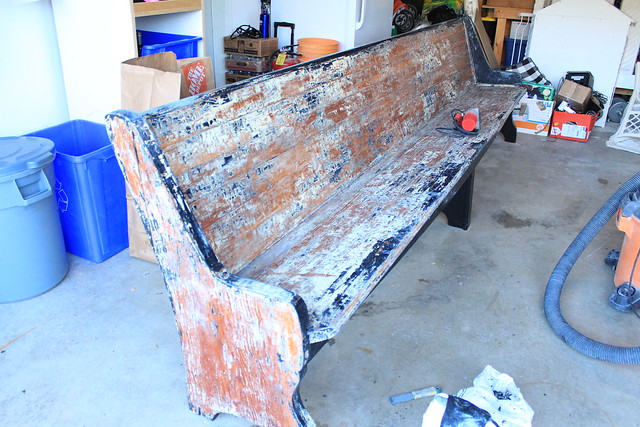
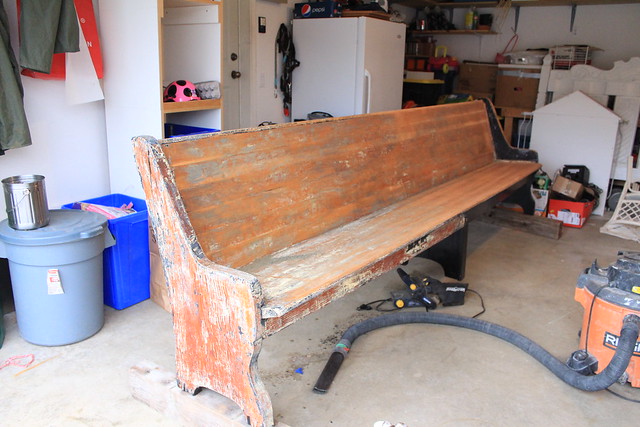
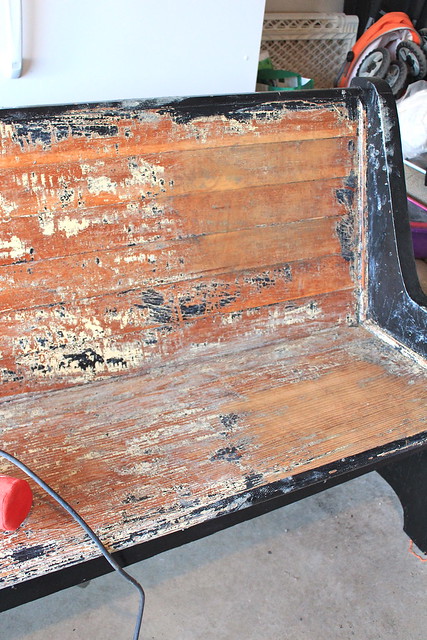
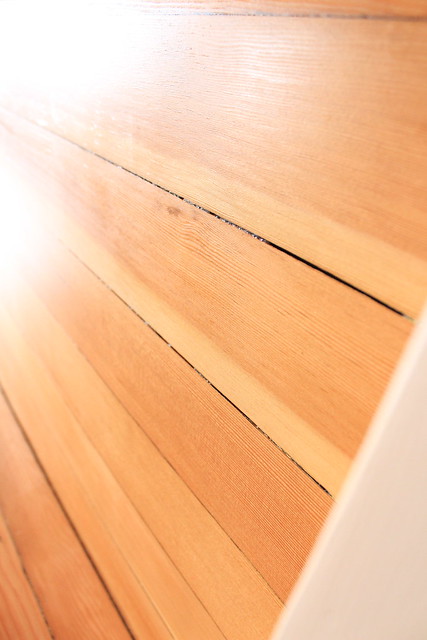
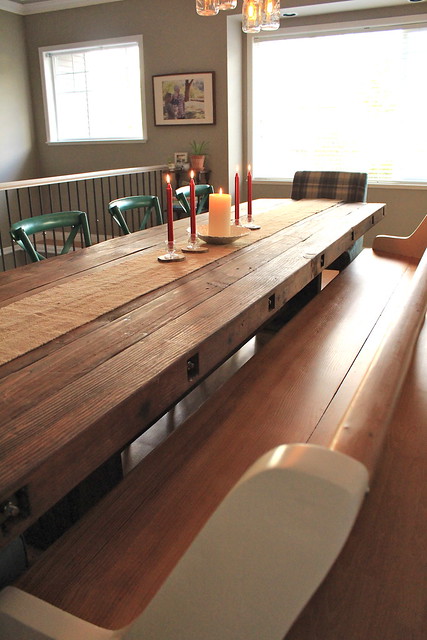
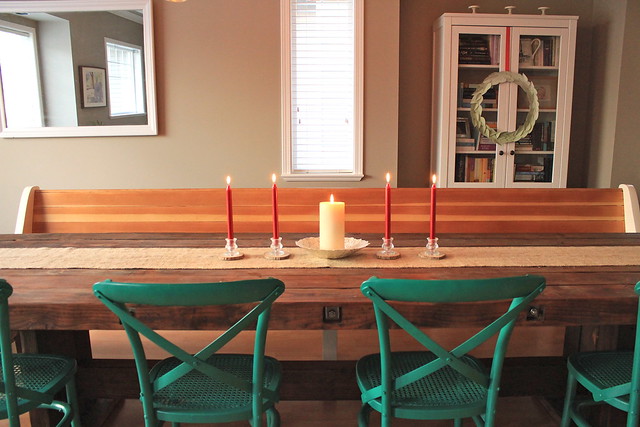
It was SO MUCH work, but we both agree now that it was totally worth it. All of that stripping and sanding revealed some gorgeous cedar on the seat back. The wood of the seat wasn't quite as nice, but still had a neat grain to it that we really liked. After some discussion we decided to clear coat the back and seat. There is still some paint stuck between the boards, and a lot of variation in the colour of the cedar since some spots needed more sanding than others, but it looks so great.

Completed Pew - Nov 22, 2014

Since these wood tones differ from our dining table, we decided to break up the colour a bit and paint the arms and legs of the pew. I picked out a variety of warm white paint chips from the Home Depot and we started by comparing the chips to our head chairs in the dining room. We were able to narrow it down to 4 colours, and once we had all of the cedar stained on the bench we compared our colours again. Our final choice was called "Clean Canvas" from the Home Decorators collection and it is perfect!

Completed Pew - Nov 22, 2014

Completed Pew - Nov 22, 2014

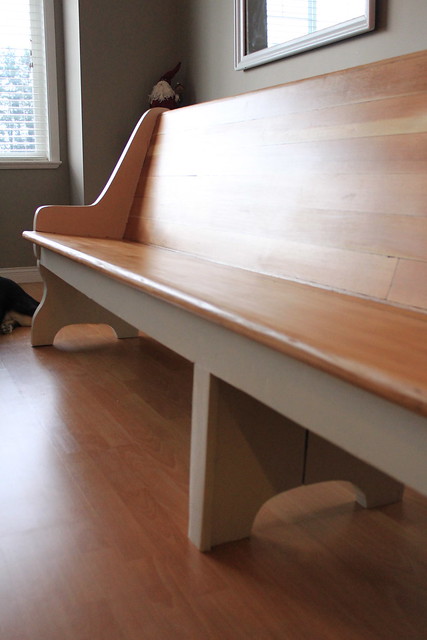
B finished it last week and a friend came by on Friday to help him move it into the house (and up the stairs... a little awkward, but they were troopers). We'll be using it this Thursday to host our annual Thanksgiving dinner, just as we had hoped!

Completed Pew - Nov 22, 2014

Completed Pew - Nov 22, 2014

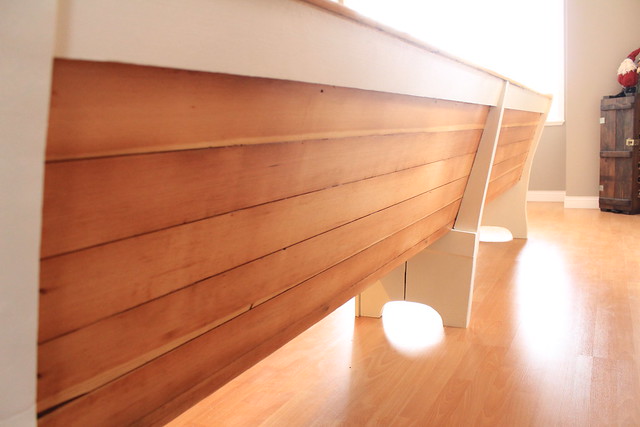
I honestly cannot believe this is the same piece of furniture that we brought home. It adds so much to our space, though we are far from finished in the dining room. At least for now we are ready to host our friends on Thursday!

Dining Room with Pew - Nov 22 2014

Dining Room with Pew - Nov 22 2014

Dining Room with Pew - Nov 22 2014Dining Room with Pew - Nov 22 2014

Dining Room with Pew - Nov 22 2014

Dining Room with Pew - Nov 22 2014

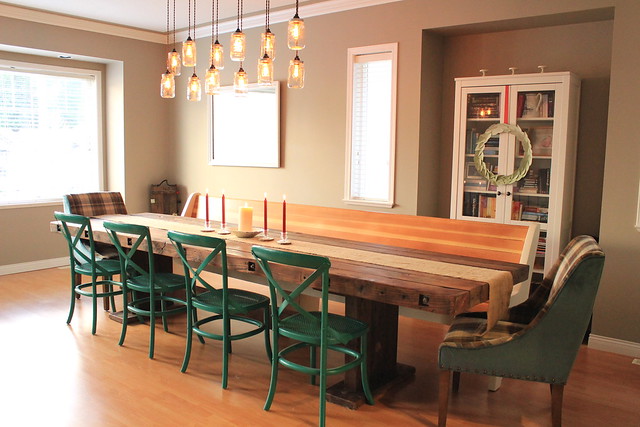
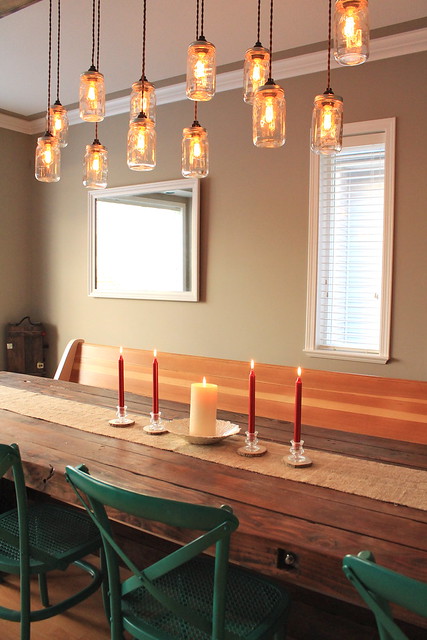
At Halle's request we ate our pancakes at the table on Saturday morning, and all agreed that this room is exactly how we imagined it! Such a great space for a large table for gathering family and friends... or just enjoying a yummy Saturday breakfast together!
SHARE:

Monday, June 9, 2014

I've Been Benched

First off, I need to thank everyone for their input on my last post. There were some really great suggestions, including one that has really started to evolve in my head... so we'll see where that goes!

Now, for an update on the pew. The last I showed you, our bench was looking like this...


Dining Room Pew - Stripping

Well, I've been a busy bee, taking every opportunity that I can to get out there and strip it clean of the two layers of paint. 

Church Pew

Church Pew

After some stripping and then letting it dry out, B went at it with a random orbital sander and a belt sander to get rid of some of the leftover paint.

Church PewChurch Pew

Church Pew

What did we discover when B hit some of the parts of the pew that had not been touched by the stripper? The paint would've come straight off really easily had we just sanded it from the start and skipped stripping completely. Yeaaaa.... so had we done that, we would've saved some money AND probably have all of the paint sanded off by now. However, as it currently sands, we still have some work ahead of us to get the rest of the paint off...

Church Pew

I am frustrated knowing that we could be in the refinishing stage already if we (read: I!) had just attempted sanding before stripping.

While sanding B also discovered that the back of our pretty pew is solid cedar - a very nice cedar, and he's intent on staining it. I on the other hand, am not completely convinced. After reading Jen's comment on my last post, I'm pretty sure I'd like to do something two toned (pulling colours from our end chairs at the dining table). Something along the lines of this pew, or this one. B and I will continue to discuss this.

So, with the progress we have made so far I am still hoping to have this project (as well as a few others I have started), completed before our house guests arrive later this month! I also believe that now that we've been in our West Coast home for over a year, I owe you some updated pictures of our spaces! Hope to start snapping some photos one space at a time once I get them cleaned up. 

Have you been working on any projects recently that seem never ending? Maybe you've had a frustrating experience with something you are trying to tackle? 
SHARE:

Thursday, June 5, 2014

How I Got My Blog Groove Back

Well... it's been far too long since I've been around these parts. I've just been busy being a Mom, keeping home, doing fun things with the family and small projects around the house. Nothing has really given me that spark recently to write... even when B began building Halle's playhouse in the backyard, or started working on tiered vegetable garden (all of which there will be photos of.... soon). Then, the other week, I was doing my usual craiglist creep when I struck gold!


Dining Room Pew - Before

That my friends is an 11 foot church pew... which I paid $100 for. Yes... ONE HUNDRED DOLLARS! I was thrilled that I was able to score this (and so thankful to our wonderful friend who helped me out and loaded it into the pack of his pickup truck and moved it to our place while B was away). It's going to be the perfect addition for seating at our 12 foot dining table...


First Time Fancy Dining Room - DIY Dining Table & Light Fixture

The pew will go on the far side of the table where the two blue chairs are. However, I'm still stuck on what to do with the pew. I'm in the middle of stripping the paint off...

Dining Room Pew - Stripping

I've made some more progress since this photo was taken, but I still have a lot left to do. The wood seems to be in okay condition, but I'm not sure I want to stain it. Even if we use the same stain as we used on the table and light fixture, it would come out a different colour (just like the table and light fixture did). I'm concerned that it will be too many types of woods and tones competing in the space (especially since we also have our wine rack and a new little wood table that I scored at the Salvation Army. 

So, I guess I'm looking for a little input. While I strip and sand this big old pew down, I want to know - What would you do? What do you think I should do? Stain it? Paint it? I'm thinking maybe a cream colour, similar to the light part of the plaid on our head chairs at the table. At this point, I'm leaning towards painting (which would save me a lot of stripping down the line)... so give it to me! What should I do?
SHARE:

Wednesday, February 19, 2014

Back in Action

Talk about a break from blogging! I don't really have a reason for you as to why it happened, except for maybe I've really been embracing my 2014 motto of "Simplify". After completing our kitchen cabinet transformation project, we took a little break to just enjoy the start of the new year as a family. We've been getting out and enjoying being together (especially since we haven't been slammed with snow and ice like our families back east), and I've also been doing a lot of cleaning and organizing. I've been able to sell some things we don't use as well as donate a few things, and it was nice to purge a little. 

BUT, with B's sister arriving on Friday and a little dinner party planned for Saturday, we needed to whip our dining room into shape for some hosting. We've been busy bee's the last couple of weeks. The last photo I shared on here of our dining room was just after B had finished our dining table...


Our DIY Dining Table

In the last few weeks we've accomplished quite a bit. Here's what our dining room currently looks like...

First Time Fancy Dining Room - DIY Dining Table & Light Fixture

We are getting there! On the far wall we have hung a mirror that B has had since before we even started dating (it sat on the mantel in our home in Toronto). It may not be the forever solution, but for now it fills the wall and really bounces more light around in the space. We like it.

You'll notice I've also started to address our seating issue. Those four green chairs I grabbed at HomeSense for a great deal. I'd been eyeing them since November, but couldn't pull the trigger on them for $99.99 a piece. At the end of January I popped back in and was checking the clearance section, only to discover four were left at $36 each! Of course they had to come home and they are perfect. The two blue chairs on the opposite side of the table will be painted the same green colour in time. 

First Time Fancy Dining Room - DIY Dining Table & Light Fixture

By far, the biggest and best addition is the light fixture that B put together for us. Of course this style is all over Pinterest, but I wasn't in love with the idea until we went to Scotland and saw a huge light fixture made from Mason jars at the Super Dry store in Glasgow. So when we got back and needed a big idea for over the dining table, this seemed the best and most affordable solution. The whole thing cost us under $300 - not bad considering the impact it makes. 

First Time Fancy Dining Room - DIY Dining Table & Light Fixture

We bought the pine and the wiring and junction boxes from The Home Depot, using a gift card my parents gave us for Christmas. For the stain, we used leftover stain from the table. The woods are different (pine for the light fixture and douglas fir for the table), so the stain appears slightly different. I like that they don't match exactly, but have the same tone! 

The jars I bought off of someone local for $8 (for all 12), which was a great snag. We bought the fabric covered wire and sockets from a Massachusetts based company called Sundial Wire - definitely recommend them if you are looking to do something like this! Finally, the amber coloured filament bulbs top off the whole project. We bought 16 for $5/each from Restoration Hardware when they were having their lighting sale in early January.

First Time Fancy Dining Room - DIY Dining Table & Light Fixture

I feel like it makes the most impact when it's all lit up at night. The amber lights were the perfect choice, and we're happy with how much light 12, 30W bulbs give off. The perfect ambiance for dining!

First Time Fancy DIY Dining Room Light Fixture

First Time Fancy DIY Dining Room Light Fixture

There's still much to be done around here. B and I have agreed the next big thing will be the built-in in that nook currently occupied by the far too small bookcase. The good thing about the built-in is we will be able to build it slowly. Start with a lower cabinet and had uppers afterwards. Just something to add some extra storage and character to this slowly evolving room. 

I'm just thrilled with how quickly we've been checking things off of our to-do list so far. The bedroom has had some progress as well, and I hope that today I can finally finish getting paint on our walls. It's a much slower process now that I have a two-year old underfoot at all times! She is one busy and curious little girl!

What have you been doing to keep yourselves busy? Anyone been hibernating inside and making big changes to their homes?
SHARE:

Monday, November 18, 2013

Table for 12

Well, Thanksgiving (of the Canadian variety) and Halloween are now well behind us. While many of my fellow Canadians turn their minds towards Christmas, we are preparing ourselves for Thanksgiving Round 2! Normally we celebrate back in Massachusetts with B's family, but after all of the travelling and money spent this past year, we decided to spend this one at home. B has taken the day off from work and we'll be hosting our own Thanksgiving dinner for a group of friends. In order for this to be successful, B has been working to finish off our big huge, DIY dining table for our massive dining room. Remember, this big empty blank canvas?


IMG_1409

Well, after months of work we've finally filled it up. So what was our plan of action? Instead of using this one small area that the builder defined as a dining space, we wanted to fill the whole room so we could have all of our friends over for dinner and meals whenever we wanted. 

Unfortunately, it was not in our budget to spend thousands of dollars on a beautiful new table. Instead, B decided to use some wood he had to make us a big solid table. 

When I had arrived back from my two month trip to Toronto/Scotland/Boston for our wedding, honeymoon and my friends wedding, B had the table all mocked up. He spent a lot of time measuring, cutting, sanding, drilling, etc. to get everything just right. His Dad even helped with the drill press while they visited in October. They had to drill 7 equally spaced holes through each of the 7 wood beams that became our table top. 

Building our 12 Foot Dining TableBuilding our 12 Foot Dining Table

Why? Well, B used threaded steel rods through each of those beams to reinforce and hold the table together. Let me tell you, that is one solid piece of furniture.

Oh - they also chiseled out the boxes that our metal clamps fit into that secure the threaded rods. It was a labour of love - but man does it look really, really good!

Building our Dining Table

Building our Dining TableBuilding our Dining Table

We even saved money on the stain we picked. The RONA close to our home was closing, so I popped in with B's parents while they were visiting and checked out the stains. Everything was 50% off at the time, and we found the last can of the perfect brown stain that cost us roughly $7 for a quart. Not bad at all. It even worked out that it almost perfectly matches our ammunitions crate wine rack (we bought that at the One of a Kind Show Christmas Show back in 2009 - they are no longer available as the couple who made these used up their supply of ammunitions cases! We cherish that piece). 

I'm going to have to leave more of the details to B, as only he could best describe all of the time, energy and dedication he put into building this beauty. We are both so thrilled every time we look in our newly filled dining room, and I feel so lucky to have a man who uses his spare time to build incredible furniture (this is the second piece he's built. You can peek the desk he built here and here. I'm sure I'll share a full office reveal with the huge desk he built me before the new year). So, enough of the chit chat - here she is. Our new 12 foot dining table...

Our DIY Dining Table

Our DIY Dining TableOur DIY Dining Table

Our DIY Dining Table

Our DIY Dining Table

Our DIY Dining Table


It was quite the event moving it into the house. B and our friend were able to move the base straight in and upstairs from the garage relatively easily. We called in another helper for the table top, which had to be brought in through the back yard and involved me following along with the saw horses for when they needed to rest. They worked hard, and we paid with beer and pizza, which we enjoyed at the new table. Of course, they are also invited to the big Thanksgiving dinner as well. 

So what's next in this space? Of course more chairs, a chandelier and some sort of artwork on those empty walls. Those are top of my list... but of course tough to solve with our tight budget. Also, as much as I would love to paint, I think that project will fall to the back burner for a bit as it will involve more than just painting this room. We would like to add a built in to that niche in the wall, and move the too small for that space book case into our living room. 

So, still a space that is far from done, but so much better with our beautiful new table in place. We are almost ready to host our big dinner on the 28th! 
SHARE:

Monday, September 30, 2013

A Table & Chairs

Well - we've been busy bee's around here. In just over a week we have FOUR house guests coming to stay with us - two for one week, and the other two for two full weeks. All four will be staying here for the Canadian Thanksgiving holiday so we are doing our best to have a mostly functioning dining room for the occasion. So what have we been up to?

Let's start with the table situation, shall we? When Halle and I arrived back to BC last Monday, B had our dining room table "mocked up" in the garage. As in, he had most of the pieces cut, and clamps holding it all together so I could get an idea of what the finished product would look like. I was thrilled, but there was still a lot of work to be done. So on Thursday evening last week, after dinner B headed back outside and spent a couple of hours  cutting a few more pieces and getting the base assembled. 


DIY Dining Table - First Time Fancy

Unfortunately, that one night did not complete the table. B mentioned that night he had a lot of sanding ahead of him, and that he may even need to borrow a plainer to get our table nice and smooth and pretty looking. 

Even with an unfinished table, new furniture has made it's way into the dining room. Let me start from the beginning.

The week before I arrived back in BC, I had been online looking at different dining chairs. I somehow ended up on Cost Plus World Market and fell in love with the Plaid and Teal Green Wes Dining Chair. It immediately reminded me of a number of chairs we had seen in Scotland and loved, and as a bonus, it was on sale! I sent the link to B, commenting on how great it was. Turns out, he thought so too because he arrived home on Tuesday last week with two of them for either end of our dining table! True love people! He apparently ordered them almost immediately after I sent the link and then drove to our mailbox in Washington State after work to deliver them home for my birthday! I married a good one!


World Market Dining ChairWorld Market Dining Chair

World Market Dining Chair

World Market Dining Chair

Two down, 10 more to go. (Yup, this table is going to be a BIG one!). 

... Now to start preparing the guest rooms! What did you get up to this weekend? 
SHARE:
Related Posts with Thumbnails
© Life on Misneach Ridge
Blogger Designs by pipdig