Trending

Tuesday, August 11, 2015

Love Your Wood!

Last month I was contacted by the good people over at Rust-Oleum Canada, asking me to take part in their Love Your Wood challenge. The idea was that they sent me (and 7 other DIY bloggers) a box containing a wood stain, a clear coat, five mystery items (which ended up being a hook, a drawer pull, decorative stones, wire and rope) and a $75 gift card to help buy any additional items we needed. Each blogger had to refinish a piece of furniture or build something using wood, stain and three of the mystery items. If you follow me on Instagram then you've seen a few of my sneak peeks over the last little while. 


Love Your Wood

Love Your Wood

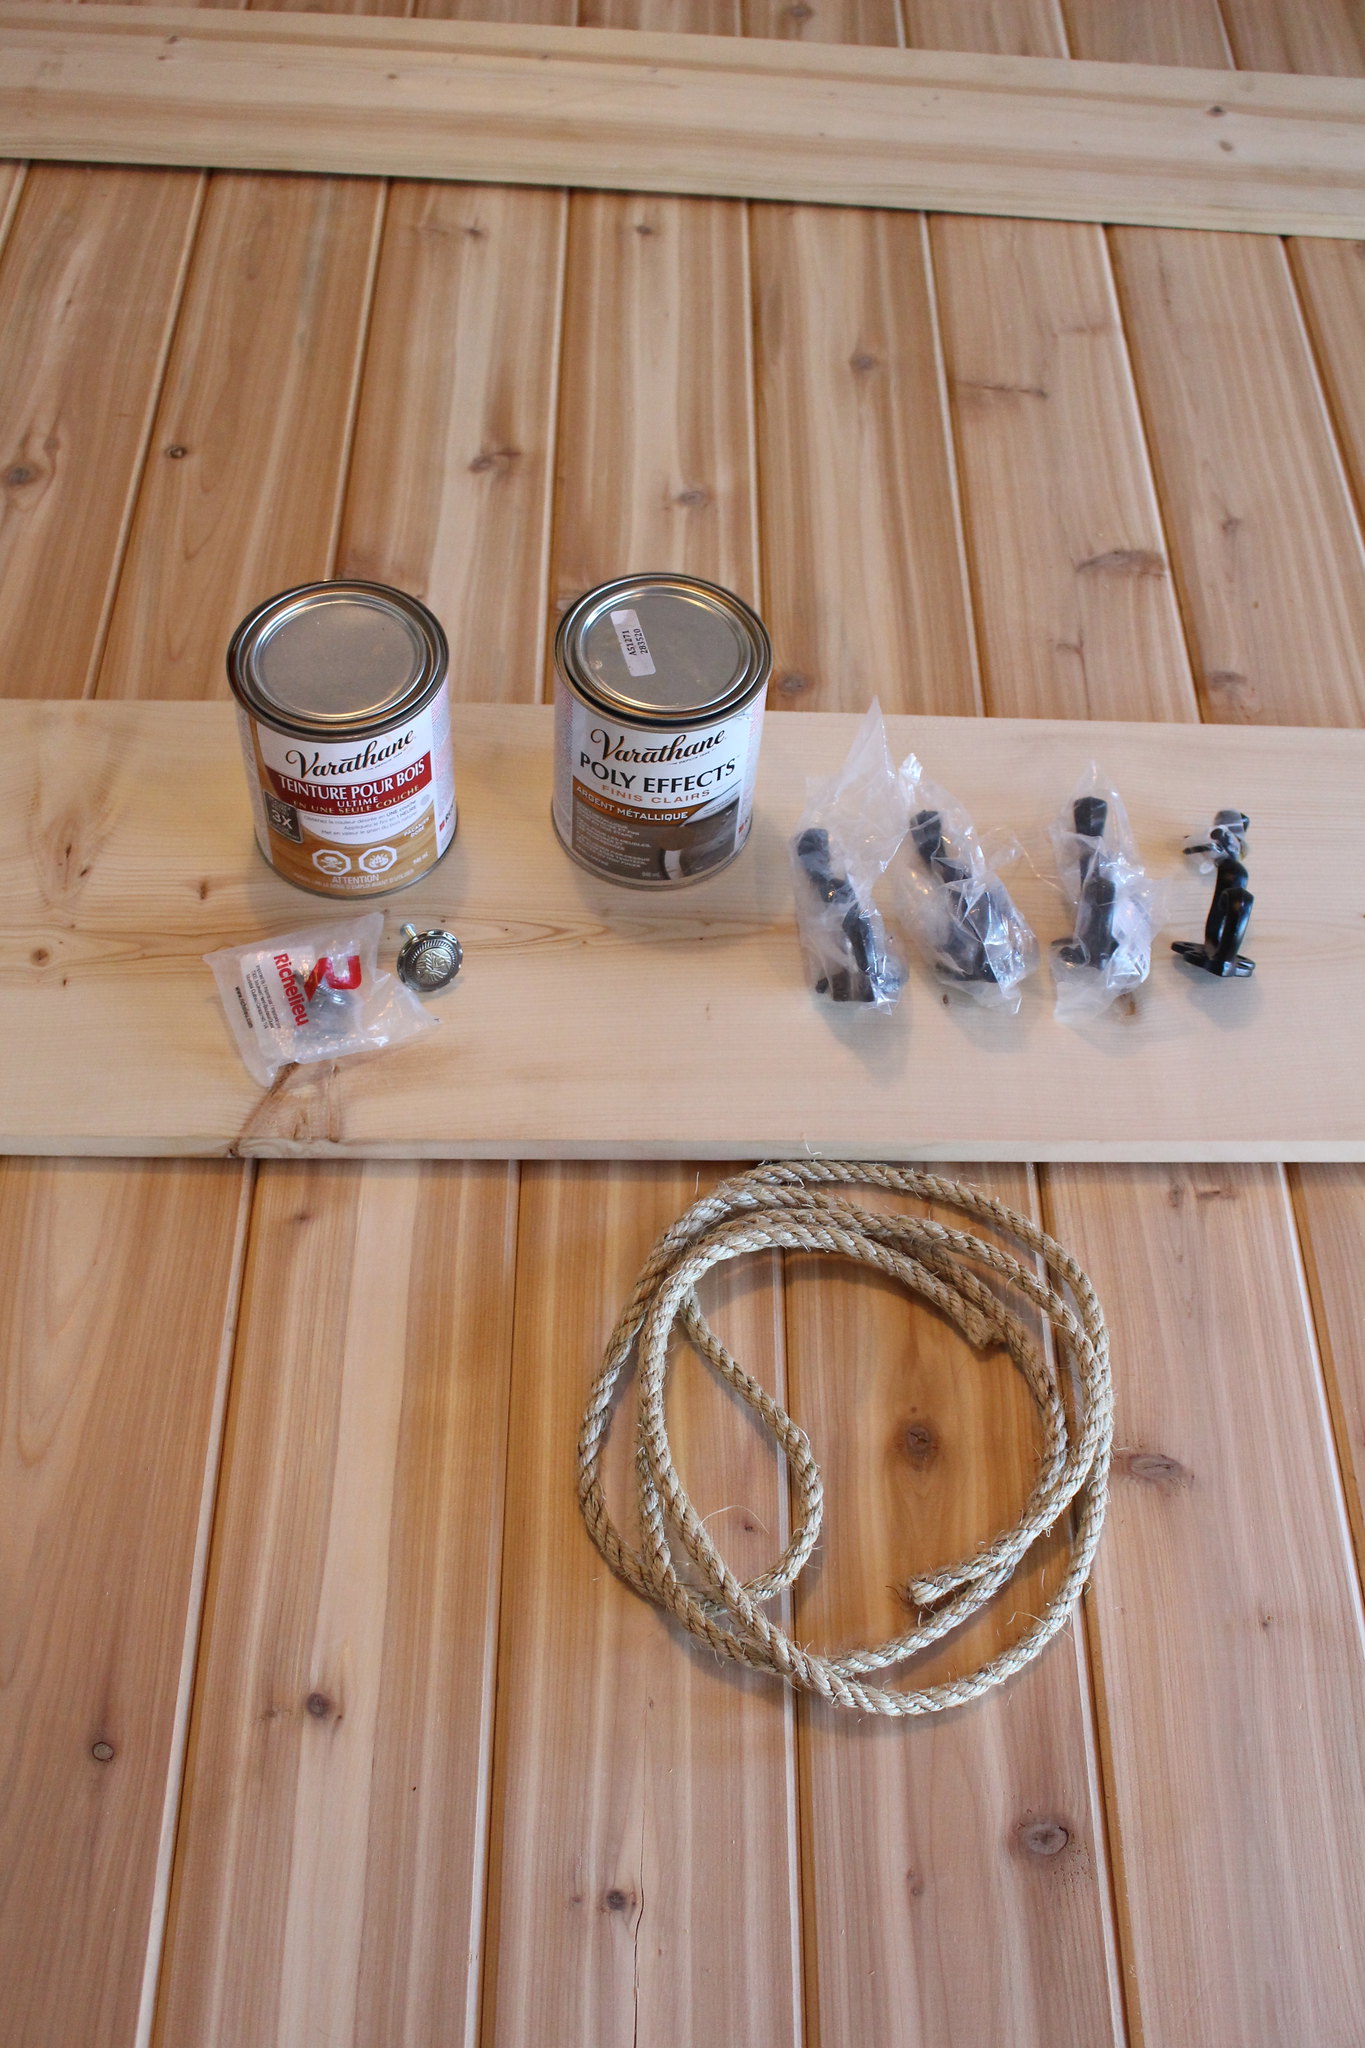
For my wood I picked tongue and groove cedar and some pine boards and the 3 mystery items that I picked to work with were the rope, hook and drawer pull (we bought extra hooks and an extra pull). As we worked we also ended up purchasing 6 brackets and an extra Varathane stain, in weather grey, to work with. 

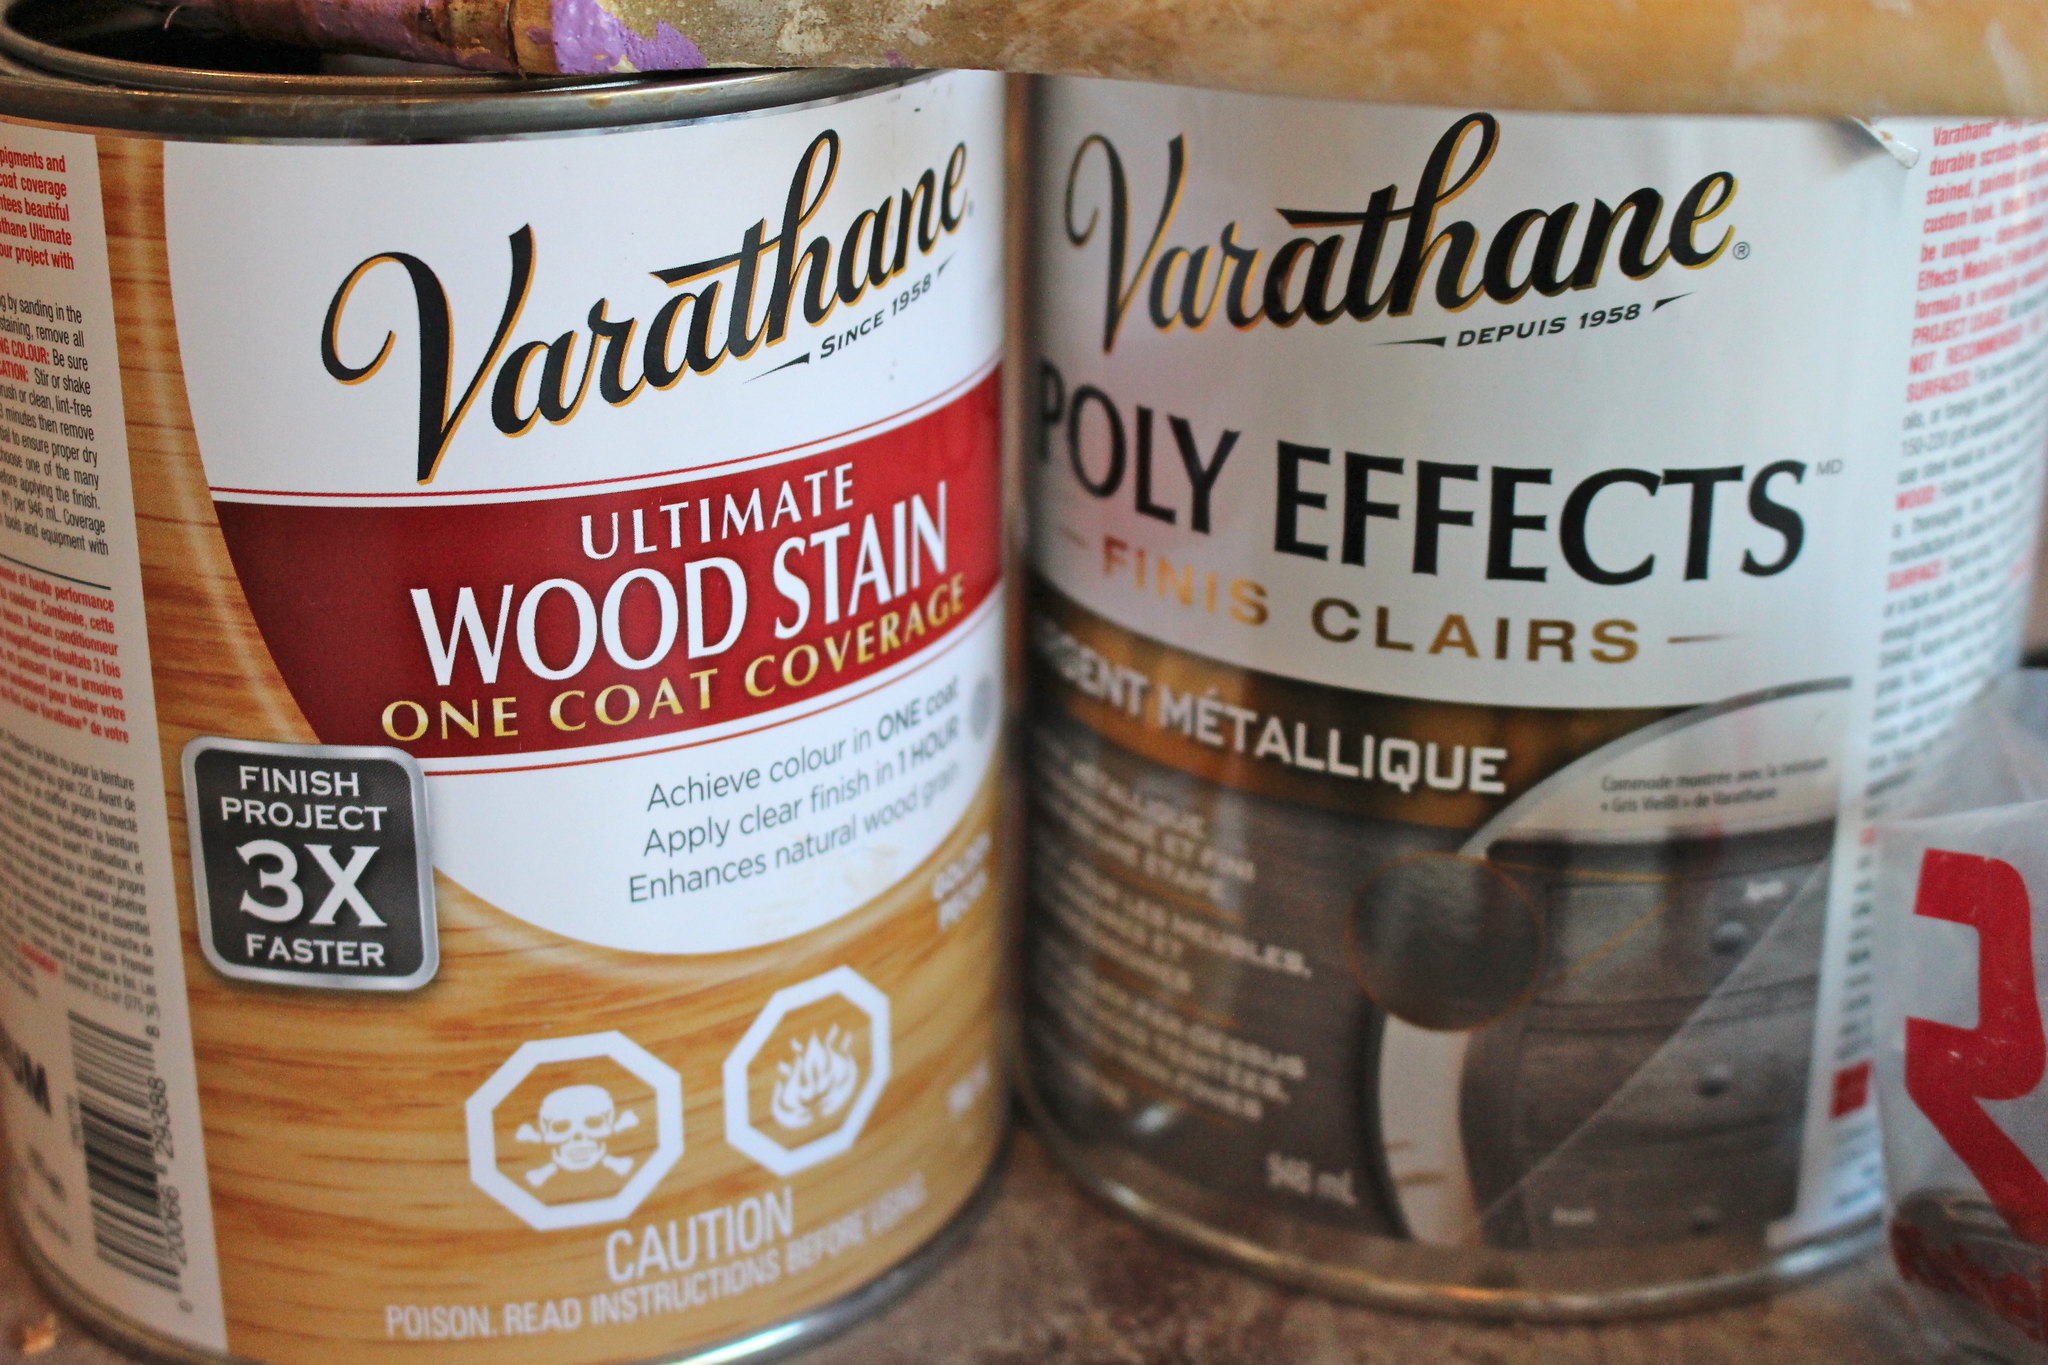
Rust-Oleum had provided me with the One Coat Coverage Ultimate Wood Stain in golden pecan. The stain covered wonderfully in one coat, and it was the perfect colour to put over my lovely cedar! It really brought out the beauty of the wood!

Love Your Wood

Love Your Wood

Love Your Wood

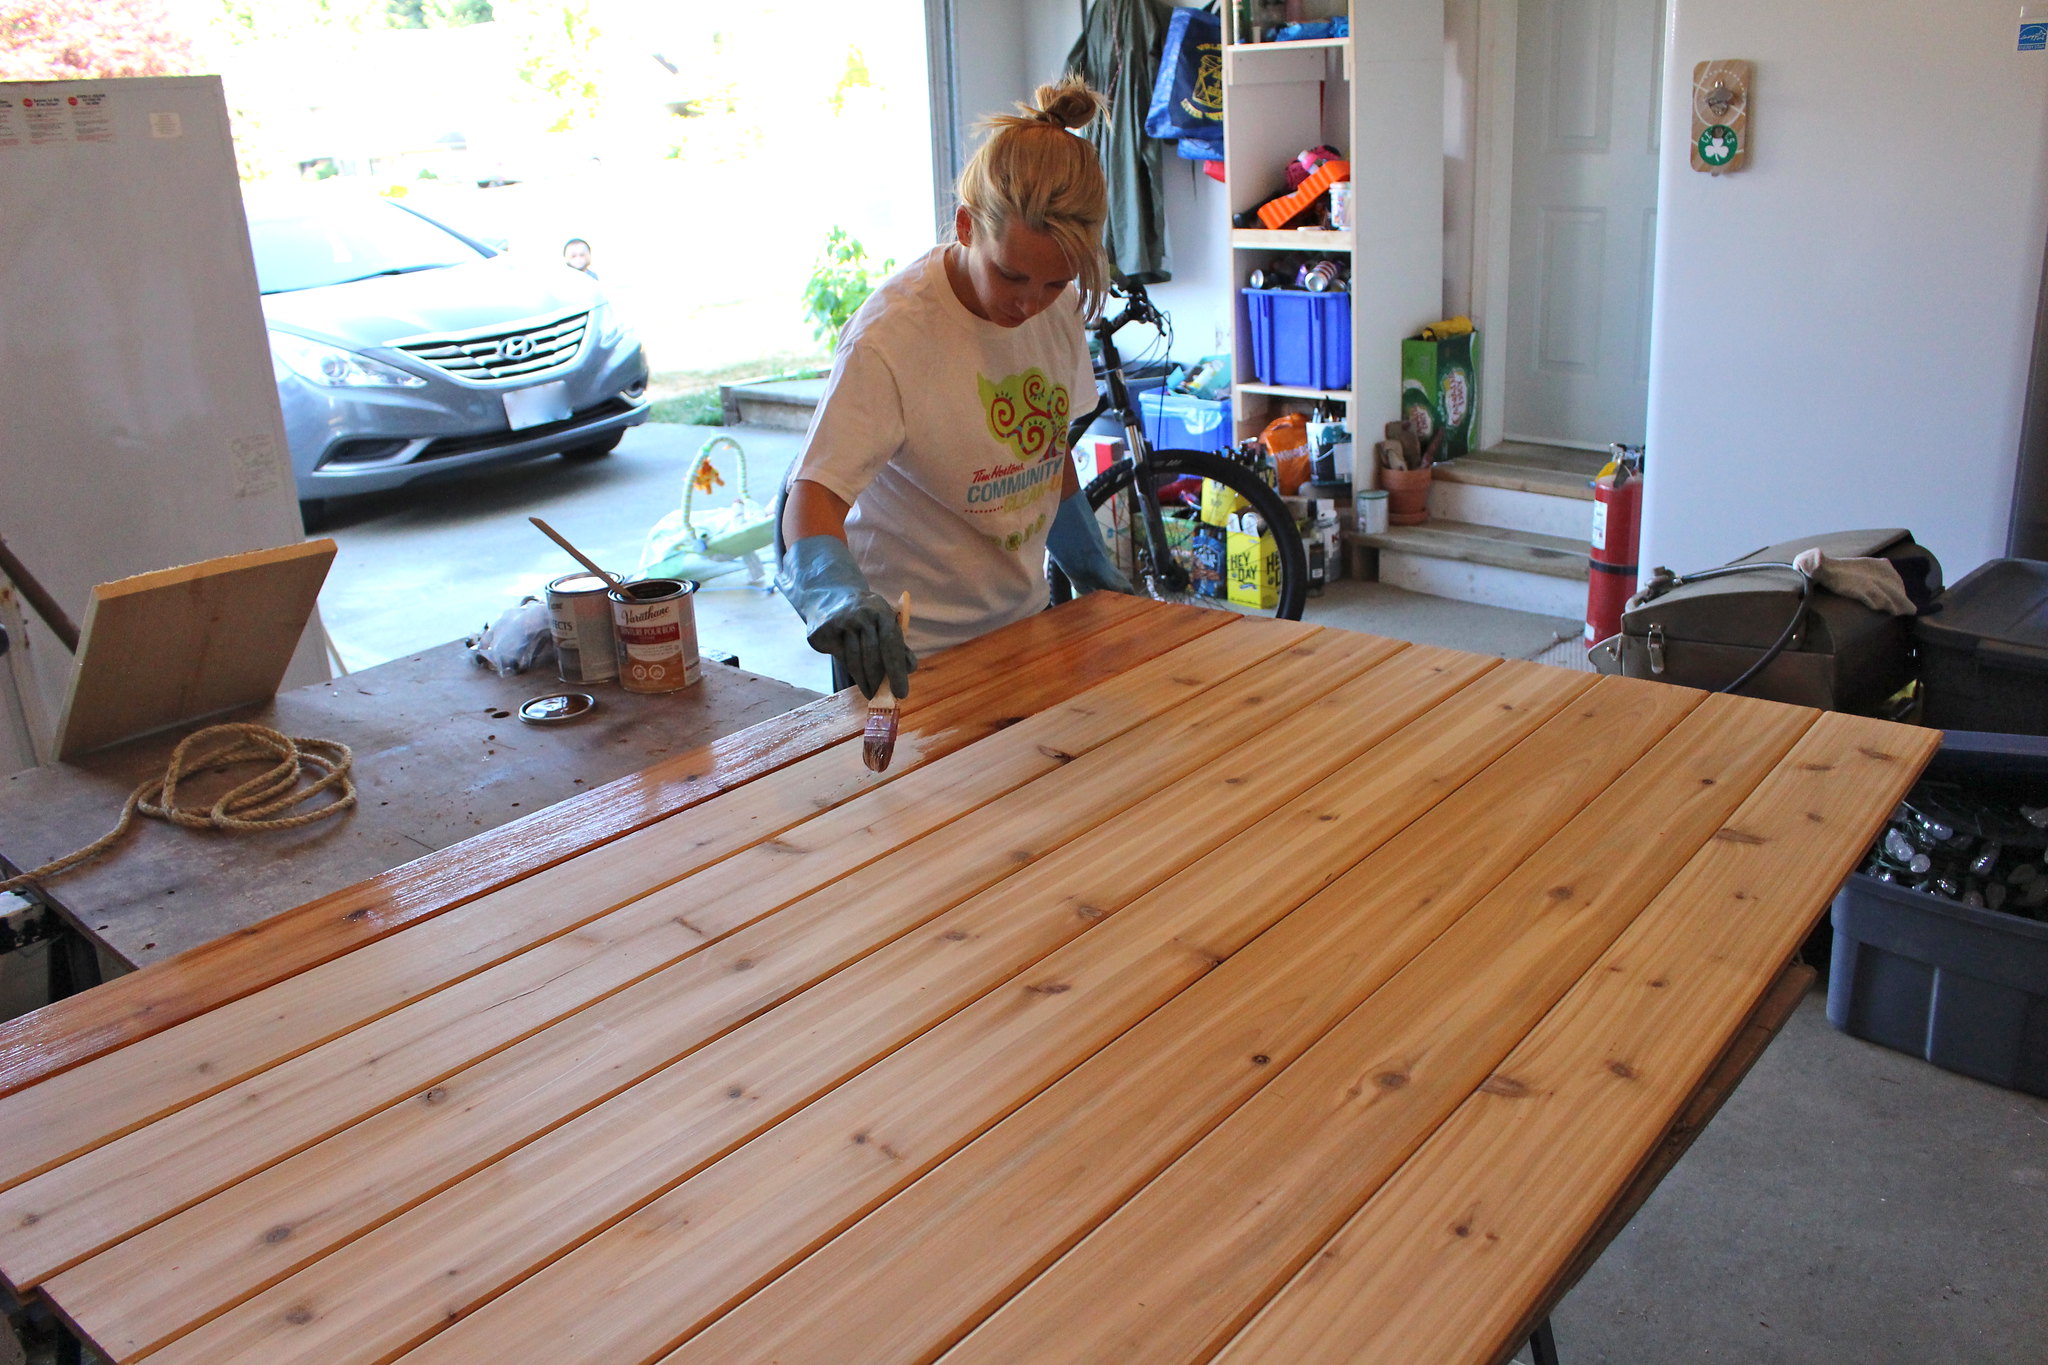
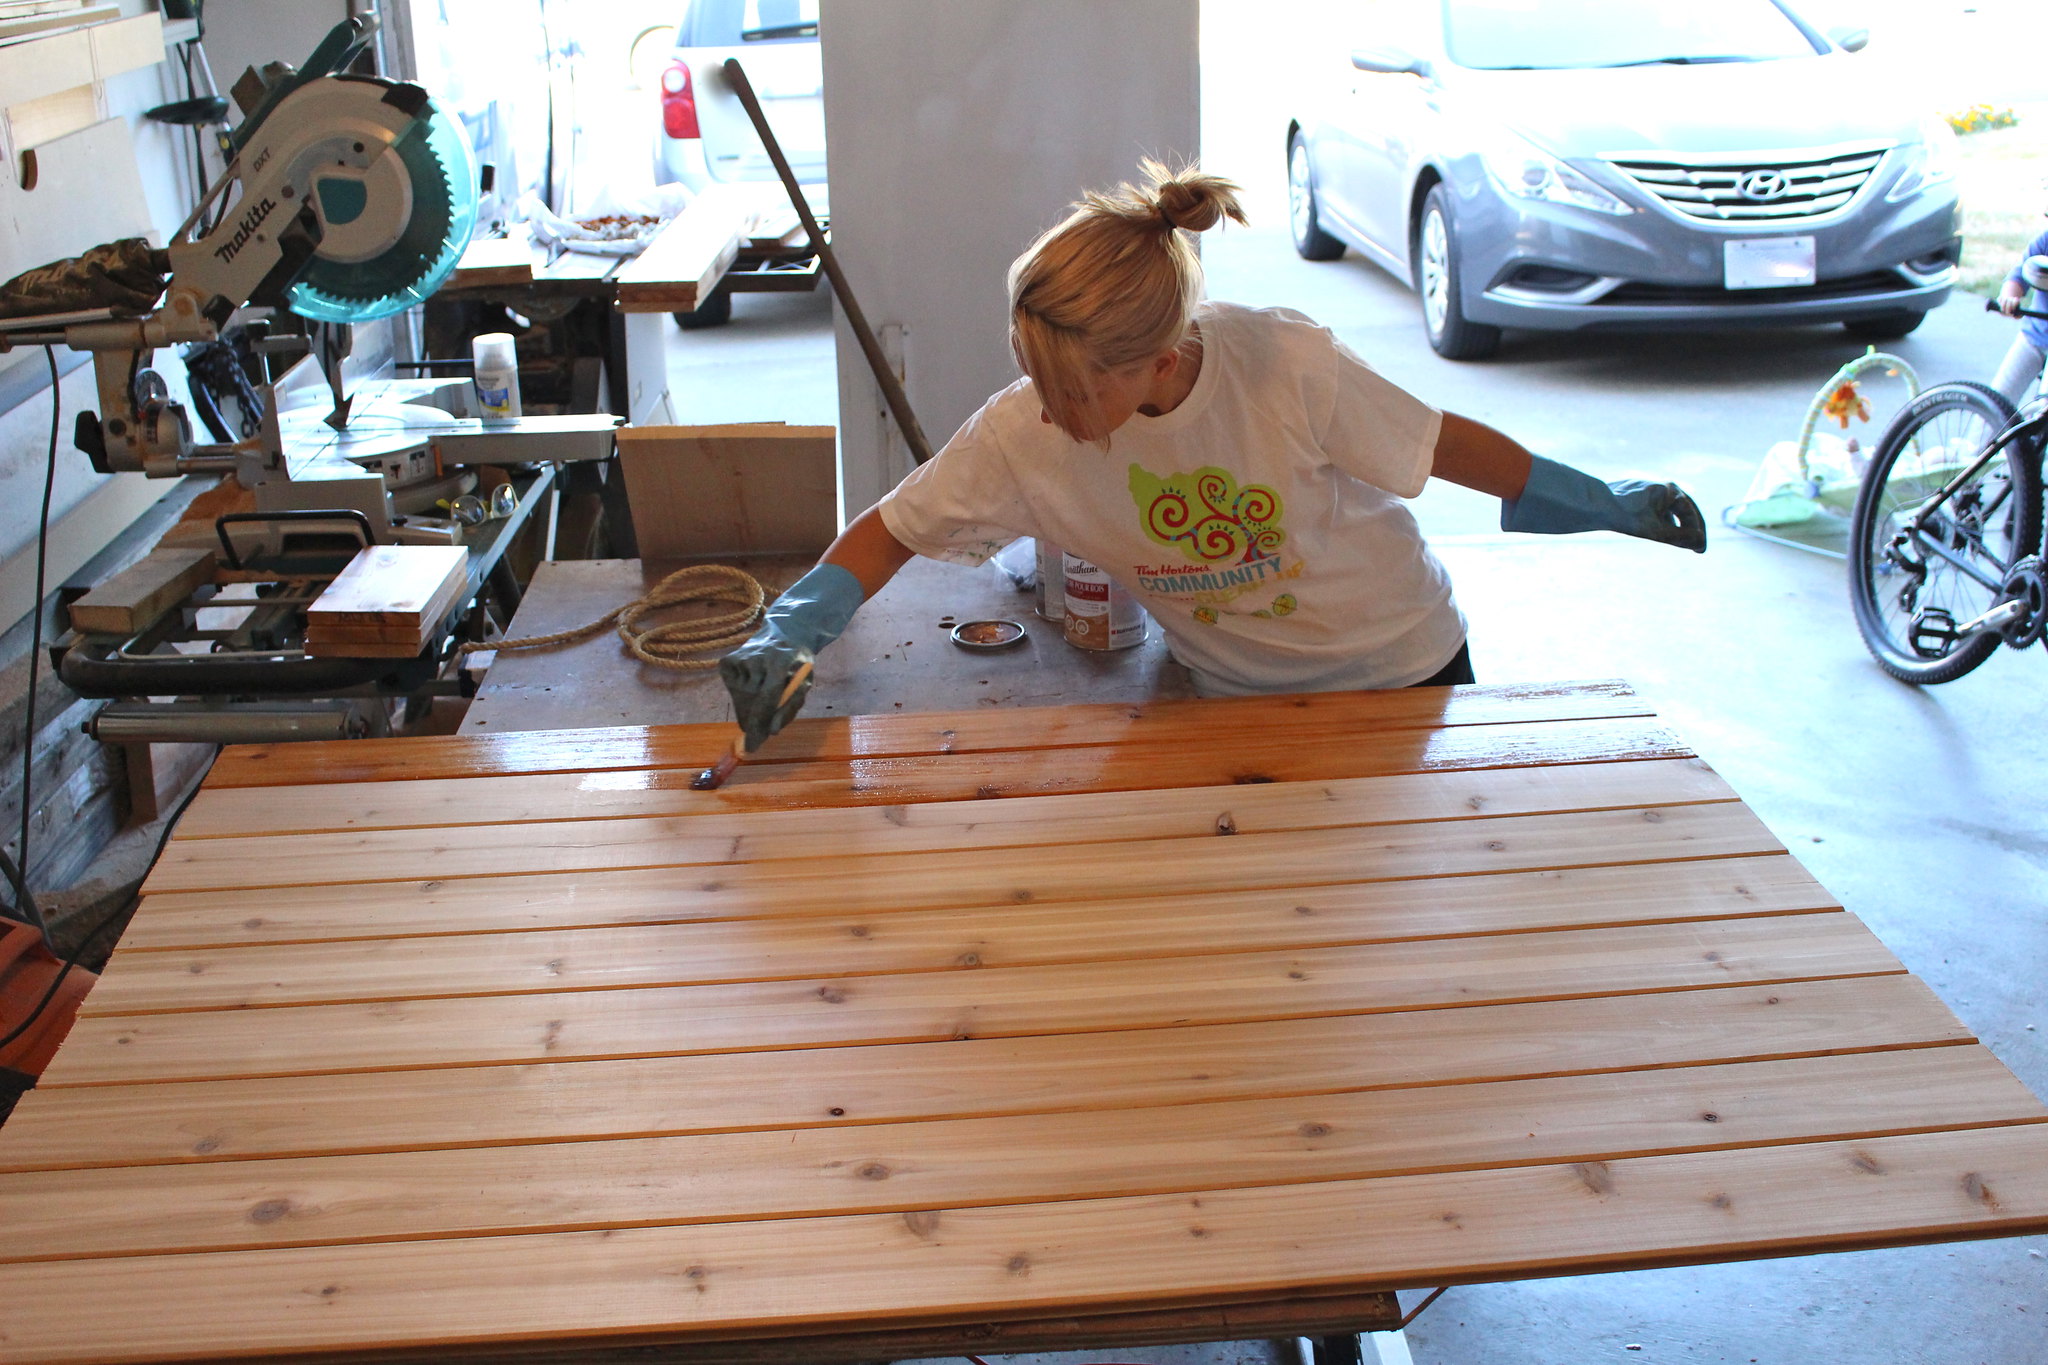
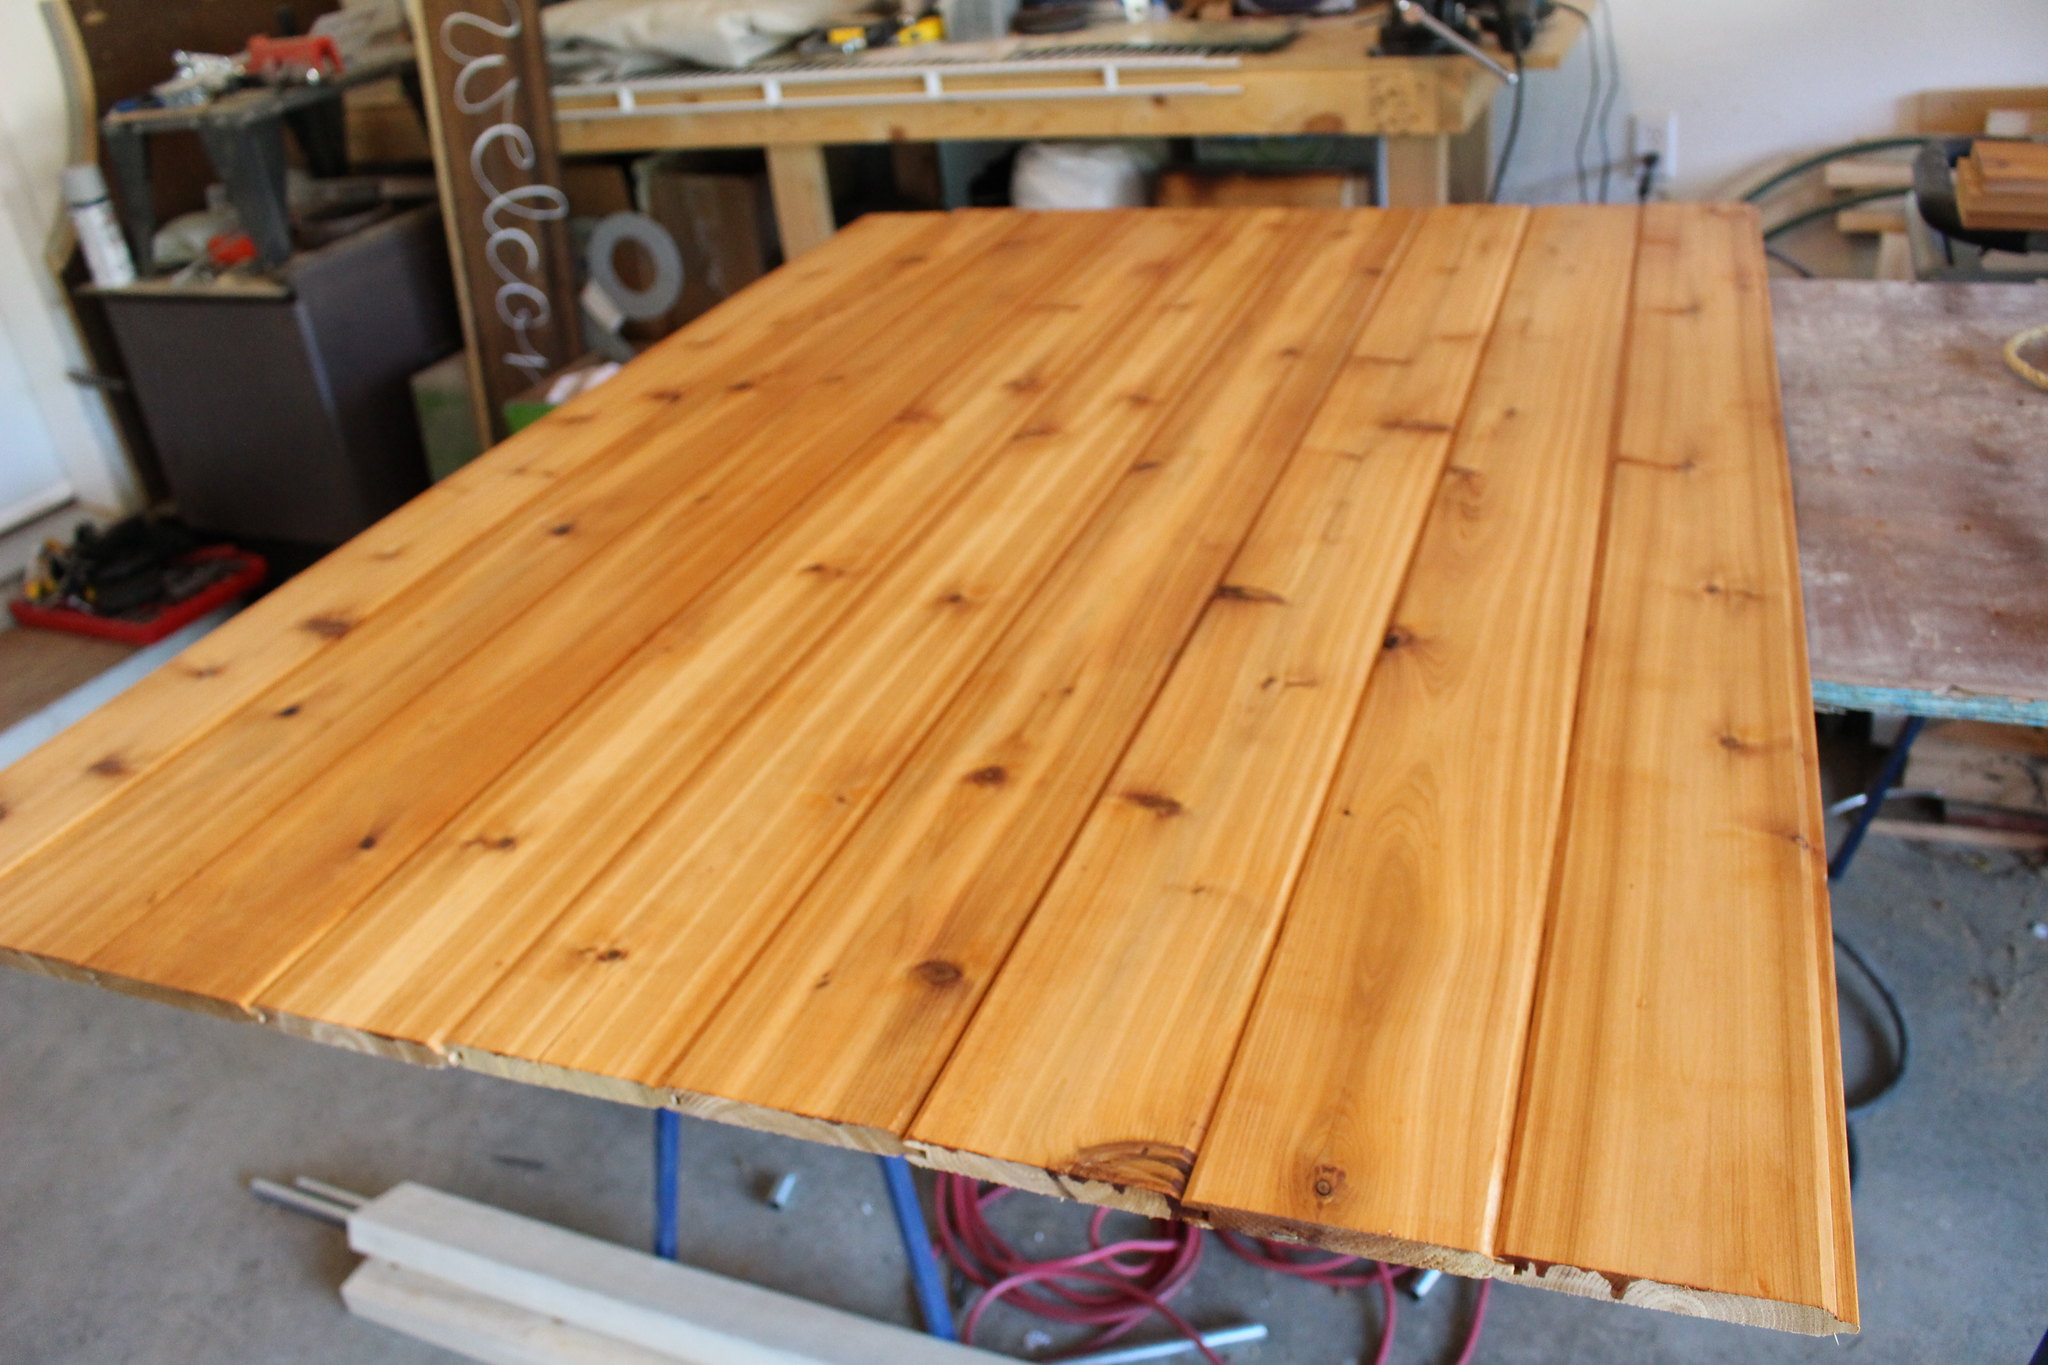
Hello beautiful golden cedar! It was the colour of the stain that led me in the direction of this wood, as I knew that would pair nicely. Sure enough, we had a beautiful result after just one coat of stain.

Love Your Wood

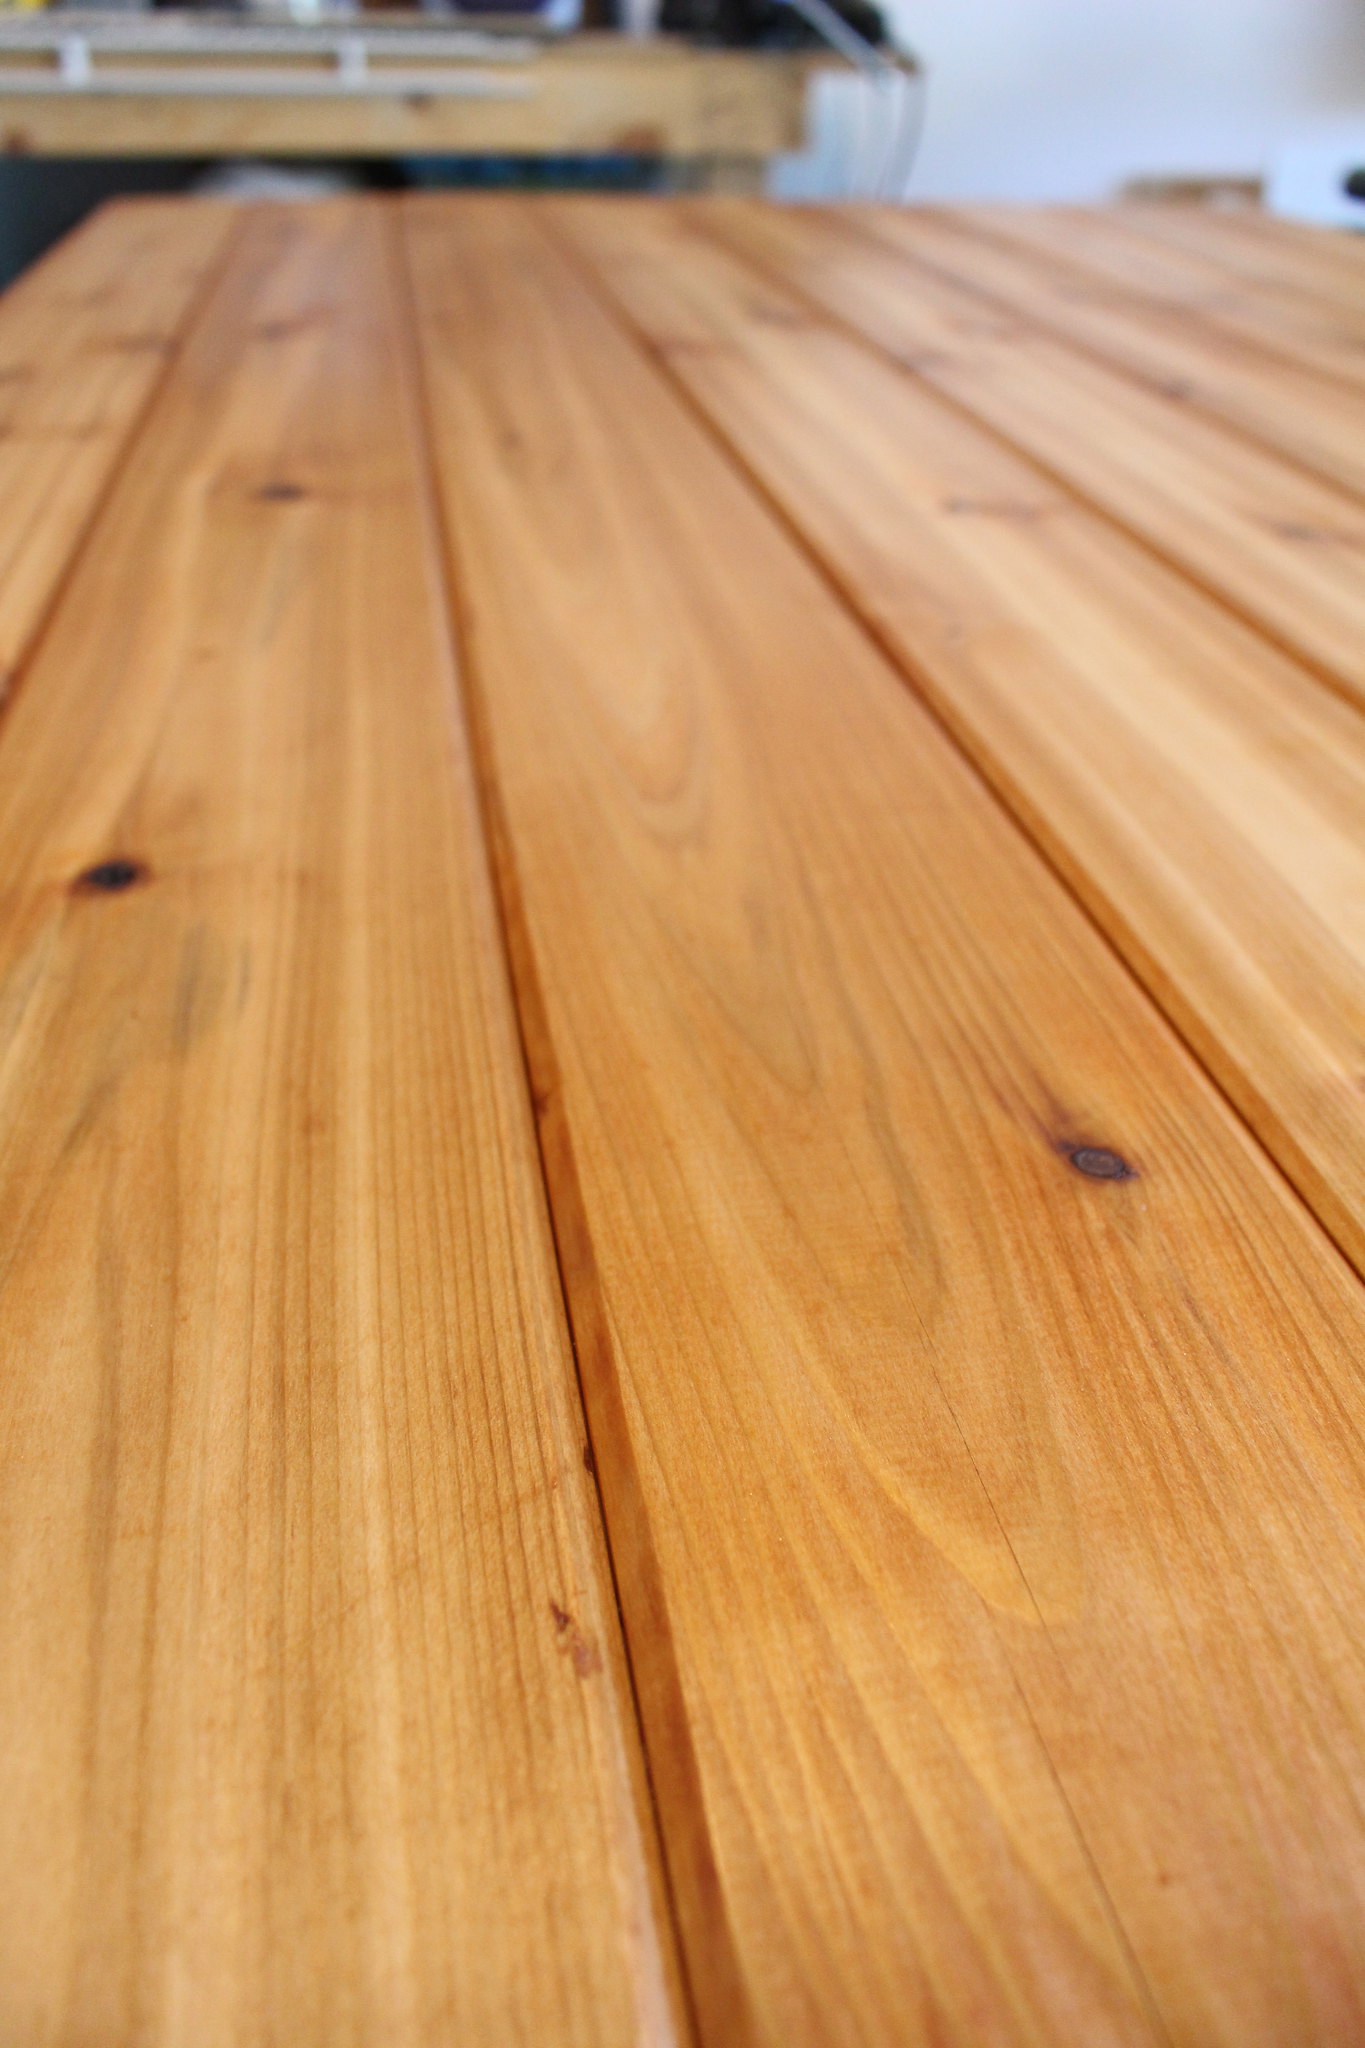
To be completely honest, I was a tad nervous about the clear coat they sent. It was metallic accent in silver and I wasn't too sure what to expect. I ended up being pleasantly surprised, seeing that the clear coat just added a really beautiful shimmer to both of the stains I worked with. I just went with the recommended minimum of two coats, and it was perfect. I'm sure if you added another coat or two, it would bring a much more metallic finish to the piece. I could see it working great on a pink dresser in a little girl's room - would give it a great shimmer!

Moving on, with everything stained and protected, it was time to get into building. I was excited to get involved since B is usually the one doing all of the building. The best part, this wasn't just building something, we were also transforming a small corner of our home! The wall right by the front door to be exact...

Love Your WoodLove Your Wood

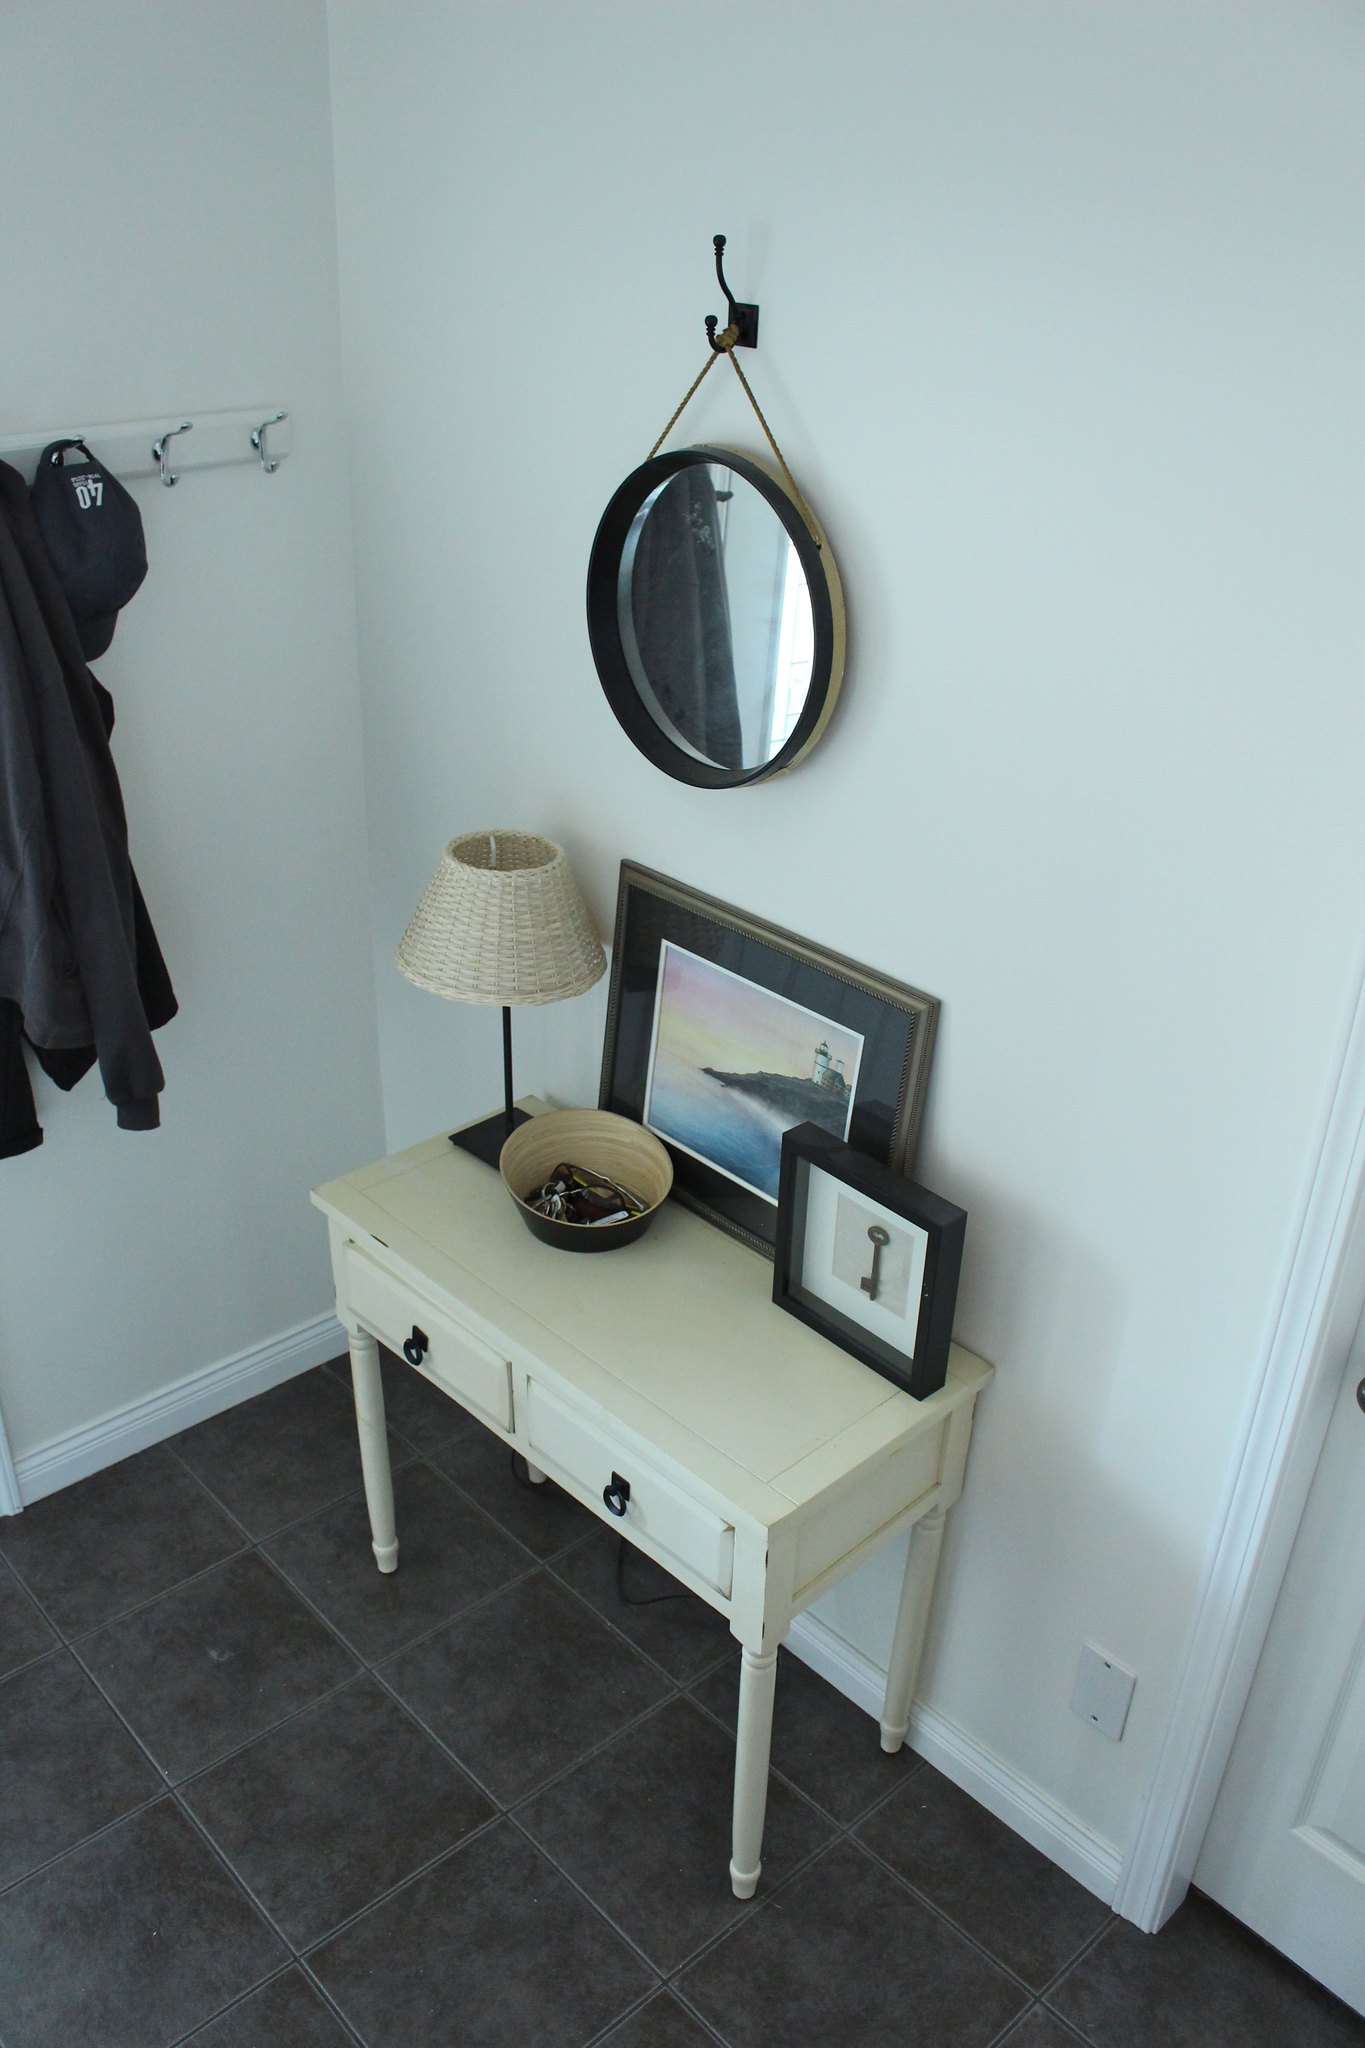
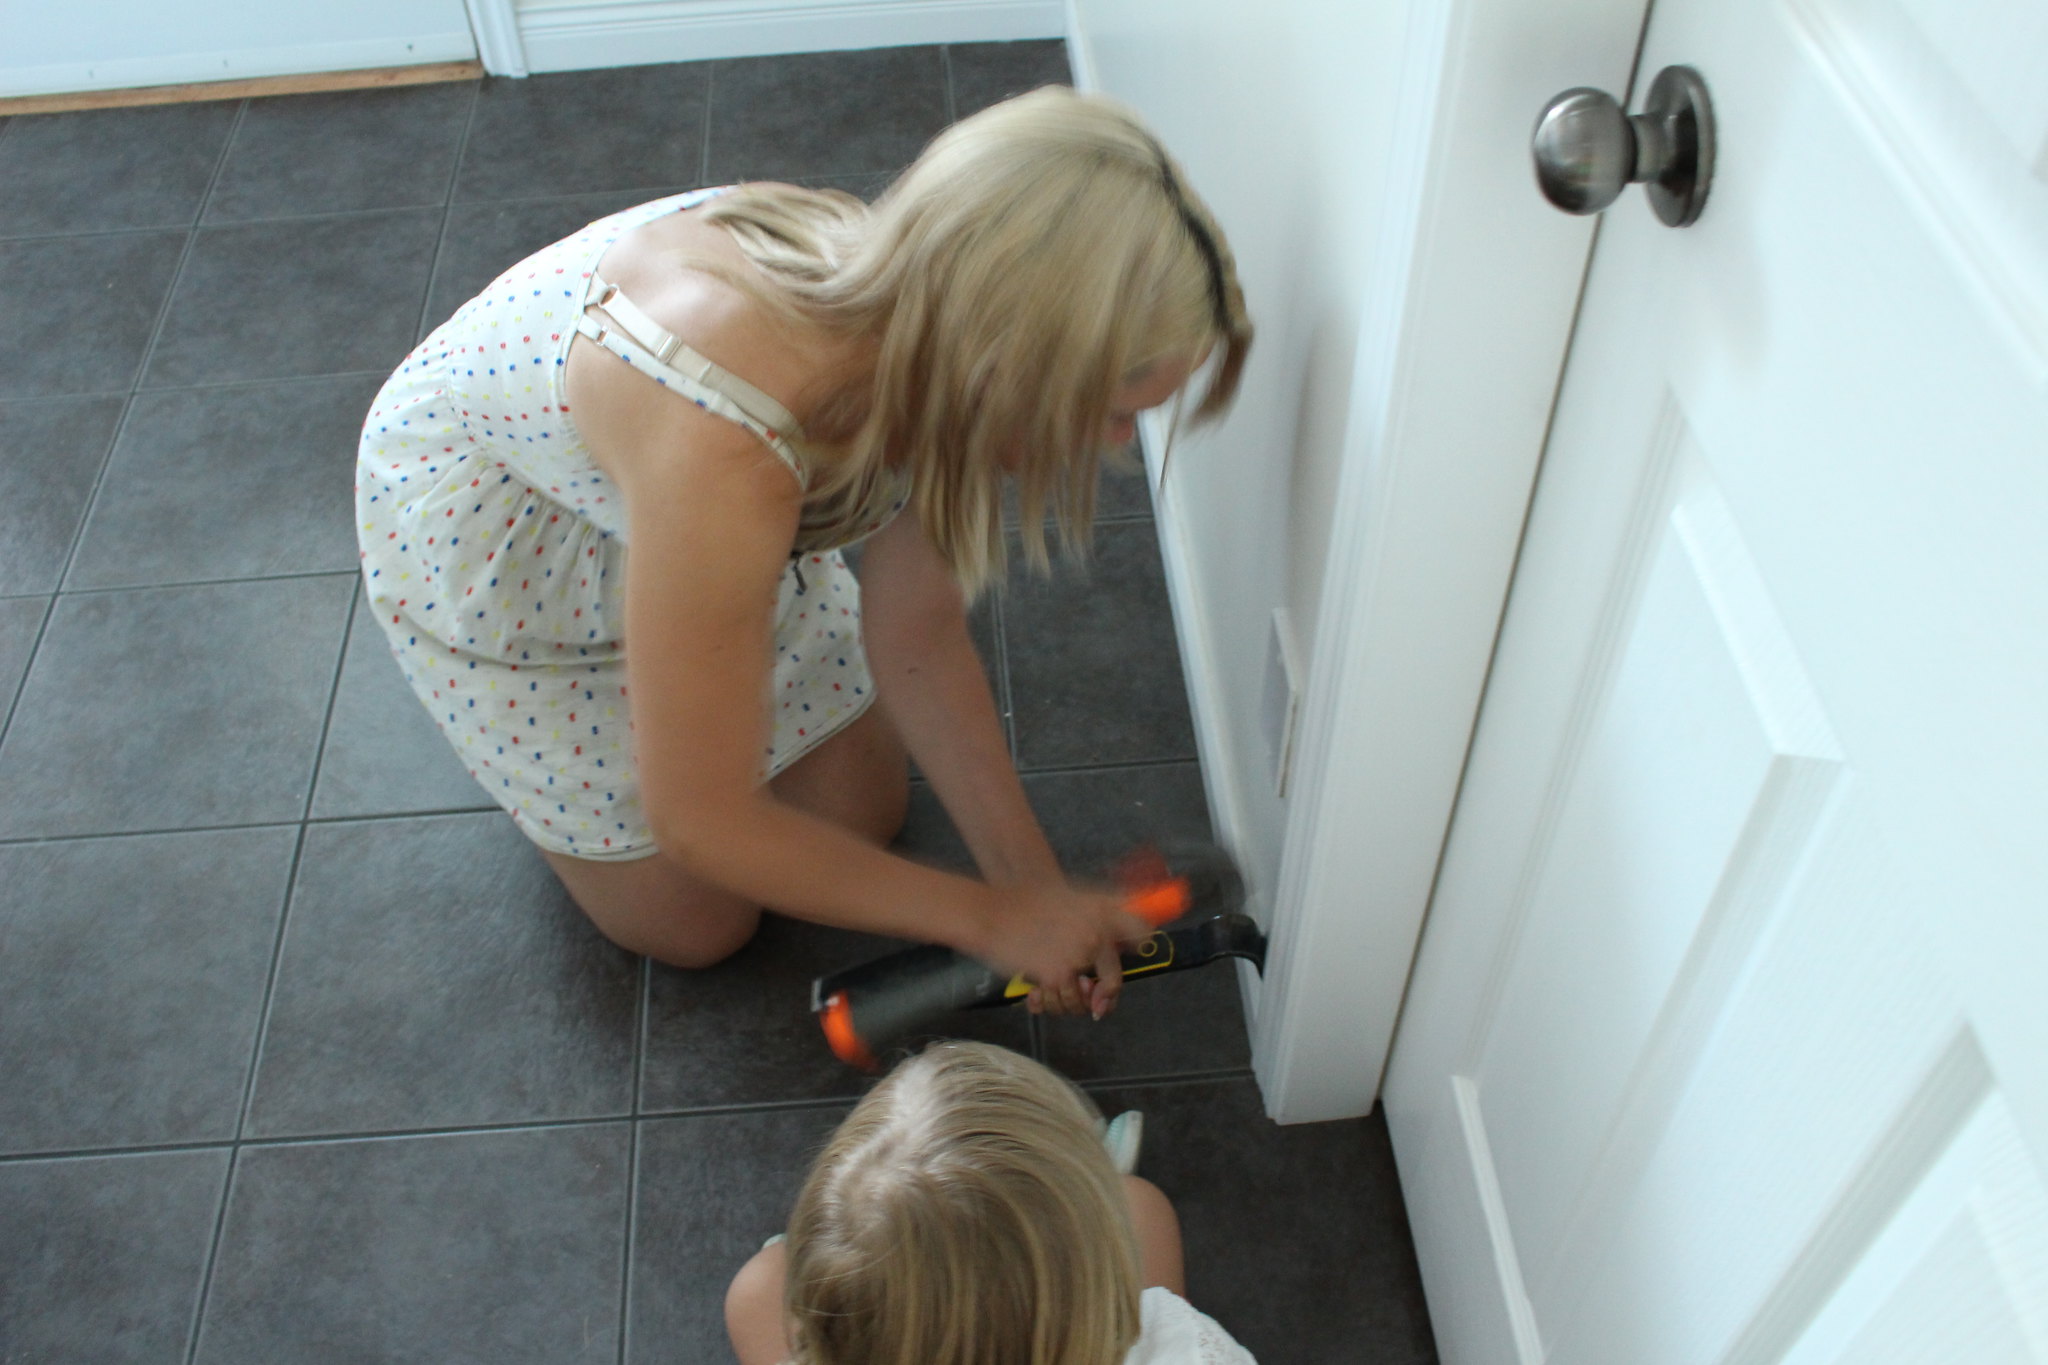
This too small table operated as a dumping ground for items when we walked in the door. When I started brainstorming for this challenge, a new functional front entrance space jumped out at me right away! It was time for ME to tackle it. We took everything away and I started by removing the baseboard (as you can tell, I was dressed appropriately for this part of the project).

Love Your Wood

Then things had to be nailed. I love using our nail gun attached to the compressor - makes me feel tough and useful. Unfortunately, no photos of this nail gun toting Mama. B actually attached some large pieces of scrap wood to the studs in the wall to make sure that when I nailed my wood in place it would be securely anchored to the wall.

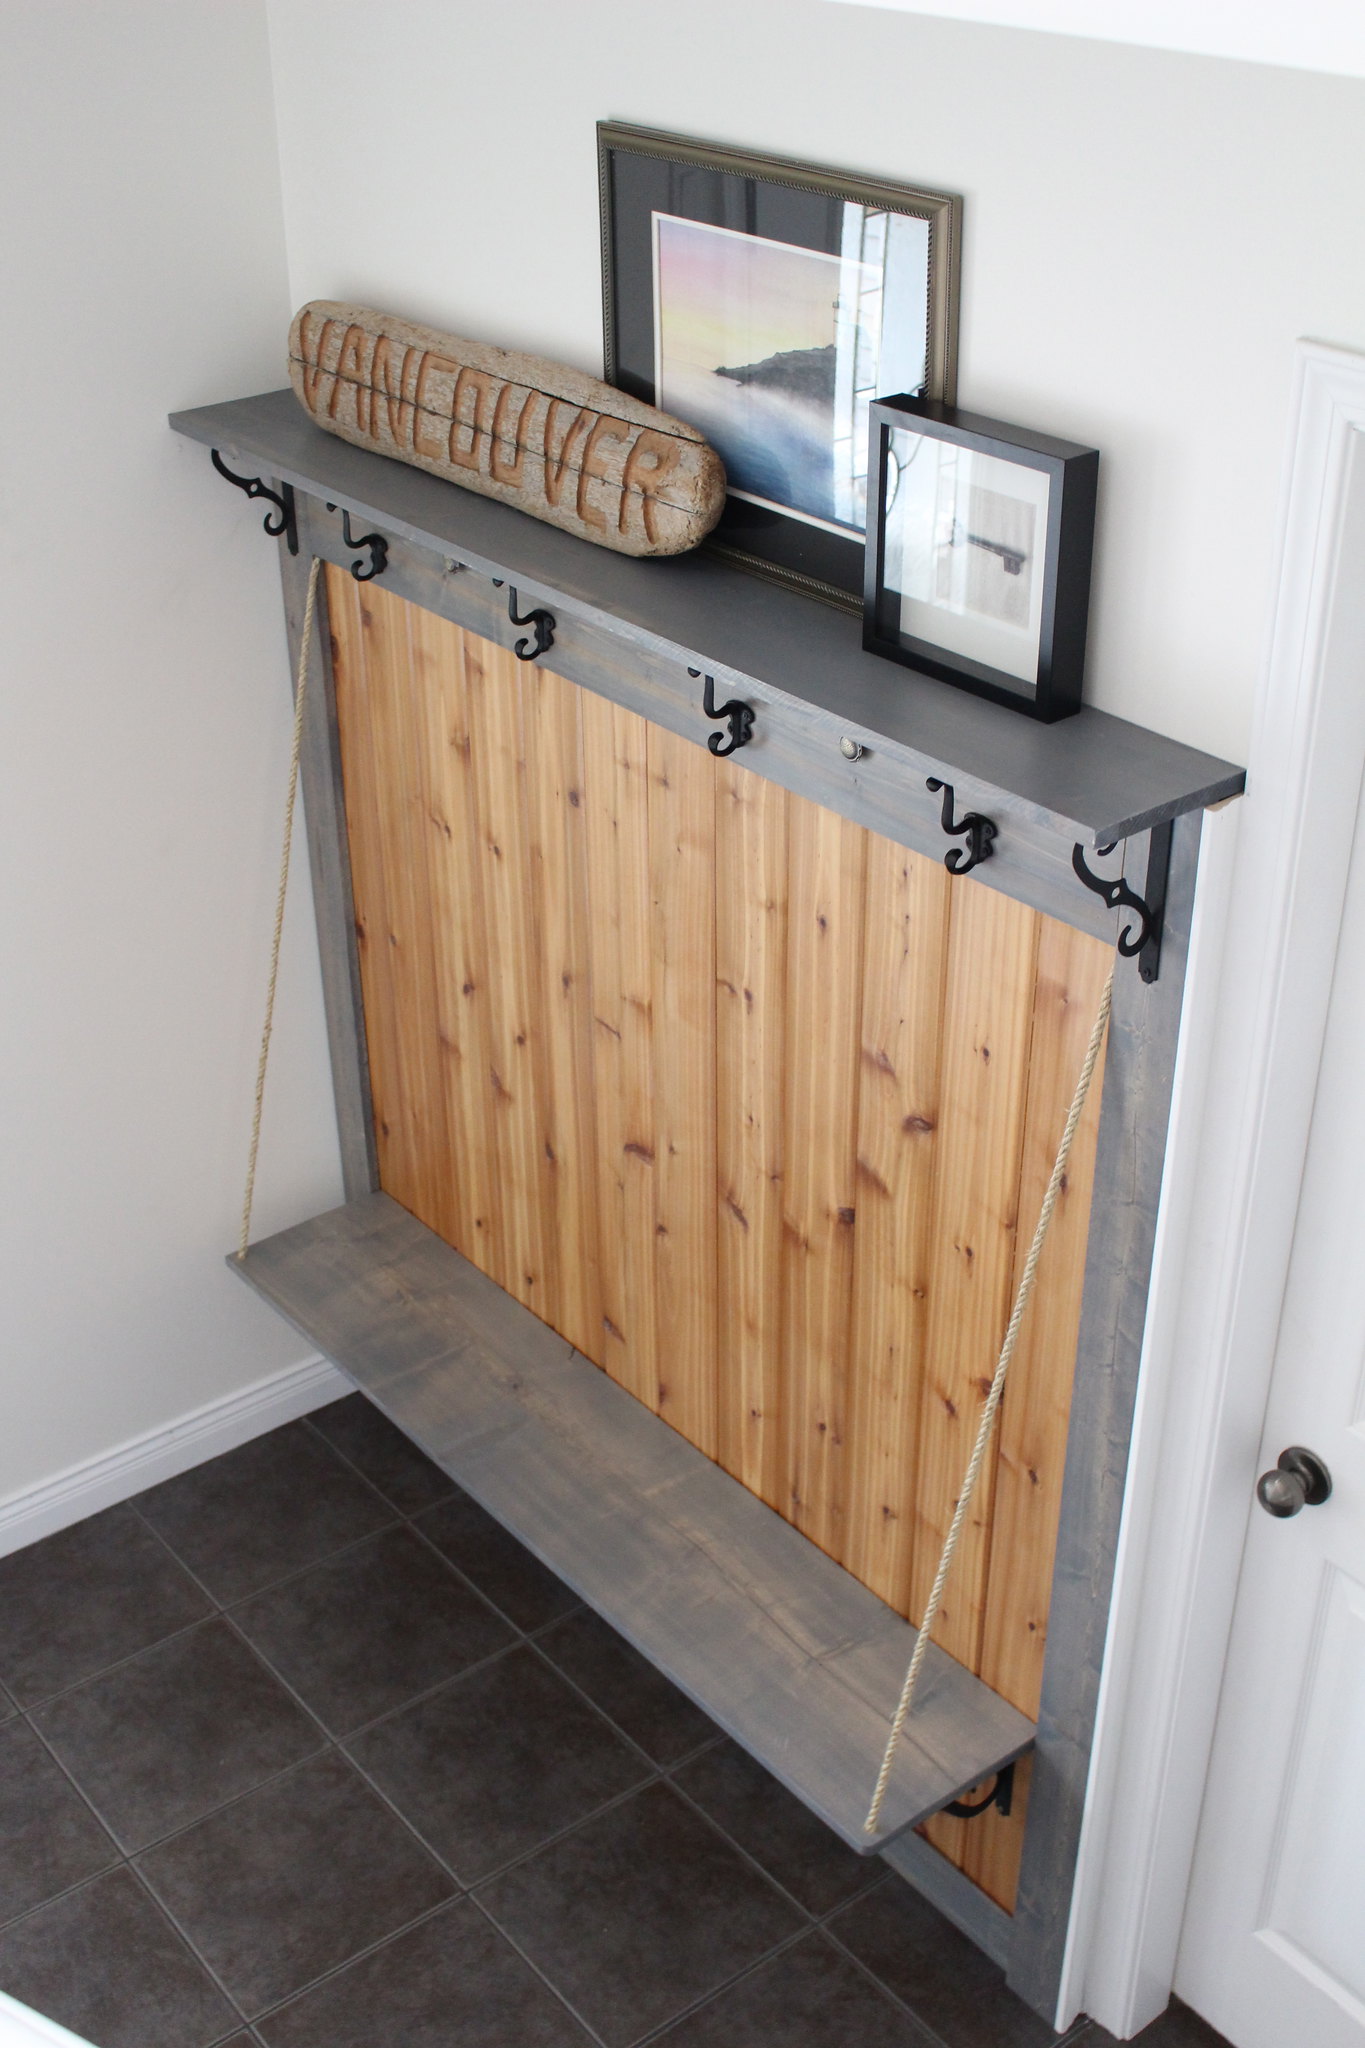
The cedar was nailed in place first, followed by the side trim and then the top trim board. The top shelf first got nailed into our trim boards to make sure it would stay put, then I drilled pilot holes for the decorative brackets and finally screwed them in place. Our bench is secured in place using larger brackets, so again I drilled pilot holes and then secured them in place with screws. 

Love Your Wood

Our hooks went up in a very similar fashion, after being measured. I drilled pilot holes, then screwed them in place by hand. It took a lot longer, but I knew if I used the cordless screwdriver that I would strip the screws, so by hand it was. Once I was done B did go back over them with the screwdriver to make sure they were nice and tight.

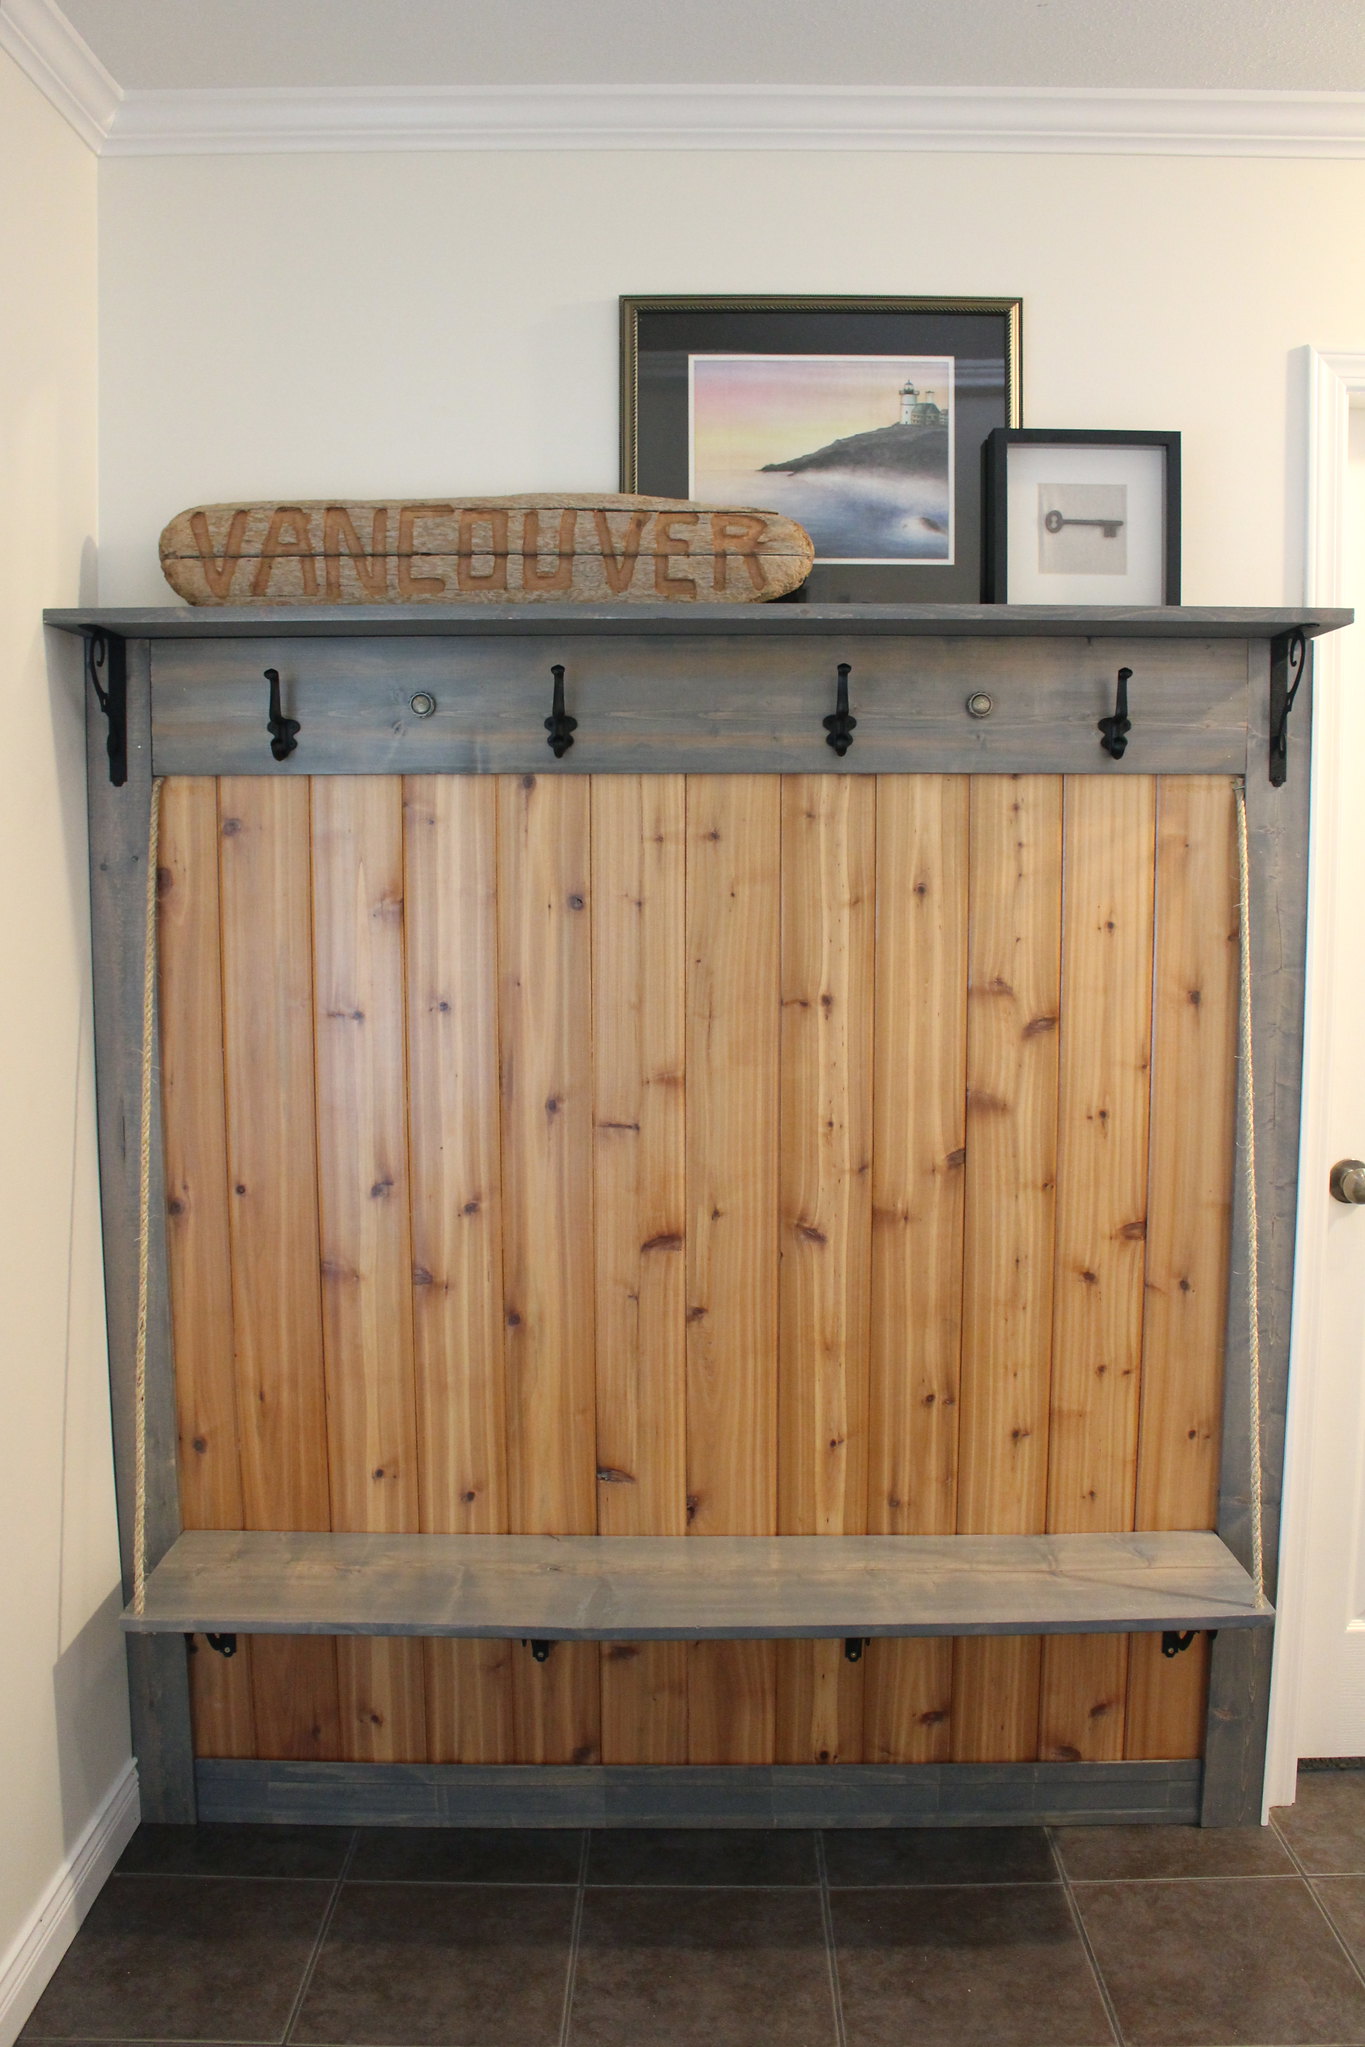
By this point in installation Nolan had, had enough so I let B take over for the  installation of the rope and drawer pulls. The rope is attached to the corner of our pine trim and cedar using u-nails that he nailed into place. He then drilled a hole in the corner of the bench which he thread the rope through and nailed it into place as well. This was my favourite part of the project, I think the rope adds something to the bench, so it doesn't just look like it's floating off of the wall. The knobs I decided to use more decoratively (my initial idea was to have drawers under the bench, but that was too time consuming and complicated). B drilled holes only slightly larger than the back of the pulls and then pushed them into place.  

Love Your Wood

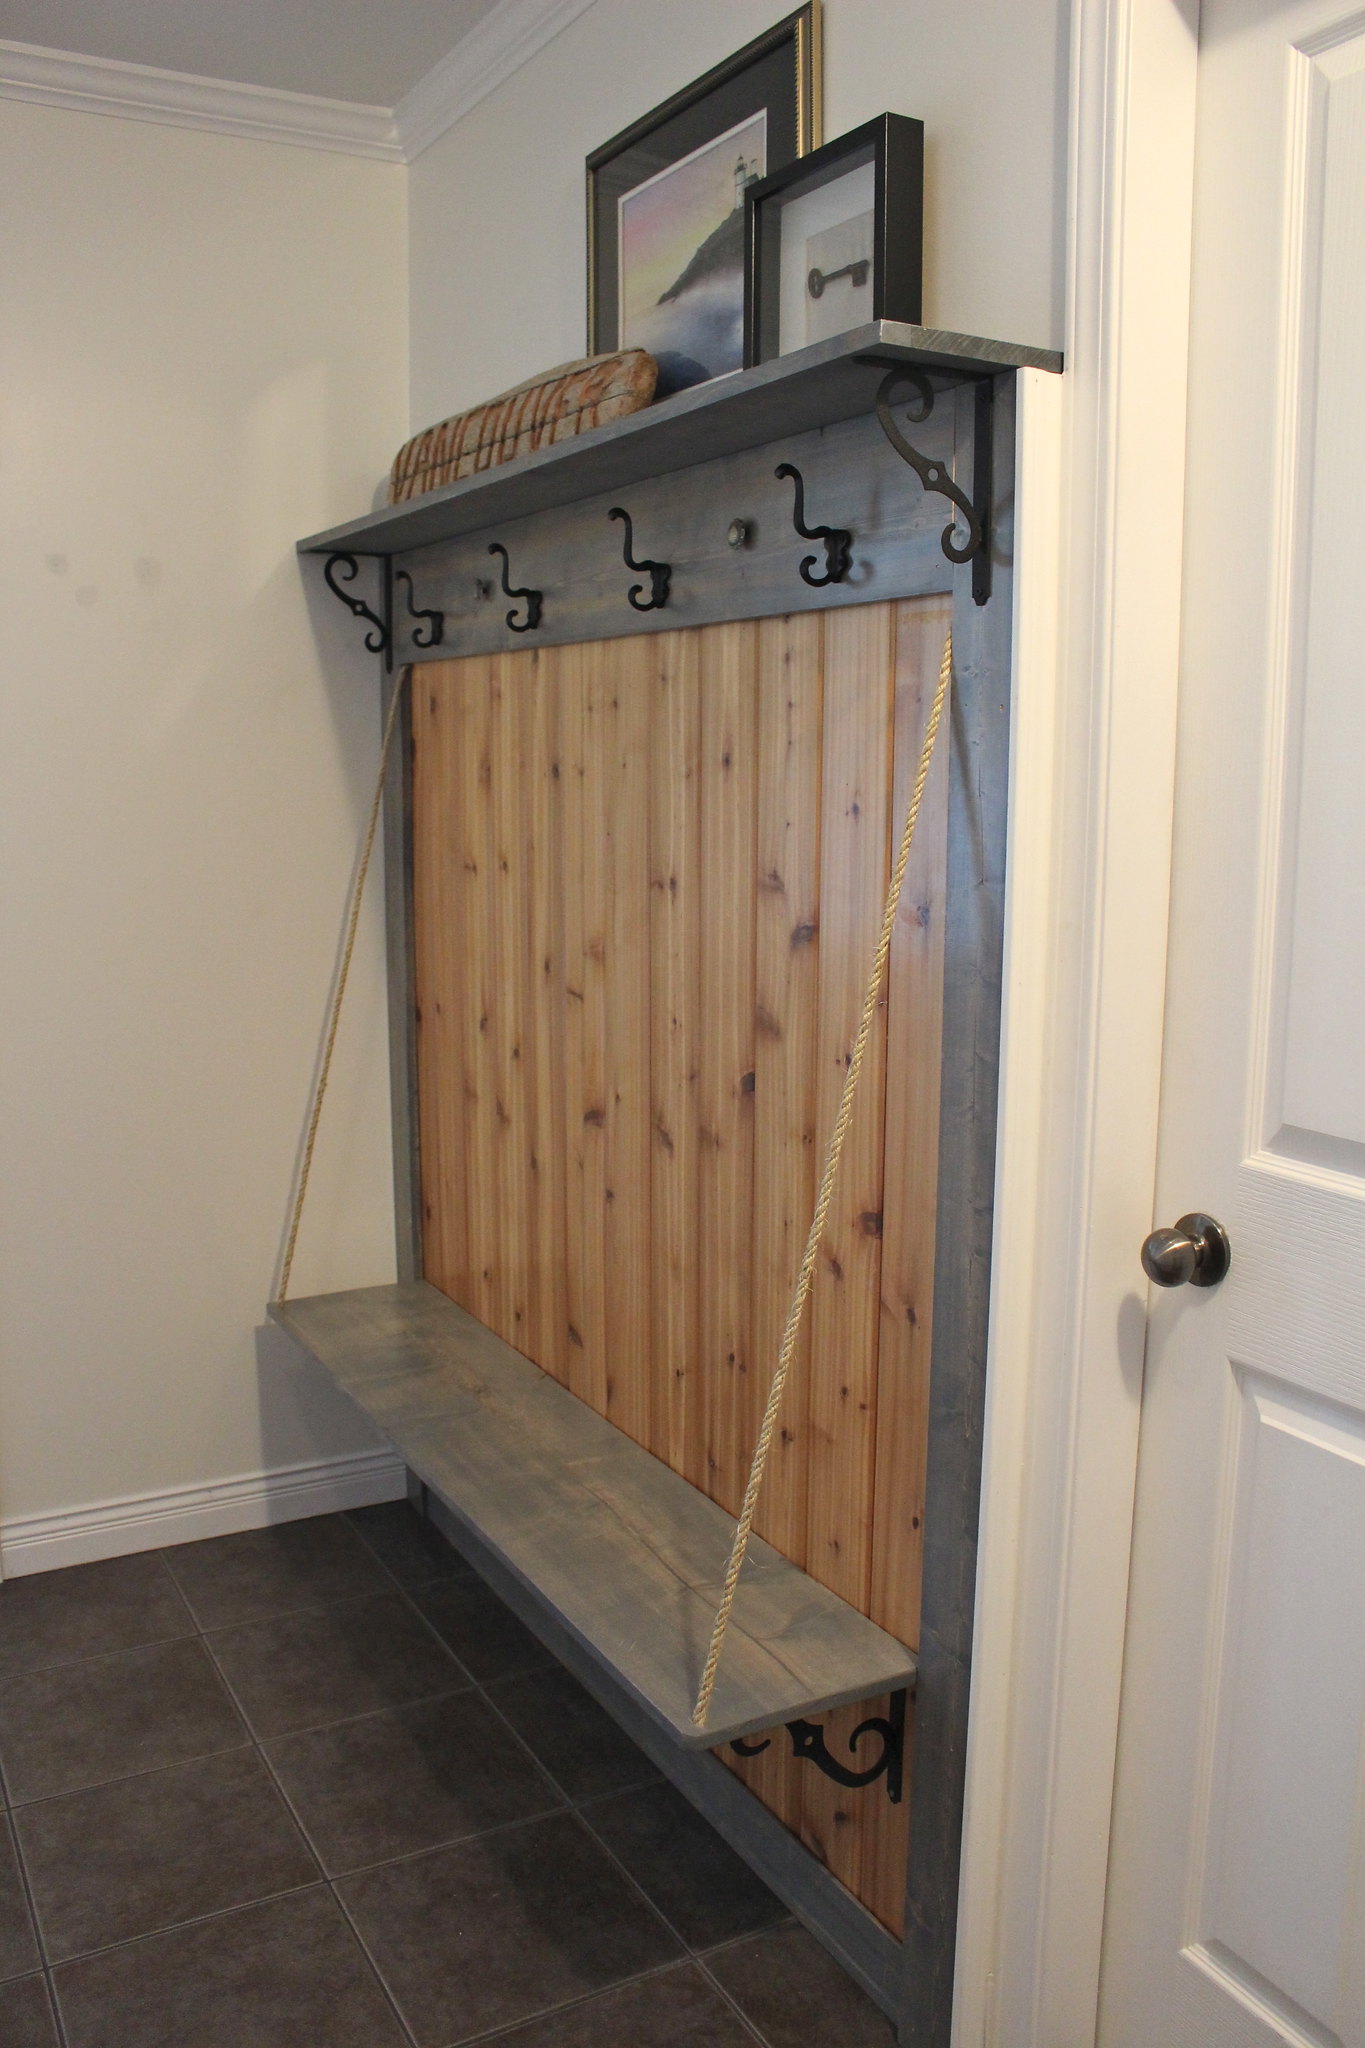
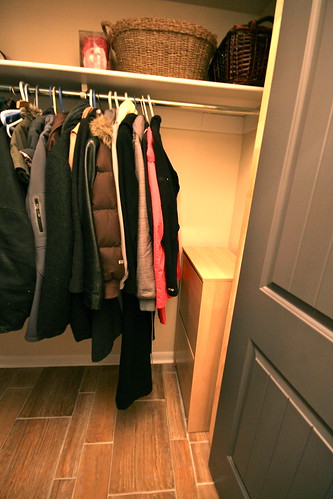
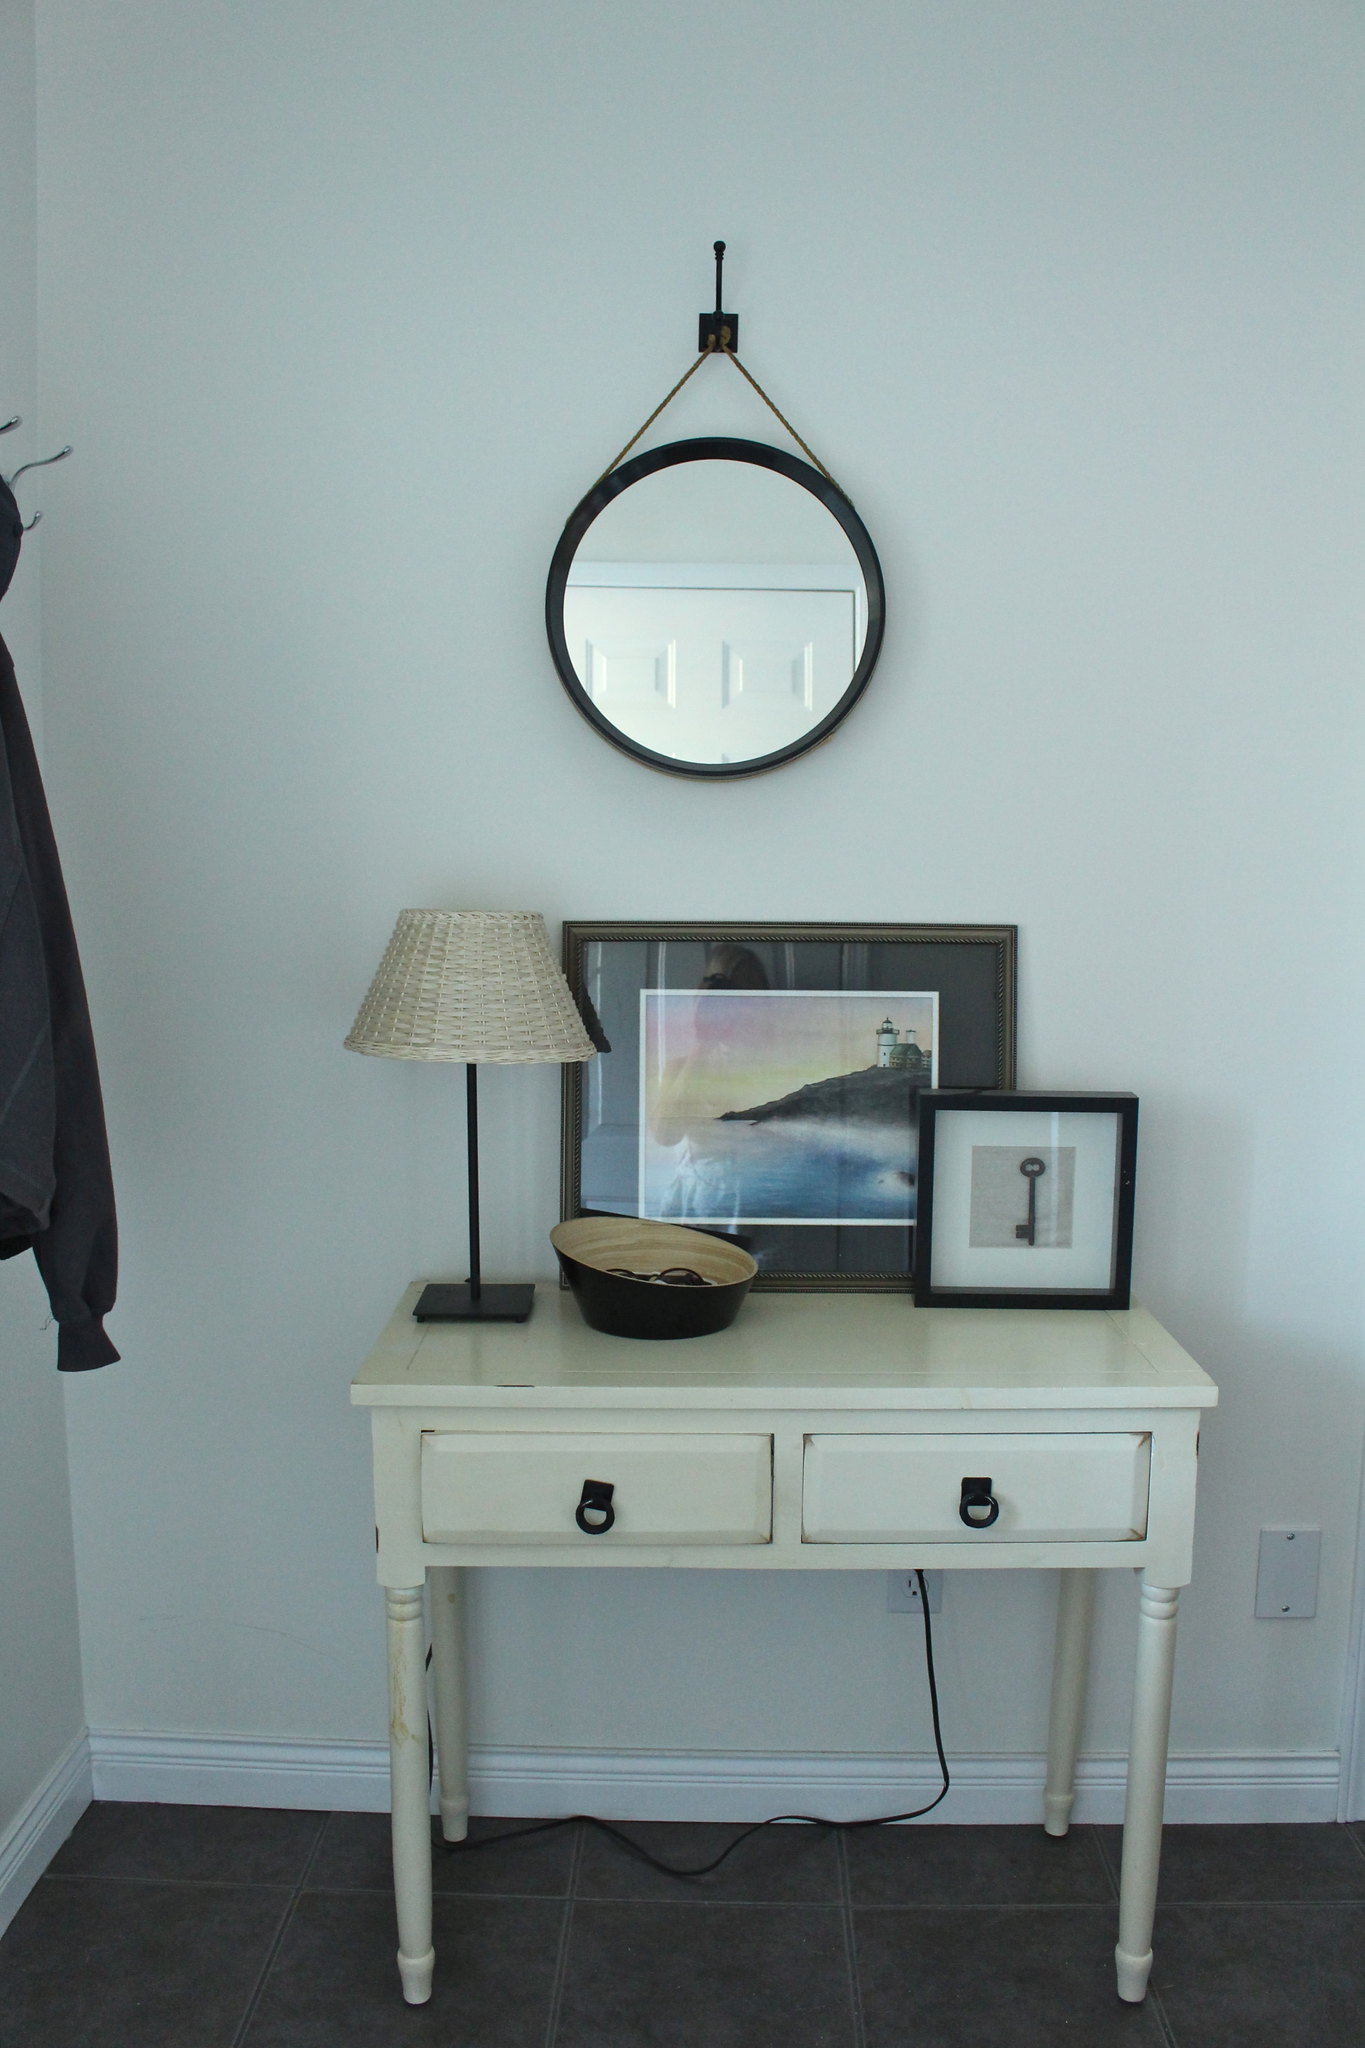
I honestly love how it turned out more than I even thought I would. It will be a much more functional space for us as we come in the front door to hang jackets and bags, and I may hunt out some trays for under the bench for our shoes to dry in the coming wet months (oh how I hope the rain will one day return). It's really perfect timing as Halle begins preschool next month too! I can already see her tiny pink backpack hanging here every day when she arrives home! It's a much more beautiful space overall, and I'm glad our top shelf can provide a safe spot for our artwork to sit (away from little hands), and we finally have a home to display that piece of driftwood B brought back from the island and carved up!

Now for some awesome before and after, side by side comparison shots!

Love Your WoodLove Your Wood


Love Your WoodLove Your Wood

Now for the fun part! There were 7 other talented bloggers taking part so you need to check out what everyone else came up with (I'm excited to see what was made as well). Then - VOTE! As much as I want you to vote for me (please, please, please vote for me!) you need to pick your favourite of the 8 projects. There's $2,500 on the line, and if I win, I'd like to renovate one of our bathrooms - preferably the master bath!

Voting starts today and ends on August 31st at 11:59PM (EST). You can place a vote once per day over on the Helping You Finish Facebook page - so make sure to visit daily to support your favourite project! Thanks so much for checking out my project! HAPPY VOTING and may the best blogger win!!
SHARE:

Monday, July 15, 2013

So Fresh & So Clean

Originally we had reserved this past weekend for a camping trip on the island with some of our friends. Unfortunately, some unexpected financial obligations arose and we had to back out last minute. We were sad to miss it, but on the upside we accomplished A LOT around here (including meeting new friends in our neighbourhood for both Halle and myself! Exciting!!).

With Halle's birthday party happening this coming weekend, we really want to house to be clean and as organized as possible before our friends show up (we're still settling in after the move). After reading this post last week by my blogging pal Sheila, I wanted to tackle a project we've been putting off since we moved in - our front door. From a distance, it didn't look like much more than a white painted door (with mismatched hardware). 


July 13, 2013


When you got closer, the ugly became a bit more obvious. The door itself is your run of the mill exterior grade steel door, but it had never been painted and was incredibly dirty and marked up. To make it look even worse, the brass paint from the door handle was chipping off and it just looked awful.


July 13, 2013July 13, 2013

July 13, 2013

We had already bought some flat black spray paint to use for the door handle a while ago, but we needed to decide what do for the door itself. We talked colours and picked up some paint swatches to bring home and test next to our siding. We'd even considered purchasing a new window insert that we saw at Home Depot for $28. In the end, it came down to the fact that the door is NOT our style at all, and eventually we'd like to replace it with a nice wood door like thisthis, or (my personal favourite) this.

With all this in mind, we opted to use some white exterior paint that B needed for another project (to be shared soon), and just freshen up the front door. Once I started painting it was obvious how grey and dirty the door really was.


July 13, 2013July 13, 2013

It took about 3 coats to get the door looking great, and once we put that black door handle back on everything was looking much crisper around here. 


July 14, 2013

Front Door Before & After

The door handle was pretty easy to clean up. B just gave it a good sanding to get all the old chipped paint off, and then we gave it three light and even coats of the matte black spray paint. It's looking fantastic and matches our deadbolt nicely!

July 14, 2013July 14, 2013

Isn't it great that one day of light work can make such a noticeable difference? Have you been freshening anything up around your place recently?
SHARE:

Thursday, June 14, 2012

Upon Arrival

While I've been plugging along inside and making some good progress in our rental, sadly, we've left the outside feeling rather neglected. It really isn't the most inviting looking home from the outside, especially when so many of the other homes in our neighbourhood look so manicured. 


I won't scare you off with photos of the exterior of this place, but why not take a look at some of the things that are inspiring me to make our little place more pretty and homey for the time being. 


One of the first things that comes to mind when I think of sprucing up our front yard, is to add some pretty planters by the front door. They are the perfect way to add some colour, and when we are ready to move on from our rental, it can all come with us. It's a win-win situation. Something like these lattice planters, available at The Home Depot, would be perfect!


YM11532_lifestyle_highres

Or maybe something a little more simple that I could decorate as I please. I think that these Square Cedar Planters would be a great little project, and at only $31.61 each - they don't break the bank!

15687.CD1616L_4

Aside from our planters, we have a small garden bed off to the right of our front door. It lies directly beneath our dining room window, and at the moment is empty... with the exception of some weeds. B and I have been discussing planting something in there to pretty it up a little and I'd like something that does well in the shade, and won't need a ton of attention from us. I'm leaning more towards a leafy plant that can add some colour, rather than flowers whose blooms can die off anyway. After flipping through a slideshow over on Better Homes and Gardens, the Coleus really jumped out at me...

550_101300436

I love the bright shade of green and red together! So bright and pretty, and no flowers required!

Then of course there is the obvious step - a seasonal wreath! Though I know that a floral wreath is pretty traditional for the summer months, I'm not much of a floral wreath type of lady. So when I spotted this lemon wreath on Pinterest... I was sold! After checking out this great how-to, I think this is a legit project that I would like to tackle soon...

274860383477432879_GbFTZIiG_f

I think this about does it... enough typing and time to start working! I'm feeling highly inspired to get things spruced up out front. Time to go out in search of supplies!

What are your best tips for prettying up the exterior of your rental? Have you been doing any of your own exterior projects recently? I must say... all of this talk about curb appeal, really has me missing our lovely little front porch back in Toronto...

Painted Door - July 2011

Yup... definitely feeling a little homesick for that tiny home every now and again....
SHARE:

Thursday, January 12, 2012

Off The List...

Even with an extensive to-do list to tackle for 2012, I got a little distracted this week by this...


IMG_6948

Yup, an IKEA RIBBA frame. We picked it up in the As-Is section the other week when we went to get our BISSA shoe cabinets. At $4.90, I couldn't leave it behind, and I knew that I would be able to make use of it.


It sat on our fireplace mantel for a while, until the inspiration finally came to me. For ages I've been trying to come up with some way to use an old skeleton key that I'd picked up at the St. Lawrence Market a few years ago. This seemed like the perfect opportunity to do just that, and to create something new for our front entrance, using things we already had at home (I'm on a roll, using stuff that is cluttering up my office).


IMG_6952

What I Used:
1. Left over light-weight fabric from our stockings
2. The Skeleton Key
3. Scissors
4. Double Sided Hem Tape
5. Glue Gun


It was an incredibly easy project that I was able to whip together in a matter of minutes, while Halle played next to me in her excersaucer. Quick projects are my best friend these days. If it only takes me a few minutes, then it doesn't get cast aside and forgot about for days or weeks.


After taking apart the frame, I cut one layer of my lightweight fabric, slightly wider than the back of the frame. (Note: before I starting cutting, I made sure that the back of the frame would still fit in place once the fabric was secured to it. Nobody wants to start a project like this and then find out your new art won't fit back into the frame!)


IMG_6953


IMG_6954

Next, I cut my hem tape into strips the same width as the back of the frame. I adhered it to the frame and them pulling my fabric tight, pressed it onto the sticky edge of the tape to secure it in place. 

IMG_6955

After doing the first side, I found the tape was much wider than it needed to be. So on the remaining sides. I cut the tape in half, and used thinner strips so that the tape wouldn't stick out past my fabric. I also had to use a few small dabs of hot glue in the corners where the fabric folded over itself. This helped to keep everything in place. Once all four sides were pulled tightly, and secured into place, the back of my frame looked like this...

IMG_6957

Not the neatest thing ever... but it's the back, it won't be visible. So, I just flipped it over and began working on the important side of it.

I wasn't too sure if I wanted to keep the mat for this project. So, in order to make it easy to display it with or without the mat, I placed the mat on top to help me centre my key...

IMG_6958

Next, a nice healthy squeeze of hot glue along the back of the key and I stuck it in place. I then let it dry flat on the table while Halle and I played...

IMG_6959

Finally, I popped it back into the frame (with the mat for now), and into the front entrance it went.

IMG_6960

IMG_6962

At the moment, it resides on our console table, until I can decide where on the wall it will hang... and what to hang with it. It's better than I had hoped, and I am so happy that old key is finally on display and no longer hidden away among my "crafty pieces" in the basement.

Do you have any left alone projects you need to tackle? Or maybe you're like me and have finally had a chance to make use of some of the supplies you have laying around at home? Either way, I'd love to hear about some of your current crafty projects...
SHARE:

Wednesday, January 11, 2012

Full Steam Ahead!

Last week we officially proclaimed our to-do list for 2012. With a lot to accomplish, and a lot of motivation, we got right down to business, starting with the first spot you see in our home - the front entrance.


The big closet thatwe put into our front entrance in late 2010 was meant to help with our storage and organization issue in this little ol' house. While it has served us well in the storage department, it hasn't been doing so hot in the area of organization...


January 4, 2012


Not pretty, right? It had been bothering me for ages, so I was happy to work on this one early on. My first step was to pull everything off that top shelf. I organized a basket of dog stuff, and the second held all of our scarves, mitts and other winter accessories. Any winter pieces we no longer needed or wanted were put into a donate bag. Our large collection of baseball caps was also sorted through - with one of B's old hats getting tossed in the trash and a couple going into the donate bag as well. 


With the top shelf under control, everything came out of the bottom and it got a good vacuum. There was one pair of old boots that went the way of the trash and a few pairs that went into our donate bag.

January 4, 2012

One thing that I was really happy about, was to get that old trunk out of the closet. It took up a ton of floor space, and with shoes just piled in there, it wasn't helping us stay very organized. So, to solve the shoe storage dilemma and clear up some floor space, we headed to IKEA and purchased two BISSA Shoe cabinets, which fit perfectly on the two ends of the closet (and at $30 a piece, were easy on the bank account)...

January 4, 2012

January 11, 2012


Each drawer is meant to hold four pairs of shoes, but since we had a few pairs of sandals and some of my flats, a couple of drawers held more than four and left us with some extra space for future storage. Clear floor space also means more space to store Halle's car seat and stroller. In the end, it makes me incredibly happy to see it finally looking nice and neat...

January 8, 2012

January 8, 2012

I'm loving that clear floor space! No more shoes just randomly tossed about on the floor. Now I won't be so embarrassed when guests come over and go to hang their coats in our closet. There is definitely still room for improvement, but things are already looking much better!

Have you started to tackle any projects on your to-do list? Maybe you've just been working on purging and organizing your home too? I'd love to hear what you've been doing around your home!
SHARE:

Tuesday, August 2, 2011

Guest Posting - Brooklyn Limestone

Good morning friends! We're still enjoying our little peanut, and today is my first day home alone with her as B is back to work. I just wanted to let you all know that today I'm guest posting over at Brooklyn Limestone! I'm so excited to be visiting Stefanie today and sharing the transformation we've made to our front entrance, both inside and out - so head on over and say hi!


Painted Door - July 2011

For those of you that are new to First Time Fancy - thanks so much for coming over to check us out, and I hope that you like what you see! To find out more about us and our home, you can check out our About Us page, and our Home Tour
SHARE:

Tuesday, July 12, 2011

Finishing the Front Door

First off, I NEED to start by saying thank you all SO MUCH for your sweet, sweet comments yesterday on our little peanut's nursery! It means so much to both of us to have such positive feedback on a room that we put so much of ourselves (and our family) into. You are all truly the best! Also, a big thank you to Megan over at Honey We're Home, who is featuring our little nursery today on her fabulous blog. So to all of those who are new to First Time Fancy - welcome and I hope you enjoy looking around!


Today - I have another new project to share. Yes... we're still crossing stuff off of our list as we inch closer and closer to the big due date (Two more days...). Over this past weekend and into yesterday, we were working on sprucing up our boring old front door. In my last post about improving our curb appeal, I made it no secret that our next step was to get it all painted. So, as we worked on painting the exterior the other weekend, our front door looked like this...


Front Door Paint - July 2011

We had picked up this selection of yellow paint chips from Home Depot quite a while back, and left them laying in one of the drawers of our console table for future reference. We eventually both agreed that yellow was indeed the colour we wanted to use, so we whipped the paint chips out and lined them up. After staring at them for quite some time, I narrowed my choices down to the top two paint chips, and after a bit more consideration, B and I narrowed it down to the top chip...

Front Door Paint - July 2011

The final choice was the third from the top. It's a CIL colour, called "Cheers" for anyone interested.

Front Door Paint Colour - July 2011

Last Friday, when B got home from work, we decided it was time to get the paint on. We knew it would take a few coats for the yellow to look right. So first things first, off came the hardware...

Removing the Hardware for Paint - July 2011Hardware Removed for Paint - July 2011

... and on went the first coat of our cheery yellow...

Preparing to Paint - July 2011Going Yellow - July 2011

Friday night we got as far as the first two coats before we headed over to our friend's for dinner. Sunday morning we were back at it, and while B got the final coat of yellow on, I was inside working on the next step of our front door project. A step that was inspired by this image, which I found on pinterest...

Front Door via Pinterest

I sent my oh-so-wonderful Mother the above photo and she found a gorgeous font and printed "Welcome" for us on some heavy card stock. I then used my x-acto knife to cut out each of the letters so that we ended up with something like this...

Welcome Stencil - July 2011

Next, we measured the door and used some small pencil marks to ensure that our stencil was centred and level on the front door...

Front Door Painting - July 2011

We gave the back of our stencil a quick blast of tacky spray to help it stick to the door and to try and avoid any bleeding of our paint. (Make sure you only spray the paper, or you'll have one heck of a time trying to get that paper off your door!). Then, we proceeded to use newspaper and painters tape to tape off the door around our stencil and B sprayed it completely with some exterior black spray paint...

Front Door Painting - July 2011Front Door Painting - July 2011

Unfortunately, as B was spraying, he noticed that parts of our stencil were starting to lift. So he got all of it sprayed and we let it dry for a bit before peeling off all of the paper and the stencil. From far back, it didn't look half bad (with the exception of the little lines that we needed to keep on the stencil so the middle of the "e's", "l" and "o" would not fall out)...

Front Door Painting - July 2011

However, up close was a whole different story...

Front Door Painting - July 2011

Not quite as sharp looking! After it letting it dry up some more, I went after it with some black paint and a small paint brush to clean up our edges and then B touched it up with some yellow. We were thrilled with the results...

Painted Door - July 2011

Painted Door - July 2011

I think with this project we have truly hit the mark. We got the colour we were looking for, and added a little something extra to make our home that much more welcoming for our guests (which I'm sure we'll have a lot of not long after Peanut arrives!). 

Has anyone else been working on sprucing up their curb appeal? Any fun elements that you've added to take the front of your house up a notch?
SHARE:
Related Posts with Thumbnails
© Life on Misneach Ridge
Blogger Designs by pipdig