Trending

Monday, August 29, 2011

Student Style and Function

Happy Monday friends! I hope you all enjoyed the weekend and that all of my readers who were affected by Irene are safe and sound. 


As I promised, I have a new project to share with you this morning. The other week I got an email from the Home Depot Team, asking if I would be interested in working on a creative project with them. Of course I would! What was even better was they were looking for me to work on a project that would add style and function to a student's space. Perfect, since I'll be back at my night classes on September 14th and we've been working on sprucing up my laundry room / office space in the basement recently.


I immediately started to brainstorm some ideas and thought that a chalkboard calendar over my desk would be a great way to keep track of my assignments and projects and manage my time better. After measuring the wall over my desk and determining that a 2' x 3' calendar would be the right size, I headed to Home Depot with my $50 gift card to buy the supplies - here's the breakdown...


Chalkboard Paint - $21.49 + tax
Frog Tape - $7.99 + tax
1/4" Underlayment - $9.99 + tax


For a total of $44 (and change... our receipt went for a walk) - under budget!


Chalkboard Calendar


Once home, it was time to decide how to handle taping off my calendar. I'd go into all of the math, but I don't really know how I could share my measurements without it sounding confusing. But, the basic idea was that I allowed for space to write the days of the week, have five rows of seven days and then a space for the month and a space for notes. Since the tape was an inch wide, I needed to lay it out on my cutting mat and use a straight edge ruler and my xacto knife to cut it down into more narrow strips that would work with all of my math...


Chalkboard Calendar


Rather than going the traditional route with the Month at the top, I ran the month along one side of the calendar, while leaving the opposite side open for writing important notes and reminders for myself. My final taped off board looked like this...


Chalkboard Calendar


The next step, was to prime everything. So, out came the basic latex primer and on it went using a mini foam roller that we already had at home...


Chalkboard Calendar

Chalkboard Calendar


It sat like this in our kitchen for two days (some things came up around here) and on Sunday morning B was kind of enough to get the first coat of paint on with a brush.

Chalkboard Calendar

Chalkboard Calendar

We then had to wait the recommended 4 hours to get the second coat on the board. At the time I had some girlfriends over visiting with me and Halle, so B was kind enough to finish paining it for me... and peeling the tape off once it was all dry. I was thrilled to later see the finished project...

Chalkboard Calendar

I know... it's not in my office and there is nothing written on it yet. The next step is to let the chalkboard paint cure for 3 days before we can write on it. That actually works quite well as it means I'll be able to start using it for the beginning of September!

I'm so happy with this project and the materials were definitely within a student's budget! Even if you didn't have $44 to spend on it, it would be easy to buy regular painter's tape for less (I decided to use Frog Tape in order to get cleaner lines). I'll be back on Thursday with the final board in my office all filled out and ready to run! 

Thanks again to the Home Depot for asking me to work with them - I had a lot of fun working on this project and I know it will be extremely useful to me when I'm back in my classes! 

Have you completed any back to school projects, or do you have any that you're finishing up now - either for you or your little one's? I'd love to hear how you stay organized when back to school season hits!
SHARE:

Monday, January 24, 2011

My Great Clean Out!

Today I'm joining in on a little clean up / organization blog party that Anne-Marie of 10 Rooms has put together! 

When Anne-Marie emailed me about taking part in "The Great Clean Out", I just knew I had to say yes... what better motivation to get my butt in gear and start cleaning and organizing? I also knew right away what room I would be tackling... My Craft Room / Office / Laundry Room...


Yeah - it was looking pretty rough. Left over Christmas pieces were stuffed in boxes in here. Construction materials had been placed here to stay out of the main basement living area. Basically, it had been a giant catch all for anything that didn't have a proper home.

With me back to classes as of last Monday (I'm soooo excited about my class this term!), I knew I needed to whip this space into shape so that I would have somewhere to escape to and get my work done. My first step was just to get EVERYTHING out... which meant relocating it all (with the help of B) into our living area. My #1 rule was that anything that didn't belong, was not to go back in! I knew that by keeping it out in the open in our living space, I would be more motivated to find a proper place for everything. After running the vaccum around quickly, I got to work organizing.

With the help of B, we moved my brand new IKEA "As-Is" dresser into the spot that was previously occupied by our big, ol' ugly filing cabinet (which we no longer needed).


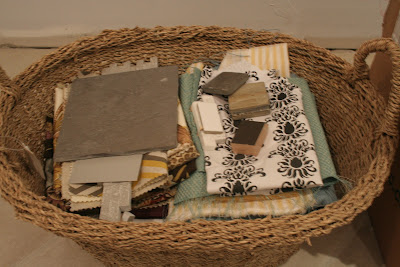
There was a lot of stuff to sort out and organize. Old school projects, paper (LOTS OF PAPER!), crafty items, fabric and other samples... and pretty much any other thing you can possibly think of. 


It kept me busy for quite some time, and I definitely did not complete this in a couple of nights, it was an on going process. Items were moved, and moved again. At this point it is by no means "perfect", but it's exactly what I set out to accomplish for now. It has more storage, and it's a lot more functional than it was before - take a look at the before and after...


I can actually get INTO the room again... and with all that new drawer space, everything has a home!


The top left drawer contains ribbons, my blog cards and some other crafty items (and yes, it could still use some organization... I'll be working on that). The drawer on the right is looking a little better with a utensil organizer keeping all of my pens, pencils, markers, etc. nice and organized. This will make looking for a pen and other writing utensils a lot easier!


The next drawer down is home to all of my paper. The far left is craft and painting papers, the middle is blank and lined paper with some smaller pads down at the bottom. The right side is all notebooks - yeah, there are a lot of those around here.


The third drawer down I have dedicated to "gift wrapping/giving materials"... kind of. You see blank note cards, some tissue paper and a LOT of tape... that could also use a little extra organization.


This drawer holds a lot of my old writing stuff. I used to be big into writing poems and short stories, and they are all housed here. I am hoping to condense everything so I can free this drawer up... I have a feeling my bottom drawer contents will only continue to expand in the future...


My fabric drawer doesn't look very exciting right now, but they are all organized by colour, and my neutrals ended up at the top. 

My cleaning also got B motivated, and last weekend while I was back home spending some time with my family, he made some more progress on finishing up my desk. He finished painting it white, got the final trim attached, put up my cork board and attached my pistons... check it out in action...


I have a bunch of stuff that I stumbled across that needs to be added to my inspiration board up there, but I think that it is so perfect! What a lucky girl I am to have B make me such a fabulous desk! 

So, that's everything that went back in... what came out? Well, of course the old desk and filing cabinet - both of which are waiting to be relocated to my parents house. All of the Christmas stuff that had ended up in there was packed up when we did a proper clean up after the holidays, and then this...


Quite a lot to toss and recycle, as well as quite a few things that we will donate / add to our garage sale pile (we are determined to make a little bit of cash off all of the extra / unused stuff we have laying around).


Organizing, cleaning and purging our home of things always calms me down and makes me feel good, so thank you to Anne-Marie for lighting the fire under me, and getting me going on cleaning up this room! I'm already dreaming of all of the great projects I'll work on in here and all of the great blog posts I can write from my nice clean desk! Make sure you head over to Anne-Marie's blog to see her Great Clean Out and find out who else participated!

Have you taken on a major cleaning / organization project recently, or do you have one coming up? I would love to hear some of your best organizational tips!
SHARE:

Wednesday, November 3, 2010

All Desked Out

Recently I've been talking about a new project that B and I are undertaking at home, and believe it or not, it has nothing to with our front entrance construction! We're actually back down below trying to finish up work in my laundry room / craft room, and B has been busy building me a new desk. Lucky girl, right?

The last time I showed you my craft space, we had my old desk from my parents home filling in for the time being...


Not bad, I mean it was a place to do homework and blog from, but I wanted something larger and that worked well for what I needed it for - blogging, drafting, crafting, etc. The whole idea for B building me a desk started when I spotted this one in the latest IKEA catalogue...


{via}
It's the VIKA VEINE (can't find it on their website, strange, no?). I loved that it had a space for me to blog and work from, and could close up keeping everything stored inside, making room for things like drafting floor plans without having to pack everything else up. The inside of the top of the desk was also lined with a fabric, with some elastics to hold pictures, pens, etc. It seemed like the perfect desk... until we saw it in the store and realized it wasn't that sturdy or large... and also had a price tag around $200. In the end, B concluded building me a similar desk would be a much smarter option. So away he went...


The legs we bought from IKEA, but the rest of the desk was completely constructed by my oh-so talented other half! Isn't he great? The best part? The top that lifts is slightly angled much like a true drafting table. 


The whole thing has been painted (all white, with the front panel in a bright yellow. I'm undecided on whether I love the yellow or not), with the exception of the inside of the top of the desk...


They aren't pictured here, but there will be two pistons on either side of the desk that will hold it open. Actually, they are the exact same pistons that B used on the cover for the bed of his pick-up truck. Those bad boys are heavy duty. We had to use a window latch at the bottom of my desk to hold it closed. Yes, my desk will open automatically when unlatched. Fancy!

As for the top of the desk, I thought about using magnetic paint, chalkboard paint and a combination of both, but in the end decided to use cork. I won't be covering it with any fancy fabric, because this will be my inspiration board and I would prefer my beautiful images, fabric samples etc to stand out  and not be overpowered by a pattern. So, we bought some cork the other night, now we just need to adhere it to the top of my desk.


I'm so thrilled that B opted to go the custom route with this project! I already love my new desk and I haven't even had a chance to use it yet (still blogging from the basement day bed for now). B plans to share a full recap of building the desk soon, and I'll share a full reveal when the whole desk project is complete, I just couldn't wait any longer to debut it.

Do you have a special place to work from, or a custom piece that was built just for you? 
SHARE:

Sunday, April 18, 2010

Ravishing Raspberry

I haven't given our basement reno much attention on the blog recently. Why? Well, the main reason was that for a while it was kind of at a stand still. Then, there was a period were B was working on plumbing and electrical, so there really wasn't a whole lot to blog about. Alas, things are back on track and I am excited as I see our basement bathroom moving along. Keep your eyes out for a basement bathroom progress photo soon.

Now, with that out of the way, let's get to the real reason I found it necessary to write a post at 11:57pm on a Saturday night. An inspiration photo I found today. B and I were out at Home Depot, picking up some things for both the closet reno (which I plan to reveal on Monday) and the basement reno, when I picked up the April 2010 issue of Better Homes and Gardens. As we waited in line I started to flip through the pages and came across this:


Um, HELLO! There was just something about that beautiful raspberry coloured chair that jumped off the page at me! The wallpaper, is what sold me, as the light blue is so close to the colour we have used in my laundry / office / craft space in the basement. THAT raspberry is the colour I want on my chair! I originally planned on using one of the two chairs I've blogged about recovering, but I've decided I will save those for the main living area in the basement.

Who know's if I will actually go with this colour for my office chair (which I have yet to find, as I seem to be on the hunt for that exact chair at the moment), but I just had to share this photo! It seriously got me thinking, especially as I have spent a considerable amount of time this last half of the week thinking about my little personal space! One day it'll be mine to use... one day!
SHARE:

Tuesday, January 12, 2010

A Little "Me" Space

I've been talking a lot recently about our basement laundry room reno. One thing I haven't talked about is that this room will be much more than a laundry room (as many of you may have guessed based on the size of the room). Earlier this morning I tweeted about a new idea I have. It's something I've been thinking over for a while, and I'm now ready to move forward with it! This room will be integral to this idea/project. What is it you ask? Well - that I can't share right now, but I can at least let you in on what the other half of this room will provide me.

Our laundry room plan didn't start off with such a large space, but the more B and I talked about it... the bigger it seemed to grow. We ended up taking away some space from the width of the old bathroom (but added some on in length) to make a larger space for the laundry room. Why? Well - the main section you've been watching the progress on, will actually be a small office/craft space for moi! A place where I can let my creativity abound!

Because it's so small (especially height-wise), I've been looking for small office space inspiration photos that will help me come up with some excellent storage solutions.


I seriously love the above room found in the Basement Gallery on the Canadian House & Home website. Especially when I found the storage portion of it...


Look at all that storage space!! Exactly what I need! What's even better is that this room looks about the same size as ours - I mean, the ceilings may even be a bit lower in the pictured room! Which means - this could totally work in our little basement! JOY!


I'm sure most of you have stumbled across this beauty from homelife.com.au. What's most appealing here to me is the organizational pieces used around the desk. For what I have in mind, I'll have to have a lot of organization going on. Specific pieces from here I plan on using? Magazine holders and an idea board - both of which are mini projects I am sure I will feature on this blog at some point!


This one, also from Canadian House & Home, I was drawn to because it's such a small space that is so neat and so organized. I think that all three of these combined could turn my new little basement room into the perfect laundry/office/craft space!

However, still lots of work ahead before we start building and adding furniture - but I think my vision of what I want is finally starting to come together. I'll probably be a little lighter on the basement updates over the next little while as we pull together finishing touches - but I can't wait to share the final reveal (whenever we get there!)
SHARE:
Related Posts with Thumbnails
© Life on Misneach Ridge
Blogger Designs by pipdig