Quick recap for those who may have missed my first post. We took a table that looked similar to this:

Please note: This is not the actual table we transformed. Since we had no before pictures, I scoured the internet and found this "look-a-like" photo (it was a piece available at one of our local Habitat for Humanity ReStores)
And turned it into this:

Since the table was a pretty straight forward, "sand 'er down and stain 'er" kind of project, I'll leave it be and focus on how we got the chairs looking like they do.
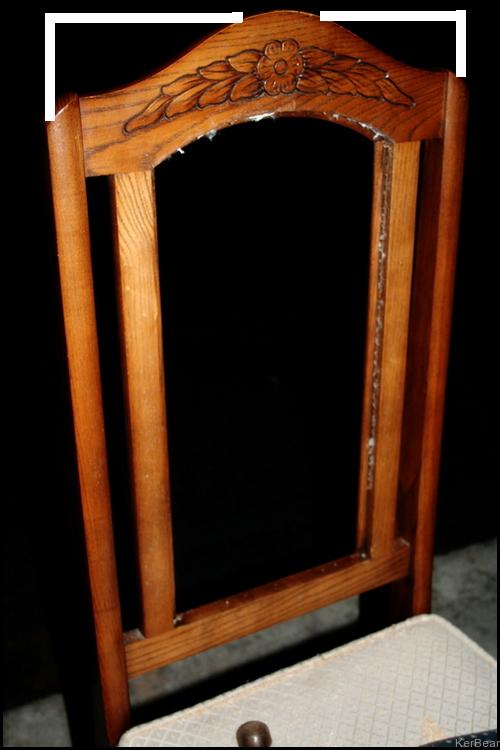
First things first, we needed to dismantle the original chairs. I did manage to get a few photos of the very first chair that we took apart.


Getting the fabric/padding/wood insert out of the back of that chair was such a labour of love, I don't think we touched them again for another few months. Then at some point I think my Dad was "looking for something to do" and took each chair apart, carefully removing the back insert and unscrewing the seat from the chair. He then numbered everything so that when we were done we could match it all back up together. What a great father I have!
Once the chairs were apart I had to make a decision about how to handle the two chairs with arms from our set. "Two chairs with arms? I don't see any chairs with arms!" I know... I decided to lose the arms. So those were (kind of) carefully removed. Thankfully, we didn't have to be overly careful or worry about scratching the chair backs because I knew from the start that they would be completely slipcovered. From there we stained only the legs (in a glossy black stain) and let them dry. Easy pee-sy, right?
Well, it was this last part that turned into a bit of a hassle. As you can see from the pictures above, the original chairs had a curvy top with some carved detail. Really not my style, so we had to come up with a creative solution. After some thought, B used one inch strapping to create 90 degree angles on the chair tops, as I have depicted in my "Paint" altered photo below...
Seriously, no need to be jealous of my mad "Paint" skills. Unfortunately it's all I really had to work with given the fact that I had no progress photos of our little project. Deal! Thanks.
Moving on, the little structures looked pretty rough when they were done, and I actually remember my Dad seeing them and asking what we had done (he of little faith!). They worked out perfectly though.
Before we got started on the upholstering, we used plywood on either side of the chair to make the backs flat and solid. Then we used spray glue, and a staple gun to attach batting to the backs of the chairs - wrapping it from the bottom of the front, over the top to the bottom of the back. This ensured that everything was equally padded, and that there were no sharp edges from our DIY solution to losing the curvy backed chairs.
After a lot of discussion, and an inital attempt at making a removeable slip cover, my mom and I decided that it was not to be for these chairs. Finally after a long night of sewing, we wrestled the fabric on and stapled the top piece in place before reattaching the chair seat. (Believe me, stripes can be just as difficult to deal with as pattern - lining up the stripes from the back of the chair to the seat was NOT easy!) And VOILA - we ended up with this...

I know it's not really the most detailed "how-to" post in the history of blogging, but it was almost a year ago that this project was completed and had actually spanned a period of year (at least). There is also the downfall of not actually having any actual "before" or "after" photos. But I hoped this helped to clear up our little project anyway!
I've learned my lesson. Always document the process and take pictures. Next time... I promise!
Any lingering questions or anything you think I may have missed? (I wouldn't put it past me to completely leave out a step despite my planning)

Like I said before... Love it!! I think that lining up the stripes would have made me want to pull my hair out! You guys did a great job!
ReplyDeleteLooks great. You are SO much more creative than me!!
ReplyDeleteshut up you made these?! they are GORGEOUS!! I wish I was this creative jesh! :) xo
ReplyDeleteThanks everyone!
ReplyDelete@Rhiannon - haha thanks! We like knowing we were able to turn something not so pretty into something people comment on! (They're pretty comfy too!)
holy crap, good job!!
ReplyDeletebitlis
ReplyDeleteurfa
mardin
tokat
çorum
H6S1
ankara parça eşya taşıma
ReplyDeletetakipçi satın al
antalya rent a car
antalya rent a car
ankara parça eşya taşıma
NW6
4B5B5
ReplyDeletebinance komisyon indirimi %20
654F5
ReplyDeleteistanbul sesli sohbet uygulamaları
canlı ücretsiz sohbet
canlı sohbet
en iyi görüntülü sohbet uygulaması
sesli sohbet siteleri
samsun sesli sohbet odası
artvin canlı görüntülü sohbet
yozgat sesli sohbet
çanakkale en iyi rastgele görüntülü sohbet
2B6BC
ReplyDeletekırıkkale ücretsiz görüntülü sohbet
konya bedava sohbet uygulamaları
erzurum bedava sohbet uygulamaları
mobil sohbet odaları
yozgat görüntülü sohbet odaları
tunceli canlı sohbet odaları
Kayseri Mobil Sohbet Odaları
düzce ucretsiz sohbet
mobil sohbet odaları
3A3DF
ReplyDeleteSoundcloud Takipçi Satın Al
Discord Sunucu Üyesi Hilesi
Coin Nasıl Üretilir
Coin Çıkarma
Youtube Beğeni Satın Al
Okex Borsası Güvenilir mi
Kripto Para Nasıl Çıkarılır
Threads Yeniden Paylaş Hilesi
Bitcoin Nasıl Alınır
03AD9
ReplyDeleteweb avax
onekey
web ledger live wallet
trezor suite
web trezor suite
trust
wallet ledger
ledger live app
arculus wallet
58D01
ReplyDeletelayerzero
quickswap
galagames
ledger live
ellipal
pancakeswap
yearn
arculus
dappradar
0BA6525ADD
ReplyDeletetwitter türk beğeni satın al
5F00B990AB
ReplyDeleteinstagram yabancı takipçi
begeni satin al
gerçek takipçi
garantili takipçi
telafili takipçi
B4A03F4865
ReplyDeleteinstagram yabancı takipçi
instagram beğeni satın al
takipçi
türk takipçi
takipçi
15FCEB9FE1
ReplyDeletetakipçi instagram
youtube beğeni satın al
yabancı takipçi
kaliteli takipçi
garantili takipçi