Trending

Wednesday, October 9, 2013

Guest Room on a Dime

Things have been crazy around here recently. We've just had so much going on, mainly getting ready for 4 very important house guests who arrived yesterday! In particular, we were busy turning the basement bedroom into a welcoming and inviting space for two of our guests, using only items we already had in the house...


IMG_1399

IMG_1400

You think I had my work cut out because it looked like that, right? Well... that's just what it looked like the second time we viewed it. It actually looked like the picture below when I went down there to get to work last week...

First Time Fancy - Guest Room Before


First Time Fancy - Guest Room Before

Here are the steps I took to get it guest ready, broken down nice and simple.

1. Sort and Organize - Clearly there was a lot of stuff collected into the space that we had yet to unpack/didn't know what to do with it. I started by taking out everything that didn't belong in here. I discovered most of it belonged in my office/craft room, which means that I will be spending a lot of time cleaning and organizing that space a well in the future.

2. CLEAN! - Once everything was out I pulled out the vacuum, warm soapy water, a cleaning cloth and the mop and got to work on the space. You don't always realize how dirty a room is until you are down on your hands and knees wiping up those dusty (blue) baseboards.

3. Repair - There were a lot of holes and dings in the wall that needed to be gone. So, last Friday I pulled out the Drydex and filled some holes. We may not be able to paint the walls, but they are light enough that once we took some find grit sandpaper and a damp paper towel to the walls, it made the spots almost invisible.

Downstairs Guest Room - October 8

Downstairs Guest Room - October 8

4. Shop Your Home - While I waited for the floors to dry from mopping, I started shopping the house for items I could use to cozy up the guest room. Artwork, a throw blanket, our guest book - whatever wasn't being used elsewhere and could be used in there, was set aside.

Downstairs Guest Room - October 8

5. Rethink Your Space - We were left with picture ledges all over the room when we moved in. They looked pretty awful with those huge screw heads sticking out, but I realized if we hung them over the bed and filled them with pretty things and artwork, they would make for a really interesting piece!

Downstairs Guest Room - October 8


6. Decorate! - We moved in everything we had set aside for the space and started putting everything together.

7. Details - Don't forget about the little details to make the space feel extra special. For example, I left a basket of extras that our guests may need while staying with us. It really helps to put the finishing touches on a space. 

Downstairs Guest Room - October 8


It may not be exactly how I would want our guest room to look, but considering we only used what we already had, and didn't spend a cent I'd say we did a pretty good job in less than a week...

Downstairs Guest Room - October 8

The bed and bedding are from Halle's room, and the "nightstands" are two Ikea Lack shelves that hung in our kitchen at the rental. The curtains also hung in the kitchen dining area at the rental house.

All of the artwork had been hanging out in different rooms, waiting to be hung in a forever spot. For the time being, I think they have all found a pretty good home in our second guest room.

Have you been whipping any rooms into shape, using what you already have on hand? Sometimes all it takes is a little vision and handwork to make a room into something new!
SHARE:

Tuesday, September 11, 2012

A Guest Ready Room

I've been lacking in posts showcasing projects and rooms that we have been tackling recently. I guess that would expected with all of the guest traffic we have going on. Well, I'm back today with a peek at how I fluffed up the guest room for those coming to stay. We didn't have a lot to spend, but wanted to make the room feel really comfortable, cozy and inviting for our family and friends.

Back in early June, we had our first house guest, and in a rather rushed attempt to prepare for her arrival, we got the room looking like this:

May 30, 2012

May 30, 2012

Not awful, but still incredibly bare, so we had our work cut out for us. The first thing we did, was add a little bit of artwork. We shopped our home for this and pulled out the headboard from our old bedroom in Toronto, along with a print that B gifted me a few Christmas' ago. The colours worked with the bedding from our old bedroom, along with the paint colour on our garage sale find headboard. 

September 6, 2012

I also figured, our guests could use somewhere to hang towels, purses, jackets, sweaters - whatever they pleased really. Thankfully, we had some hooks that hung in our house in Toronto when we had moved in. We had taken them down when we painted, and never got around to hanging them again - but we did decide to move them out west with us. So, up they went, just next to the door to the guest bedroom. The perfect place for our guests to hang whatever they may need.

September 6, 2012

I also wanted to make sure that our guests had everything they needed right at their finger tips when they arrived. I brought down one of our newly painted blue chairs and placed a basket of towels, face cloths and goodies on it for them. All the toiletries one could ever need are in that basket, along with a hair dryer.

September 6, 2012

For the nightstand, we decided we needed a lamp for our guests to flick on before they crawl into bed. Whether they would like to read, or just not have to worry about getting from the door to the bed in the dark, it was necessary. Since it was short notice, we actually moved one of our master bedroom lamps down there before my friend came to visit in June, and it remained there right up until B's parents left. But last week, after they were gone I was at IKEA and found a much smaller lamp in the As-Is section for only $10. Perfect solution for our small table, and it made room for us to add a clock, as well as a place to keep our guest book.

September 6, 2012

September 6, 2012

On the floor next to the night table, I placed a basket that I picked up at IKEA for $5.99. Inside of it, I placed all of the brochures we have collected for the surrounding areas, and other places we have visited. I figure this is a great resource when people are coming to stay from out of town. We don't really make a ton of concrete plans in advance, so this way our guests can take a look at the different places nearby, and maybe decide what they would really enjoy seeing. After all, I'm around all day to help them see the sights, and I'm happy to bring them wherever they would like to go...

September 6, 2012

I'd say, for mostly shopping our home (with the exception of the $15 I spent for the lamp and basket... not including some toiletries I picked up) that we did a good job setting up the space for guests...

September 6, 2012

There is still room for improvement to cozy it up a little. Maybe a nice chair, or a dresser, and definitely another nightstand. We'll get there eventually, but slow and steady is our best way to go. We enjoy finding the right pieces and not just throwing stuff in there because it was a great deal. I need to really love it. So I'm keeping my eyes out, and maybe by the next month we have a ton of visitors, I'll have some more updates to share.

September 6, 2012

So far the reviews from B's parents were great! They loved the room and found the bed incredibly comfy! Come back tomorrow to see how we whipped our "office/work out room" into a guest room in a pinch! Yup you read that right. We have three people staying at the moment and needed to provide some privacy for our extra guests, so we made some moves and shopped our home and pulled together a cozy little space for extra over night guests!
SHARE:

Wednesday, September 5, 2012

A Swell Place to Dwell - Guest Bedroom Revamp

Happy Wednesday everyone! Our second round of house guests arrive tomorrow, so I'm thrilled to have another wonderful blogger fill in for me today while I make some last minute tweaks around here. Say hello to Kelly from A Swell Place to Dwell...

Hello fancy readers! I'm Kelly from A Swell Place to Dwell, which is my little slice of the blogesphere where I share my crazy exploits in revamping a 'starter' builder grade home with my husband, while raising a very busy 13 month old and wrangling a totally neurotic great dane. I am excited to be here today, and am super thankful to Kerry for letting me share a little peek into our guest room.

Are you ready? Just imagine you are lucky enough to be staying with us in our house for the weekend. You have a baby trying to share Cheerios with you and a dog who is bringing you his leash. Get the picture? Get ready to relax in this oasis.  Ok, ok....it's not quite an oasis.  But what I hope I have created is a space for my guests to feel slightly at home for the few days they visit us.  The best part?  I revamped our little guest room for $10.  By shopping our own home and redoing a Kijiji find, I was able to give our tiny little guest room a facelift  and a little personality.

Here's the first glimpse of the guest room from the hallway.  The room is small.  11'x 8' small.  Not a lot of room for fluff....just the essentials.

Photobucket

Let's take a peek inside, shall we?

The little dresser beside the bed was a free find on Kijiji (like Craigslist). I repainted it and added the stencil.  You can see the before pictures and the whole process here.  The stencil was the only thing that I actually bought for the whole room.  Using my 40% off coupon at Michael's it was $10.

Photobucket

On the other side of the bed there are two pieces of framed fabric.  The bright orange fabric was my jumping off point for this room.  The fabric was from my husband's Great Aunt, who was a Missionary in Papua New Guinea.  It's really bright and a bit crazy, but I love how it adds some serious personality to this room.  I pulled out a poster that I had in the frame and just replaced it with the fabric.  With some of the left over fabric scraps I used scissors to cut out an intricate pattern and framed it in another Ikea frame that I had hanging around.

Photobucket

At the end of the bed is a little stool that has been in my family for years and years.  I repainted it and added some gold dipped legs (see before and afters here).

The little basket holds essentials for our guests.  I've collected all of the sample size products for free through coupons and mailing campaigns.  It's amazing what companies will send you for free if you just ask.

Photobucket

Heading back over to the other side of the room......

I used some of the left over fabric in a tray that I already had.  The tray is meant to hold photos, but I love how the fabric adds colour to the top of the dresser.  I also spray painted an old bottle with metallic gold spray paint to add a bit of bling (almost every room in my house has metallic somewhere).

Photobucket

Above the desk is a gallery wall of sorts.  It's comprised of odds and ends that were had stuffed away in a closet.

Photobucket

The guy with the crazy lips came with my husband when we moved in together.  He bought it in Cuba and loves it, but I wasn't quite sure about it.  The lips were a little bit too much for me to handle.  I figured he'd been stuffed in the closet long enough though (the mask, not my husband) and should be displayed somewhere.  I think he fits perfectly in this room.  Even though he's from Cuba and the crazy fabric is from Papua New Guinea, they seem to be a perfect fit for each other.  Plus, once the mask became part of a collection of art, the lips became less creepy.

Well, that's the whole tour of the room.  To give you a quick idea of what you can do for $10, here's a look at what the room looked like before.

Photobucket


Photobucket


And after, one more time for comparison's sake...and to save you from scrolling up.

Photobucket


Photobucket

Thanks so much for being a guest in our house! Feel free to pop on by A Swell Place to Dwell and check out some of my other projects. Click on the photo to see the full post.

Photobucket
Photobucket
Photobucket

Thanks so much for stopping by today Kelly! I love that you were able to put this whole room together by shopping your home (and spending $10 on the stencil - totally worth it!). Inexpensive updates are my favourite thing, and this one is no exception! We're still working on making our own inexpensive updates - so keep an eye out for more coming soon! 
SHARE:

Tuesday, September 4, 2012

Little Orphan Aggie - Guest Bedroom Inspiration

Happy Tuesday readers! Today I'm running around preparing for our next guests who will be coming to stay with us tomorrow. Thankfully, I have some really great bloggers lined up to help out with content. Today, Linds from Little Orphan Aggie is stopping by with some guest bedroom inspiration. I don't think I could thank her enough for helping me out, as she was a very busy girl getting ready for her own wedding which happened this past Saturday! I'm not joking! So a big congrats to this beautiful gal and her brand new hubby! Really, could this girl be any more thoughtful? Check out what Linds has to share with you...

Hello First Time Fancy readers!  My name is Linds and my blog, Little Orphan Aggie, is where I've been sharing the details on our home renovations and, more recently, our wedding. 

At our house we've only tackled the main floor so far, so while I don't have my own guest room to show you, I thought I'd share some inspiration for when we finally do get to working on one.  Our home is a two and a half story brick house so our third floor loft is one with slanted ceilings like those in these pictures.

I love the light, calm, airy feel this room has, and look at the use of space - 4 beds!  I love the idea of adding curtains for added privacy as well...

Pinned Image

I would love to be able to create a loft space like this, I think simplicity can go a long way in a guest room.  The less there is going on, the more your guests can relax.

Pinned Image

This is a picture of a child's room, but I love the raw wood ceilings, they add so much warmth to what can easily end up feeling cold, dark and "attick-ish"

Pinned Image

And this is just pure awesomeness...a loft permanently set up as one big tent/luxury camping trip!?  Now that is my idea of a great guest room.  I would be over the moon if I was a guest in a room like this!

Pinned Image

After looking at all of these pictures I started thinking about how I like to prepare for overnight guests:

One thing I have to do before I have guests, and this may seem obvious but I'm sure we've all been a guest somewhere where things looked less than fresh and it does leave an impression, is clean.  It doesn't even have to be a major clean if you're short on time, but the bathroom and kitchen, and of course the room your guests will be staying in, are a must for me.  A sparkling tub, toilet and sink and some fresh sheets can go a long way!


I also like to have everything as prepared in advance as I can. So new sheets and a cleanly made bed before the guests arrive is important. That way when they are tired and ready to sleep, they don't feel obligated to help you make the bed as they watch you scramble last minute.


Try to have some of your guests favourite foods available, whether it's a favourite meal you can serve, or just some yummy treats you know they like.  It shows you put some extra thought towards their arrival.

This obviously isn't what I do, since I don't have a "guest room", but having been a guest at other peoples houses, it is something I would appreciate.  As an early riser (or even for night owls) it's sometimes uncomfortable if your host is still sleeping and you're laying there in bed wondering what do you do until they wake up?  Having a tv and maybe some reading material available in the room if possible gives your guests a way to occupy their time.


So there's some of my thoughts and inspiration on guest rooms!  Thanks again for having me over Kerry, enjoy your time with your guests!!

Thank you Linds for being such a HUGE help! I loved all of your inspiration photos - they area all such cozy and welcoming nooks, that I am sure any guest would be happy to stay in!  Come back tomorrow, I have another blogger dropping by, sharing how she spruced up her own guest room by shopping her home!
SHARE:

Thursday, May 31, 2012

Getting Guest Ready

Aside from working on the breakfast nook, there's another project I've slowly been working on... I just haven't had much time to share it with you. 


This coming weekend, we will welcome our very first house guest to our rental. So, in order to make her feel welcome and comfortable in our new space, I'm doing what I can to spruce up our basement guest room. If you caught a glimpse of our rental tour last month, you may remember that our guest room was a giant blank slate in the basement that looked like this...


IMG_9984

Clearly, this was not going to cut it as a guest space. So, about a week before we were to depart on our Florida trip, B and I set to work. The day we had arrived in BC we had swung by IKEA and purchased a queen size SULTAN HULTSVIK mattress for us to use until we ordered our own king size bed. We were pretty pleased with how comfortable it was, especially as we knew it would only be used as a guest bed. The price tag was a little high, but knowing we would probably have quite a few guests staying with us during our time out west, it was worth the investment in our books. 

That first weekend we had also scored a bed frame and headboard for $40 at a garage sale, and we later picked up a box spring. With all of that behind us, we were ready to get to work piecing together the room. We planned on using or queen size bedding from our room in Toronto, and I had found a cute flat sheet and matching pillowcases at Real Canadian Superstore for $4 a piece that we knew would look great with our bedding. Thankfully, we also still had our light blue queen bedskirt from our old guest bedroom that we were able to make use of. So, with all of the bedding on the room was starting to come together, but it was still a long way from feeling welcoming...

IMG_7919

My next step was to work on our garage sale headboard. It wasn't much to get excited about when we first picked it up, but I already had plans for it...

IMG_7859

Since I still love the fabric we had used as a headboard in our Toronto bedroom, I decided to use that as my inspiration. I brought a swatch of the fabric with me to HomeDepot, and had one of the flowers on it colour matched. We came home with a sample sized can of Behr's Amazon Moss and I set to work sanding and painting it. 

I must admit, when I first started painting it, I got a little nervous that the green just wasn't going to work in the space. I told myself I had to trust my instincts though, and move forward confidently with my design decisions. In the end, once it was all painted and put together in the basement, I was feeling pretty good about my choice...

May 30, 2012

May 30, 2012

Yes, there is still some work to be done, but it's coming together quite nicely so far. The side table was relocated from our living room where Halle had been repeatedly trying to pull herself to standing on this. Not so safe, so into the basement it went, and thankfully it works perfectly next to our guest bed. 

What do we plan to do with our hold headboard that is leaning against the wall? We're talking about hanging it on that section of wall it is leaning against - we just need to pick up the proper clips for it. Hopefully we can get it hung tonight or tomorrow before our guest arrives. We also have some hooks that I would like to add to the wall by the door for our guests to hang purses, bags, etc.

For now... lot's of cleaning and organizing left to do before our guest arrives. The work of a hostess never ends...
SHARE:

Thursday, May 26, 2011

Lending A Hand

My parents have officially been empty nesters for quite a while now. It seems that every time we go to visit they have a new project on the go, and I'm excited to be a part of this next project with my Mom. 


They've already spent some time turning my childhood bedroom into a guest room. Unfortunately, the last bed frame they bought had some issues so it will be a while before they are able to get it together. In the mean time, my mother and I have discussed working together on a very small budget to pull together a welcoming guest room. A lot of what we will use they will already have in their home, with very minimal purchases being made.

For now they will use one twin bed frame (which was once my brothers) and the mattress that was once on the day bed in our basement. Here is the space that we have to work with...


IMG_3009
Yup! There's that retro looking mattress again!

IMG_3010

IMG_3011

I am in love with the mirror she has hanging over that dresser. She mentioned to me that she wasn't sure she wanted it black anymore but I've been working on convincing her that it is perfect just the way it is... don't you agree?

It's hard to tell in these photos (because of my poorly set white balance), but the room is a very pale purple. The plan is to use some nice neutral bedding and add some darker shades of purple in accents. Our main goal is to make this a welcoming and relaxing space for any guest that comes into my parents home.

I always love a project that is a bit of a challenge, and what's more of a challenge than pulling together a room with mostly just the pieces you already own? Keep an eye out - we should be pulling this all together really quickly!
SHARE:

Sunday, April 18, 2010

The Lovely Bones - My Closet Reveal

After four weeks of having to shuffle through piles of clothes on the guest bed every morning to dress myself, I finally have a more functional and organized closet structure! Let's take a quick trip down memory lane and peak at my previous closet monstrosity, shall we?


Pretty bad, right? Looking at this actually makes me pretty happy that it collapsed, as it gave us a reason to give it some new life. And give it new life we did!

We started out by knocking out the back wall and building a cubby that would add some extra storage. It gave me endless amounts of joy to see us making use of that long forgotten space in behind the closet, and create a new home for my most beautiful shoes!

The next step was to paint the walls white, and get rid of that awful colour (whatever it was). Just removing that awful almondy colour from the wall really made the space a whole lot brighter, and seem so much bigger!

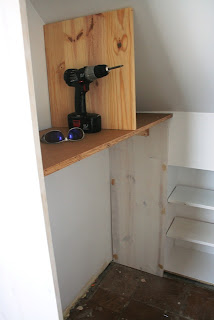
After painting, work once again ground to a halt as B and I stood back to check out the space and really plan out how my clothing rails would fit. Finally after much discussion, we headed out to buy all of the necessary pieces, and B got to work measuring, cutting and priming all of the wood for the new closet structure. Nothing much happened for a bit, then last Sunday, I arrived home from Brunch with a girlfriend to discover this:


What a wonderful, hardworking man my B is! Of course, as the afternoon wore on, I left B to his own devices and had continued on my quest to work on another project I have been working on (to be shared soon... I hope). However, by that evening, I was inside painting all of the wood, anxious to get my clothes back into their proper place.

Late last week the flooring went in, and over the course of the weekend trim was installed and painted, and my closet is finally being used again!


We're still trying to decide how to handle storage above the clothes rail on that second side of the closet. We have a general idea, but right now we are determined to make some serious progress in the basement. I also want to find some nice curtains to cover the opening of the closet, but I'm in no rush.

So just to recap, we went from this:


To this:


In FOUR weeks! Not too bad right? I love it!

Have you done a major overhaul of a storage space in your house? How were you creative with storage in an awkwardly shaped or small space? Would love to hear what some other people have done!
SHARE:
Related Posts with Thumbnails
© Life on Misneach Ridge
Blogger Designs by pipdig