Trending

Thursday, April 12, 2018

Welcome Home

It's taken me far too long to get back into the swing of blogging. I have an idea, but instead of sitting down to write it, I procrastinate. I'm pretty good at that. I've decided no more though! Blogging was a passion of mine for so long and I look forward to once again making the time to sit down and write, and share the things that I love with you. 
Yesterday I shared the back story to us arriving in Cape Breton and finding our dream home. The bones of this house are fantastic. We don't see ourselves having to make any huge changes to the layout inside. Most of the house will stay as it is, with just some cosmetic upgrades. Structurally, we need a new foundation poured under the house, so last week we ripped the small bathroom off the back of the house, as well as the mudroom which we plan to make bigger. We've already started demolition in a number of rooms, but today I want to share some photos of the house as it was when we purchased it. 


The Mudroom

The Mudroom is currently the main entrance into the home. You enter on the side of the house near the driveway and two car garage and from this room you enter into the kitchen. It's a decent size with ample storage, but not quite what we need. A couple of the windows are broken from stray golf balls and of course it was full of stuff from the previous two owners. The plan is to enlarge this room, give it more functional storage for our family of five and more than likely put in new stairs to the basement that will be poured in thecoming weeks (if the weather cooperates). I'm feeling pretty excited about what this room will become!
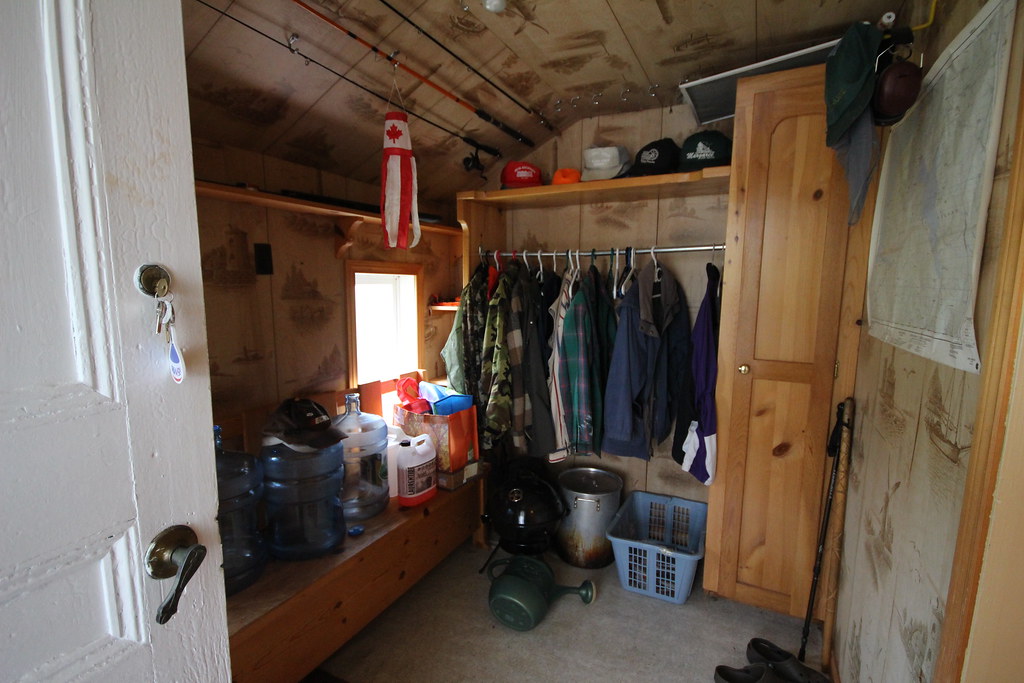
Mudroom - Nov2017

Mudroom Door - Nov2017

The Kitchen

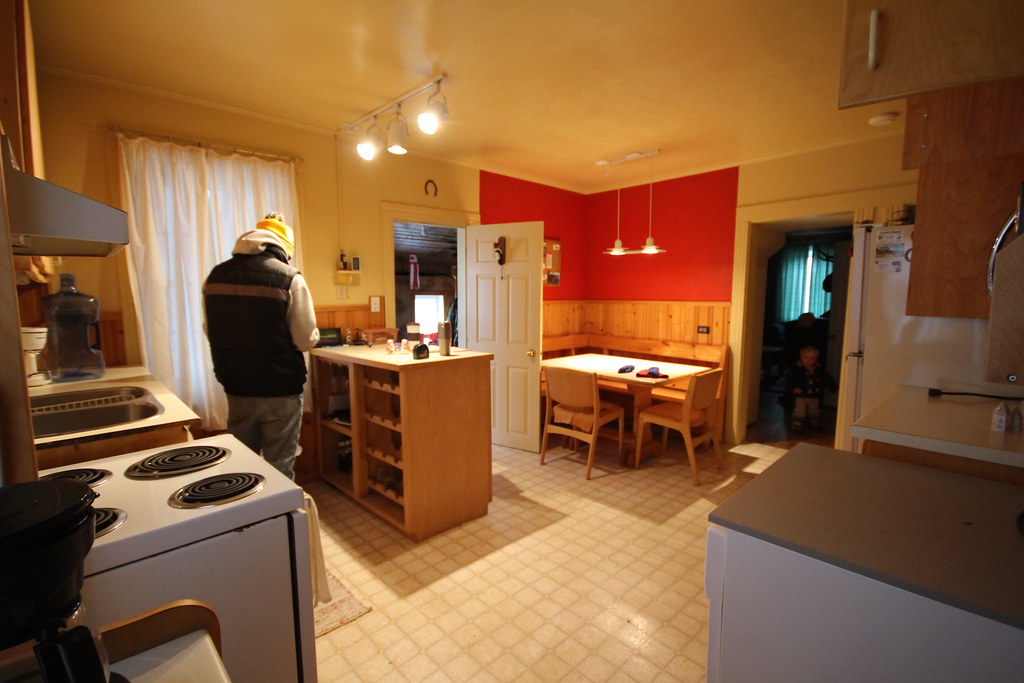
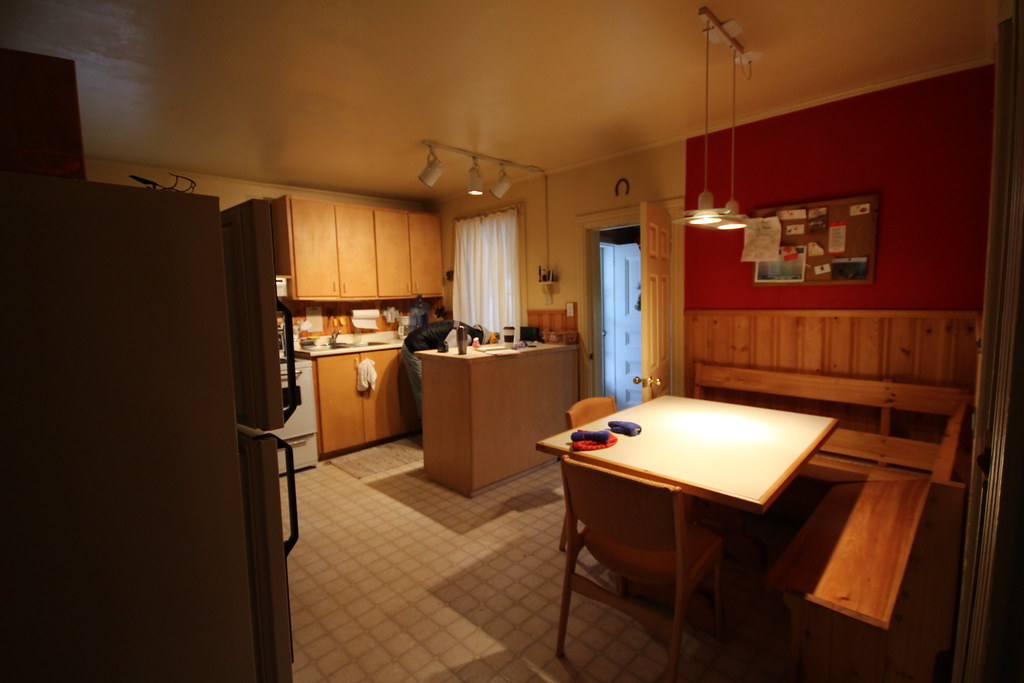
The kitchen is a decent size for what we need, the biggest problem we found when trying to plan a new layout was the five doorways on three walls and two long windows on other walls. It really breaks up the space and makes it impossible to have an entire wall of cupboards. We are discussing some options to close off at least one door and will be losing those two long awkward windows for one big window over our new sink. Again, there is a lot of potential here and I'm extra excited as this will be our first full kitchen renovation. 
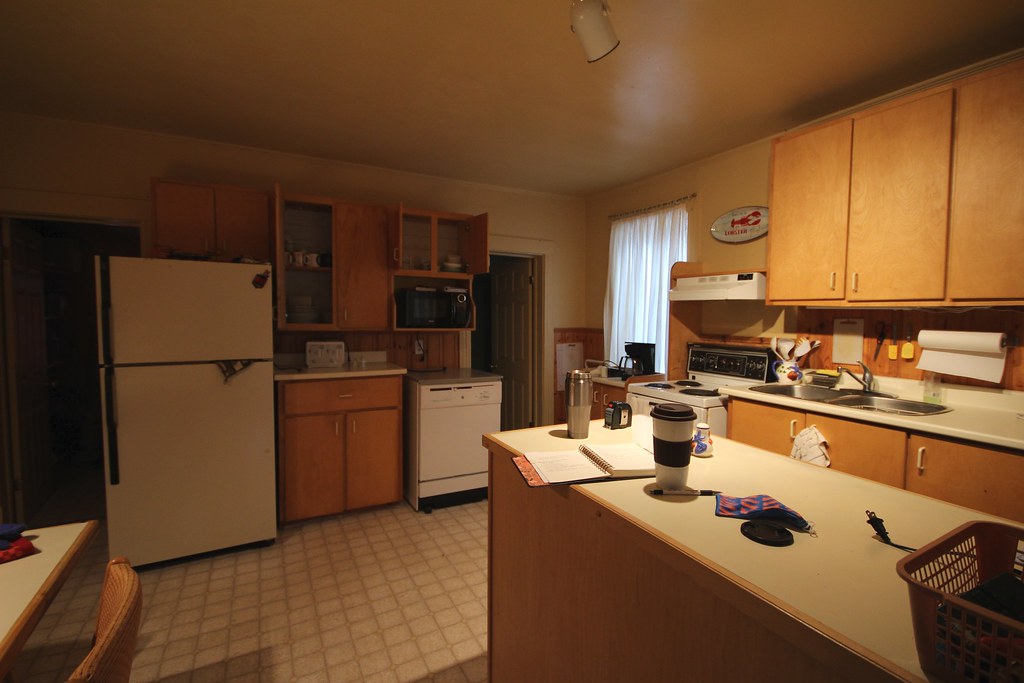
Kitchen3-Nov2017

Kitchen2- Nov2017

Kitchen1- Nov2017

The Living Room

You can enter the living room from the kitchen... and the dining room (which you also enter from the kitchen). It's a cozy place with a wood burning stove, and yes, it did come with the Moose and Deer head. We're probably relocating both to Brett's three bay workshop since they are far too large for this small space. Lighting definitely needs to be addressed in this space (as it does in every other room), and we also plan on turning one of the windows into French doors that will eventually exit onto a deck. I can't wait to make this a really cozy and functional family space!
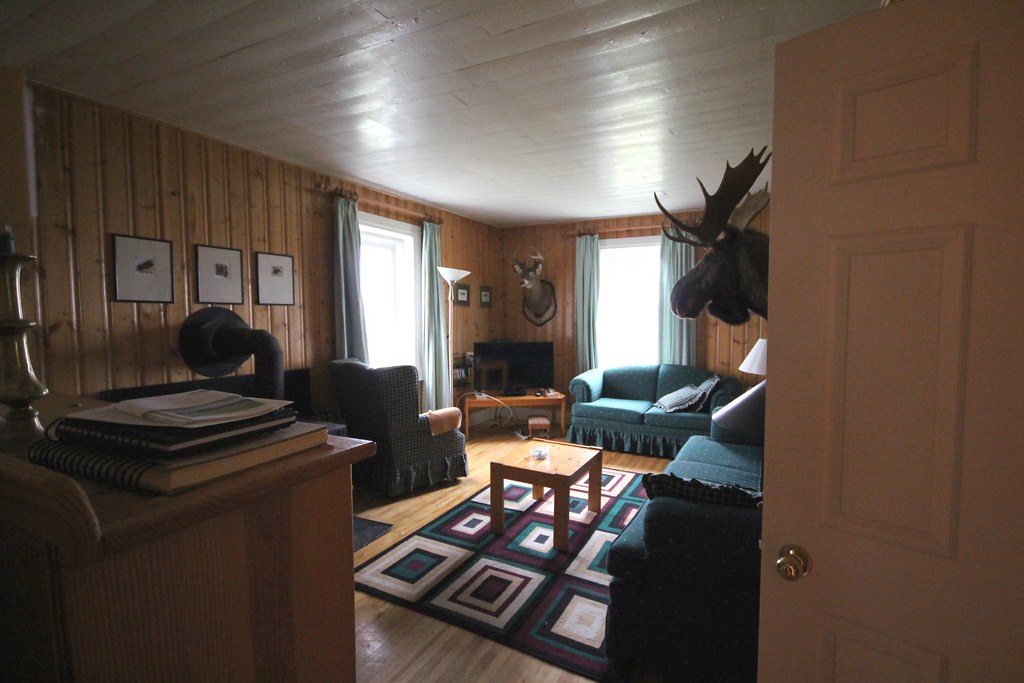
LivingRoom2-Nov2017

LivingRoom-Nov2017

The Dining Room

The dining room is a great size, and one room I was very excited about. It has a beautiful view to the lake, an original built-in (the white one to the left in the picture) and it's a great size. After discussing our kitchen renovation, this will be the primary dining spot. Weekend breakfasts and family dinner's will be eaten here, around a new table Brett will construct. we're both looking forward to building more furniture for this place.
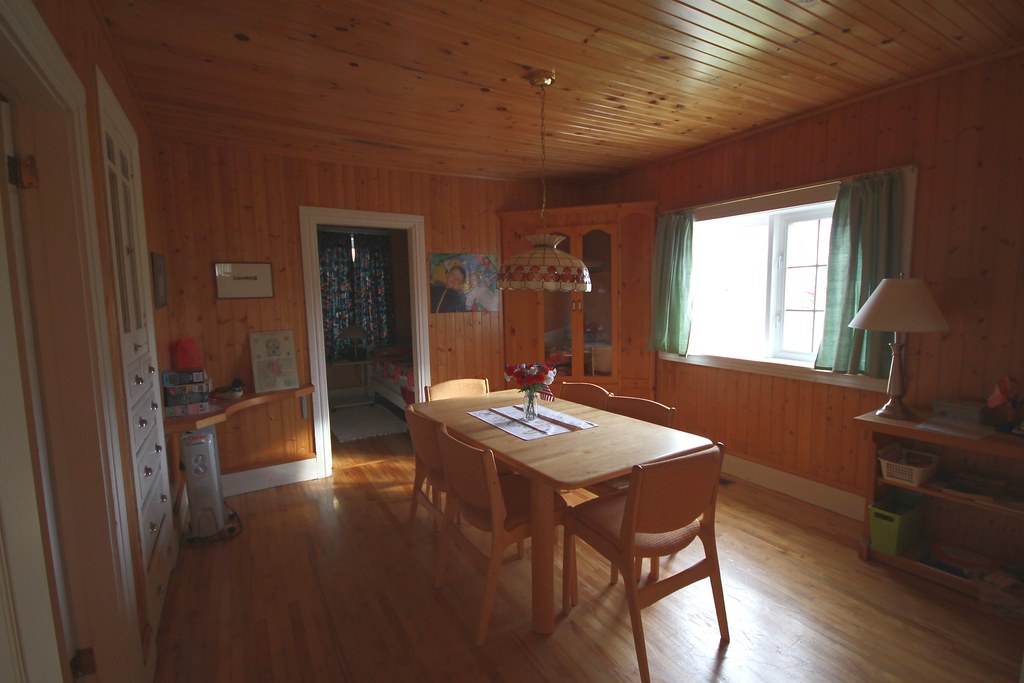
DiningRoom-Nov2017

The Guest Room

Having a guest room in this house, and on the main floor is a huge bonus! It's the door directly off the dining room that you can see in the photo above. It's a decent size but we may play with the layout a bit to make it more visitor friendly. Again, it has a nice view out the front of the property and our visitors will have their own powder room downstairs as well. I look forward to painting and cozying this space up for our friends and family!
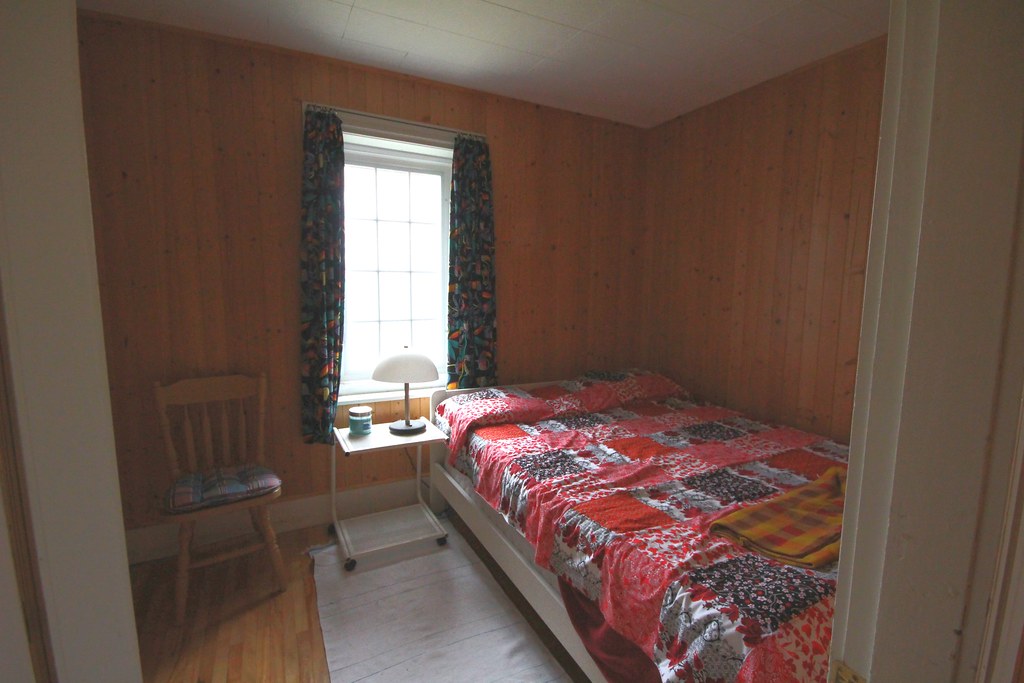

GuestRoom2-Nov2017
So that is our ground floor (with the exception of the pantry, laundry room and bathroom that we had ripped off. I wish I had remembered to take photos of those spaces before demolition began, but they seemed so unimportant. Looking back now we have some big plans to close off the door into the laundry room in the kitchen and enter that space from the pantry. The laundry room will also double as our downstairs powder room. We need to figure out our layout plans, but I'm anxious to get to the point of putting everything back together.

Next post I'll be sharing the upstairs - the three kids bedrooms, our main family bathroom and our master. 
SHARE:

Wednesday, August 20, 2014

Canadian Blog Home Tour

Last month I got an email from Shannon at AKA Design, asking if I would like to take part in a Canadian Blogger Home Tour. I jumped on the opportunity... and a few days later reality set in and I freaked out a little. I kept thinking "Our house is a mess and not really anything special"... then I told myself to breathe and thought about this realistically. We've lived here just over a year (15 months to be exact)... and I'd say that in that time, we actually have done a reasonable amount of work to make this home reflect who we are. 

Home's are always a work in progress and when we moved into this larger home from our tiny place in Toronto, we didn't have much furniture. We have been putting our home together on a single income, and I believe that we are proof that you can do a lot on a small budget. There is a lot more to do around here, but these are the rooms we've pulled together so far...

My Office

When we bought this home, I was so excited to finally have a space to turn into my own office/craft space. In our previous home the area was shared with our laundry room and it could get very crowded very quickly. 

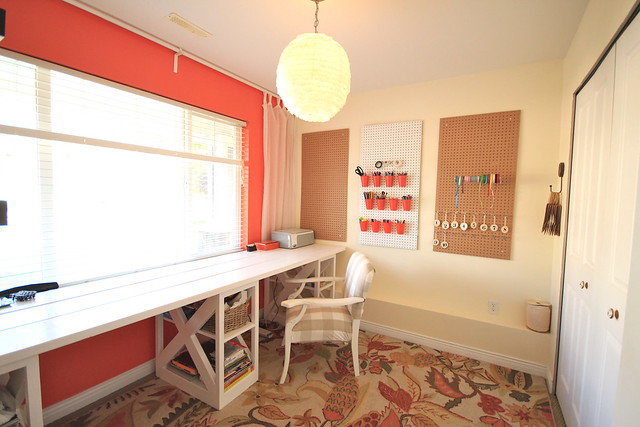
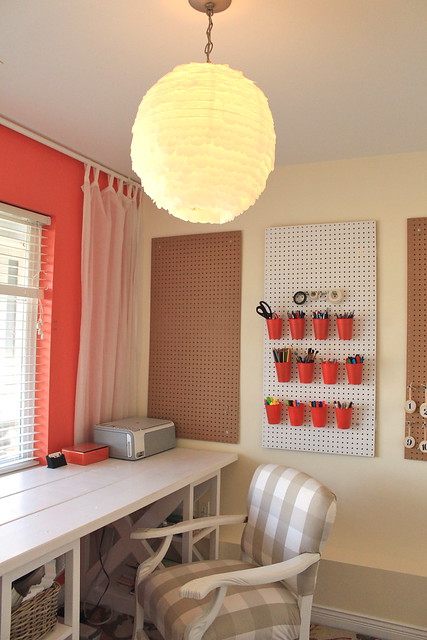
The first thing we did in here was to paint the walls. I used the same two colours that were used in Halle's room (Pearl and Coral). The little bit of coral on the window wall was the perfect punch of colour but it's not too overwhelming in the small room since it's used sparingly, and the sheer curtains help to soften it a bit as well. I also replaced the light fixture with a paper lantern that I DIY'd , and we hung some pegboard on the wall to help with organization. My favourite part of the room though, is the huge desk B built for me that runs wall to wall. It's the perfect spot to spread out and craft, sew - whatever creative thing I desire. 


My Office - August 2014

My Office - August 2014My Office - August 2014

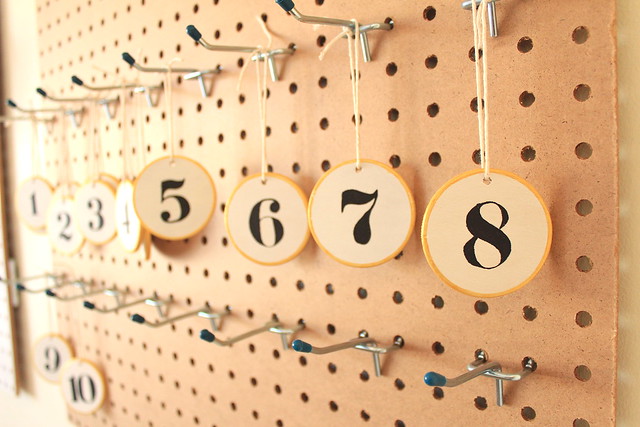
For my pegboard storage we bought some hooks for hanging my tags that I paint. I also used a small dowel on hooks to keep all of my ribbon organized. For my pens, pencils, etc I used plastic cups and punched two holes around the top edge. I then used zip ties to attach them to the pegboard. A perfect spot to keep everything easily accessible from my desk, and neatly organized. I also think it looks kind of pretty with the coral cups (that were left over from H's 2nd birthday party) offset in rows. Who doesn't enjoy some pretty organizational solutions?

My Office - Halle Handmade tags
{some of my newest tags for Halle Handmade}

The Dining Room

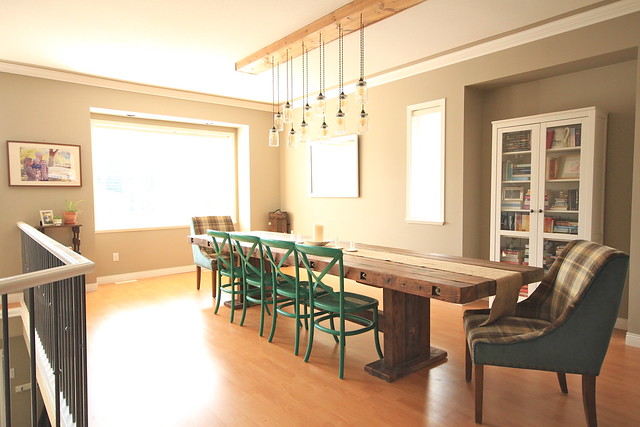
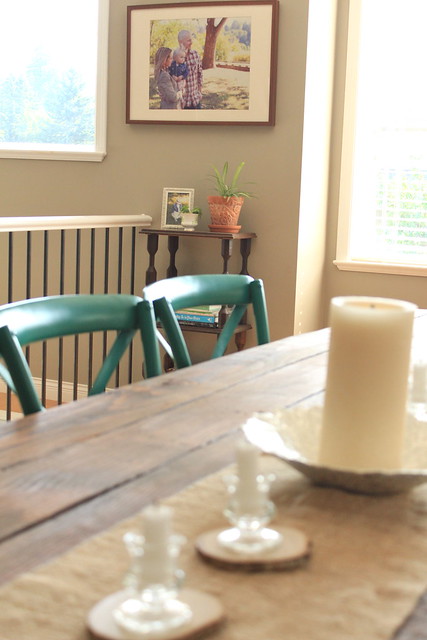
The dining room was originally meant to be two separate areas, with a seating area by the window and a smaller dining table located under that light fixture. When we bought the house we envisioned this area as one large dining room that could seat all of our friends, so that is what we did. 

Dining Room - August 2014

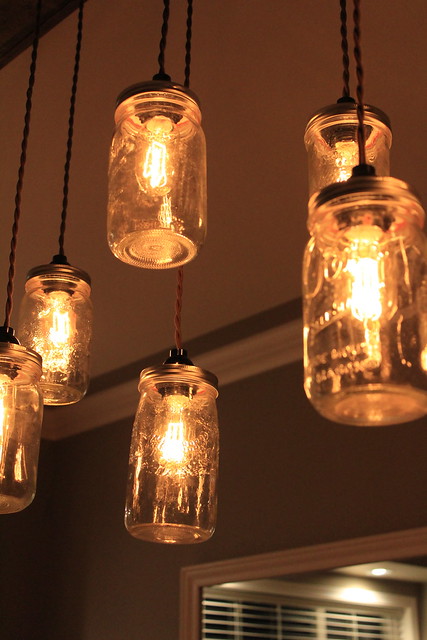
B built the table for around $100 (it's 12 feet long) and he also constructed the light fixture using pine boards. We ordered the wire from a company online and bought the mason jars from someone local. We bought the filament bulbs (plus some extra's) from Restoration Hardware during their lighting sale early in the year. To keep the jars from getting too hot we just drilled a few small holes into the snap lips. 

First Time Fancy DIY Dining Room Light Fixture

First Time Fancy DIY Dining Room Light Fixture

I found the small table at Salvation Army for $3, and it's perfect in here since the wood tone works with our dining table. Our large family photo I had printed when Shutterfly ran a "free" 16x20 deal and the frame is a simple IKEA Ribba frame. Artwork is one thing we need to add more of to our home - it's slow going, but we're getting there.

Dining Room - August 2014

On the table is a burlap runner that my Mom sewed for us, using burlap left over from our wedding tablecloths (she sewed those for us as well). We have so many more plans for this big room (like the 11 foot church pew we are working on for the opposite side of the table), a built in where the too small bookcase currently lives and maybe even a window seat. I'd also like to paint in here, but that is a much larger commitment as our house is pretty open concept.

The Kitchen

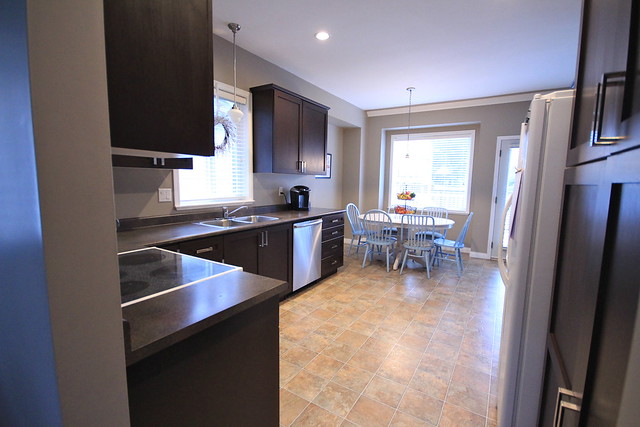
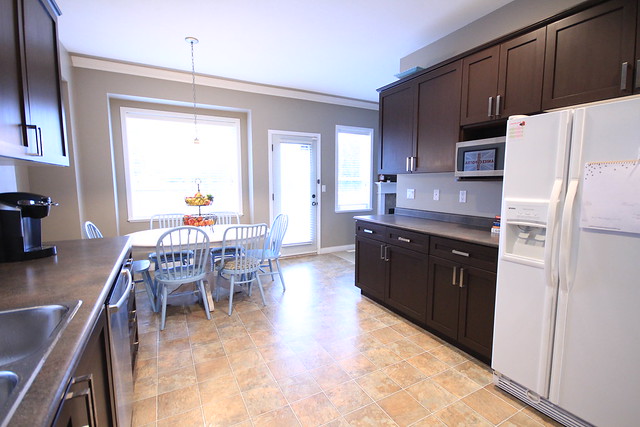
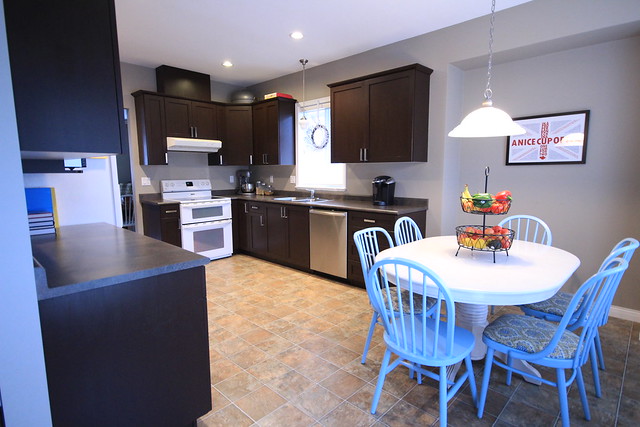
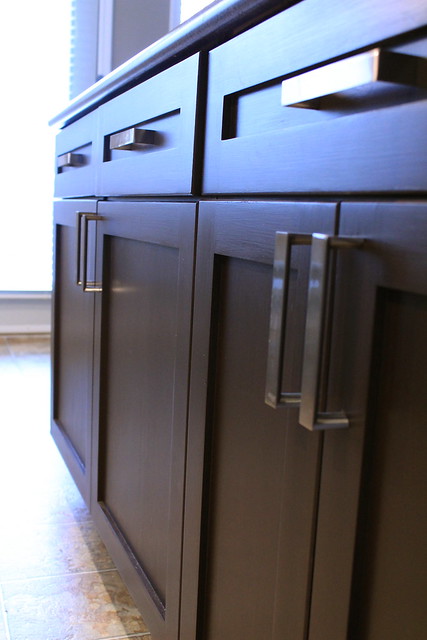
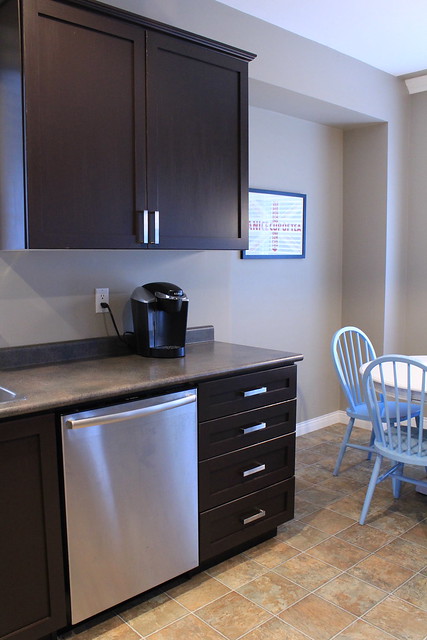
Since moving in, in May of 2013 we've done quite a few things in this room. We started by replacing the light over the kitchen sink, with a fantastic $7 find at Home Depot. Then around Christmas last year we made some bigger changes, including a new dishwasher (after the old one started to leak and flood the kitchen) and a complete makeover of our kitchen cabinets. Not only did we change the colour using Cabinet Transformations from Home Depot, but we also upgraded the hardware to something more substantial. It's not a forever solution, as down the road I think we'd love a full kitchen renovation, but this has made us very happy with the space for the moment.


Refinished Cabinets - January 2014

Refinished Cabinets - January 2014

Refinished Cabinets - January 2014

The room has come a long way, but I'd still like a new fixture over the table, a seating bench in the window area and some shelving in the bump out where my "A Nice Cup of Tea" print hangs.

Refinished Cabinets - January 2014Refinished Cabinets - January 2014

The Family Room

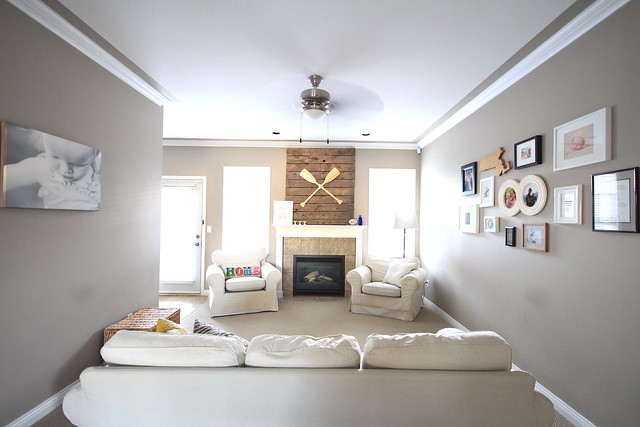
The family room was bland and boring when we bought the house. It hasn't been painted yet since it opens into our dining room, kitchen and main entry. We've done what we can with what we have though. 

Living Room Wide Angle

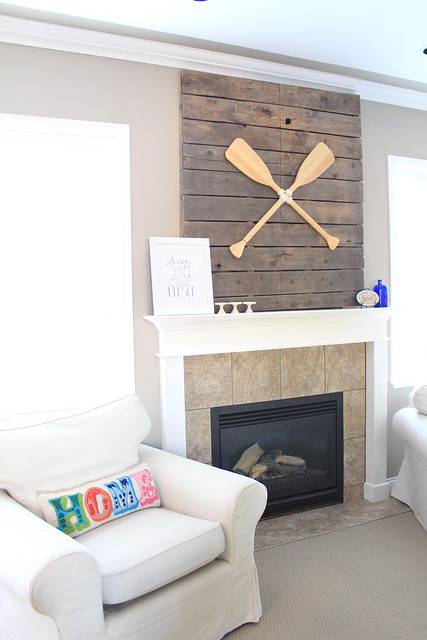
The pallet over the fireplace is one of my favourite pieces. It's a pallet that B got for free. He ripped it in half and attached two oars that we purchased on sale from Canadian Tire. We originally planned on using hinges to hang it so we could keep seasonal decor behind it in the "alcove", but it wouldn't fit properly. B ended up screwing it directly to the wall and it works perfectly. We're so happy to have that hole covered by something we love!

DIY Pallet in Living Room

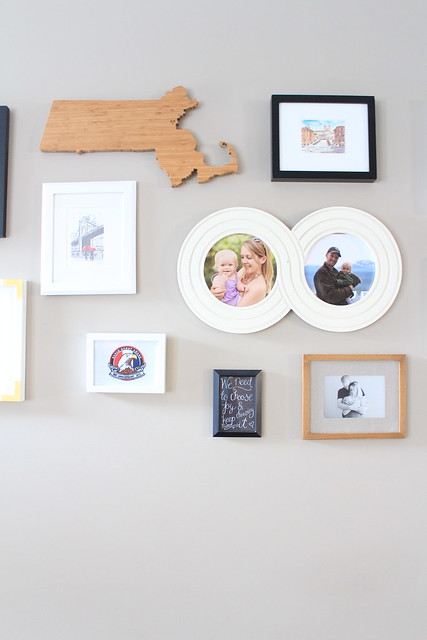
Our gallery wall in this room holds a lot of meaning. B is from Massachusetts, hence the cutting board we have hung. The picture in the top right is a watercolour of the Spanish Steps, which I bought when I was in Rome in 2005. The print in the white frame below Massachusetts is of a couple in New York, a reminder of where we met and fell in love. The small white frame is an anniversary Eagle Scout badge B received - and of course our family photos always make us smile.

Living room gallery wall

The Master Bedroom

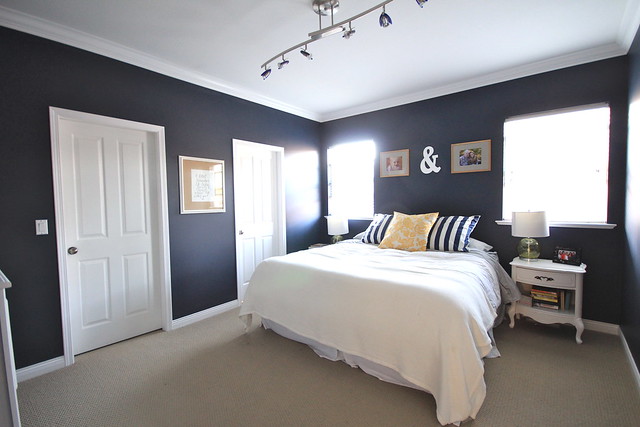
When we bought our home we thought it was great that everything was neutral and grey... then we lived here for a few months in this rather grey climate and realized it wasn't as wonderful as we thought. This past winter I finally painted our bedroom - choosing a dark moody blue, inspired by the room we stayed at when we were in Scotland for our honeymoon.


Master Bedroom

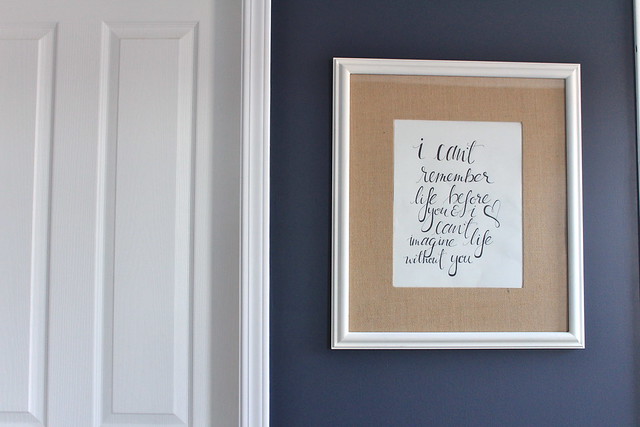
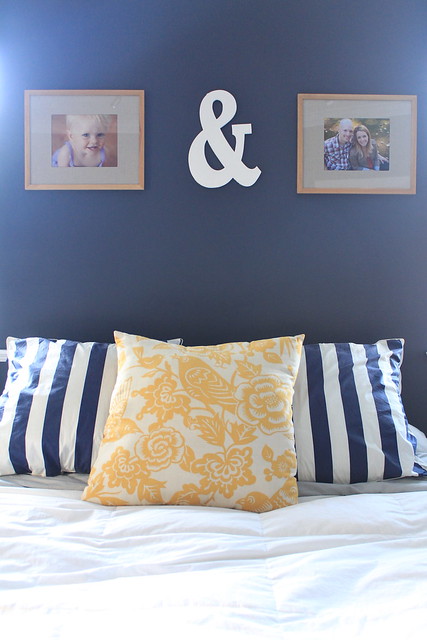
We're slowly adding artwork to the space. Family photos over the bed with an ampersand that my father made for us. The frame between our closet and our bathroom is a piece that I created for B for our 1st Anniversary (which is on Sunday, but I gifted it to him early). 

Master Bedroom - DIY ArtworkMaster Bedroom

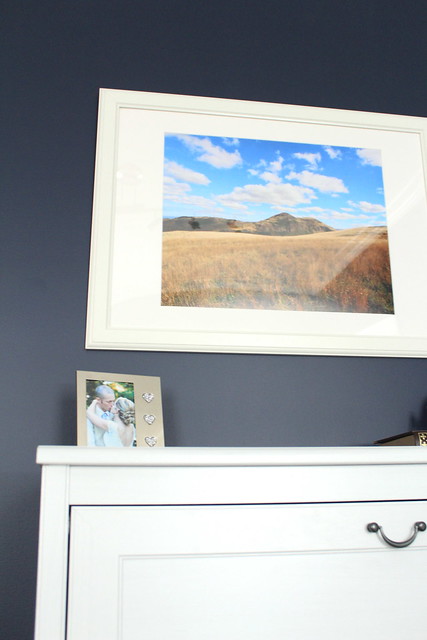
Our most recent artwork addition is this large print that I took from the top of Arthur's Seat in Edinburgh last September. This is my favourite photo from our honeymoon, and again I had it printed when Shutterfly ran a promo for a free 16x20 print. It's the perfect addition to our room, and the best reminder possible of our incredible honeymoon!

Master Bedroom Artwork


H's Bedroom


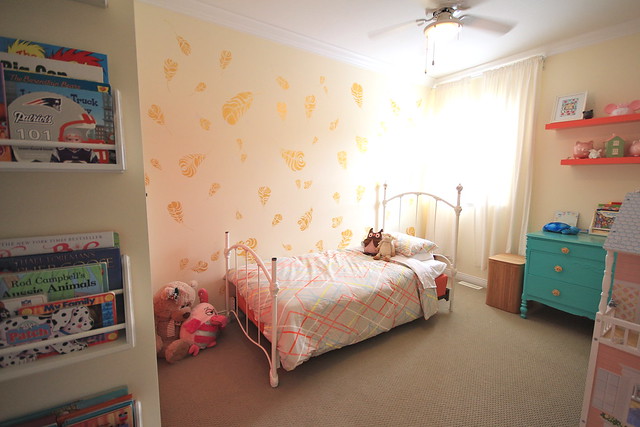
When we got the keys, H's bedroom was the very first one we painted. B spent a night sleeping on the floor here since we wanted it all painted before we moved in. The walls and closet doors were horrible and dirty. We took the room from a bubble gum pink nightmare to a bright and airy little girl's space.

Halle's Big Girl Room

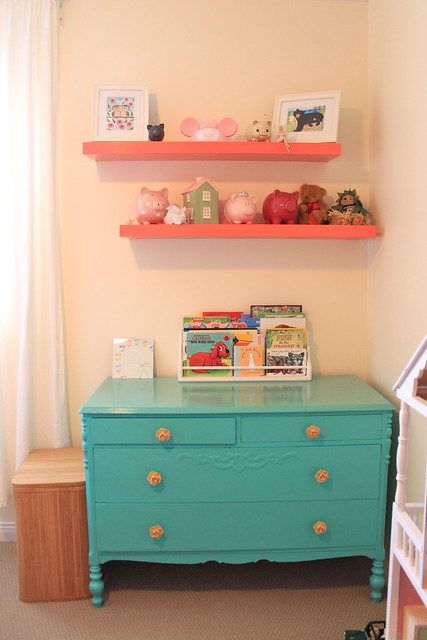
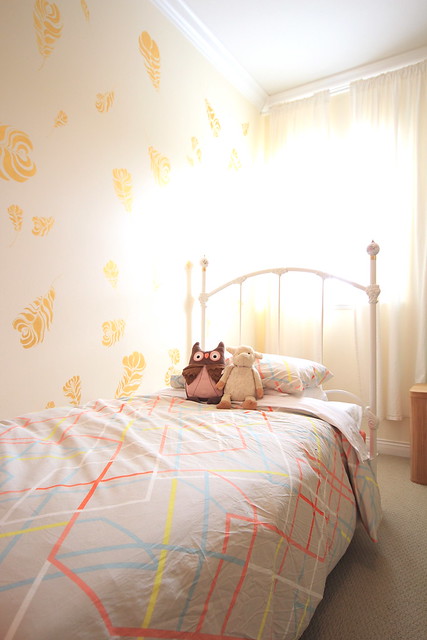
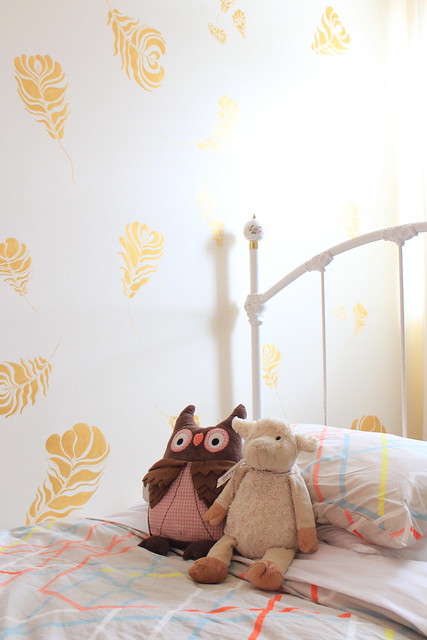
The bedframe was a $6o score on craigslist. The shelves were left by the previous owners and we painted them coral (her closet doors are the same colour). The dresser is a DIY project that B and I tackled when she was a baby. I was thrilled to find the IKEA PS 2014 Duvet Cover for her bedroom, as it ties together the coral, teal and yellows that are scattered throughout the space. Her boxspring is covered in a coral fitted sheet from Target and her sheets are a plain white. 

Halle's room - DIY BookshelvesHalle's Room

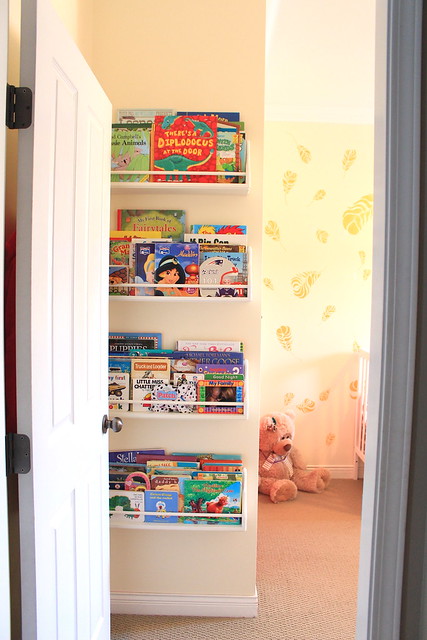
Her bookshelves may be my favourite part of her room. My father made them for us when I was pregnant with her and they are perfect for her ever expanding book collection (I may need him to make her more).

Halle's Room

Halle's RoomHalle's Big Girl Room

Halle's Room

The gold plumes were a cheap, but not quick addition to make her room a little more fun. I handpainted each one last fall using metallic gold acrylic paint. Each plume needed two coats of paint and it took a while as I had to free hand them, but I think it was so worth it. Whenever people visit, she loves to show off her bedroom and announce "My Mommy painted these for me!". I love that she loves them so much!

Looking for some more fabulous interiors and inspiration? Make sure to check out all of the Canadian bloggers that are giving you a look at their home! If these teaser shots don't convince you, I don't know what will! Stop by and show them all a little love and be inspired! Links below!

Canadian Bloggers Home Tour

Monday August 18


Tuesday August 19


Wednesday August 20


Thursday August 21


Friday August 22

SHARE:

Monday, September 23, 2013

Come On In

Happy Monday dear readers! Currently little H and I are on a flight back to BC. I've really enjoyed my time visiting with family and friends since the beginning of August, but I'm excited to finally return to our home.

Being away for so long (48 days to be exact) has inspired me in different ways, and I'm eager to get back to decorating our new-ish space! The whole place is still all sorts of empty... and grey, so we have our work cut out for us! Today, I'm finally posting up a house tour page for our new home! Progress photos will come as we work through the rooms, so make sure to check back regularly (There should be some updated office photos in the next week or so!)


Front - without number

So come on in, take a look around and stay awhile (just click the page link above that reads "Our Second Home")! With wedding and honeymoon stuff behind us, it's time to start focusing some more time and energy on our lovely home!

What things do you plan on tackling this fall?
SHARE:

Thursday, May 23, 2013

The New House Tour

So, we are slowly getting settled into the new place. Still lots of boxes and unpacking going on, so not many photo worthy moments right now. In the meantime, I thought it was time that I finally gave a proper photo tour of our lovely new home! So, here you go...


The Front Entry


I really love how grand our front entrance feels with the high ceilings and the beautiful staircase. For now, the only things we have discussed changing here, are the light fixtures.

IMG_1392

The Office

This room is considered one of the five bedrooms in the house. To me, the location is not right at all for a bedroom, so instead we will use it as an office space. I look forward to focusing more on my blog and Halle Handmade in this space. I have already started to think about paint colours, decor and of course a new light fixture. 

IMG_1397

IMG_1396

The Laundry Room

A small and rather boring space. We do have a brand new washer and dryer in here, which for now is all of the "updates" we will be doing. In the future, I'd like to paint, lay tile, update the light fixture and really just make this space a lot more fun and functional. 

IMG_1395

The "Rec Room"

This space will be used as an entertainment room. B would like a TV down here, and some of Halle's toys will probably make their way into this large room as well. It will be a great space for us to hang as a family, or with friends.

IMG_1394

Basement Bathroom

What you see is what you get. It's nice and clean and at least there is tile on the floor. Glossy black may not be our thing, but it doesn't need to be touched right off the bat.

IMG_1398

Basement Guest Room

This space was obviously used as a work room by the previous owner. With a guest room upstairs for the moment, we can leave this space mostly untouched for now, but in the future the blue trim will go and we will add some other updates. It's just nice that we do have another bedroom in the basement if we ever need it.

IMG_1399

IMG_1400

Basement Work Room

This is a space we are both pretty excited about. It's a great space for us to work on projects, without taking up too much space in the garage. Even better, is the door you see in the photo actually goes into the garage, giving us easy access to tools or other items we may need. I'm looking forward to having a space like this INSIDE the house!

IMG_1401

The Living/Dining Room

I love that this is a bright and open space, but I'm not crazy about the light fixture, and we're actually not completely sold on this space being the dining room. I find it a little awkward that when you come up the stairs the table would be right there, but we'll see how I feel once we live here for a little while. 

IMG_1409

The Kitchen

This kitchen is HUGE and BRIGHT and we love it... for now. Of course we hope to show it some love down the line. If nothing else it will get some tile and backsplash and new appliances. For now, I'm just excited about the big kitchen with lots and LOTS of cupboard space. As the picture below indicates, Halle is also excited about all of the storage space and was testing out the drawers for us...

IMG_1413

IMG_1414

The Family Room

This space is smaller than it looks, but we'll make it work. For now we may not put anything here (lack of furniture), but I would like to fill in that box over the fireplace (no tube TV will fit in there for us), and down the line we'd like to do the whole top floor with some engineered hardwood, but this room definitely has a ton of potential to be great.

IMG_1422

The Master Bedroom / Bathroom

From the moment we first walked into this house, we loved that buying it wouldn't mean a huge downgrade in the master bedroom department. The space is nice and big (lots of room for our King Size bed), and the closet is even larger than our previous closet in the rental. There is a lot of room for improvement here, including storage in the closet, and the master bath could use some upgrades like a second sink and some tile, but first on our list will be that light fixture in the bedroom.

IMG_1424

IMG_1427

IMG_1428

IMG_1430

The Hallway Bathroom

A nice and simple bathroom for Halle and guests. I'm glad that it's neutral for now (and nice and clean). We have discussed how this room may be the first reno we do (not right away of course). We'd like to lay new floor tile, upgrade the lighting, paint and maybe even tile in the shower enclosure. It's not a bad space, but it could definitely use some upgrades.

IMG_1431

Halle's Bedroom

Where to start? Pink walls and decals - GONE! I've already shared our inspiration for her new room, and you better believe that progress is well underway! Keep an eye out next week for some updates on how her new room is coming along!

IMG_1434

IMG_1435

The Guest Room

Thankfully, the previous family did not have two girls who wanted pink bedrooms. We are so happy with this nice neural grey room that will make a perfect guest room. For now, we don't need to do much except move in the furniture.

IMG_1440

So - there you have it. Your first look at our new place, as a whole. I've left out outdoor photos for now and will save those for another day. I'm so happy that the previous owners did a great job of maintaining the property so we have a nice outdoor space to start with and can only continue to improve it from here.

I am beyond thrilled to be in our beautiful new home, and my mind is already swimming with all of the fantastic things we can do to this space! I hope you are as excited as I am to follow along with us turning this house into our very first West Coast home!
SHARE:
Related Posts with Thumbnails
© Life on Misneach Ridge
Blogger Designs by pipdig