


Since I already shared some of my inspiration photos with you the other week, I thought it would only be appropriate for me to share with you my final work.
Everyone in the class was given the same floor plan and we were given permission to remove and change interior walls as needed. Exterior walls were not to be changed. Here's what I came up with...
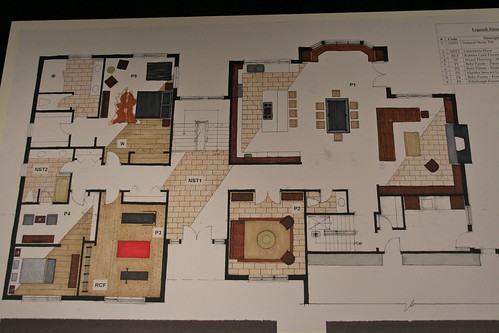
Please be kind... with the exception of the walls, I was drawing everything by hand. No fancy computer programs for me.
So what you're seeing is what B's dream home would look like if he were a bachelor. The double doors in the centre of the plan are the entrance. Everything to the right are the social spaces in the home, while the left portion of the home contains the private spaces. Let's start with the social spaces, shall we?
B wanted an open concept that was suitable for entertaining large numbers of guests... every weekend. He didn't require formal dining, but wanted special feeding stations for his two dogs. He also asked for somewhere to display his sports awards, memorabilia and professional recognitions, along with a large TV that would be visible to the entire open plan entertaining space...
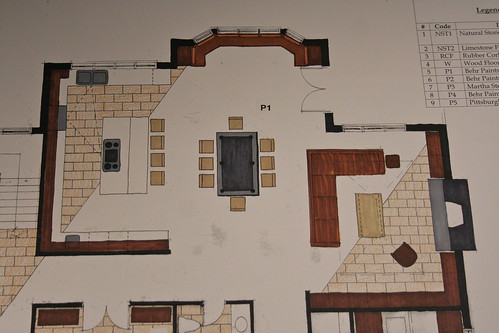
I removed all of the walls, and pushed the kitchen from it's original location in the middle, to where the formal dining area once existed. This gives him a ton of space to cook and still interact with his guests. At the bottom of the kitchen, there is a small bar area with a sink and under counter double "beverage" refrigerator.
The seating area located in the bay window also doubles as the dog's feeding station. Drawers underneath pull out and contain the dogs water and feeding dishes, and cupboards on either end act as storage for leashes, treats, dog food etc.
Since B didn't require formal dining, we decided to go with a Fushion Table just off the kitchen area which I am sure, would mostly be a pool table, but could also become a dining table when necessary (or a great place to just hang out with friends and play cards, etc). The far right is a seating area, where we placed the Fulham Leather L Sectional, a Leather Copenhagen Chair and a Brickmaker's Table, all from Restoration Hardware. The TV would be mounted over the fireplace, and all along the walls we installed built-in bookcases for B to display his collections. He loved that the TV over the fireplace would make for easy viewing right into the kitchen. Mission accomplished.
The other room considered part of his social space was the "Smoking Lounge" (again, B is not a smoker... I guess if he was a bachelor he would just enjoy cigars with his buddies).
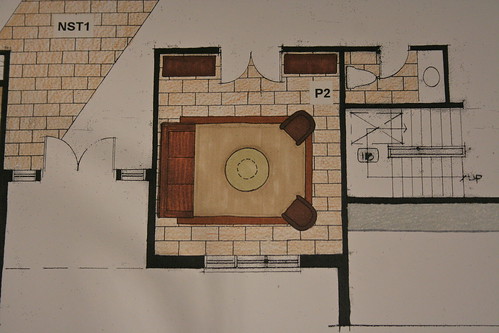
I kept the layout pretty simple in here. Two humidors on either side the doorway, two Leather Copenhagen Chairs, a basic Fulham Leather Sofa and the Rotunda Coffee Table from Anthropologie.
All of the flooring through the social spaces was natural stone (12 x 24 tiles) with in floor heating. I wanted to use something durable that would stand up to the abuse of the guest's he would be entertaining, as well as two dogs. B was pleased.
Then there are the private spaces...
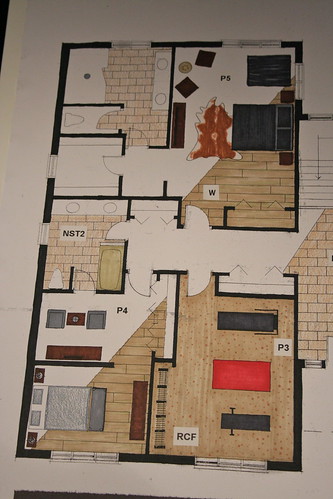
One of the additional bedrooms became B's home gym, while the second was transformed into a guest suite with it's own small seating area and TV, as well as access to the home's second full bathroom.
B's master retreat (at the top), is where I used two Industrial Tool Chest's as nightstand's on either side of the bed, and the Industrial Tool Chest Console was placed by the foot of the bed to hold his TV, and act as additional storage.
His master bath had double sinks, a separate water closet and a huge steam shower... Lucky boy.
My final concept board looked like this...
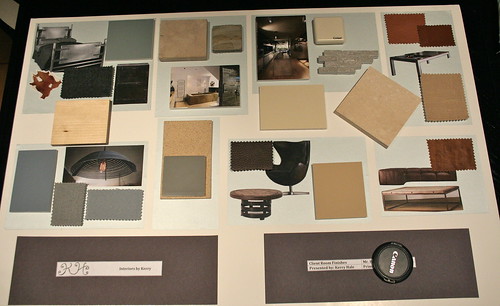
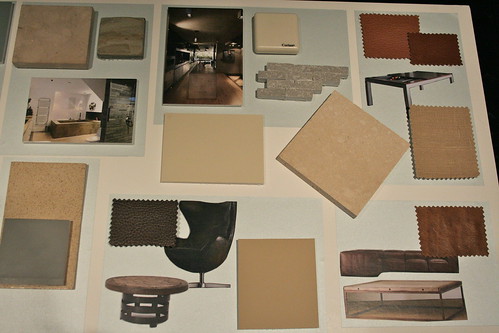
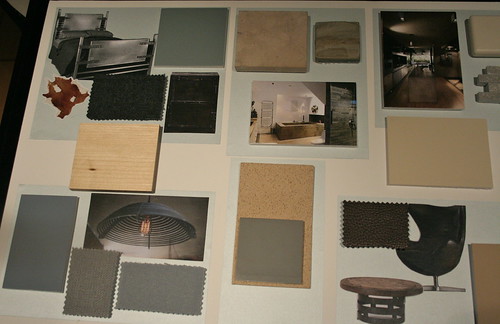
There you have it... my final project. I'll know on Monday how I did, but I felt pretty good about it - this being my first crack at interviewing a client and designing an entire home. Definitely a learning experience, and I for sure need to practice my rendering skills.
But that's it! I'm off until September, so I hope to have more time to share nursery progress and other home projects that I plan to take care of in the next few months! We're busy bees over here!


