Trending

Monday, July 15, 2013

So Fresh & So Clean

Originally we had reserved this past weekend for a camping trip on the island with some of our friends. Unfortunately, some unexpected financial obligations arose and we had to back out last minute. We were sad to miss it, but on the upside we accomplished A LOT around here (including meeting new friends in our neighbourhood for both Halle and myself! Exciting!!).

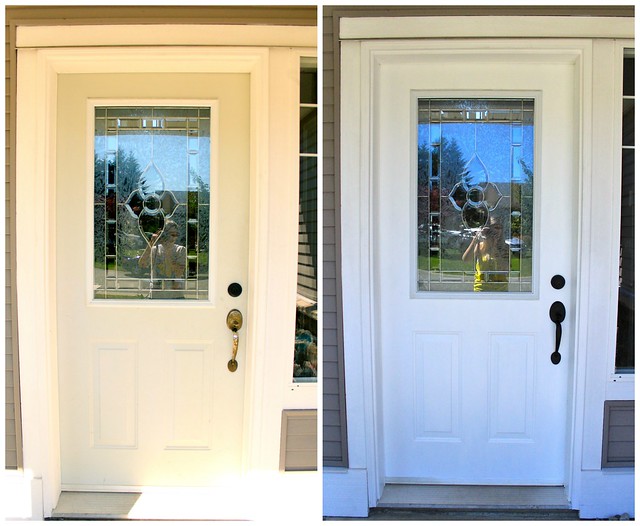
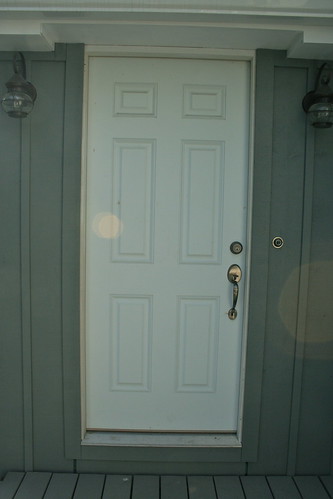
With Halle's birthday party happening this coming weekend, we really want to house to be clean and as organized as possible before our friends show up (we're still settling in after the move). After reading this post last week by my blogging pal Sheila, I wanted to tackle a project we've been putting off since we moved in - our front door. From a distance, it didn't look like much more than a white painted door (with mismatched hardware). 

July 13, 2013


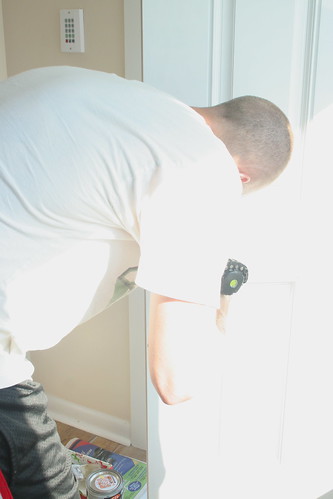
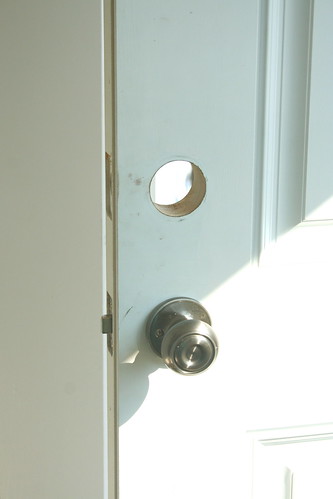
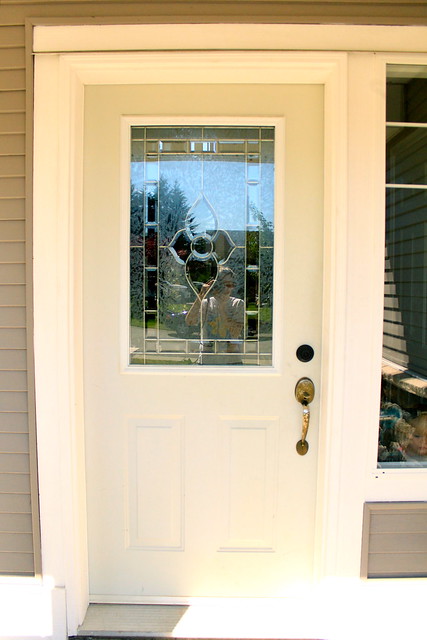
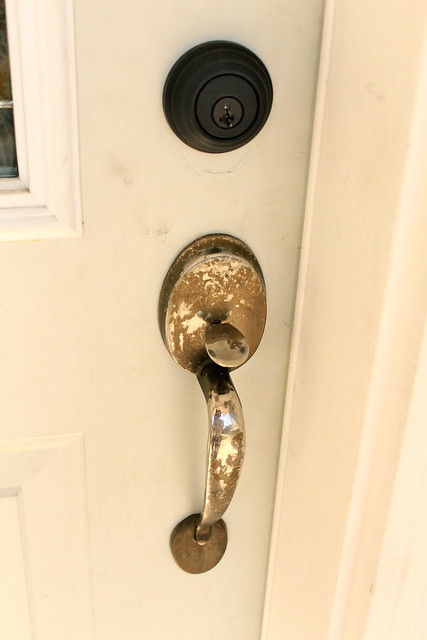
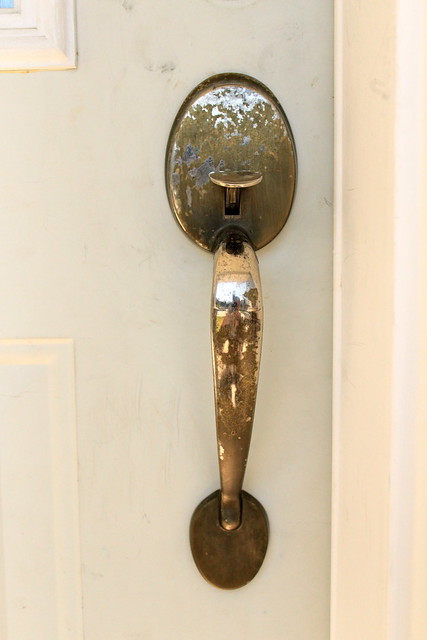
When you got closer, the ugly became a bit more obvious. The door itself is your run of the mill exterior grade steel door, but it had never been painted and was incredibly dirty and marked up. To make it look even worse, the brass paint from the door handle was chipping off and it just looked awful.
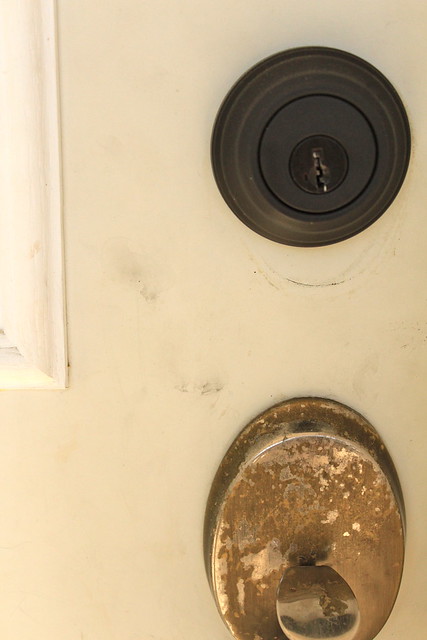
July 13, 2013July 13, 2013

July 13, 2013

We had already bought some flat black spray paint to use for the door handle a while ago, but we needed to decide what do for the door itself. We talked colours and picked up some paint swatches to bring home and test next to our siding. We'd even considered purchasing a new window insert that we saw at Home Depot for $28. In the end, it came down to the fact that the door is NOT our style at all, and eventually we'd like to replace it with a nice wood door like thisthis, or (my personal favourite) this.

With all this in mind, we opted to use some white exterior paint that B needed for another project (to be shared soon), and just freshen up the front door. Once I started painting it was obvious how grey and dirty the door really was.
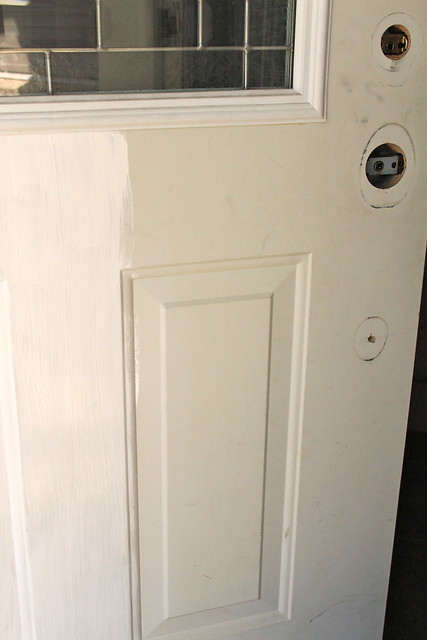
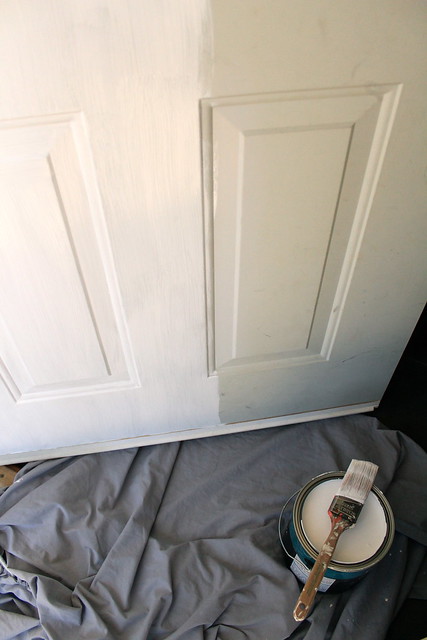
July 13, 2013July 13, 2013

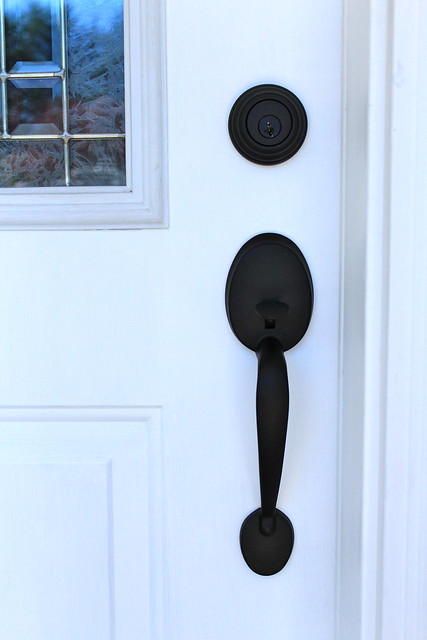
It took about 3 coats to get the door looking great, and once we put that black door handle back on everything was looking much crisper around here. 
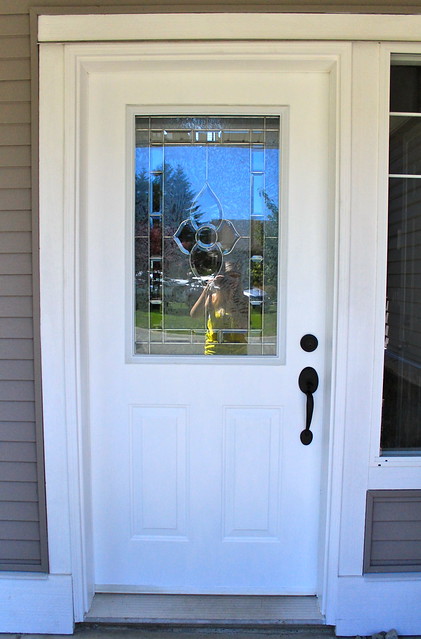

July 14, 2013

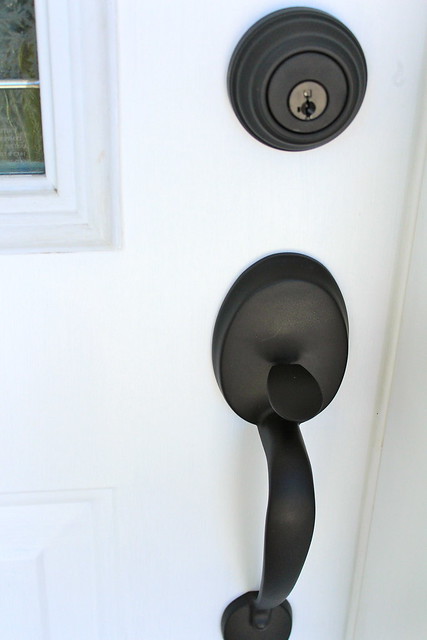
Front Door Before & After

The door handle was pretty easy to clean up. B just gave it a good sanding to get all the old chipped paint off, and then we gave it three light and even coats of the matte black spray paint. It's looking fantastic and matches our deadbolt nicely!
July 14, 2013July 14, 2013

Isn't it great that one day of light work can make such a noticeable difference? Have you been freshening anything up around your place recently?
SHARE:

Thursday, June 14, 2012

Upon Arrival

While I've been plugging along inside and making some good progress in our rental, sadly, we've left the outside feeling rather neglected. It really isn't the most inviting looking home from the outside, especially when so many of the other homes in our neighbourhood look so manicured. 


I won't scare you off with photos of the exterior of this place, but why not take a look at some of the things that are inspiring me to make our little place more pretty and homey for the time being. 


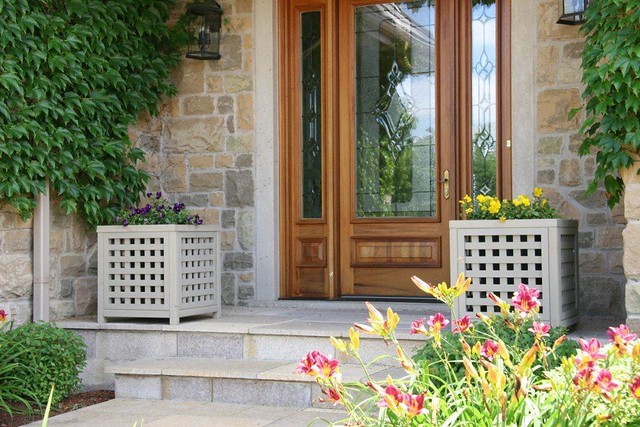
One of the first things that comes to mind when I think of sprucing up our front yard, is to add some pretty planters by the front door. They are the perfect way to add some colour, and when we are ready to move on from our rental, it can all come with us. It's a win-win situation. Something like these lattice planters, available at The Home Depot, would be perfect!


YM11532_lifestyle_highres

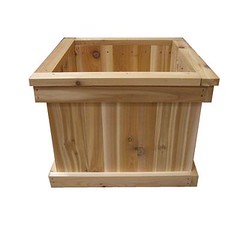
Or maybe something a little more simple that I could decorate as I please. I think that these Square Cedar Planters would be a great little project, and at only $31.61 each - they don't break the bank!

15687.CD1616L_4

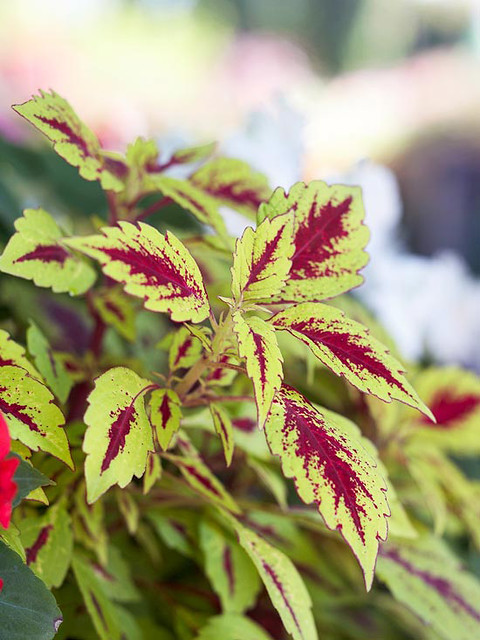
Aside from our planters, we have a small garden bed off to the right of our front door. It lies directly beneath our dining room window, and at the moment is empty... with the exception of some weeds. B and I have been discussing planting something in there to pretty it up a little and I'd like something that does well in the shade, and won't need a ton of attention from us. I'm leaning more towards a leafy plant that can add some colour, rather than flowers whose blooms can die off anyway. After flipping through a slideshow over on Better Homes and Gardens, the Coleus really jumped out at me...

550_101300436

I love the bright shade of green and red together! So bright and pretty, and no flowers required!

Then of course there is the obvious step - a seasonal wreath! Though I know that a floral wreath is pretty traditional for the summer months, I'm not much of a floral wreath type of lady. So when I spotted this lemon wreath on Pinterest... I was sold! After checking out this great how-to, I think this is a legit project that I would like to tackle soon...

274860383477432879_GbFTZIiG_f

I think this about does it... enough typing and time to start working! I'm feeling highly inspired to get things spruced up out front. Time to go out in search of supplies!

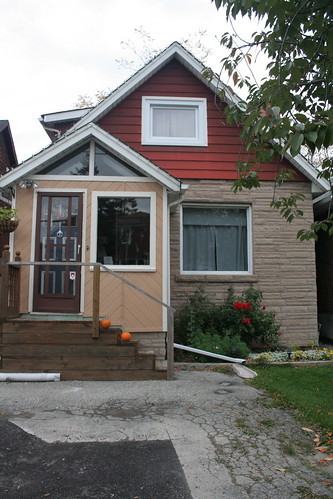
What are your best tips for prettying up the exterior of your rental? Have you been doing any of your own exterior projects recently? I must say... all of this talk about curb appeal, really has me missing our lovely little front porch back in Toronto...
Painted Door - July 2011

Yup... definitely feeling a little homesick for that tiny home every now and again....
SHARE:

Tuesday, July 12, 2011

Finishing the Front Door

First off, I NEED to start by saying thank you all SO MUCH for your sweet, sweet comments yesterday on our little peanut's nursery! It means so much to both of us to have such positive feedback on a room that we put so much of ourselves (and our family) into. You are all truly the best! Also, a big thank you to Megan over at Honey We're Home, who is featuring our little nursery today on her fabulous blog. So to all of those who are new to First Time Fancy - welcome and I hope you enjoy looking around!


Today - I have another new project to share. Yes... we're still crossing stuff off of our list as we inch closer and closer to the big due date (Two more days...). Over this past weekend and into yesterday, we were working on sprucing up our boring old front door. In my last post about improving our curb appeal, I made it no secret that our next step was to get it all painted. So, as we worked on painting the exterior the other weekend, our front door looked like this...


Front Door Paint - July 2011

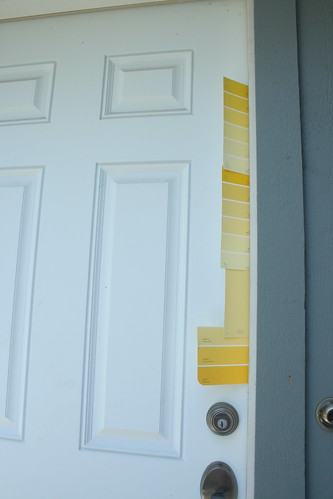
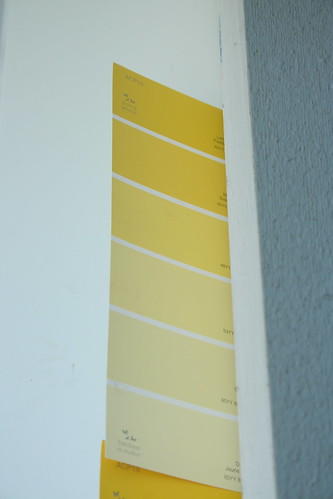
We had picked up this selection of yellow paint chips from Home Depot quite a while back, and left them laying in one of the drawers of our console table for future reference. We eventually both agreed that yellow was indeed the colour we wanted to use, so we whipped the paint chips out and lined them up. After staring at them for quite some time, I narrowed my choices down to the top two paint chips, and after a bit more consideration, B and I narrowed it down to the top chip...

Front Door Paint - July 2011

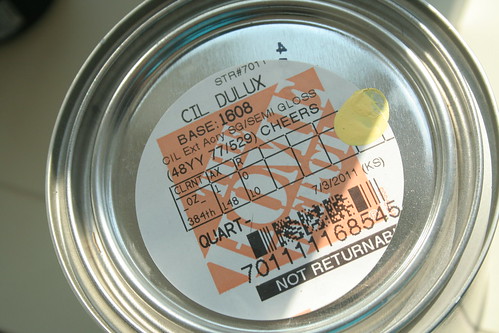
The final choice was the third from the top. It's a CIL colour, called "Cheers" for anyone interested.

Front Door Paint Colour - July 2011

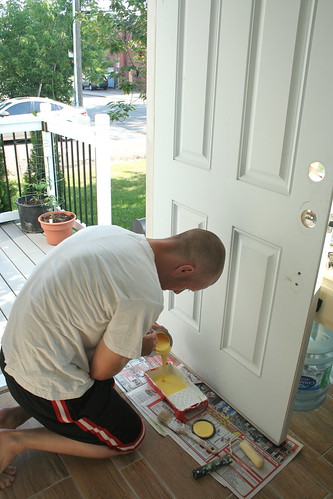
Last Friday, when B got home from work, we decided it was time to get the paint on. We knew it would take a few coats for the yellow to look right. So first things first, off came the hardware...

Removing the Hardware for Paint - July 2011Hardware Removed for Paint - July 2011

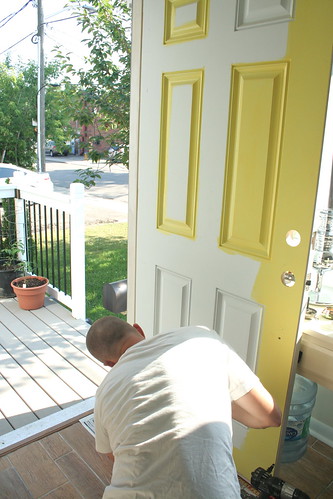
... and on went the first coat of our cheery yellow...

Preparing to Paint - July 2011Going Yellow - July 2011

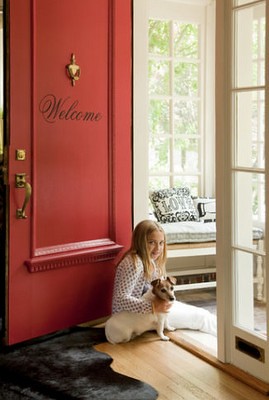
Friday night we got as far as the first two coats before we headed over to our friend's for dinner. Sunday morning we were back at it, and while B got the final coat of yellow on, I was inside working on the next step of our front door project. A step that was inspired by this image, which I found on pinterest...

Front Door via Pinterest

I sent my oh-so-wonderful Mother the above photo and she found a gorgeous font and printed "Welcome" for us on some heavy card stock. I then used my x-acto knife to cut out each of the letters so that we ended up with something like this...

Welcome Stencil - July 2011

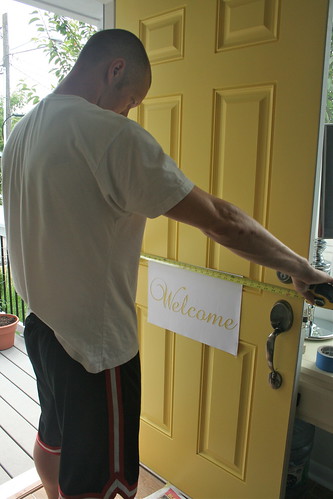
Next, we measured the door and used some small pencil marks to ensure that our stencil was centred and level on the front door...

Front Door Painting - July 2011

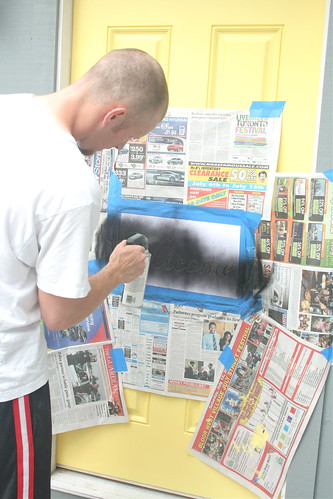
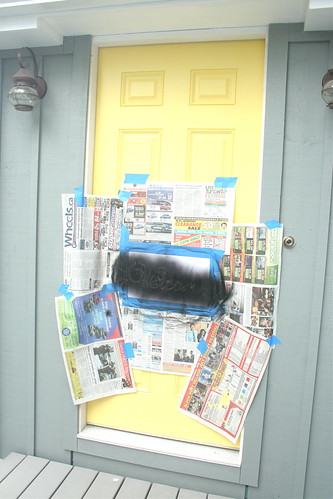
We gave the back of our stencil a quick blast of tacky spray to help it stick to the door and to try and avoid any bleeding of our paint. (Make sure you only spray the paper, or you'll have one heck of a time trying to get that paper off your door!). Then, we proceeded to use newspaper and painters tape to tape off the door around our stencil and B sprayed it completely with some exterior black spray paint...

Front Door Painting - July 2011Front Door Painting - July 2011

Unfortunately, as B was spraying, he noticed that parts of our stencil were starting to lift. So he got all of it sprayed and we let it dry for a bit before peeling off all of the paper and the stencil. From far back, it didn't look half bad (with the exception of the little lines that we needed to keep on the stencil so the middle of the "e's", "l" and "o" would not fall out)...

Front Door Painting - July 2011

However, up close was a whole different story...

Front Door Painting - July 2011

Not quite as sharp looking! After it letting it dry up some more, I went after it with some black paint and a small paint brush to clean up our edges and then B touched it up with some yellow. We were thrilled with the results...

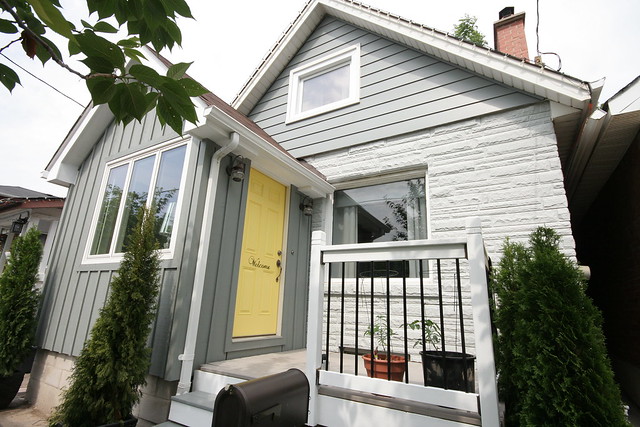
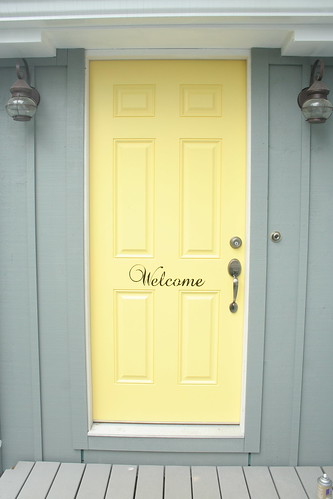
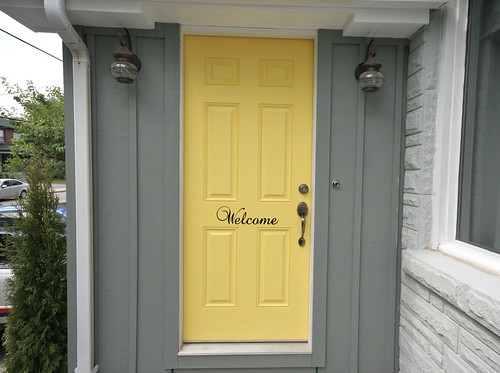
Painted Door - July 2011

Painted Door - July 2011

I think with this project we have truly hit the mark. We got the colour we were looking for, and added a little something extra to make our home that much more welcoming for our guests (which I'm sure we'll have a lot of not long after Peanut arrives!). 

Has anyone else been working on sprucing up their curb appeal? Any fun elements that you've added to take the front of your house up a notch?
SHARE:

Wednesday, July 6, 2011

Backyard Inspiration

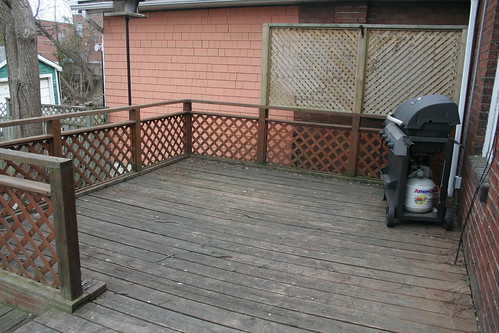
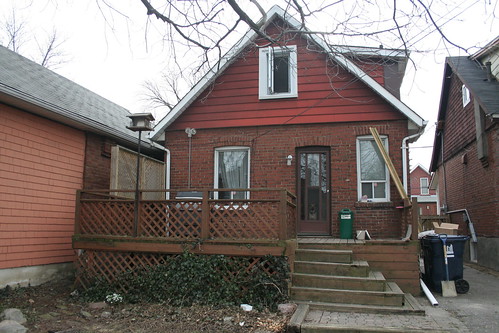
As yesterday morning's post would indicate, we've spent a lot of time recently focusing on the front of our home. Well, our backyard is one of those spaces that could probably be really nice... if we tried... harder. Not to say we haven't given it any TLC since we moved in. I mean, it's already quite an improvement over what it used to look like, but it has a long way to go still. One area in particular that I often dream about sprucing up is our back deck area...

Cleaning Up

Cleaning Up
{All photos taken circa April 2010}

Here's some inspirational photos that have me dreaming about what could be...

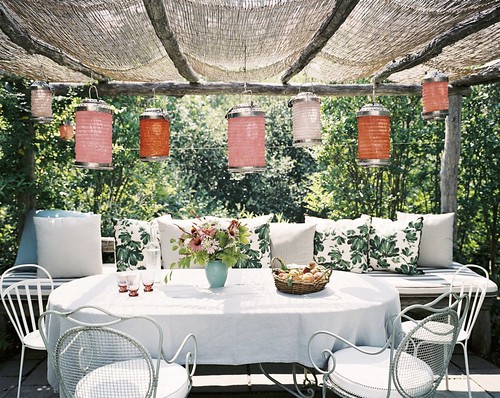
via lonnymag
{via Lonny}

A seating bench, pretty throw pillows, a vintage patio set, lovely lanterns and the perfect patio covering that allows the sun to shine through, but would protect our deck in particular from all of the "stuff" that falls out of giant tree in the yard (we're pretty sure it's a walnut...)

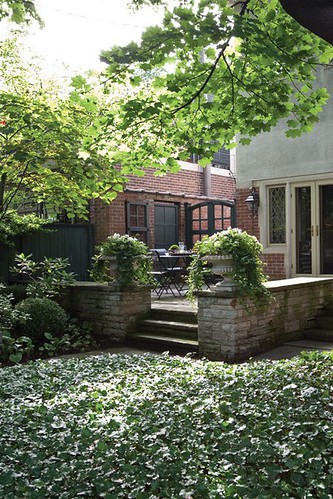
via house and home sept2010
{via Canadian House & Home - September 2010 issue}

We always talk about putting in double doors at the back of the house, and I just wish we could have a beautiful patio built up like that. Everything about this yard is absolutely gorgeous! What a perfect summer entertaining spot.

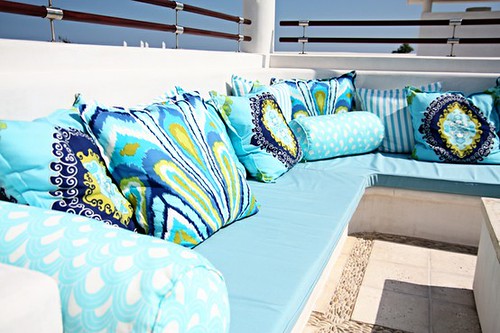
We've talked about putting in a prettier privacy screen and a seating bench on the side of the deck that faces our neighbours (in the above picture, it's the side with the cheap lattice privacy screen and our old BBQ). A pretty seating bench like this perhaps...


via 6th street design
{Urban Grace Interiors via 6th Street Design School}

As for the privacy screen idea, B and I are both in favour of horizontal wood - kind of like this...

Tiger Deck Privacy Screen
{via}

I only hope that our deck can look as pretty as the one above one day! What a great place this would be to hang out with our little fam and entertain extended family and friends!

I have always adored blue and white together and think that this little backyard is just lovely!


via creategirl
{via}

What's not for me to love? The grey, blue and white combo would work perfectly with our home, and B and I always talk about putting double doors from our kitchen, and a nice wide staircase on our back deck! I also like the way they used some plain pavers and made the lower patio look spectacular! 

At this point, it's quite clear that we will not be getting around to any major back yard changes this summer, with our little girl set to arrive whenever she pleases - but we'll store these ideas away and can start planning next spring.

Do you have any big outdoor projects underway at the moment?
SHARE:

Tuesday, July 5, 2011

Project Curb Appeal Continues

Last Thursday when I went to go and see my baby Dr, she told me now was the time to keep busy with doing things that I / we wouldn't do once baby arrived. So Friday morning we did just that. We got out of bed, ate quickly and got to work out front... painting the siding. 


B had come home on Thursday asking me to go to Home Depot with him to pick up all of the stuff he would need to paint our red siding out front, as well as the railing on our deck. I later asked him if this project was his way of nesting and he replied (probably jokingly) that yes, it was. I won't go into a lot of detail here... I mean, there isn't much detail really, as all we did was paint, so let's first take a look back at the front of our home from before we began "Project Improve our Curb Appeal" last fall...


Fall 2010

Yup... all of it was pretty sad looking. That pathetic excuse for a front entrance... that not too pretty garden and the mish-mash of colours that we had going on (please don't judge... we tried to work with what we had and failed miserably, so decided not to invest any more money until we were ready for the big change).

Then of course, last November we ripped that off and B and my Dad built a beautiful new (and warm) front entrance and front deck, which by itself, drastically improved our curb appeal. Come this spring - the front of our home looked a little something like this...

Spring 2011

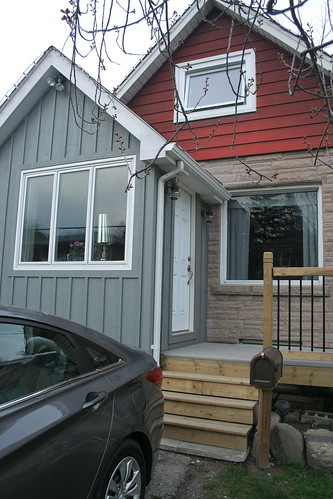
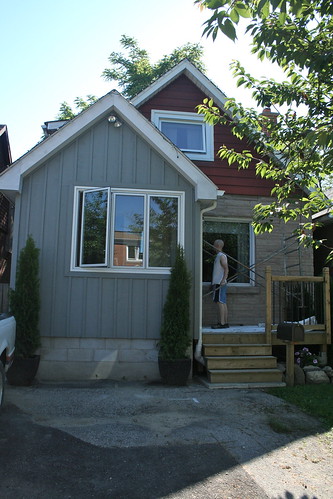
A little better - but still some issues with the grey siding on the new entry, the red up top and that pinky coloured stone veneer that was put onto the home at some point in the past. So yes, ladies and gents - this past Friday was the day to address this issue. When we had gone to Home Depot the day before, B had brought along a sample of the board and batten siding on our new front entrance and had it colour matched to Behr exterior paint. Friday morning after our quick breakfast B headed outside and got the scaffolding all set up to get to work...

House Painting - July 1, 2011House Painting - July 1, 2011

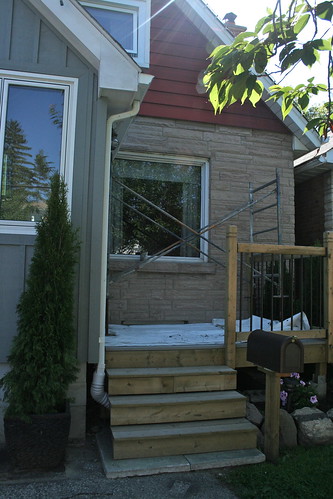
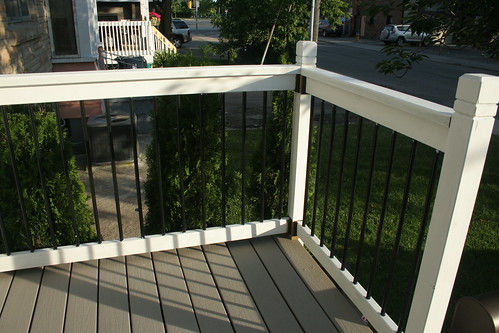
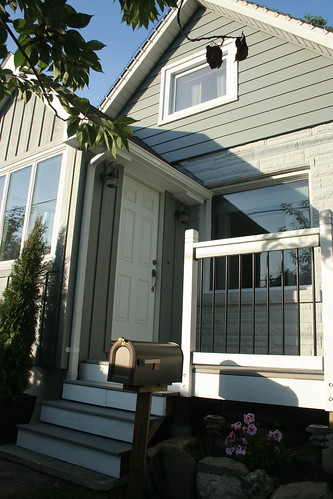
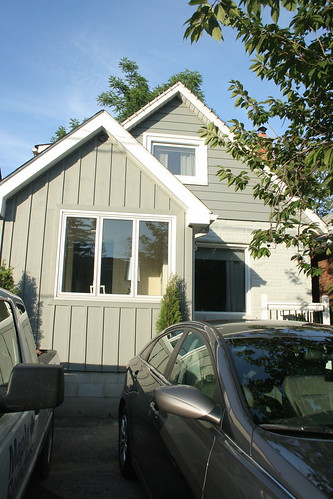
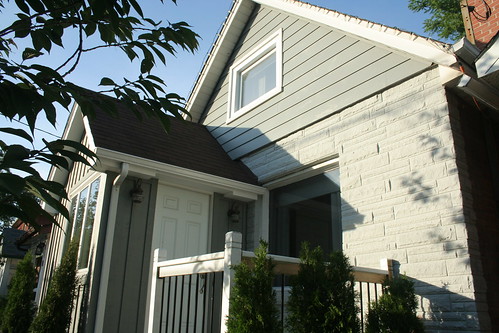
Though we planned to only paint the siding that day, once B was done we looked at each other and agreed it was also time to tackle that old stone veneer. B took some of the white we had picked up for the deck railing (which I had been working on painting) and mixed in a bit of grey, to cover up that stone. Though most of it was complete by Friday evening, we had to come back to the project on Sunday (after taking Saturday off to spend at my parents house celebrating Canada Day). It was a lot of hard work (especially painting that stone veneer) - but it was well worth it now that our home looks like this from the front...

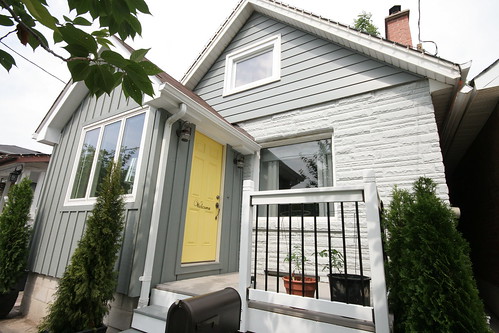
House Painting - July 3, 2011

House Painting - July 3, 2011

House Painting - July 3, 2011

House Painting - July 3, 2011

Yes - you may notice that the outside portion of the railing in that last photo is not yet painted. We'll have to take it apart in the future to get the whole thing - but for now, we'd say the house is looking 100% better than it did before. We're so thrilled with the transformation, and I'm so thankful for all of B's hard work over his long weekend. Now the next project...

House Painting - July 3, 2011

... adding some colour to the front door. Once we get that colour on (which we've already picked out and purchased), we know it will help to set the tone for the rest of the front. But for now, we're feeling like our curb appeal has come a long way since we first got the keys two years ago.
SHARE:

Tuesday, June 14, 2011

Guest Post - 8 Curb Appeal Ideas

Today's post comes from Arcadian Lighting. I was so thankful when they asked to do a little guest post on 8 ways to up your curb appeal. Lately things have been a little nuts prepping for baby and i'm definitely starting to feel the end of pregnancy exhaustion, so it was nice to have someone step in for a day and do the work for me!

Curb appeal is an important aspect of home decor - it creates that first impression for visitors before they enter the home and it really sets a tone. Whether the curb appeal is accentuated by light fixtures, greenery or even seasonal accents, a little can go a long way. Here are 8 ideas to really "up" the style and provide curb appeal for a home.

Red Door

From My Front Porch To Yours (via)

Nothing says "welcome" like a bright red door - it is both cheery and inviting. Add a great doorknocker and a traditional pendant light or hanging lantern to highlight this bold statement.

Seasonal Delights

Sense-sational Living (via)

No matter the season or holiday, there's always a way to incorporate it into exterior decor -- like a theme-appropriate wreath, whimsical characters or twinkly lights.

Welcome Seat

Oakton House and Gardens (via)

The front of a home always looks more attractive when there's seating on the porch. Depending on the style of the home, Adirondack chairs, chaise lounges and rocking chairs can all look warm and welcoming.

Swingin' Style

Garden Swing Bench (via)

Everyone wants a turn on a swinging bench! Incorporated into a residential terrace, this simple detail adds loads of character to a house.

Bright Blooms

Viva Veracruz & Viva Puerto Escondido (via)

What's more appealing than blooms in exotic colors? Flowering bushes and trees, planted in pots or window boxes, there's no shortage of varieties to choose from to enhance curb appeal.

Tasteful Topiaries

Boxwoods (via)

Curvy and geometric topiaries are a modern way to create a chic look outside of a home. When paired with more conventional greenery, this look works for any residence. Make sure to use outdoor lighting to highlight the beautiful greenery.

Lighting

Doors Sliding (via)

Shed some light on curb appeal with a range of different exterior light fixture options, like pot lights, deck lights and even outdoor wall sconces.

Delightful Decor

Home stories A2Z (via)

Why stop at decorating the interior of a home? There are endless outdoor accoutrements that can completely transform curb appeal, such as outdoor cushions, chandeliers and end tables.

Content provided by Arcadian Lighting, a site that specializes in top quality lighting fixtures at extremely affordable prices. Come visit us today!


Thanks again to Arcadian Lighting for popping in for a visit and providing us with some pretty curb appeal inspiration! I'll be back tomorrow with some more updates on Peanut's nursery... we're still working away over here!
SHARE:
Related Posts with Thumbnails
© Life on Misneach Ridge
Blogger Designs by pipdig