Tuesday, December 31, 2013

Looking Back

Here we are, on the cusp of another new year! 2013 seemed to fly by in the blink of an eye, and what a tremendous year it was for our little family!

2013 Collage

For a year that was so exciting, I actually had the fewest blog posts ever. In my mind, I'd like to think it's because I spent a lot of time enjoying all of these wondrous moments that we shared together.

We of course bought a new house in the spring, making our move to the west coast more permanent! It was the best choice we could've made. We all love our new house and have been busy making it feel like home. Thankfully, the move also brought us all new friends who we truly enjoy spending time with! 

In July, our sweet girl turned 2! TWO! How quickly did that happen? She's turned into quite the character, spewing new words and spinning new thoughts and ideas. I love hearing the new things she says, and am astounded at what an incredible little girl she is becoming. Her heart huge, and her imagination just as big - she continues to bring us so much laugher and joy every single day!

In August, B and I were finally married! (You can read all about our wedding day here, here and here). I think everything that I wanted to say about our wedding can be found in those posts. 

Afterwards, we enjoyed the most perfect 10 days in Scotland - just the two of us! It was the best honeymoon either of us could have imagined. It took me five posts to share my favourite photos from the trip and you can find them here 1, 2, 3, 4 and 5!

It's funny, every time the end of December rolls around I wonder "How could next year get any better?". I find it hard to believe that 2014 will top 2013 for us, but as usual, only time will tell what lays in store for us!

We'll be ringing in the New Year tonight family style with some great friends! Whatever you are doing, make sure you stay safe, and surround yourselves with those you love most! 
Happy New Year!
SHARE:

Friday, December 20, 2013

Wishing You Joy

Things have truly been silent over here! Between Christmas prep, a 2 year old who enjoys constantly testing our limits and a number of home projects, my blog has just fallen to the wayside. Though I had planned on sharing more than just Halle's room with you this week, it will have to wait a little longer. We have a kitchen reveal to share with you soon, but with everyone being so busy with the impending holiday's, I plan to leave it a little longer until I share our incredible transformation!

In the meantime, I wanted to pop in and wish all of you a very Merry Christmas and all of the best for 2014! 

FancyChristmas

2013 was such a spectacular year for us! Purchasing a new home, getting married, the perfect honeymoon in Scotland and just creating so many wonderful memories with family and friends! We are so excited over here to see what the coming year has in store for us!

I will try to drop by before we ring in the New Year, but I will make no promises! If not, enjoy your holidays, stay safe and spend the time with the one's you love the most!

MERRY CHRISTMAS & HAPPY NEW YEAR!
SHARE:

Tuesday, December 17, 2013

At Long Last

They say that the third time is a charm, right? Yup, most of you probably caught the two times that this post accidentally went up a while back (you'll catch three comments down there from the first two accidental posts)! Well, here's the REAL, FINAL reveal of the wall I hand painted in Halle's room!

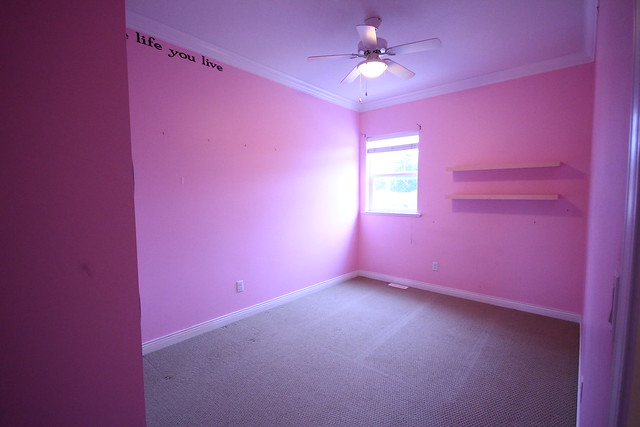
You may remember that when we purchased our house in the spring, Halle's room was bright pink...


IMG_1434

IMG_1435

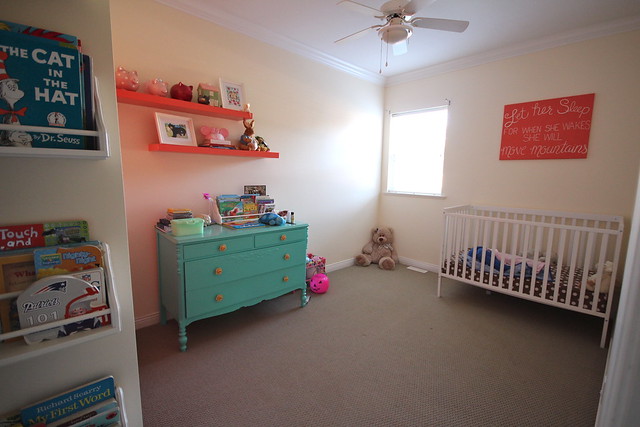
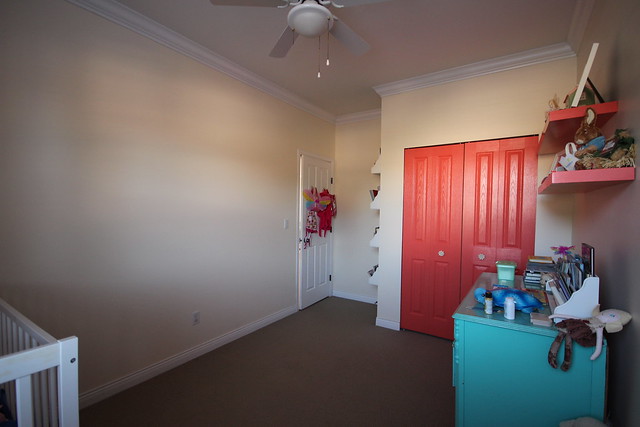
We wasted no time in painting it. B actually had it all painted before we officially moved in. The walls we painted cream, and I gave the closet doors a dose of bright coral. Things were feeling fun and I was so excited to give her a fun toddler room!

Unfortunately I got a little stuck and after some shifting around of furniture to move her bed into the basement guest room, we were left with this...

Halle's Bedroom - October 2013

Halle's Bedroom - October 2013

Yup, still no curtains and the whole space was feeling very cold and empty. I had been so focused on the wedding and other endeavours previously, that Halle's room (and most of the house for that matter) got put onto the back burner. 

So, as our visitors were getting ready to leave back in October, I began searching for inspiration on ways to pretty up Halle's room on a budget. I already knew I wanted to switch the position of her dresser and shelves with her crib and canvas, and I planned on buying her some curtains using an IKEA gift card I had received for a wedding shower gift. But how could I add some fun to the space without spending anything? Finally, I found my inspiration on the Anthropologie website!

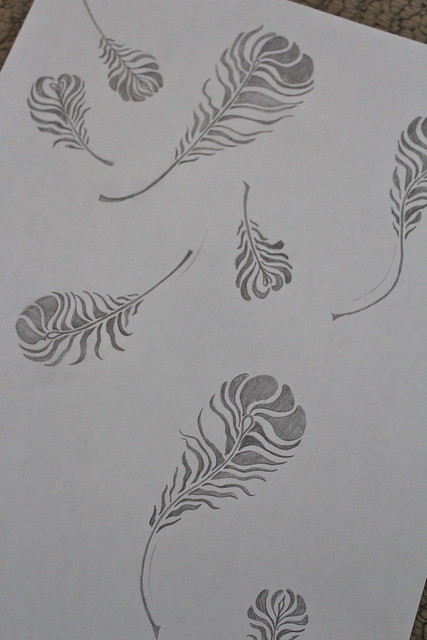
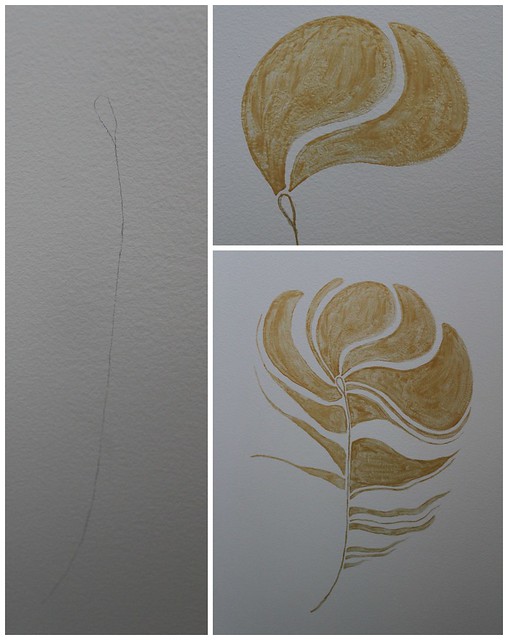
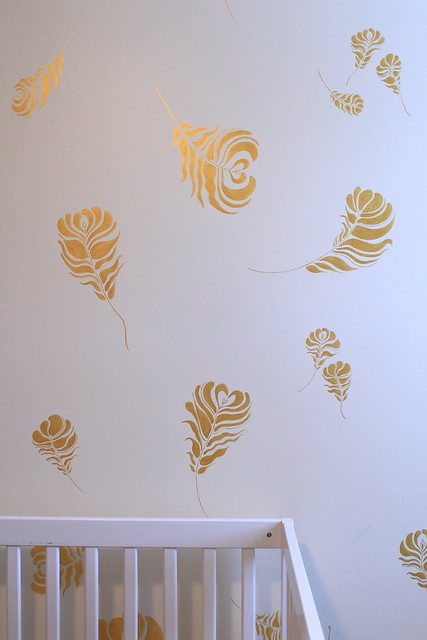
The Coppered Plume Wallpaper was gorgeous, but way out of our price range at $198 a roll. I decided to try my hand at drawing them, so to warm up I drew a few sketches one night after Halle went to bed (my most productive hours)...

Plume Sketches

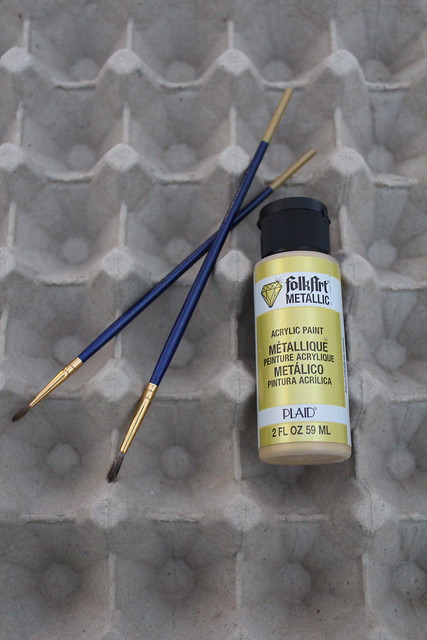
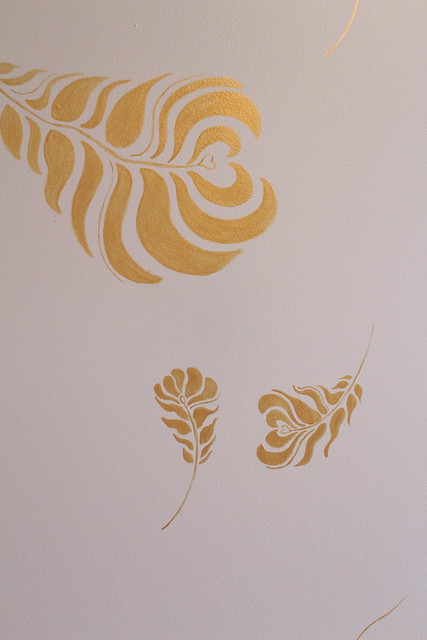
The sketches had me feeling pretty confident that I could figure something out on her wall myself. So, the Wednesday after everyone left, I decided to try it out. I grabbed some metallic gold acrylic paint I had on hand, a couple of paint brushes and an old egg carton and got to work.

Painting Halle's Wall - October 2013

For my very first go, I started using pencil. I then realized that whole process would take forever, and you would probably be able to see the pencil lines through the gold paint, so I decided to freehand everything. Still time consuming, but totally worth it.

GoldenPlumes

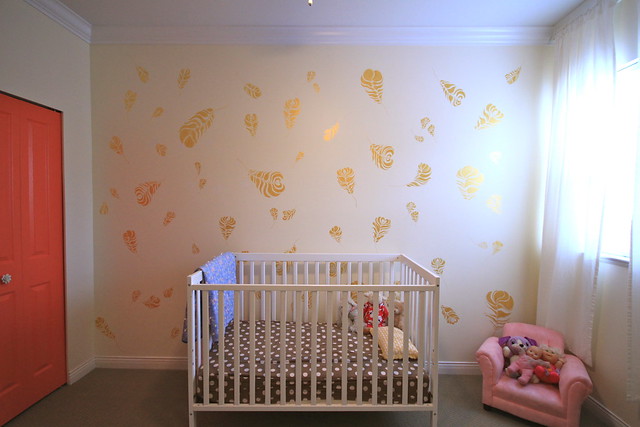
The first plume, was by no means perfect... but really none of them are. The great part is there are so many scattered across the wall and each plume allows for a little imperfection. I found as I went my technique improved quite a bit, which was good - the one's right over Halle's crib are some of my favourite's!

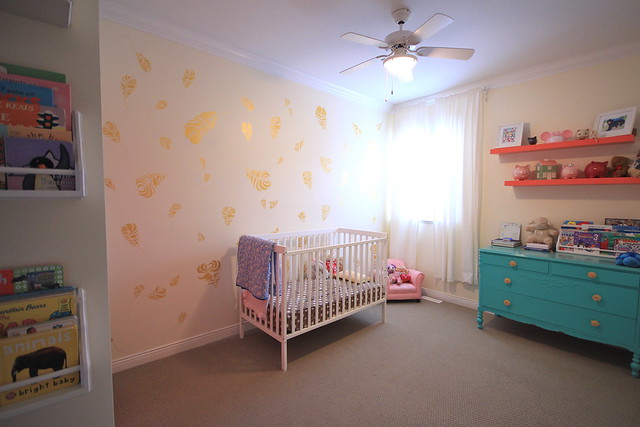
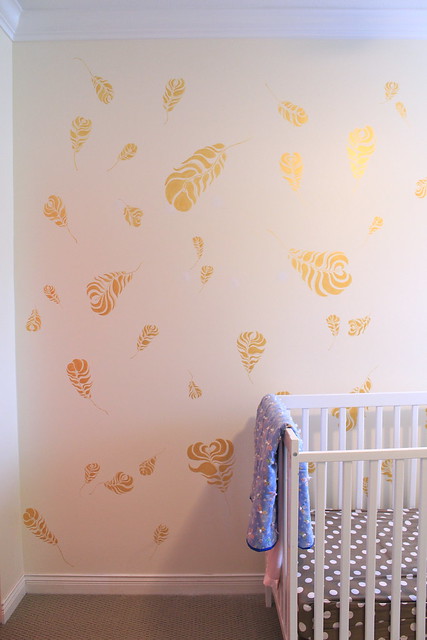
The whole process was still totally time consuming. In a week and half I was barely halfway done the room! I also had to get B's help to move the dresser off of the wall and move her shelves to their new home on the other side of the room so that I could make my way into the opposite corner. I finally finished everything off in here on 7th of this month, which means it took me almost a month and a half to get it all done. But here is Halle's room now...

Handpainted Plumes

I need to style her shelves with some special items, but B needs to add a few more anchors to the top shelf before I can do it. I also have some plans for her room that I want to tackle in the New Year (there is a list coming in January!). For now, I'm feeling happy with the progress, and I'm glad I finished painting before Christmas!

Handpainted Plumes

Handpainted PlumesHandpainted Plumes

Handpainted Plumes

Her room is far from finished, but I love the softness that the curtains and feather's bring to the room. A new light fixture and big girl bed/bedding are definitely in the cards for the new year! For now it's come a long way from that pink place we started with back in May...

IMG_1434


Handpainted Plumes

Have you ever attempted paint anything by hand on your walls at home? Or maybe at somebody else's home? I'd love to hear about your experience! Leave any links in the comment section to any projects you've tackled!
SHARE:

Wednesday, November 27, 2013

Here I Am!

My posting has been all over the place recently. With everything else going on, I just can't seem to find the time or energy to post. Both B and I have been sick, on top of me co-hosting a baby shower, working on Halle's room (some of you may have caught a glimpse of that project the other day when I accidentally posted it), a kitchen project I'm working on and getting ready to host a Thanksgiving dinner tomorrow.

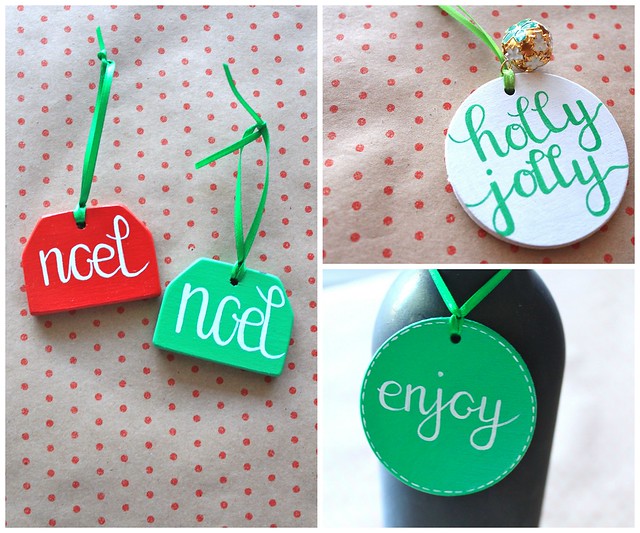
Oh, and did I mention how busy I've been with my Etsy shop, Halle Handmade!? I sold my tags at a Farmer's market back on the 16th, and have had a few orders coming in online as well - so I'm busy keeping the shop stocked. On top of that, Halle Handmade will be participating in it's very first giveaway on Friday with the blog The Olive Tree - so make sure to pop on over and check it out! If you want to keep up to date on what's happening in my little shop, you can 'like' Halle Handmade's Facebook page! We'd love to have you!

Halle Handmade 2013


So, that's what's new with me... along with a little Christmas decorating here and there. So I'm hoping to share that with you in the coming weeks... along with the kitchen project and Halle's room... which I will finish... one day... I hope!

What have you been up to??
SHARE:

Monday, November 18, 2013

Table for 12

Well, Thanksgiving (of the Canadian variety) and Halloween are now well behind us. While many of my fellow Canadians turn their minds towards Christmas, we are preparing ourselves for Thanksgiving Round 2! Normally we celebrate back in Massachusetts with B's family, but after all of the travelling and money spent this past year, we decided to spend this one at home. B has taken the day off from work and we'll be hosting our own Thanksgiving dinner for a group of friends. In order for this to be successful, B has been working to finish off our big huge, DIY dining table for our massive dining room. Remember, this big empty blank canvas?


IMG_1409

Well, after months of work we've finally filled it up. So what was our plan of action? Instead of using this one small area that the builder defined as a dining space, we wanted to fill the whole room so we could have all of our friends over for dinner and meals whenever we wanted. 

Unfortunately, it was not in our budget to spend thousands of dollars on a beautiful new table. Instead, B decided to use some wood he had to make us a big solid table. 

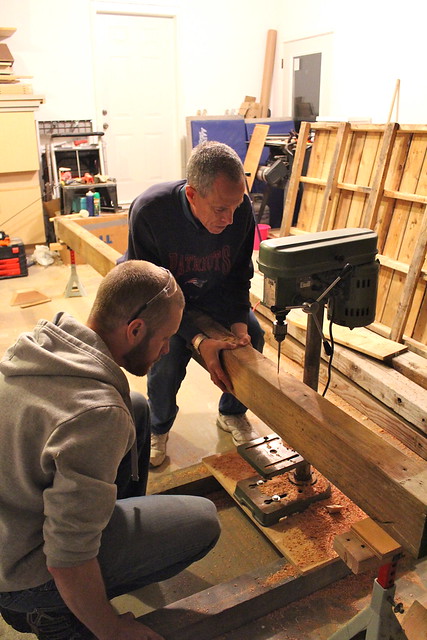
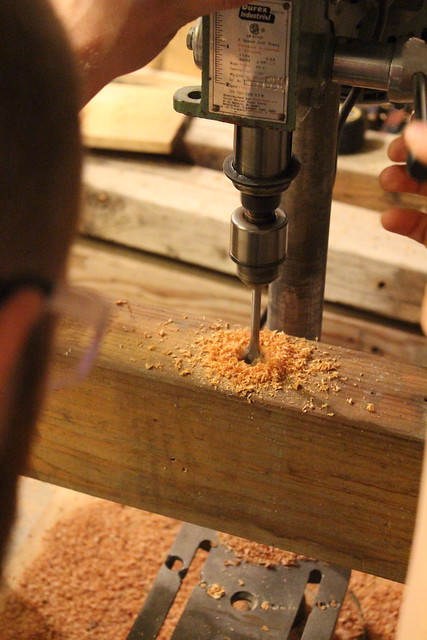
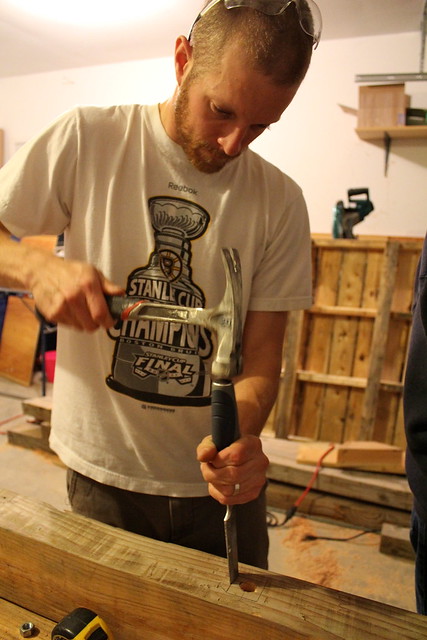
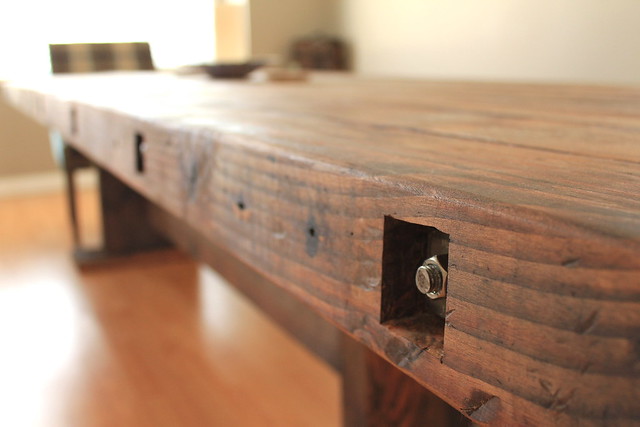
When I had arrived back from my two month trip to Toronto/Scotland/Boston for our wedding, honeymoon and my friends wedding, B had the table all mocked up. He spent a lot of time measuring, cutting, sanding, drilling, etc. to get everything just right. His Dad even helped with the drill press while they visited in October. They had to drill 7 equally spaced holes through each of the 7 wood beams that became our table top. 

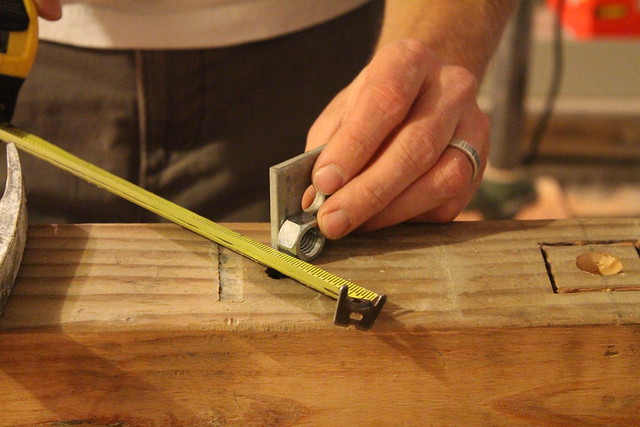
Building our 12 Foot Dining TableBuilding our 12 Foot Dining Table

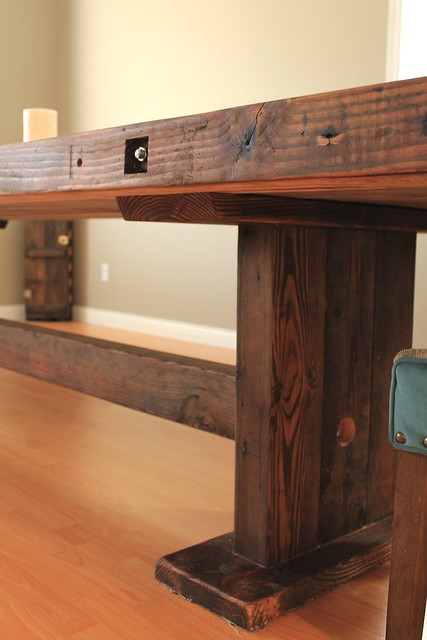
Why? Well, B used threaded steel rods through each of those beams to reinforce and hold the table together. Let me tell you, that is one solid piece of furniture.

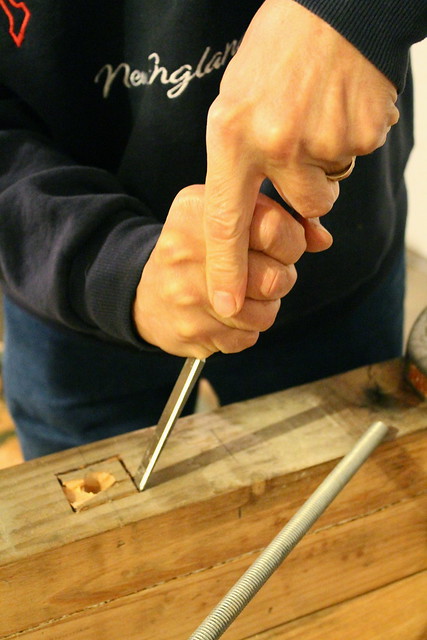
Oh - they also chiseled out the boxes that our metal clamps fit into that secure the threaded rods. It was a labour of love - but man does it look really, really good!

Building our Dining Table

Building our Dining TableBuilding our Dining Table

We even saved money on the stain we picked. The RONA close to our home was closing, so I popped in with B's parents while they were visiting and checked out the stains. Everything was 50% off at the time, and we found the last can of the perfect brown stain that cost us roughly $7 for a quart. Not bad at all. It even worked out that it almost perfectly matches our ammunitions crate wine rack (we bought that at the One of a Kind Show Christmas Show back in 2009 - they are no longer available as the couple who made these used up their supply of ammunitions cases! We cherish that piece). 

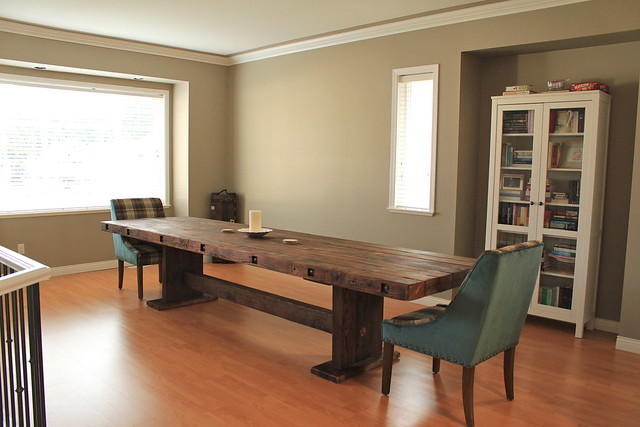
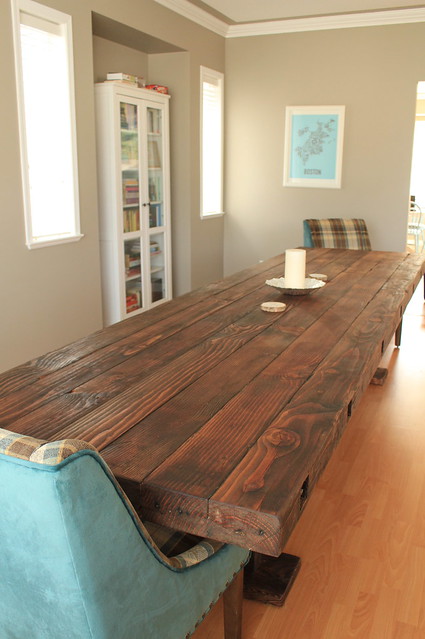
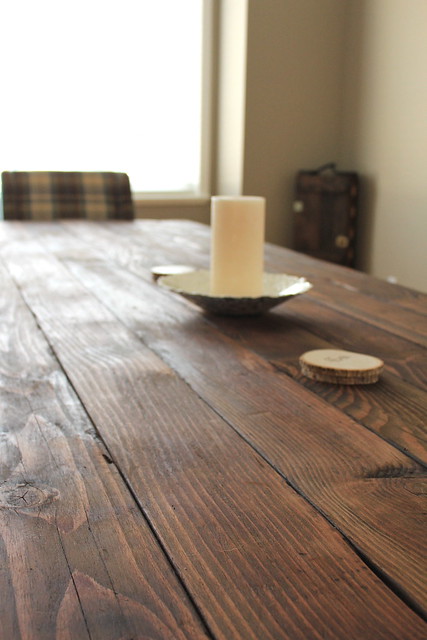
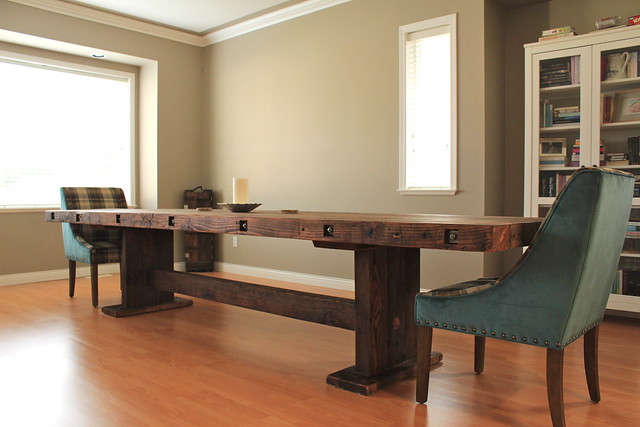
I'm going to have to leave more of the details to B, as only he could best describe all of the time, energy and dedication he put into building this beauty. We are both so thrilled every time we look in our newly filled dining room, and I feel so lucky to have a man who uses his spare time to build incredible furniture (this is the second piece he's built. You can peek the desk he built here and here. I'm sure I'll share a full office reveal with the huge desk he built me before the new year). So, enough of the chit chat - here she is. Our new 12 foot dining table...

Our DIY Dining Table

Our DIY Dining TableOur DIY Dining Table

Our DIY Dining Table

Our DIY Dining Table

Our DIY Dining Table


It was quite the event moving it into the house. B and our friend were able to move the base straight in and upstairs from the garage relatively easily. We called in another helper for the table top, which had to be brought in through the back yard and involved me following along with the saw horses for when they needed to rest. They worked hard, and we paid with beer and pizza, which we enjoyed at the new table. Of course, they are also invited to the big Thanksgiving dinner as well. 

So what's next in this space? Of course more chairs, a chandelier and some sort of artwork on those empty walls. Those are top of my list... but of course tough to solve with our tight budget. Also, as much as I would love to paint, I think that project will fall to the back burner for a bit as it will involve more than just painting this room. We would like to add a built in to that niche in the wall, and move the too small for that space book case into our living room. 

So, still a space that is far from done, but so much better with our beautiful new table in place. We are almost ready to host our big dinner on the 28th! 
SHARE:

Friday, November 15, 2013

One of a Kind WINNERS!!!

OOAK Show and Sale


WHAT A WEEK! Seriously things have been so nuts finishing up projects around here and getting ready for my sale tomorrow. I'm going to start off this week by announcing our One of a Kind Show and Sale ticket winners! Here are the ten lucky winners...

1. Hari Dra

2. Laura Lehmkuhl

3. Katie Thompson

4. Derek Haukenfreres

5. Adrienne the Magnificent

6. Samantha Morellato

7. Kelly Heynen

8. Bri Petersen

9. Shawna Janssen

10. Fan Rakim

Congrats to all of our winners! Please, please, please enjoy the show for me... and make sure to stop by and visit Olivia from Anonum Design Ltd. at her booth!
SHARE:

Wednesday, November 13, 2013

Hole Be Gone

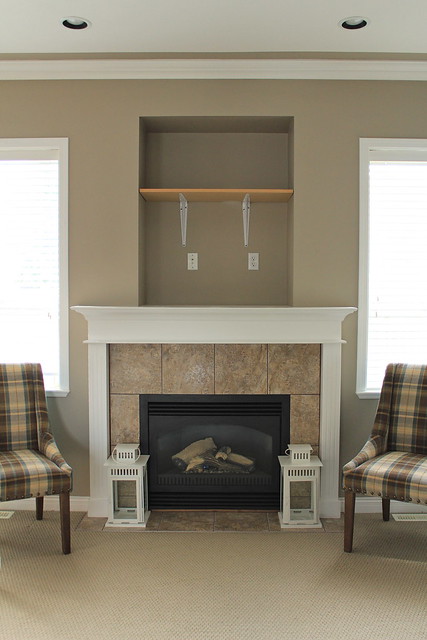
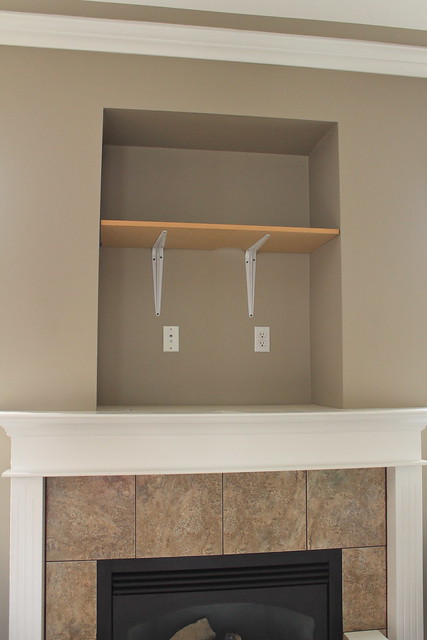
Slowly but surely, this house is starting to feel more like us. Most importantly, we are starting to bring in a lot of pieces that we love and really cozy up the place as we head into the cooler months. One project that has been on our list since mid summer, was finally completed last night. We finally addressed the big alcove over our fireplace...


Living Room Fireplace - Nov 2013Living Room Fireplace - Nov 2013

It was obviously put there for the purpose of people placing TV's there (our house is about 10 years old). Well, we don't have a TV that would fit in there (nor would we want it to), and we don't even have cable, so we needed to figure out another solution. 

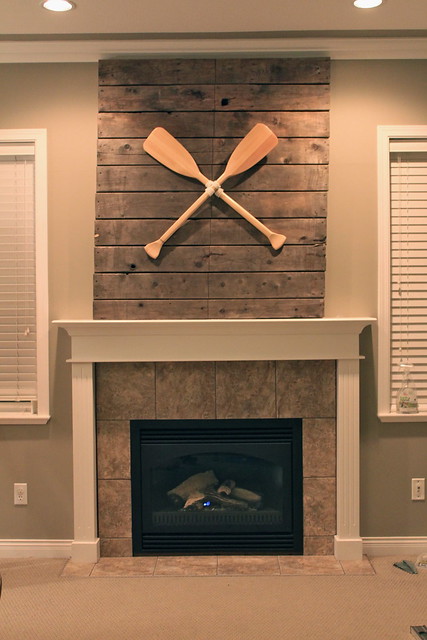
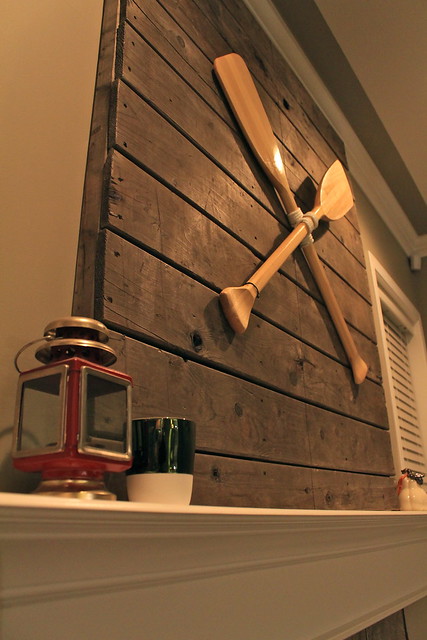
While out shopping at Canadian Tire near the end of July, we spotted some small oars on sale for $8 each. We looked at them for a while and then started talking about using an old pallet to cover the alcove over the fireplace and attaching the oars to it. The idea stuck and home came the oars... and then sat in our garage until Monday (you may have caught a peek if you follow me on Instagram).

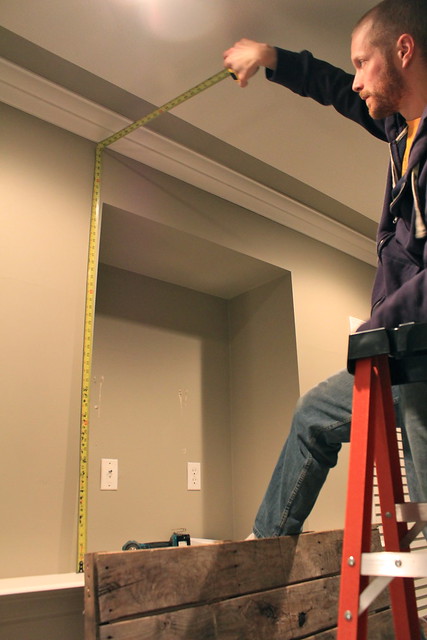
While B was working away on our dining table (reveal post to come next week... I promise), he decided it was time to get the pallet out of our garage as well. I cleared off the mantle and we took some time to take measurements and discuss how we wanted everything to look. We decided that we wanted it to reach from the mantle all the way up to the crown moulding, and be as wide as we could get it at that point (which worked out to be about 4 feet). 

So, B spent some time cutting the pallet, including ripping down the boards on the back so it wouldn't take up the entire mantle on us. Then, he tied the oars together, drilled a couple of holes into the pallet and attached everything using some thick coated wire. 

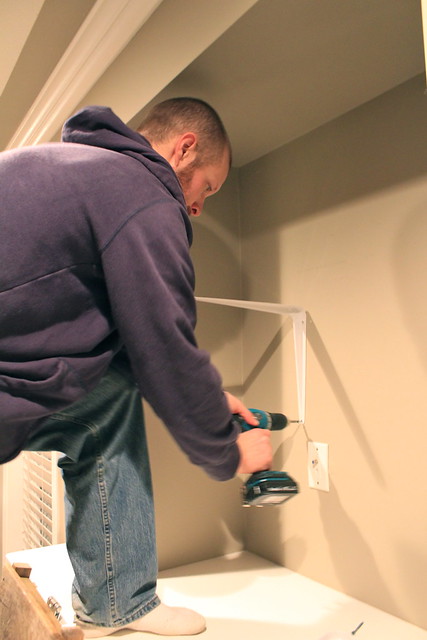
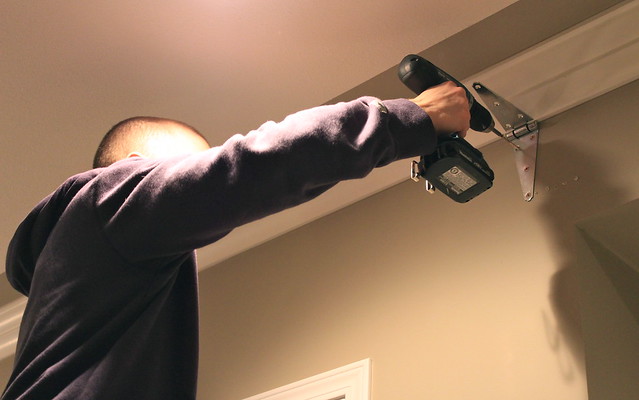
From this point, our original plan was to attach the pallet using anchors and large hinges that we'd picked up at The Home Depot. So, B took some more measurements, removed the shelf, looked for studs and then went about attaching the hinges to the wall...

Living Room Fireplace - Nov 2013Living Room Fireplace - Nov 2013

Living Room Fireplace - Nov 2013

See all the holes in the wall in the above photo? It took a few tries to find the studs. B also decided not to use anchors since the majority of the weight of the pallet would actually rest on the mantle anyway.

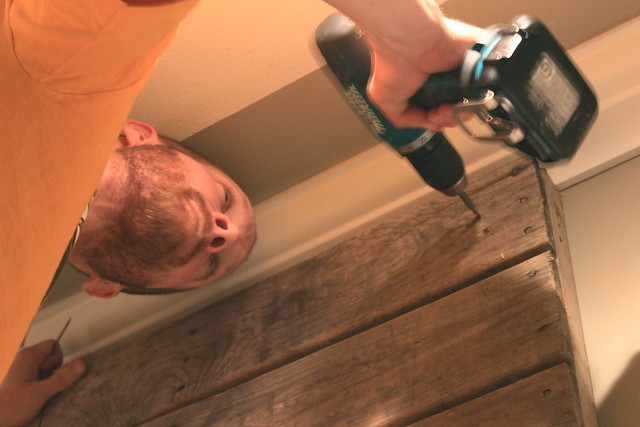
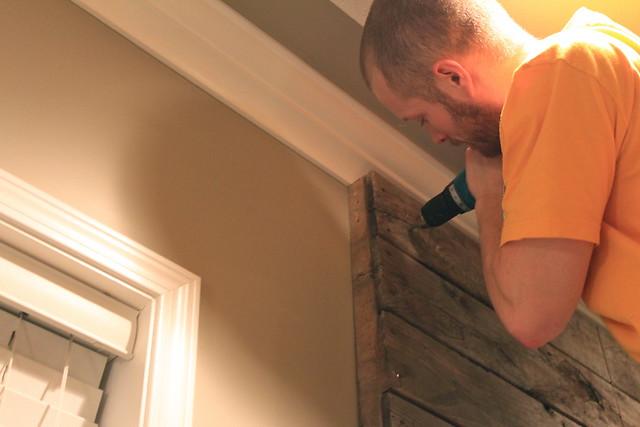
Once both hinges were attached to the wall, I crawled into the alcove and B was going to hold the pallet right up flat to the ceiling while I screwed the other half of the hinges to the pallet. That plan was quickly shot down when we realized there wasn't enough room for the pallet to fit between the hinge and the crown moulding. Poor planning on our part. So the hinges were removed, and B decided to drill the whole thing directly into the studs...

Living Room Fireplace - Nov 2013

Living Room Fireplace - Nov 2013

And how did that work out for us, you're wondering? Well take a look for yourself...

Living Room Fireplace - Nov 2013

We had known the pallet was pretty crooked, but didn't realize how bad it was until it was all attached to the wall. There was no way we could live with this wonky looking pallet over our fireplace. It made everything look off.

So, off it came again (by this time it was probably around 8:30pm) and B took it back out to the garage to work his magic. His plan was to cut it on an angle along the bottom, so we could lift it slightly on one side when we attached it to the wall. He figured this would be the best way to counteract how crazy it was all looking... and well, it looks much, much better now!

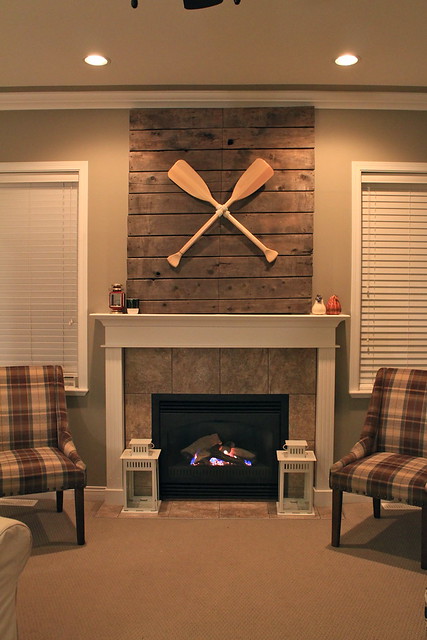
Living Room Fireplace - Nov 2013

Living Room Fireplace - Nov 2013

It's a huge improvement from the large gaping hole that existed there before, and I think it will be perfect to decorate seasonally. I can already picture a wreath hanging over the pallet, with a garland draped across the mantle, for Christmas. Now if only B would let me start decorating!

We have other plans for the fireplace, and room as well. I'm itching to paint everything but with such a large open area in our home, it will be a big investment to get it all painted. We'd also like to change the tile on the face and hearth of the fireplace. We like the idea of stacked stone for the face, kind of like this. All in time of course! Up next - finishing the dining table and Halle's bedroom!

Any big projects you're trying to finish up before the holiday rush really begins?

SHARE:

Monday, November 11, 2013

A Monday Giveaway!

HAPPY MONDAY & Happy Remembrance Day! It's a long weekend here in BC, and today we take time to remember all of those who have served, fought and died for us. We plan on taking in some of the ceremonies that are happening here in our new hometown today.


Remembrance Day

I know things were silent here last week! I was busy working on a project that I hope to share by the end of the week, while also preparing for a show that Halle Handmade will be a part of this Saturday. 

And speaking of shows, you know what's coming up SO SOON!? The One of a Kind Show and Sale in Toronto. You know, only my favourite show ever!? Well, since I can't go this year to support my new artist friend, Olivia from Anonum Design Ltd., we'd like to send TEN of you + a friend each to this years Christmas show.


OOAK Show and Sale

So, how do you win? It's easy, just check out the rafflecopter below!

a Rafflecopter giveaway


So there you go! FIVE chances to win one of TEN PAIRS! All ten winners will be announced on Friday morning! Good luck!

(**Please be aware this giveaway is only for ENTRY tickets into the show in Toronto. Each winner will be responsible for their own transportation to the show at Exhibition Place. Only one pair of tickets can be won per person.)
SHARE:

Friday, November 1, 2013

Halloween 2013

Well, another Halloween has come and gone and this year was even better than last. Our new neighbourhood is a lot more child friendly than our previous one! We had tons of kids come by, and Halle enjoyed trick or treating with a couple of her little friends. B said by the time they were visiting the last few houses she was running up to the door, knowing she was going to get more treats. At each house she would say "Teet peeze!"... we'll work more on "Trick or Treat" for next year. She came home with a loaded bucket and a big smile on her face, and she scarfed down a bag of chips before bed (her favourite treat). 

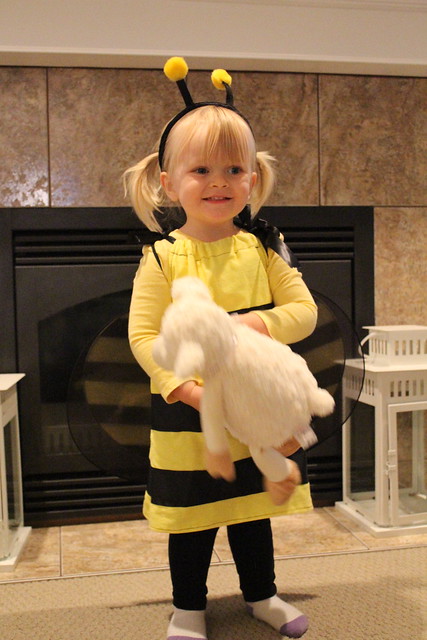
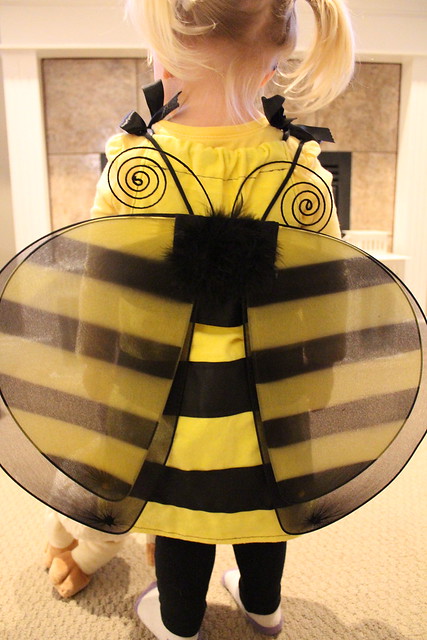
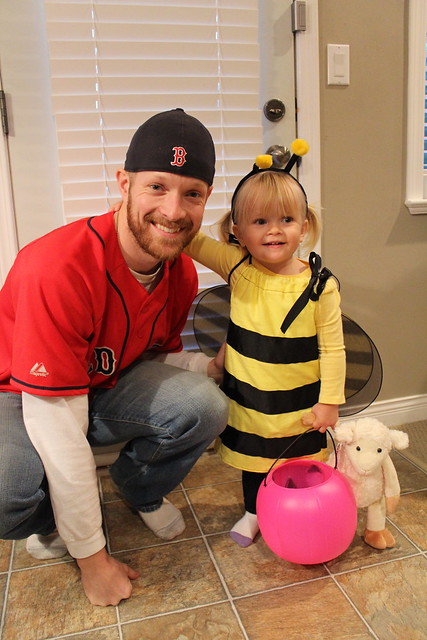
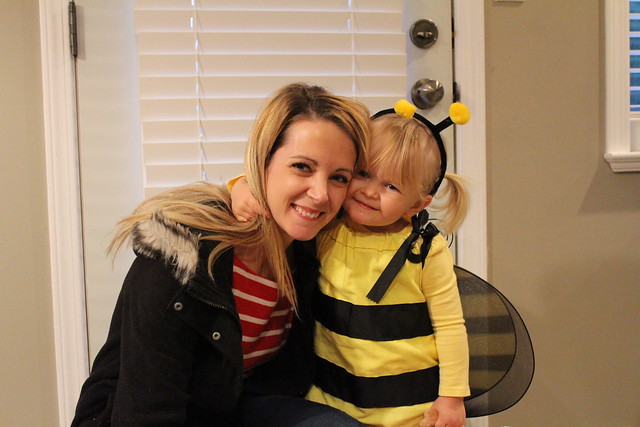
As for her costume, this year she had asked to be a bee, so I decided to make her a little costume. I used this tutorial to make her a little dress, and it worked out perfectly. Underneath it she wore a pair of black stretchy pants and long sleeved yellow t-shirt. I ended up putting a black jacket over her for trick or treating and her wings over the jacket. The wings we bought at Jo-Ann and the antenna are from a dress up costume that B's Mom brought for her. It came together great and we all loved it...


Halloween 2013Halloween 2013

Halloween 2013
{B was still feeling pretty excited after the Sox big win on Wednesday night!}

Halloween 2013

We both love how she wraps her little arm around our necks for photos. It's totally unprovoked!

It's also hard to believe that this is her THIRD Halloween!

Halloween2011

Halloween2012

Halloween 2013

I hope you all had a safe and memorable Halloween this year! We sure did! I know this week was quiet, but I've been working away on some changes in Halle's room and B was away for a week (he got back on Tuesday), so I was solo parenting which kept me busy. Hoping to share Halle's bedroom updates early next week, and possibly even a look at our new dining room table! So excited!

Happy November & Happy Weekend! What do you have planned for this weekend to ring in the new month?
SHARE:

Friday, October 25, 2013

Fancy Friday Love

What a week it's been! Travels, Halloween and Christmas all rolled into one! It's been a busy one, but I still managed to squeeze in a little time to find some lovelies online. Here's what I loved this week...

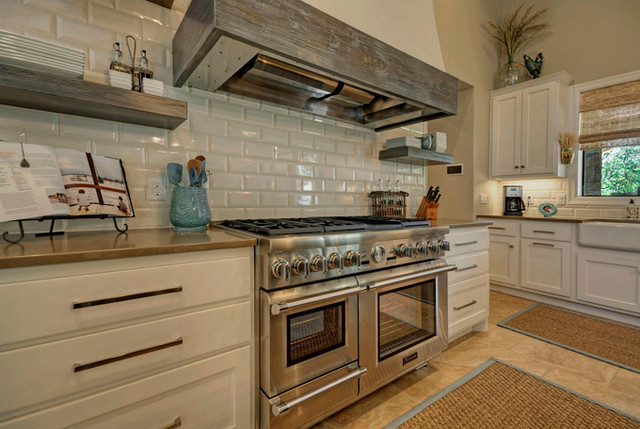
Another incredible home on House of Turquoise this past week, this time by interior designer Jeanette Forney Van Wicklen. My favourite part has to be the weather wood over the range hood in the kitchen (it helps that the kitchen is incredible). Adding everything about the kitchen to my dream home files! Seriously!


Jeanette Forney Van Wicklen via House of Turquoise

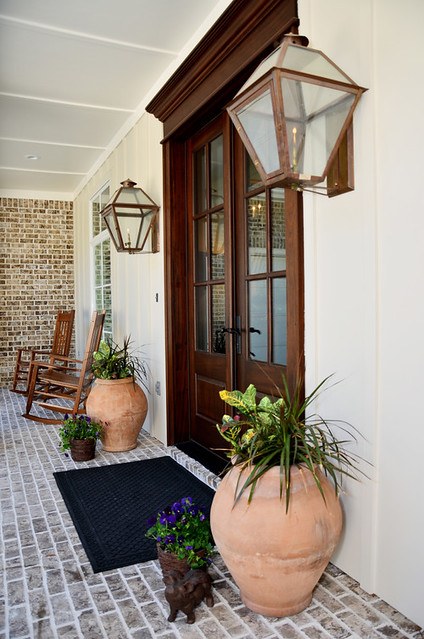
Jenny shared a post this week about staining her front doors. This inspiration photo that she shared was perfection. I can't wait for the day that we have a nice dark wood front door. It's on the list people!

traditional-entry

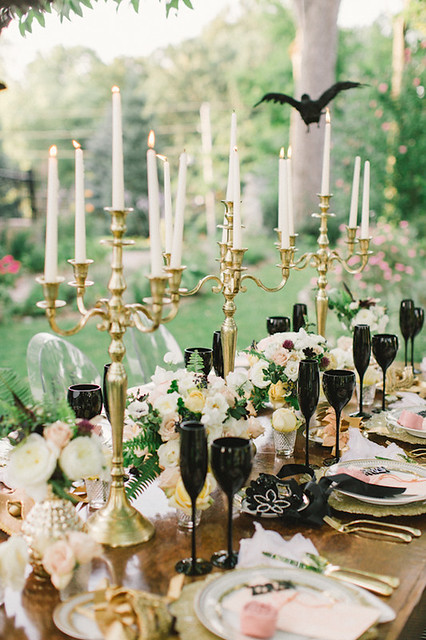
I hope you all caught this incredible Halloween inspired shoot, pulled together by the fabulous Rhiannon from Hey Gorgeous Events. This girl is so fabulous at what she does. She's making me wish we had opted for a Halloween inspired wedding! So lovely!

Enchantment via Hey Gorgeous Events

Brittany from Gallery No. Eight, shared a great post on connecting your Twitter to your Facebook account (I'm most concerned about First Time Fancy's Facebook page and twitter account). She makes it really easy to follow, so I intend to go back and use it as a guide - how about you?

What were some of our favourite finds this past week! Share links in the comments below - I'd love to check them out!

Well, the weekend is here and I'm pretty excited. We have some down time which I am very much looking forward to, as well as a play date on Sunday (for Halle and myself), followed by some planning for a baby shower I am co-hosting next month! I'm also working on  big project in Halle's room that I can't wait to share with you! What do you have in the books?
SHARE:
Related Posts with Thumbnails
© Life on Misneach Ridge
Blogger Designs by pipdig